Garlic bread

Garlic bread
Garlic bread

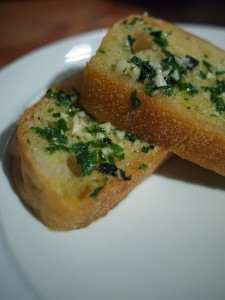
I was tempted to title this post “F***ing fantastic garlic bread”, because when people taste it, they tend to say something along the lines of: “Cripes. This is f***ing fantastic garlic bread.” But my Mum reads this blog and has a habit of looking horrified and exclaiming: “Elizabeth!” if I so much as say “Damn” in her presence, so plain old “Garlic bread” it’ll have to be. Sorry, Mum.

I wooed a boyfriend with this stuff once (and swiftly thereafter wished I hadn’t, but that’s by the bye). It’s powerfully good; you won’t go back to shop-bought garlic bread once you’ve tried it. The trick here is to simmer the garlic in the butter to sweeten it up and release its aroma before you let it anywhere near the bread, alongside the judicious application of some herbs. Use whatever loaf you fancy here. Something reasonably open-textured to soak up all that butter is a good move. This recipe will make sufficient garlic butter to anoint a whole baguette, but you can make a smaller loaf and keep any leftover butter in the fridge for up to a week. There were just two of us eating when I made this, so I used a ciabatta and steeled myself for leftovers – if you put the remains back together into something that resembles a cut-down loaf, rewrap it in the tin foil and refrigerate, you can take the recipe from the point where you put it in the oven again the next day.

You’ll need:

450g butter
2 large, juicy heads garlic
15g fresh chives
15g fresh flat-leaf parsley
15g fresh oregano
½ teaspoon salt
Several turns of the peppermill

Peel the garlic, and use a knife to mince it until you have a heap of garlicky rubble in the middle of your chopping board.

Melt the butter in a small saucepan over a very low heat, and spoon the garlic into it. Allow the garlic to cook very gently in the butter for about ten minutes, until it is soft and fragrant. While the garlic is cooking, chop the herbs and put them with the salt and pepper in a bowl.

Pour the hot butter and garlic mixture over the herbs in the bowl, and stir well to combine everything. Leave at room temperature for ten minutes, then cover with cling film and move to the fridge. Refrigerate until solid. (The butter doesn’t need to be rock-hard – a couple of hours should be sufficient.)

When the butter is stiff enough to spread, warm the oven to 150ºC (300ºF).

Slice the bread and spread each side of each slice generously with the garlic butter. Reassemble the loaf, and wrap it tightly in tin foil. Bake on a metal tray for 20 minutes, and remove from the oven. Unwrap and serve piping hot. You will be unable to avoid getting garlic butter all over your chin as you eat, and possibly on your elbows, so have napkins standing by.

Potato salad

Potato salad
Potato salad

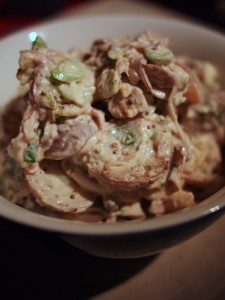
So now you’ve got your hands on some really fine mayonnaise, you’ll be wanting to use it to make a really fine potato salad. The ingredients list here is a simple one. Use the best waxy little potatoes you can; I used Roseval, which have a sweet, yellow flesh sometimes tinged with red rings. Pink Fir Apple, all knobbly and smooth-skinned, are another favourite, but Jersey Royals are best of all, and this is a great way to showcase their delicate flavour during their short season (around May and June). Don’t peel your potatoes or scrub off their delicate skins when you clean them; much of the potato’s flavour is held just below the skin, and the tasty skins themselves are a good source of vitamin C.

You can boil or steam your potatoes. Many varieties of new potato are perfectly happy being boiled, but if you’re not familiar with the variety you’ve chosen, steam them – they’re less likely to crack or collapse this way.

The sweet red onions in this salad should be sliced as fine as you possibly can. They’re less harsh this way, and their flavour gently infuses the whole salad. If you have a mandoline (mine, which I love and fear in equal measure, was a present from my lovely in-laws – I am pretty sure they are not trying to kill me, but that rather, they imagine I’m actually competent around razor-sharp blades), set it to slice paper-thin. If you’re using a knife, sharpen it before you start on the onion to help you slice thinly.

To make enough potato salad for a side-dish for four, you’ll need:

500g new potatoes
3 spring onions
½ red onion
2 tablespoons mayonnaise
2 tablespoons crème fraîche
1 teaspoon nonpareil capers, drained of their vinegar
1 heaping teaspoon grainy Dijon mustard
1 tablespoon parsley, chopped finely

Steam or boil the potatoes for 20 minutes, and allow to cool to a point where you can handle them. While the potatoes are cooling, slice the red onion into paper-thin half-moons, and chop the spring onions on the diagonal into 1cm pieces. Mix together the mayonnaise, crème fraîche, capers, mustard and parsley in a bowl.

Cut the warm potatoes into slices and toss them well with the onions in a serving bowl. Pour over the dressing, toss again and serve. You shouldn’t need any additional salt, but taste to check and season if you want to.

Iceberg lettuce and beansprout stir-fry

Iceberg lettuce and beansprout stir fryI’ve never really caught on to this British idea of the lettuce as mere salad vegetable. The Chinese aren’t alone in cooking them; you’ll find lettuce simmered gently in French soups and especially in dishes with peas. Cooked, the lettuce becomes silky and sweet; a totally different beast from the salad leaf you’re used to.

In China, you’re much more likely to find a lettuce cooked than raw. This preparation works very well with the spicy, rich, Vietnamese caramel pork from the other day; in Chinese terms, its clean, fresh flavour would be described as being Yin, against the Yang of the pork. This philosophy of food strives to balance the body – if you are prone to cold fingers and toes, and have a slow heart rate, you’re considered to have an excess of Yin. If you’re sleepless, sweaty or jittery,  Chinese grandmothers would tell you you’ve too much Yang. Yang foods tend towards richness: think chestnuts, squashes, onions and garlic, meat, ginger, coffee, alcoholic drinks and fruits like peaches, mangoes and cherries. Apples, bananas, asparagus, watermelon (as distinct from cantaloupe, which is Yang), shellfish, lettuce, beansprouts, citrus fruits and cucumbers are among the foods considered Yin.

I live in a post-enlightenment age, and do not think my cold fingers are due to an excess of lettuce, rather an excess of typing. But it’s still an interesting philosophy which works surprisingly well to help you balance the flavours in a meal. In Malaysian Chinese households, you’ll often be offered a Yin mangosteen to accompany the excessive Yang of a durian, for example; the two work together exceptionally well. Try this dish, which only takes minutes to cook (and is only Yanged-up slightly by the chicken stock, rice wine and a little garlic) to accompany fierce and rich flavours like Monday’s pork. To serve two generously, you’ll need:

1 iceberg lettuce, halved and chopped into strips
500g beansprouts
3 fat cloves garlic, sliced
1 ladle good home-made chicken stock
2 tablespoons light soy sauce
2 tablespoons Chinese rice wine
Groundnut or grape seed oil to stir fry

Bring a small amount of oil to a high temperature in a wok. Throw in the sliced garlic and stir-fry for ten seconds, then add the beansprouts to the pan and continue to cook, stirring all the time. After three minutes, add the liquid ingredients, bring to a simmer and add the lettuce. Cook, stirring, until all the lettuce is wilted, and serve immediately.

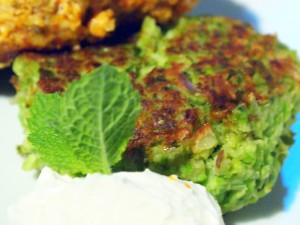
Pea and edamame falafel

Pea and edamame falafelFalafel? Well, kind of, although I don’t think anyone from the Middle East, or anywhere else where they’re a staple, would necessarily agree with me. I threw this together after eating something advertised as a pea falafel wrap at Harvey Nichols cafe in Leeds last week. I felt the Harvey Nicks version could do with some work – it was underseasoned, underspiced and crying out for a squeeze of lemon and some mint, but had the makings of something really rather good, as I discovered after some experimentation with a bag of peas and some soybeans back home.

Frozen peas and edamame cooked like this make a very quick store-cupboard supper, and the results taste as if you’ve spent much, much longer on them than the few minutes these take to throw together. This is a great dish to whip out when you’ve been landed with an unexpected vegetarian guest (like my poor parents-in-law, who were told that the foreign students they were hosting a few weeks ago were Germany’s only veggies barely a day before they arrived), and a good burger substitute for vegetarian barbecue-goers. Lacto-ovo vegetarians who do it for moral reasons befuddle me. What do they think happens to the calves who were going to drink the milk, and the chickens who weren’t female enough to lay eggs? I can guarantee you that they’re not all prancing in the sun and nibbling on tender shoots, shepherded by the consciences of unimaginative veggies. Cue comments storm.

Anyway. These falafel make for a great side-dish, or a main event on their own. Stick them in a wrap, once they’ve cooled, for an easy and uncharacteristicly healthy lunch, if you have any left over.

To make 12 burger-proportioned falafel, you’ll need:

200g sweet frozen peas (the frozen ones are almost always sweeter than fresh, unless you’re picking straight from your own garden and shelling immediately)
100g frozen edamame (soy beans) without pods
1 medium onion
1 teaspoon cumin seeds
1 teaspoon coriander seeds
1 small handful (about 20g) fresh mint leaves
50g fresh breadcrumbs
Zest of 1 lemon
Juice of ½ lemon
1 egg
Salt and pepper
Olive oil to fry

Defrost the peas and beans, throw all the ingredients into the bowl of the food processor and pulse until you have a rough paste. Use your hands to bring the paste together into patties about the size of a burger.

In a non-stick pan, heat the olive oil until it shimmers and starts to give up its fragrance. Slide in the patties and cook for a couple of minutes per side, until golden on the outside. Serve with a big dollop of Greek yoghurt and some lemon to squeeze over.

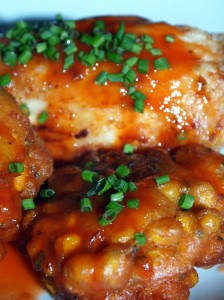
Crisp sweetcorn fritters

Sweetcorn frittersEverybody gets those days when happiness is not achievable without some fried chicken, and I wanted something horribly unhealthy to accompany it. Remembering fried chickens past, especially the ones I ate about a year ago at Lolo’s, a soul food restaurant in Phoenix, I decided that something with a sweet/savoury finish and a bit of spicing that would stand up to being drizzled with my own approximation of Lolo’s hot sauce was just what the chicken breasts I was cooking needed. The resulting fritters are crisp and puffy, and fall somewhere between an Indian pakora, a Thai fritter and a New Orleans beignet.

These are not not awfully good for you. Don’t make them too often.

To make ten once-a-year fritters and some killer honey hot sauce, you’ll need:

Fritters
1 large egg
60g plain flour
60ml milk
½ teaspoon salt
1 teaspoon baking powder
340g tin sweetcorn OR kernels from 2 fresh cobs sweetcorn
4 spring onions
1 teaspoon ground turmeric
1 teaspoon fennel seeds
1 teaspoon coriander seeds
1 small handful (about 15g) fresh chives
Oil to fry

Sauce
150ml bottle Frank’s original hot sauce (available in several UK supermarkets or online)
3 tablespoons runny honey

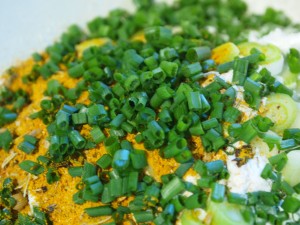
IngredientsBeat the egg into the milk. Grind the spices in a mortar and pestle with the salt, and mix with the flour, baking powder, chives and finely chopped spring onions in a large bowl. Use a whisk to beat the egg and milk into the flour mixture until you have a batter. Use a spoon to stir the corn kernels through the batter.

Drop heaped tablespoons of the batter mixture into your deep fryer, and cook a couple of minutes on each side, until crisp and golden.

To make the sauce, just combine the honey and hot sauce in a small pan and bring to a simmer, stirring well as you go. Cool before slathering generously all over your chicken and fritters. You can rebottle any extra.

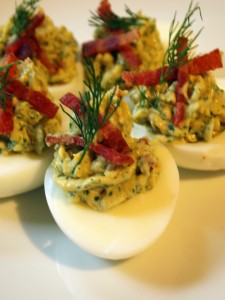
Devilled eggs with bacon and chilli

Devilled eggsA couple of weeks ago, I was footling around in the sun at Ciudad, one of my favourite restaurants in LA, with a Margarita and some devilled eggs. (This goes some way to explain the recent hiatus at Gastronomy Domine; I went away for a week and forgot my laptop, then caught something filthy from one of the insanitary people on the plane on the way home and spent all of last week in bed. To be honest, enforced absence from the internet has been great – I highly recommend it.)

I have some friends who claim they don’t like eggs, and whose idea of picnic hell is a plate of devilled eggs. This recipe, inspired by the two helpings of Ciudad’s spectacular and spectacularly expensive jalapeño and bacon devilled eggs that I ended up face down in, is not for them. If you are a fan of devilled eggs, you’ll be pleased to learn that these keep well, refrigerated, for a couple of days. They’re a great outdoor food – just pack them in the bottom of a plastic box before you go, and make sure you keep it the right way up.

To prepare 12 eggs, you’ll need:

12 eggs
2 tablespoons Dijon mustard
2 tablespoons mayonnaise
2 tablespoons creme fraiche
½ pickled habanero chilli – or other chillies to taste
6 spring onions, white and pale green parts only
1 small handful each dill, parsley and chives
½ stalk celery
½ sweet dill pickled cucumber
8 rashers smoked streaky bacon (a sweet, dry cure is best here – try to get a reasonably thick cut too)

Start by boiling the eggs. Perfect hard-boiled eggs are as easy as anything – just cover all the eggs with cold water in a saucepan, and bring it to the boil with the lid on. As soon as the eggs boil, remove them from the heat, keeping the lid on, and leave to one side for 12 minutes. Put the saucepan in the sink and run cold water over the eggs for a few minutes until they are cold, then peel.

While the eggs are boiling, grill the bacon until it starts to crisp at the edges. Put all the ingredients except the dill pickle and bacon in the food processor, and whizz until you have a creamy paste.

Dice the pickle finely by hand. You’re chopping it rather than processing it so that it adds a bit of crunch to the eggs. If you’re in the UK, Mrs Elswood pickles, which are available in most supermarkets in the pickles section and sometimes in the kosher section, are excellent. (Like Betty Crocker and Sara Lee, the Mrs Elswood pictured on the label is a fiction – the name is a portmanteau of Elstree and Borehamwood, where the company is based. They’re still damn good pickles.) Dice the bacon finely with a sharp knife, reserving one rasher. Slice that rasher finely to use as a garnish and reserve. Add the diced pickle and bacon to the whizzed ingredients in a large bowl and taste for seasoning. You may find you don’t need to add any salt.

Halve the peeled eggs and pop their yolks out into the bowl with the other ingredients. Use a fork to squish the yolks into the creamy mixture, and stir vigorously to combine everything. Put the mixture in a piping bag with a medium nozzle and pipe dollops into the empty egg halves. Use a squeeze-down-up motion for the best results – you don’t need to twist the bag or nozzle as you work. If you don’t have a piping bag, just spoon the mixture into the eggs or pop it in a freezer bag with the corner snipped off and use that instead – it won’t look as pretty, but it’ll taste just as good.

Sprinkle some herbs and the reserved bacon over the top, and serve cold.

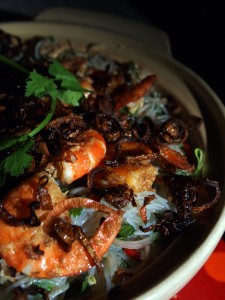
Glass noodle salad

Glass noodle saladA friend complained the other week that there aren’t enough noodle recipes on this blog. So here, just for you, Andras, is a noodle salad.

The noodles in this salad are glass noodles, made from mung beans (the same beans that beansprouts…sprout from). Don’t be tempted to substitute rice noodles, which have a very different texture. You’re unlikely to find glass noodles at your local supermarket, but any oriental grocer will carry them – they are sometimes marked “bean thread” or “pea thread” noodles. Check the packet – the only ingredient should be beans, or bean flour.

Texture’s all-important in this salad. The moist crunch of the lettuce against the dry crunch of crispy shallots, the slip of the noodles and the dense pieces of chicken and prawn all add up to a world-beating mouthfeel. A Thai-style dressing, with herbs, fish sauce, palm sugar, chillies and limes, gets the tastebuds in every part of your tongue working. We ate this as a main dish; it’s great as a side-dish too. For some reason, this is one of those recipes which demands to be eaten outdoors, so consider making it for a picnic or to serve at a barbecue.

To serve two to three as a main course or six as a side-dish, you’ll need:

8 large, raw prawns
2 chicken breasts, without skins
1 tablespoon tom yum paste
1 iceberg lettuce
100g glass noodles
1 handful (25g) coriander
1 handful (25g) mint
Juice of 4 limes
3 tablespoons fish sauce
2 teaspoons palm sugar (substitute soft brown sugar if you can’t find any)
1 red chilli
3 banana shallots

Stir the tom yum paste into the prawns and leave to marinade while you prepare the noodles (about 10 minutes).

Pour boiling water over the noodles to cover, and leave for 5 minutes until they are soft. Drain in a sieve, rinse in cold running water and transfer to a bowl. Use scissors to snip into the noodles so they are cut into pieces about an inch long. Cover and refrigerate.

Heat a tablespoon of oil in a very hot frying pan, and cook the prawns until pink. Remove to a bowl. In the same pan, which will have retained some of the paste, sauté the chicken until it is brown outside and cooked through. Remove to another bowl. Leave the prawns and chicken to cool while you prepare the crispy shallots and dressing – when you come to make the salad, they’ll be close to room temperature.

Slice two long shallots into very thin rings, and shallow-fry in a couple of centimetres of oil, stirring occasionally, until they are brown and sweet (10-15 minutes). Remove from the oil with a skimmer and drain on kitchen paper. Set aside.

Slice the third shallot in half lengthways, and chop very finely. In a bowl, mix it with the herbs, chopped very finely, the sugar, lime juice, fish sauce and finely chopped chilli. Stir the dressing into the chilled noodles. Chop the chicken into dice the size of the top joint of your little finger, and toss the pieces, along with any juices from the chicken, with the noodles.

Slice the lettuce, straight from the fridge, as thinly as possible, and lay it in the bottom of a large serving bowl. Cover with the noodle mixture, and arrange the prawns on top. Sprinkle the crispy shallots over the dish and serve, making sure that some of every layer makes it onto the plate.

Refried beans with salsa and chorizo

This photo reminds me that the kitchen really, really needs painting in a colour that doesn’t look like bloodless frogs.

Anyway. About the food. This is my slightly European-ised (and it’s no worse for that) take on Mexican refried beans. You can serve yours in chi-chi little towers like this if you’re feeling all…retentive, or you can just dollop piles of beans, salsa and avocado/crème fraîche on the plate however you fancy. I have a sense that life is probably too short for chi-chi little towers.

This recipe makes more in the way of beans than you’ll eat at one sitting; you’ll probably get two or three meals for four out of the amounts below. (The salsa amounts below are for one meal.) This is because the long simmering of the beans and the making of the sauce that flavours them is quite time-consuming, so it’s worth making plenty and freezing the remainder before you mash them to cook quickly at a later date if you want to save yourself some work. To keep the chorizo crisp, you’ll need to fry some up each time you make this (although you can, of course, leave it out, especially if you have a vegetarian to feed); chopping and frying the sausage is not so much of a hardship, though, given how good it tastes.

Refritos, despite the title of this post, doesn’t actually mean ‘refried’, but ‘well-fried’. These are really worth the effort; they’re silky-smooth in the mouth, and intensely savoury: a billion times better than anything you might have had out of a can. Amazingly, they also do not make you fart. To make a large panful of beans for three meals and enough salsa for one meal, you’ll need:

Beans
500g pinto beans
3 bay leaves
5 cloves
2 dried chillies
1 large onion
1.5l water
1 can tomatoes
4 banana shallots
6 anchovies (yes, even for anchovy-haters – see below)
1½ tablespoons smoked Spanish paprika
2 tablespoons chipotle chillies in adobo
Bacon fat or chorizo fat to fry
1 dried chorizo

Salsa
Six medium tomatoes (vine-ripened is your best bet at this time of year)
½ banana shallot
1 small handful (about 15g) coriander
A squeeze of lime juice
1 avocado
crème fraîche

Chop the onion into rough dice and put it in a large saucepan with the rinsed beans, bay leaves, cloves, dried chillies and water. Bring to a simmer, put the lid on and simmer for 2½ hours, until the beans are soft. Check during cooking to make sure there is plenty of water for the beans to swim around in, adding a little more if you think they need it.

When the 2½ hours is up, halve the shallots and cut them into half-moons. In a large frying pan, saute them in two tablespoons of bacon fat or chorizo fat (using these fats does simply astonishing things to the flavour of this dish, but you can use olive oil if they make you nervous or if you are not the sort of person who keeps jars of such artery-clogging things in the fridge) with the anchovies. The anchovies will melt and break down. They will not make the dish taste at all fishy – they just add an unidentifiable and delicious richness and depth to its structure. Keep sauteeing, stirring every now and then, until the shallots are golden. Add the tin of tomatoes to the pan with the chipotles in adobo and Spanish paprika, and simmer until thickened. Using two different kinds of smoked chillies may look like overkill, but they both have very different characters, the chipotles dark and chocolatey in their heat, and the paprika much brighter. Together they’re fantastic here.

Add the thickened mixture to the beans pan with a tablespoon of salt (smoked Maldon salt is good, but isn’t totally necessary) and return it to the heat, this time uncovered. Simmer, stirring occasionally, until the liquid in the pan takes on a texture like the sauce in a can of baked beans. You’ll be able to tell when it’s ready; it can take anything from 45 minutes to a couple of hours.

You can serve the beans now as a kind of baked bean. This is also the point at which you should stop to reserve two thirds of the beans for cooking later on. Set the third you are using for refried beans aside until you are nearly ready to eat.

For the salsa, just peel and seed the tomatoes, dice and mix with the diced shallot and chopped coriander, and squeeze over lime juice to taste. Chop a chorizo into coins, quarter each of these coins and dry-fry them until they are crisp and rustling in the pan. Set aside in a small bowl, reserving the fat for another go at the beans.

To fry the beans, eat 2 tablespoons of bacon or chorizo fat in a large saucepan until very hot. Mash the beans in their sauce with a potato masher. They shouldn’t be completely smooth, but work at it until most of the beans are reduced to a paste. Dollop the paste into the hot fat. It will hiss and spit. Use a wooden spoon to stir the beans around in the frying pan, and keep stirring every couple of minutes until all the fat is absorbed and the liquid from the beans has evaporated to leave them thick and dense.

Stir the crispy chorizo into the beans and serve with a hearty spoonful of the salsa, some sliced avocado and a good dollop of crème fraîche. This makes a great meal on its own. If you’re feeling greedy, it’s also a brilliant accompaniment for a steak.

Bombay new potatoes

Here’s the recipe I promised last week to use up the other half of that curry paste. I particularly like new potatoes in this sort of dry curry; their waxy texture and delicate flavour works very well against the aromatic spicing, and leaving the skins on helps them finish with a nice crisp.

600g new potatoes
Half of Friday’s curry paste
1 teaspoon ground turmeric
2 teaspoons fennel seeds
Flavourless oil or ghee to fry
Salt
Fresh coriander to garnish

If you didn’t cook the peas keema, Friday’s curry paste was made with 1 peeled bulb of garlic, 10 spring onions, 1 fat piece of ginger, about 5cm long and 4 green chillies. I used half of it for the peas keema and the other half for this recipe, which makes a fantastic accompaniment for the lamb and peas. If you’re only cooking one of the recipes, either make up a whole batch of curry paste and freeze half, or just halve the amounts.

A few hours before you cook the meal, steam the new potatoes for 25 minutes, drain and leave in the saucepan to cool completely. When cold, chop them in half (or quarters, if yours are large).

When you are ready to start cooking, stir the turmeric into the curry paste. Bring a couple of tablespoons of oil or ghee to temperature in a large, non-stick saucepan over a medium flame, and sauté the whole fennel seeds in the hot oil for a few seconds. Add the curry paste (now bright yellow) and fry, stirring all the time, for a couple of minutes. Tip in the potatoes with a large pinch of salt and keep frying, stirring every now and then, for about 10 minutes until the potatoes are crusty and golden. Serve immediately. These potatoes are also extremely good cold.

Game chips

There are occasions on which a roast potato will not do. (I’ll admit that these occasions are few.) For those days, these game chips are very easy to make, deliciously crispy, and packed with flavour from crispy garlic, crushed chillies, and plenty of fresh oregano.

I’ve used smoked Maldon salt here. It’s a relatively recent arrival in UK supermarkets (and I actually saw some speciality delis selling it in Lille, which made me smile), and I’ve been using it in place of ordinary salt in a few recipes. It’s very good here, but if you can’t find some just use ordinary flaky salt. If you can find some, you can make an excellent Martini by adding a pinch of the smoked salt with a teaspoon of lavender honey and a sprig of lavender to a couple of shots of iced Grey Goose.

To serve two as a generous accompaniment, you’ll need:

4 good-sized King Edward potatoes
1 large handful (about 20g) oregano
2 large pinches (use all your fingers when you pinch, not just your forefinger) smoked salt
1 teaspoon crushed Italian chillies
4 fat cloves garlic
Pepper to taste
Olive oil

Pour a generous amount of oil (enough to cover the bottom) into your largest frying pan. Slice the potatoes into eight wedges each. Bring the oil up to a high temperature and lay the potatoes in the pan for about 10-15 minutes, until they are turning gold and crisp. Flip them over and cook them on the other side for another 10-15 minutes.

While the potatoes are cooking, chop the oregano finely and crush the garlic. As always, I’d recommend you use a Microplane grater to deal with the garlic – it’s the fastest, most mess-free way I’ve found to reduce garlic to a pulp, and you won’t get the stringy bits you get with a dedicated garlic crusher.

When the potatoes are crisp and gold on both sides, stir the garlic through them vigorously with a wooden spoon or spatula, until the sticky garlic is distributed properly throughout the pan. Keep moving it around the pan with your spoon until it too is golden – the crispy garlic bits should adhere nicely to your potatoes. Scatter over the chilli, salt and some pepper straight from the grinder, then the oregano. Toss with your wooden spoon and serve immediately. Hopelessly easy, and much nicer than a chip.

I rather like these game chips drizzled with a bit of lemon juice.