Sardines on toast

Sardines on toastI suppose I should really be calling this recipe Sardines en croute or Petits poissons et tartine in order to stop you from recoiling in horror, but I am neither proud nor French. While some ingredients, particularly certain vegetables, suffer horribly from the canning process, sardines and other oily fish become dense and flavourful when tinned. They are all the better if the enterprising canner includes other flavourings. I particularly like Ortiz sardines, which are unadorned, but Waitrose Sardine Piccanti, with a couple of dried chillies lurking in-between the fish fillets are my favourites at the moment. And with five minutes’ quick chopping and some judicious spicing on your part, they can be turned into a perfect quick supper dish. Fantastic for those nights when you don’t get home until 11pm and have eaten nothing except peanuts.

To serve one, you’ll need:

1 tin sardines
2 slices white bread
1 large shallot
1 pinch paprika
1 tablespoon dry sherry
2 teaspoons soft butter
1 lime
Salt and pepper

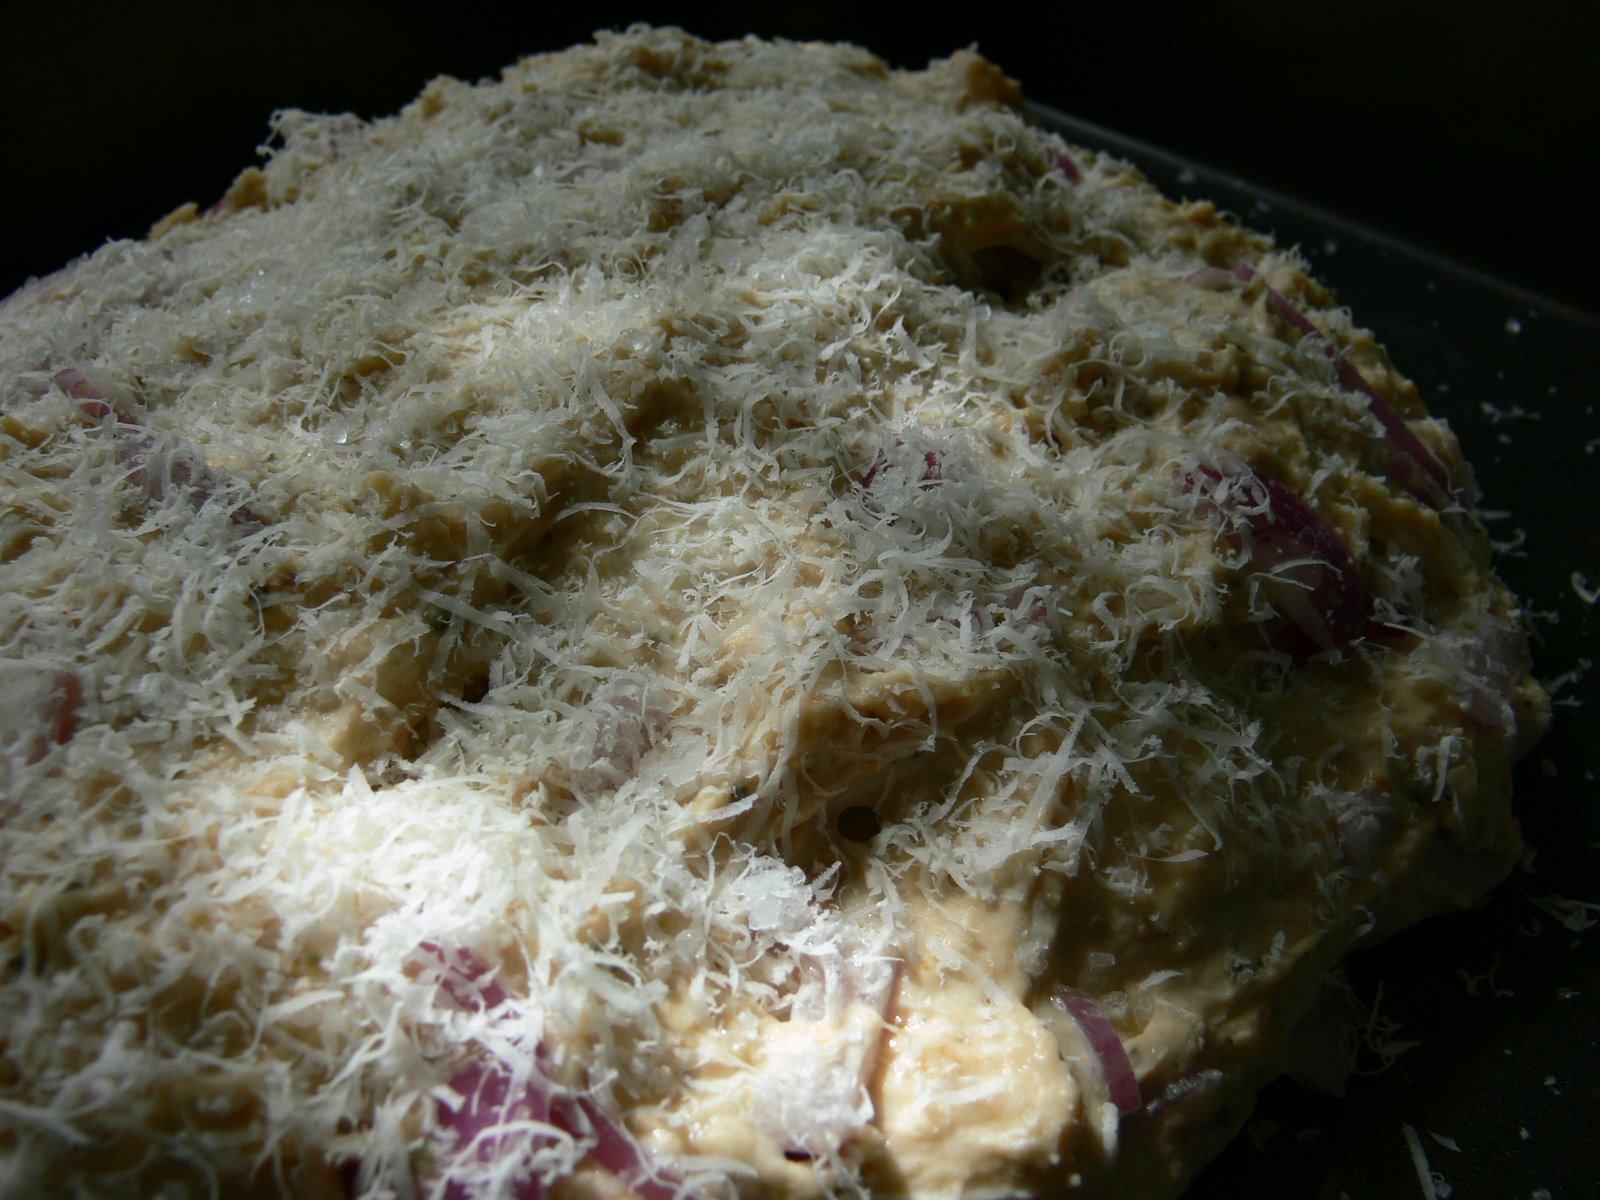
Toast the slices of bread lightly and set aside. Slice the shallot finely and put it in a small bowl with the drained sardines and a teaspoon of their oil, the sherry, a pinch of salt and the paprika. Use the back of a fork to mush the ingredients together – the shallot should separate into delicate rings and the sardines should be reduced to rough chunks. Pile the mixture onto the slices of toast. The mixture will look very shallot-heavy (see the picture), but don’t worry; once they’re cooked, this will just give your toast a lovely sweet background to support the fish.

Dot each slice with the butter and place under a hot grill for five minutes, until the shallots at the surface are browning and the flesh of the sardines is bubbling. Remove to a large plate and squeeze over the juice of a lime. Grind a generous amount of pepper over the slices and eat while still piping hot and crisp.

Panzanella

PanzanellaSummer finally happened in Cambridge this weekend. It seems to have finished today, but I’m glad we made the most of it with a picnic on Sunday. I made a Spanish omelette and this easy and delicious tomato, cucumber and bread salad. Panzanella is a Tuscan salad which works really well as part of a summer lunch, and offers you a great way to use up extra bread you’ve got lying around – it’s traditionally made with stale bread, but any dry, open-textured bread like ciabatta will work very well here. Some recipes include tuna, onions, anchovies and other strong flavours, but when your tomatoes are good, this simpler preparation makes the most of them.

This is absolutely the best time of year for tomato recipes, and the English tomatoes you’ll find in the supermarket at the moment are at their sweetest and ripest. (My own are a bit of a disaster this year; it’s not been hot enough for them to ripen, so I’ve three vines of gorgeous big tomatoes in various exciting shades of vivid green.) This salad makes the most of them by macerating them overnight with salt, lots of olive oil and garlic, herbs and a glug of really, really good vinegar. The juice from the tomatoes leeches out and combines with the other ingredients, penetrating the crisp flesh of the cucumber, and pieces of bread are added just before serving to soak up the rest of the flavourful juices.

To serve six as part of a picnic, you’ll need:

10 large fresh plum tomatoes
½ large cucumber
100g small, mild olives (again, I heartily recommend Waitrose’s Spanish Couchillo olives)
100g Sunblush tomatoes and their oil (or 100g of your own home-made slow-roasted tomatoes)
1 tablespoon chopped oregano
1 tablespoon chopped basil
1 tablespoon chopped parsley
2 cloves of garlic, chopped finely
Zest of ½ a lemon
5 tablespoons olive oil
2 tablespoons good balsamic vinegar
1 large pinch salt
1 pinch sugar
8 turns of the peppermill
½ a ciabatta, torn into pieces

Chop the tomatoes and cucumber roughly into 1cm cubes, and place in a large bowl. (If you’re going to be eating this at a picnic use a Tupperware box so you can transport it easily.) Stir in all the rest of the ingredients except the bread, and taste for seasoning – add some juice from the lemon if you want the salad to be more tart. Put in the fridge and leave, covered, overnight until you are ready to eat. The flavours will meld (there is something magical about what happens when you use this combination of herbs with raw tomatoes) and soften overnight.

Immediately before serving, tear the ciabatta into small pieces and stir it into the salad. This is great with a chilled glass of Prosecco and lots of sunshine.

Parmesan, tomato and onion bread

Parmesan, tomato and onion breadWhen I was a little girl, there was a bakery in our town which made a cheese and onion bread. It was never quite right – the cheese was too mild, there wasn’t enough onion, and it needed very salty butter. All the same, I used to really look forward to eating it, preferably sliced with plenty of cheese and tomatoes layered on top, then baked in the Aga by my Dad.

This week, I decided to try to make my own cheesy, oniony bread, this time with my Dad’s tomatoes baked into it. I used lots of parmesan, a nice big onion and some flavourful sun-dried tomatoes (along with a little of their oil). The results were great – no extra cheese, tomatoes or toasting required. To make one loaf, you’ll need:

210 ml tepid water
1 level teaspoon caster sugar
1 packet easy-blend yeast
350g strong white flour
1 teaspoon fine salt
100g finely grated parmesan
1 ½ teaspoons dried oregano
1 minced clove garlic
1 large onion, sliced finely
5 sun-dried tomatoes in oil, chopped small
1 ½ tablespoons of the tomato oil
½ tablespoon fleur de sel or other coarse salt to sprinkle
Extra parmesan to sprinkle

Mix all the ingredients (except the tepid water and the salt and parmesan to sprinkle on at the end) in a large, warm bowl. Pour in the tepid water and mix well with a wooden spoon until the dough comes together. Transfer to a floured board and knead hard for ten minutes, until the dough is stretchy, glossy and no longer sticky. The onion pieces will snap as you knead, but don’t worry about them.

Bread doughWhen the dough is kneaded, put it back in the bowl and cover with some oiled cling film. Leave in a warm (not hot) place for about 40 minutes, until it has doubled in size. (The dough will take a couple of hours to rise at room temperature if you don’t have a warm place to keep it.)

Take the dough from the bowl and knock it back down to its original size, kneading again for five minutes. If you want a traditional loaf shape, put it in a loaf tin. I decided to make a low, flattish bread in order to make the most of the lovely crust with its sweet caramelised onions poking through, so I shaped the dough on a non-stick baking sheet.

Sprinkle the bread with the salt and extra cheese, and leave to rise again, covered, for 40 minutes in a warm place. Meanwhile, heat the oven to 230° C (450° F).

When the dough has risen, place a large baking tray full of water at the bottom of the oven, and the tray with the bread on a rack in the middle of the oven. Bake the loaf for between 30 and 40 minutes. It will be ready when it sounds hollow when you tap the bottom. Serve with plenty of butter.

Pasta with anchovy crumbs and gremolata

A great no-money recipe for the end of the month, when all the money has gone on beer and skittles. You probably have all these ingredients in the storecupboard already. This is a fiercely savoury dish, where the contrasting textures of crisply fried anchovy breadcrumbs and the soft pasta come together to make something really special.

Gremolata is a bit like a salsa verde – a finely-chopped Italian mixture of herbs, lemon zest and something sharp like capers. It’s delicious with meats, and I love it with this pasta, where its freshness lifts the richness of the crumbs and infused oil.

It’s important that you choose a good, well-flavoured olive oil for this recipe. Although it is tempting to use the oil you fried the crumbs in for infusing the garlic and chilli, it’s best to use fresh extra-virgin olive oil instead. The heat that the breadcrumbs oil is subject to over the cooking period will change its flavour slightly, and you’ll find you achieve a much fresher, more aromatic flavour from the infusing oil if you use a fresh batch and only allow it to warm gently.

To serve two you’ll need:

2 slices white bread
8 anchovy fillets
4 fat cloves garlic
4 dried chillies
1 small handful parsley
1 small handful basil
Zest of 1 lemon
2 teaspoons capers
2 servings of your favourite pasta
Parmesan cheese to taste
Salt and pepper
Plenty of olive oil

Put the bread in the food processor and whizz until you’ve got coarse breadcrumbs. In a large frying pan, fry the anchovies in about half a centimetre of olive oil until they ‘melt’ and come to pieces. Add the breadcrumbs to the pan, stir them well to combine them with the anchovies, and add more olive oil to the pan until the breadcrumbs are just covered. (Don’t worry; we’ll be draining this oil later.) At this point, the contents of the pan will look like a wet mess. Turn the heat to medium and leave, stirring every minute or so: gradually the wet mess will turn into golden, crisp, anchovy flavoured crumbs (10-15 minutes). Turn the oil and breadcrumbs into a sieve and leave the sieve over a bowl for ten minutes for as much oil to drain out as possible.

While the crumbs are cooking, prepare the infused oil by crushing the garlic and frying it gently in a little olive oil until it releases its scent (about thirty seconds). Remove from the heat and add half a wine glass of extra-virgin olive oil to the pan. Bash the chillies in a mortar and pestle until they are flaked and add them to the oil. Return the pan to the heat and warm the oil gently, then leave it in a warm place to infuse until the pasta is ready to be served.

To prepare the gremolata, chop the herbs finely, and mix with the lemon zest and chopped capers in a small bowl. This is one of the rare occasions where I prefer capers preserved in a briny vinegar to the salted kind – use whatever you have to hand.

Cook the pasta as usual, drain and return to the pan you cooked it in. Pour over the garlic and chilli oil, then spoon into serving bowls. Dress generously with the crumbs and gremolata, check for seasoning, and serve with lots of parmesan cheese to grate over.

Green chilli cornbread

You don’t see cornbread recipes often in the UK. This is a traditional American accompaniment, made from ground maize or cornmeal (if you are making this in England look for fine polenta in the supermarket), and uses baking powder rather than yeast for leavening. It has a fine scent and flavour, a deliciously crisp shell and a soft, fragrant crumb.

Cornbread is often made in a cast-iron skillet in America. I like to use muffin pans to make individual servings. It’s extremely good with barbecued food – try it with pulled pork or sticky chicken.

At a Gospel Sunday service and brunch at the House of Blues (churchgoing comes with fried chicken as standard in Las Vegas) earlier this year, I found some fantastic little cornbread muffins, far tastier than other cornbread I’d tried. I asked the staff how they were made, and was told that the secret to the texture was the addition of canned, creamed sweetcorn to the batter. The cornbread was also studded with fresh jalapeño peppers. I’ve recreated them here, and I’m proud to report that they’re pretty much exactly right.

To make twelve individual cornbread muffins, you’ll need:

3 tablespoons butter
2 cups white cornmeal (polenta)
2 tablespoons soft brown sugar
1 cup milk
½ cup buttermilk
1 egg
1 teaspoon baking powder
½ teaspoon bicarbonate of soda (baking soda)
1 can creamed corn
4 green chillies (jalapeños if available), chopped finely

Turn the oven up to 220° C (425° F) and preheat the muffin pans with the butter dotted in the base of each. While the pans are heating, mix the cornmeal, sugar, milk, buttermilk, egg, baking powder and bicarb thoroughly in a large bowl.

Stir the creamed corn and chillis through the mixture. Pour an equal amount into each muffin tin, and bake in the hot oven for 20 minutes or until golden brown. A skewer inserted into the middle of one of the muffins should come out clean.

The muffins are delicious split and spread with some butter and a little honey (even better if you whisk the butter and honey together before spreading, for some reason). You can also use them to accompany savoury dishes. The muffins will keep well, maintaining their crisp surface, in an airtight box for a few days.

Wholemeal flour from Lode Mill, Cambridge – and a loaf of bread

Lode Mill, a working, eighteenth-century water mill, is in the grounds of Anglesey Abbey, a Jacobean house near Cambridge which is built on the grounds of a medieval priory. The mill itself operates on the first and third Sunday of every month (subject to the water level), and is open to the public who can view the mill workings, and buy the oatmeal and wholegrain flour produced there. Saturday’s visit to the winter gardens at Anglesey Abbey saw me buying up armsful of flour bags and quizzing the miller in enormous detail, all to keep you happy.

There has been a mill on this site since the Domesday survey, but the current mill is only about 300 years old. The building has four storeys; a ground floor; a stone floor where the mill stones are kept and operated; and two upper storage floors. This huge central shaft (the wheel you can see here is the spur wheel which drives the gears under the mill stone) is made from a whole sweet chestnut trunk; other wood in the mill building and wheels is seasoned oak, which, according to the miller, is as hard as iron.

There are four pairs of stones, each of which has to be dressed (cut with chisels) every ten uses to keep them sharp for grinding. The resulting flour is pushed from the outside edge of the mill stones and falls down a chute to the ground floor. It takes 30 seconds and ten tons of water to make 1 ½ kilograms of flour.

If you’re using wholemeal flour for bread, it’s a good idea to mix it with some strong white flour. An all-wholemeal loaf made at home can be chewy and dense; it’s especially hard on very young jaws. (A primary-school aged Mr Weasel was, in an episode he recites every time he eats a sandwich, told off by a school dinner lady for hiding a homemade, wholemeal sandwich in his pocket; he wanted to get out of the dinner hall and play, but chewing the bread was taking so long his friends had left without him.) For one large loaf you’ll need:

3 sachets instant yeast
30g honey
625ml water at body temperature
500g wholemeal flour
500g strong white flour
30g salt

Half an hour before you start, put the flour in a warm place.

Dissolve the yeast and honey in half the water. Put the warm flour in a large bowl with the salt and make a well in the centre. Pour all the yeast and honey mixture into the well, and mix with your hand until it’s all soaked into the flour. Add the rest of the tepid water and continue mixing until you have a soft dough. Knead for ten minutes to develop the gluten in the dough; you should end up with a soft, stretchy mass. Return it to its bowl.

Flour the top of the dough and use scissors to score it; this will help it to prove faster. Leave it somewhere warm until it has doubled in size (an hour or so in a warm room), then knock all the air out of it, kneading for a couple of minutes. Divide the dough into six pieces, and form them into balls. Arrange the balls in a cake tin, flour them and leave the tin in a warm place again until the bread dough has doubled in size once more.

Put the tin gently (without knocking it about) in the oven at 225°C for half an hour. Check to see that the bread is done by taking it out of the tin and tapping the bottom; if it sounds hollow, it’s ready. (Be careful; wholemeal bread takes a bit longer to cook than white bread does. Exercise judgement.)

This flour makes a lovely, malty bread. Enjoy it toasted with honey, and bask in the smell filling your house.