Garlic bread

Garlic bread
Garlic bread

I was tempted to title this post “F***ing fantastic garlic bread”, because when people taste it, they tend to say something along the lines of: “Cripes. This is f***ing fantastic garlic bread.” But my Mum reads this blog and has a habit of looking horrified and exclaiming: “Elizabeth!” if I so much as say “Damn” in her presence, so plain old “Garlic bread” it’ll have to be. Sorry, Mum.

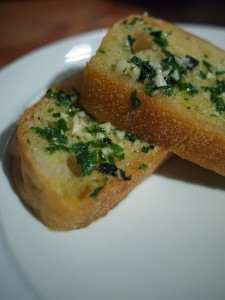
I wooed a boyfriend with this stuff once (and swiftly thereafter wished I hadn’t, but that’s by the bye). It’s powerfully good; you won’t go back to shop-bought garlic bread once you’ve tried it. The trick here is to simmer the garlic in the butter to sweeten it up and release its aroma before you let it anywhere near the bread, alongside the judicious application of some herbs. Use whatever loaf you fancy here. Something reasonably open-textured to soak up all that butter is a good move. This recipe will make sufficient garlic butter to anoint a whole baguette, but you can make a smaller loaf and keep any leftover butter in the fridge for up to a week. There were just two of us eating when I made this, so I used a ciabatta and steeled myself for leftovers – if you put the remains back together into something that resembles a cut-down loaf, rewrap it in the tin foil and refrigerate, you can take the recipe from the point where you put it in the oven again the next day.

You’ll need:

450g butter
2 large, juicy heads garlic
15g fresh chives
15g fresh flat-leaf parsley
15g fresh oregano
½ teaspoon salt
Several turns of the peppermill

Peel the garlic, and use a knife to mince it until you have a heap of garlicky rubble in the middle of your chopping board.

Melt the butter in a small saucepan over a very low heat, and spoon the garlic into it. Allow the garlic to cook very gently in the butter for about ten minutes, until it is soft and fragrant. While the garlic is cooking, chop the herbs and put them with the salt and pepper in a bowl.

Pour the hot butter and garlic mixture over the herbs in the bowl, and stir well to combine everything. Leave at room temperature for ten minutes, then cover with cling film and move to the fridge. Refrigerate until solid. (The butter doesn’t need to be rock-hard – a couple of hours should be sufficient.)

When the butter is stiff enough to spread, warm the oven to 150ºC (300ºF).

Slice the bread and spread each side of each slice generously with the garlic butter. Reassemble the loaf, and wrap it tightly in tin foil. Bake on a metal tray for 20 minutes, and remove from the oven. Unwrap and serve piping hot. You will be unable to avoid getting garlic butter all over your chin as you eat, and possibly on your elbows, so have napkins standing by.

Béchamel sauce

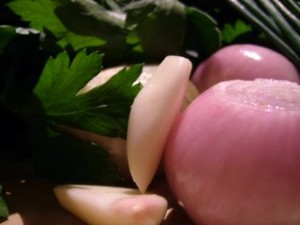
Shallots and aromatics
Aromatics ready to be infused

Widdling around with a shallot stuck with cloves earlier today, it occurred to me that this blog could do with a few very basic recipes; the sort that can form the underpinnings of a million different dishes, but which tend to get overlooked in favour of more complicated recipes. I’m guilty of occasionally writing unhelpful things like “make some gravy according to your usual method”, or “make a white sauce” here, which sort of instructions are absolutely no use at all if you’re not already a confident cook. So here, as the start of what I hope will be a semi-regular series of fundamental recipes, is a recipe for white sauce, classically called Béchamel.

My education in food started at a girls’ boarding school of the sort where we were taught all the skills needed to be a good little wife and housewife (and none of the skills necessary to operate in an environment where things like physics or grammar were necessary; happily, I overcame that hump when the school went bankrupt just in time for me to go to a proper school to learn how to punctuate, titrate and calculate vectors). The teaching in home economics, however, was second to none. We were led from boiling eggs (which we then devilled and made into salads for which we learned to make mayonnaise) through the various doughs and batters for scones, breads and cakes, via the flour-based sauces and stocks, soups and stews, to roasting and finally that most exciting of lessons where we learned how to fillet a fish. All pretty fundamental stuff, the sort of foundations on which the rest of home cooking stands – although entirely without the use of any garlic or herbs, because this was the 1980s and apparently potential husbands back then didn’t go for pesto.

The white sauce we learned was, in retrospect, a bland and awful thing; I seem to remember that it may even have employed margarine, but it’s retained a very important place in my memory because it was the first of these multi-use sauces we were taught. We used it in lasagnes and as a base for cheese sauces and other sauces for fish and meats. I discovered in the school’s copy of Ambrose Heath’s Book of Sauces that the same (or a very similar) sauce was the basis for all kinds of wonderful stuff: Mornay (cheese) sauce; the parsley sauce for a ham; old-fashioned English caper sauce; mustard sauce; Portuguese cockle sauce; onion Soubise; and sauce Nantua, a lovely thing which is flavoured with crayfish and brandy. I have my own copy of Heath’s Book of Sauces (first published in 1943 and now out of print, but it’s a book I see quite regularly in second-hand bookshops), and opened it when I was writing this post to a page which said proudly that “the sauce-maker [is] at the very head of his profession; these sauces will improve the best food and make the dullest dish tempting.”

Béchamel is, according to my copy of Larousse, an ancient thing, named after the 17th century Marquis de Béchamel, but predating him in the form of a velouté (similar to a white sauce but made with stock rather than infused milk) by  some considerable time; in the 19th century Carême called it one of the four “mother” sauces which form the foundations of French cuisine. It still, says Heath, contained veal alongside the milk well into the 20th century, at least until the early 40s when he was writing, and the standard recipe noted it although most chefs would already eschew the veal; but today the sauce is classically made with a roux or paste of butter and flour, which goes to thicken up a body of milk.

A Béchamel should always be made with milk which is infused with aromatics – otherwise, you’ll find yourself with an uninspiring sauce which reminds vaguely of glue. The herbs and spices here work well in almost any dish where a white sauce is called for; experiment depending on what you plan to do with your own. Chives, blades of mace and whole garlic cloves are good ingredients to play with. Infused milk freezes well, as does the finished Béchamel itself, so you can infuse extra milk and set some by for the next time you want to make something like bread sauce. Some extra infused milk in the freezer is also beyond useful for those days when you want to make a white sauce quickly but don’t have time to faff around with a shallot.

To make about half a litre of Béchamel, you’ll need:

500ml milk
A bunch of parsley, including the stalks
3 bay leaves
2 small shallots
5 cloves
5 peppercorns
50g butter
50g plain flour
Salt

Start a few hours before you mean to make up the sauce by infusing the milk. Pour the milk into a saucepan and add the cleaned parsley; bay; peeled and halved shallots, studded with the cloves; and whole peppercorns to the pan. Bring the pan to a gentle simmer, turn the heat off, put the lid on and leave in a warm place for at least two hours.

When you are ready to make the sauce, strain the milk into a jug and discard the bits of herb and shallot. Melt the butter over a low heat in a clean, dry saucepan, and sprinkle over the flour. Stir with a wooden spoon until the flour and melted butter are combined smoothly in a glossy paste – this is your roux. Be careful not to allow the butter or flour to colour.

Stirring all the time, add a small amount (about 25ml) of milk to the roux, continuing to stir until the milk is absorbed into the roux and you have a thick, uniform mixture. Add another small amount of milk, and repeat until about half the milk is incorporated. You might want to switch to stirring with a whisk at this point. Add the rest of the milk in larger amounts, whisking as you go, and continue to cook very gently until you have a thick and glossy sauce. When all the milk is incorporated, keep cooking for about five minutes to cook out any raw flour taste. Take a teaspoon of the sauce and taste it to adjust for the amount of salt you want.

If you need to keep the finished sauce warm, you can avoid the formation of a skin on top by melting a small amount of butter, floating it on top of the sauce and stirring it in when you come to serve, or by floating a piece of cling film on the sauce. And because you’re bound to want something to do with this sauce, I’ll post a recipe for a world-beating Croque Madame later in the week.

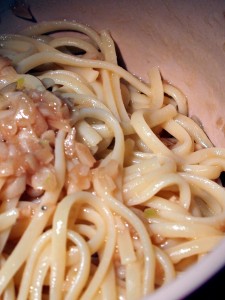
Garlic noodles, inspired by Crustacean

Garlic noodlesThe An family runs a group of Vietnamese restaurants in California. The restaurants have different menus, but the family’s famous garlic noodles are on offer at each of them. I ate a dish of them at AnQi, the group’s newest restaurant in Costa Mesa – a restaurant so swanky it has a catwalk for fashion shows slashing a line through the tables – and discovered that those noodles are justly famous.  (I can also heartily recommend the filet mignon potstickers, the shaken beef and the salt and pepper calamari.)

Those noodles though: stupendous. The An family has cottoned on to this, keeps the recipe secret, and tried to trademark the term “garlic noodles” a few years ago.  Unsurprisingly, this was unsuccessful, but since then they’ve tried again with  “An’s Famous Garlic Noodles”. So I should make the point here that the noodle recipe on this page is not the An family’s jealously guarded secret recipe, but my own (pretty successful) attempt at reverse-engineering the noodles I ate. They’re garlic dynamite, the sort of thing that you should consider eating to repel an unwanted suitor. The garlic is sweet, the buttery sauce gorgeously umami, and the whole arrangement coats the strands of wheat noodle (angel hair pasta is indistinguishable from what the restaurant uses) in a velvet-slick coating of flavour.

The Vietnamese have been working with what we’d now call fusion food for a couple of hundred years, the result of French colonialism. Some of the best Vietnamese food out there is a real mish-mash of cultures; just look at banh mi on rice-flour baguettes, with goose-liver pate spread thickly beneath the Vietnamese roast pork and pickled vegetables. So the use of butter and Parmesan cheese isn’t as barking here as it might look at first glance. This is a very easy recipe, but beware: this dish won’t just make your breath smell of garlic. Your hair, your sweat and the whole of your immediate environment will be curiously pungent for a good day or so after eating. Go with it. It’s worth it.

To make enough noodles to serve four as a side dish, you’ll need:

2 heads garlic
150g salted butter
1 tablespoon oyster sauce
2 heaped tablespoons grated Parmesan cheese
250g angel-hair pasta

Peel the garlic and use a large, sharp knife to chop it into very small pieces. If you hold the tip end of the knife in one hand and the bottom of the cutting blade in the other, you’ll find you can walk the knife up and down your board, chopping as it goes. Melt the butter and, over a very low heat, simmer the chopped garlic in it for about 20 minutes, until the garlic is soft and giving its fragrance up, but not browning. Stir the oyster sauce into the garlic and butter, and remove the pan from the heat.

Cook the pasta according to the timing on the packet, but using just enough water to cover the noodles. Drain, reserving the cooking liquid, and place in a serving bowl. Stir 50ml of the starchy water into the noodles along with the buttery garlic sauce and the Parmesan. Serve immediately.

Bread and butter pudding

Bread and butter pudding

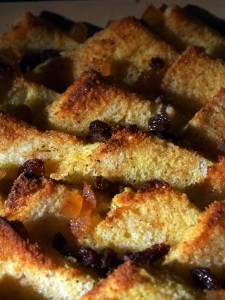
English food gets a bad rap in a lot of areas, but there’s one thing we’re world-class at: nursery puddings. A good bread and butter pudding is a joyous thing; a layer of spongey, custard-dense bread at the bottom, sweetness and flavour from a careful sprinkling of preserved fruit (I like juicy, tea-soaked sultanas and little cubes of stem ginger), and golden, caramelised points of crisp bread decorating the surface.

It’s unfortunate that so many of us were exposed to disastrous variations on the bread pudding theme when we were children. School dinners and rushed grandmothers are responsible for plenty of adult nightmares about gloppy flat puddings, studded with bits of wobbly egg, a nasty rubbery skin stretched over a sheer surface. There are a few things you need to do to ensure you avoid these problems when you’re making your own bread and butter pudding.

Firstly, and all-importantly, the bread shouldn’t be submerged in the custard. Don’t drown everything in custard, and construct your pudding so that points of buttered bread, moistened with the egg and milk and brushed with a little syrup and sugar, caramelise and crisp in the heat of the oven.  And when you make that custard, beat the hell out of the egg. Nothing is more squick-inducing than a gelatinous chunk of eggwhite in the middle of your dessert plate.

For an entirely non-squicky pudding to serve between four and six, depending on greed, you’ll need:

8 slices good white bread, crusts left on
30g softened, salted butter, plus extra to grease the dish
30g caster sugar, plus one tablespoonful
3 large eggs
500ml milk
50g sultanas
50g stem ginger chunks – reserve the syrup
1 strong cup of your favourite tea
Nutmeg to grate over

Preheat the oven to 180°C (350°F). Make a very strong cup of hot tea without milk (make another for yourself) and soak the sultanas in it until you’ve finished buttering the bread and arranging it in the dish.

Cut the slices of bread into quarters diagonally, and butter them on both sides. This is an excellent way to use up stale bread – in fact, you’ll find the stiffer slices of slightly stale bread easier to handle than soft, fresh bread.

Arrange the buttered slices of bread fish-scale style in a buttered rectangular dish measuring about 20x30cm, the crust sides touching the base of the dish and the soft points pointing upwards. The bread triangles should be snug in the dish, but need a little space between them; overlapping three per row works well.

Drain the sultanas and chop the pieces of ginger into sultana-sized dice. Sprinkle them over and between the points of bread.

Beat the egg thoroughly with 30g of sugar in a jug. Use a whisk rather than a fork, to make sure the egg is properly beaten. Pour the milk over the egg and sugar and whisk it thoroughly to make sure everything is properly mixed.

Pour the custard (because that’s what it is now) carefully over the bread, being sure to moisten all of the points with the mixture. Brush the syrup from the ginger pieces over the exposed surfaces of the bread, and sprinkle with another tablespoon of sugar. Finish with a generous grating of nutmeg.

Bake, uncovered, for 35 minutes. The bread points should be golden brown and crisp – if you think they could do with a little more colour, leave in the oven for another 5 minutes before checking again. Serve hot or warm with plenty of cream. This pudding is best on the evening it’s made, when the top will be deliciously crisp.

Bagna cauda

A miracle! The English summer actually seems to be taking itself seriously this year – we have blissy sunshine, bone-loosening heat and, in my village at least, a lovely smell of hay in the air. These conditions do not lend themselves well to lots of roasts and meaty things, so I looked to Provence and Piedmont for today’s recipe – a bagna cauda, rich with garlic and anchovies, for dipping hunks of bread, crudités and hot, steamed artichoke petals into. (There have been some fabulous and enormous artichokes kicking around the market in Cambridge this week – if you’re local, go and grab a few now.)

This bagna cauda has a texture a lot like mayonnaise, and it’s made in a similar way, but without any eggs. (The proteins in the cooked garlic and anchovies help to emulsify the oil and butter in the way that an egg yolk does in mayonnaise.) Like mayonnaise, it keeps well in the fridge and works amazingly well in sandwiches, so if you don’t polish off the whole lot in one go, just treat it as a flavoured mayo for next week’s packed lunches.

To make enough to serve six as a robust dip with bread, carrots, cauliflower, peppers, tomatoes, artichokes, asparagus, new potatoes…or anything else you can think of, you’ll need:

1 fat bulb garlic
Milk
1 tin anchovies
300ml extra-virgin olive oil
350g unsalted butter

Start by peeling the garlic. Choose the sweetest, fattest kind you can find – the Really Garlicky Company grow Porcelain garlic, which I think is the among the most reliable and delicious in the UK. They supply Waitrose, but if you don’t have a local branch, they also sell their garlic online. Pop the peeled cloves in a little pan, cover them with milk and simmer for ten minutes, until the garlic is soft and cooked through. Discard the milk.

Put the anchovies in a bowl with a cover and nuke in the microwave for 45 seconds. They should cook down to a paste. Scrape the anchovies into a saucepan (not the milk pan, which will have milky bits stuck to the bottom) with the garlic, and use the back of a fork to squish them together.

Chop the butter into little cubes about the size of the top joint of your thumb. Put four of the cubes into the saucepan with the garlic and anchovy mixture, and turn the heat on as low as possible under the pan. As soon as the butter starts to melt, start to whisk the contents of the pan with a balloon whisk. When the butter cubes are nearly melted, add four more, still whisking, and continue until all the butter is incorporated. As you continue to whisk, drizzle the olive oil very gradually into the warm mixture as if you were making mayonnaise. Eventually, you’ll have a thick, glossy bagna cauda. Remove to a bowl, plonk it down in the middle of the table, and get dipping immediately.

Portobello and prosciutto open sandwich

A quick and dirty supper dish: with the help of a food processor, this one will only take you half an hour to make. I’ve set fat Portobello mushrooms, roasted with a garlic and herb butter and covered with crisp crumbs, on top of sweet slices of brioche, with a few paper-thin slices of prosciutto draped over the top. Easy as anything, and cooking mushrooms like this really brings out their curious meatiness.

I’ve used panko breadcrumbs, which are gorgeously malty and crisp, to add some crunch to the mushrooms while soaking up some of the herby, buttery juices. If you can’t find any, just use some crumbs you’ve whizzed up from stale slices of bread in the food processor.

Look to serve each diner two open sandwiches. For each sandwich, you’ll need:

1 plump Portobello mushroom
1 clove garlic
1 small handful (15g) parsley
1 small handful (15g) chives
1 small handful (15g) oregano
30g salted butter
1 tablespoon lemon juice
1 teaspoon Japanese panko breadcrumbs
1 thick slice brioche (make sure you get a variety without vanilla essence)
2 slices prosciutto
Salt and pepper
Dijon mustard to spread

Preheat the oven to 200°C .

Put the herbs, garlic, butter and lemon juice in the bowl of the food processor and whizz until everything is chopped and blended with the butter. Place the mushrooms, gill side up, in a baking tray, and dollop the herb butter mixture evenly on them. Season with salt and pepper and sprinkle with the panko crumbs, and roast for 20 minutes.

Toast the brioche and spread each slice with a little Dijon mustard. Lay a roast mushroom on top, drizzling over some of the pan juices, and top with two paper-thin slices of prosciutto. This is oddly delicious with a very cold glass of Pinot Gris.

Lamb loin fillet with caper butter sauce

I’m having some trouble writing coherently today because I have one eye (OK – two eyes) on the news – I’m obsessing somewhat about the US election, and I really, really hope the polls are accurate. The BBC is currently showing helicopter footage of a queue of voters in Virginia – it’s so long that a helicopter is the only way they can film it.

Here’s a really fantastic lamb dish to serve to someone you’re trying to impress. Loin fillets are seared in olive oil and roasted briefly, so they’re still lovely and pink in the centre, then served with a butter sauce made dense and salty with shallots, anchovies and capers. The anchovies give amazing savoury depth and richness to the dish and go fabulously with lamb, but when cooked like this they don’t taste fishy – in fact, they melt into the sauce so completely that you will be able to serve this to anchovy-haters with no problems.

To serve two, you’ll need:

2 lamb loin fillets
Zest and juice of 1 lemon
2 shallots
4 anchovies
2 teaspoons capers (use tiny ones in wine vinegar)
1 tablespoon cream
100g salted butter
1 clove garlic
Salt and pepper
Olive oil
Fresh basil to garnish

Crush the garlic and rub it all over the lamb with the lemon zest, a little salt and plenty of pepper. Put aside for an hour at room temperature. Preheat the oven to 200° C.

Heat a tablespoon of olive oil in a frying pan until it starts to shimmer, and sear the lamb all over in it. The pan must be very hot – you’re aiming to brown the lamb to a lovely mahogany colour. Place the whole, seared fillets in a roasting dish and put in the oven for ten minutes.
When the lamb has had ten minutes in the oven, take it out and rest it in its cooking dish in a warm place for another ten minutes while you make the sauce.

While the lamb is resting, make the sauce. Melt the butter in the frying pan (over a lower heat now) and add the finely chopped shallots. Simmer the shallots in the butter for five minutes, then add the anchovies and cook, stirring, until they have melted into the sauce. Still over a low heat, stir in the cream and capers, then use a balloon whisk to beat the lemon juice into the sauce. Start with half the juice and taste as you add more until you have a sauce which is tart and buttery all at once.

Slice the fillets into medallions and arrange on the plate with a drizzle of the sauce and some basil to garnish.

Paper-baked trout with beurre blanc

Talking food on the phone with my Mum last week, the subject got on to sauces. It turns out that we share a favourite – beurre blanc, a deliciously fatsome emulsion of melted butter suspended in reduced wine infused with herbs and shallot. After putting the phone down, I headed straight for the fridge.

Being fatsome, beurre blanc works best as a sauce for very lean dishes. I steamed trout en papilotte – inside a little bag made from greaseproof paper – in the oven, with more herbs and wine, then spooned the beurre blanc all over it. (I also spooned beurre blanc all over some home-fried potatoes, which are not pictured because only people who do not fear imminent death via clogged arteries should eat beurre blanc spooned all over home-fried potatoes.) It was ludicrously good.

To serve four, you’ll need:

Trout
Eight trout fillets
4 bay leaves
4 sprigs tarragon
4 sprigs parsley
4 thin slices of lemon (with skin)
2 shallots
White wine
Salt and pepper

Beurre blanc
225g unsalted butter
1 shallot
1 bay leaf
3 peppercorns
5 tablespoons white wine
1 tablespoon white wine vinegar
1 teaspoon double cream
Salt and pepper

Make sure the butter is chilled, and preheat the oven to 180° C (350° F).

Cut out four large squares of greaseproof paper and four squares of tinfoil. Lay the pieces of greaseproof on top of the tinfoil squares, and lay a bayleaf, half a sliced shallot, a slice of lemon and a sprig of parsley and tarragon in the middle of each. Place two fillets of trout on top of each pile of herbs and sprinkle with salt and pepper. Sprinkle a couple of tablespoons of wine over the fish and fold the paper and tinfoil over to create a little packet, sealing it tight with the foil. There should be a bit of room for the steam to circulate in each packet, so don’t wrap the fish up too tight. Put all four little packets on a baking sheet and put in the oven for 20 minutes.

As soon as the fish goes in the oven, start making the sauce. Put the wine and vinegar in a heavy-bottomed saucepan with the sliced shallot, the bay leaf and the peppercorns. Bring to a simmer and reduce until there is only 2 tablespoons of liquid left. Sieve the liquid to remove the shallot, bay and peppercorns, and return to the pan off the heat. Get the butter out of the fridge and cut it into cubes about the size of the top joint of your thumb.

Lower the heat, and put the pan back over the low flame. Add a teaspoon of cream to the wine reduction and use a whisk to incorporate it into the liquid. (A note here – adding cream is, strictly speaking, cheating. The cream stabilises the emulsion and will stop your sauce from breaking and splitting. Proper chefs will scoff and tell you that the addition of cream means your sauce is no longer a beurre blanc. Scoff right back at them, but make sure you take your time over it so that by the time they return to their own, cream-free beurre blanc pans, their own sauce will have split.) Whisking vigorously, add the butter to the pan, three cubes at a time. When they are half-melted, add another three, still whisking hard. Repeat until all the butter is incorporated and remove from the heat. Taste for seasoning and add salt and pepper.

The fish should be ready at around the same time you finish the sauce; if the timer goes before you’ve finished the sauce, don’t worry about it. The fish won’t mind an extra five minutes in the oven.

Some people like to open the little parcels of fish at the table – the burst of fragrant steam from the punctured parcel is a fantastic opening to the meal. Spoon over the beurre blanc and some fresh parsley, and serve plenty of new potatoes or mash to help you soak up all the delicious sauce.

Asparagus with hollandaise sauce

Isn’t eating at this time of year brilliant? The rhubarb is still sprouting away, and now the asparagus is shooting up as well. If you live in Cambridgeshire, it’s well worth making a trip to Burwash Manor Barns in Barton, just outside Cambridge, where they grow tonnes of the stuff. It’s picked fresh daily and sold on-site at the Larder (a very nice deli), where you’ll find a lady outside trimming the stems of an enormous heap of asparagus fresh from the fields, and packing it in wrappers for sale. If you cook it as soon as you get home so the sugars don’t have a chance to turn into starch, you’ll find it amazingly sweet. Supermarket (and, sadly, market) asparagus is never available this fresh.

English asparagus is a real delicacy. Unlike asparagus grown in hotter climates, it pops up out of the ground relatively slowly, allowing the plant to build up a much greater concentration of sugars. Burwash asparagus is available as Class I and Class II (50p cheaper than the Class I this year) – I’d recommend the Class II packs, which taste exactly the same as the Class I asparagus, but contain spears which are a bit bendier than the ruler-straight Class I. (See picture for extent of bendiness.) The thickness of spear you choose is entirely a matter of personal taste, but do make sure that all the asparagus that you steam is the same thickness, or else it won’t cook evenly.

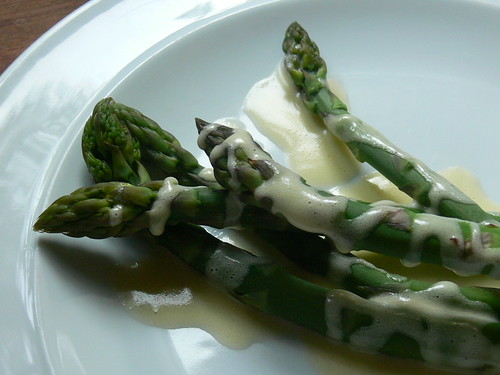
Of course, dressing your asparagus with melted butter or just dipping each spear into the yolk of a soft-boiled egg makes for a perfectly delicious starter. That said, dressing them with a hollandaise sauce – essentially just butter and yolks with an acidic spike of reduced vinegar – somehow works out to be about ten times as delicious as either butter or yolk on their own.

Hollandaise sauce is a rich emulsification of butter and good vinegar (or lemon juice in some recipes), held together by egg yolks. I always add a little boiling water to loosen the sauce and prevent it from becoming too solid – a very thick hollandaise can be overpoweringly rich.

Making hollandaise isn’t as intimidating or difficult as some make out, but it will need your full attention, so you need to make sure the answering machine gets any phone calls and ignore any cries of ‘I can’t find my shoes!’ from the family for the ten minutes or so it takes to make.

Hollandaise is cooked at a very, very low heat. In order to stop the yolks from getting too hot and turning into an omelette, you’ll be making the sauce in a bain marie or double boiler. I don’t own one of the expensive dedicated double boilers – sitting a mixing bowl on the rim of a pan part-filled with simmering water works just fine and doesn’t take up any extra precious cupboard space. To dress asparagus for four, you’ll need:

2 egg yolks
2 tablespoons boiling water
3 tablespoons good white wine vinegar (I used Maille, which, for no very good reason, keeps turning up at my local branch of TK Maxx.)
225g (half a pat) good butter
2 peppercorns
1 bay leaf
Salt to taste

The quality of your butter is all-important here. I used Bridel from Normandy. Bridel or Beurre d’Isigny is fantastic here because of its rounded and smooth flavour.

Make sure the water for steaming the asparagus is ready and boiling on the hob as you make the sauce – you’ll need a couple of spoonfuls of it for the hollandaise. Throw the asparagus into the water and put the lid on as you start to whisk the butter into the hollandaise – it only wants a little cooking, and should be bright green and ready when you finish the sauce.

Put the vinegar in a small pan with the peppercorns and bay leaf, and simmer it gently until it has reduced to about a tablespoon-full. Remove from the heat but keep warm. Melt the butter and put it in a warm jug.

Place a mixing bowl on top of a saucepan part-filled with water. The water should not touch the bowl. Bring the water to a simmer while beating the egg yolks vigorously with a hand whisk in the bowl. As the bowl warms, you will notice that the yolks start to thicken. Add a tablespoon of the boiling water to the yolks and continue beating until they begin to thicken again. Add another tablespoon and beat until the yolks are thickening once more, then add the vinegar with the bay and peppercorns removed, beating all the time until the sauce starts to thicken up again.

Pour the butter into the egg mixture in a very thin stream (as if you were making mayonnaise). Continue to whisk as you pour until all the butter is amalgamated, then remove the bowl from the heat. Taste for saltiness and acidity. If you want a little more bite to the sauce, squeeze in a few drops of lemon juice. Remove the asparagus from its water and serve with the sauce either drizzled over or as a dip.

Hollandaise sauce freezes well – when you want to use it, just bring it back to room temperature slowly.

Chicken Kiev

Chicken KievThis is a rather special Chicken Kiev. It has a super-crisp coating and is bursting with a garlic butter full of extra flavours. (You will notice that I am overdosing a little on saffron rice at the moment. It’s lovely with chicken dishes – just cook your rice as usual, but add a large pinch of saffron, which you’ve soaked in an eggcup of water from the kettle for twenty minutes, with the rest of the cooking water.)

The flavoured butter carefully packed inside this chicken (and balancing cheekily on top of that lovely saffron rice) is worth making in bulk and keeping in the freezer. You can slice it direct from the frozen roll and use it to melt over steaks, to baste roast chickens, to flavour couscous, to fill a baked potato, and anywhere you need rich flavour and lovely moist butteryness. If roasting the garlic for the butter is just too much faff for you, use an extra three cloves of raw garlic instead.

Use the largest chicken breasts you can find for this recipe; this will make it much easier to keep the pool of butter inside the bird until you cut it on your plate. Waitrose is currently selling a chicken called the Poulet d’Or – a massive and delicious behemoth of a bird which grows slowly (and ethically, at Leckford Farm, an enterprise owned by Waitrose’s parent company) – it’s fed an organic, corn-rich diet, allowed to forage and roam free, and is slaughtered at around 90 days rather than the usual four weeks. It’s a big bird, but it’s tender and extremely flavourful – I’ve read comparisons to Poulet de Bresse, and for special occasions I will be very happy to spend the £12 again on two breasts. (A whole bird comes in at about twice that price, but I’d estimate that it would very happily feed six people, so the effective price is high but not unreasonable.)

To make half a pound of garlic and herb butter, and two Chicken Kievs, you’ll need:

Garlic and herb butter
1 pat of good, salted butter (2 sticks in America), plus a tablespoon of butter to roast the garlic
1 head of garlic (to roast)
3 cloves of garlic (to be kept raw)
2 bay leaves
1 large sprig thyme
1 tablespoon chopped fresh tarragon
1 tablespoon chopped fresh chervil (leave this out if you can’t find any)
1 tablespoon chopped fresh parsley
1 fresh red chilli
½ teaspoon paprika
Juice and zest of 1 lemon
1 tablespoon light soya sauce
Large pinch of salt

Chicken
2 large chicken breasts, skinned and boned
Crumbs from two slices of white bread (blend in a food processor to make crumbs)
An equal volume of polenta or cornmeal
5 tablespoons grated parmesan
4 extra tablespoons polenta or cornmeal
2 eggs, beaten
Salt and pepper
1 teaspoon chilli flakes

Start by roasting the garlic for the butter. Slice the bulb of garlic in half across its equator and put the tablespoon of butter, the bay leaves and the thyme on the cut side of the bottom half, seasoning generously. Place the top half of the garlic bulb on top, making a herby sandwich. Roast at 180° C for 40 minutes. Remove from the oven and cool.

Pop the soft, roast cloves of garlic out into the food processor, and add the raw garlic; the tarragon, parsley, chervil and basil; the chilli and paprika; the lemon zest and juice; and the soya sauce. Drop in the half pound of butter and blend until everything is amalgamated and finely chopped into the butter.

Make a long sausage of the flavoured butter on a piece of tin foil. Wrap tightly and place in the freezer for at least an hour.

Breading mixtureWhen the butter has chilled, start on the chicken. Begin by combining the breadcrumbs and an equal volume of polenta in one bowl with the parmesan and chilli flakes. Put the four tablespoons of polenta in a separate bowl, and beat the eggs in a final bowl.

Take your smallest knife. Sharpen it vigorously. Use it to make a slit down the side of one chicken breast, creating a pocket inside the muscle. Be very careful not to cut all the way through. Remove the little fillet strip from underneath the breast and set it to one side.

Slice a disc of butter from the frozen butter sausage and tuck it inside the pocket. You may be able to fit more than one disc in, but be careful not to overstuff the breast, or the butter will leak out in cooking. If the butter sticks out at all, just trim it carefully so it’s firmly inside the meaty pocket.

Dip the fillet strip in the polenta, then back in the egg. Dip the chicken breast in the polenta, then the egg, and sprinkle the area where the slit is with a bit of extra polenta. Use the polenta and egg to glue the fillet strip around the slit. Roll the whole sticky assembly in the breadcrumbs mixture, patting plenty on around the slit/fillet area to make a good seal and ensuring everything is covered well. Repeat the process with the other breast.

Heat two tablespoons of butter and two of olive oil in a heavy, large frying pan. Bring the pan to a high temperature and carefully slide the chicken pieces in, slit/fillet area facing down. Turn the heat down to just below medium and leave the chicken breasts for 15 minutes, without poking or moving. After 15 minutes, flip them over (the bottoms will have turned an amazing golden crisp) and leave for another 15 minutes. Serve immediately. The melted butter will have formed a delicious pool inside the chicken breasts, and will pool out when you slice into the meat with your knife. Make sure you have plenty of rice to soak it all up.