Ants climbing a tree

Ants climbing a tree

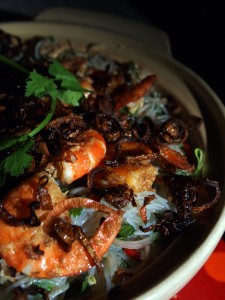
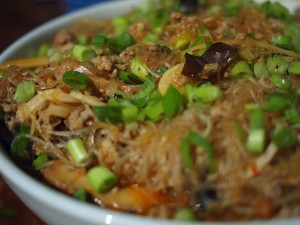
The name of this Szechuan dish is one that’s always confused me. There are, most emphatically, no ants in it; no woody bits either, unless you’ve failed to soak your dried mushrooms properly. I’ve heard suggestions that the bits of minced pork resemble ants and the glass noodles a tree. Whoever came up with that one had either been at the opium pipe, or had spent his life locked up somewhere where there are neither ants nor trees. There are other, even more unappetisingly named Szechuan dishes out there: husband and wife offal, strange-taste pork, pock-marked old woman’s bean curd. Struggle past the names – they all taste great. Szechuan cuisine lays all its emphasis on intense chilli spicing, and salty, savoury flavours.

Peculiar name aside, this makes for a terrific main dish, which you should serve with some rice to soak up the sauce. It’s important that you get your hands on glass noodles (sometimes called bean-thread or pea-thread noodles) rather than rice noodles when you cook ants climbing a tree. Their texture, slippery and glassy, and not particularly absorbent, is an important part of this dish. As always with a stir fry, make sure all your ingredients are chopped and ready to hit the wok as soon as you start to cook; things move quickly here.

To serve 6 (this also freezes well, so it’s worth making plenty even if you’re not serving that many people) you’ll need:

450g minced pork (I like a mince that’s not too lean here)
200g dry weight glass noodles
½ teaspoon salt
1 tablespoon sugar
1 teaspoon cornflour
75ml Chinese rice wine
12 spring onions
1 piece ginger about the size of your thumb
4 fat cloves garlic
200ml chicken stock (you can use half stock, half soaking liquid from your mushrooms if you prefer)
6 large, dried shitake mushrooms
6 dried cloud-ear mushrooms (sometimes sold as Chinese black mushrooms)
1 tablespoons chilli bean sauce
2 tablespoons shredded bamboo shoots preserved in sesame oil (optional – don’t worry if you can’t find these)
1 teaspoon Chinese chilli oil (look for a jar at your local oriental supermarket, and use more if you like things extra-spicy – I used about 3 heaped teaspoons in mine, but I have an asbestos tongue)
3 tablespoons dark soy sauce
6 tablespoons light soy sauce
1 tablespoon sesame oil
1 tablespoon ground nut oil

Combine the pork with the sugar, salt, rice wine, cornflour and one tablespoon of light soy sauce in a bowl, and set aside for half an hour while you prepare the other ingredients.

Soak the mushrooms for at least 20 minutes in freshly boiled water (I like to soak shitakes for an hour or more for the sake of texture; the cloud ears won’t need so long). Chop the spring onions, keeping the white and green parts separate. Dice the garlic and ginger finely. Pour boiling water over the noodles, soak for 10 minutes and then drain. Remove the mushrooms from the soaking liquid and slice them into fine strips, discarding the woody stalks of the shitakes.

Heat the oil until it starts to smoke in a wok, and throw in the garlic, ginger and the white parts of the spring onions. Stir fry for a few seconds until the aromatic ingredients start to give up their fragrance, and tip the contents of the pork bowl into the wok. Stir fry until the pork is browning evenly, and add the mushrooms to the wok with the bamboo shoots, stock, chilli bean sauce, chilli oil and soy sauces. Stir well to combine everything and add the noodles, stir again until the noodles are dispersed evenly through the wok, and turn the heat to medium. Allow the dish to bubble away until the sauce has reduced by about a third (a mixture of absorption and evaporation in this dish means this won’t take long). Remove from the heat and stir through the sesame oil and the green parts of the spring onions. Serve immediately with rice.

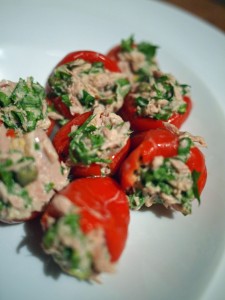
Stuffed Peppadew peppers

Stuffed Peppadew peppers

They sell something very similar to these in one of my local delicatessens, but rather more mayonnaise-y – and they sell them for about £1 per pepper, which is a simply amazing markup when you consider that a whole jar of the things, unstuffed, will only cost you about £2.50. Add a small can of tuna and a few ingredients which you probably have in the fridge already, and you’ve got (if you’re making them at home) a very inexpensive and very easy canapé, which you can make well in advance of any party you might be serving them at.

I spent years under the illusion that Peppadews (a brand name rather than a botanical name) were some sort of fruit which wasn’t related to the chilli. I think that perhaps I was a victim of some 1990s marketing. They’re actually a round chilli pepper, which grows in the Limpopo region of South Africa (cue chants of “great, grey-green, greasy Limpopo river” from all those of us who absorbed Kipling’s Just So stories at our mothers’ knees), and is processed to remove the seeds, then preserved in a sweet pickling mixture. Removing the seeds reduces the chilli’s heat, and it also leaves a nice, tidy hole in the top of the chilli which is just right for pushing stuffing into.

You want something salty, savoury and assertive in a stuffing here, that won’t get overwhelmed by the sweet and strong fruitiness of the chillies. Tinned tuna and capers are a really good match here. To fill a jar of little chillies (which will serve 4-6 as a nibble with drinks), you’ll need:

1 jar Peppadew peppers
1 small can tuna
Juice of ½ lemon
1 heaped tablespoon crème fraîche
1 stick celery, cut into tiny dice
½ shallot, cut into tiny dice
1 tablespoon capers, drained
2 heaped tablespoons chopped parsley

Easy as anything: just mix everything except the Peppadews thoroughly in a bowl, and use a teaspoon to stuff the peppers with the mixture. Chill before serving.

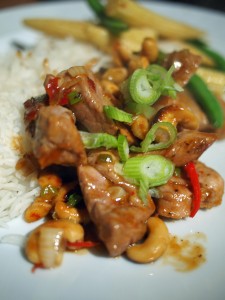
Pork with chilli and cashews

Pork with chilli and cashews

While recovering from flu, I’ve found myself turning to the wok even more than usual. It’s the perfect cooking implement when I’m feeling under the weather; there’s not too much washing up, you can get dinner on the table very quickly (you should be able to prepare this stir fry in under half an hour). Stir frying invites the use of powerful aromatics and savoury, fiery ingredients like soy and the chilli bean sauce I’ve used below – just what you need if you’re feeling a bit bunged up.

If you’re in a Chinese restaurant in the UK, you’re most likely to see cashew nuts paired with chicken. I prefer them with pork, which gives you a denser and more interesting flavour, and to my mind works much better with the sweet cashews. You’ll need raw, unsalted nuts. Most supermarkets seem to sell them these days, but if you can’t find any there, your local health food shop should stock them.

To serve three, you’ll need:

500g pork fillet
75g raw, unsalted cashew nuts
10 spring onions
3 tablespoons Chinese rice wine
2 tablespoons light soy sauce
1 tablespoon chilli bean sauce (I like Lee Kum Kee’s sauce, which you’ll be able to find in any oriental grocer)
2 fresh red chillies
1 tablespoon caster sugar
1 tablespoon sesame oil
1 teaspoon cornflour
2 tablespoons ground nut oil
Salt and pepper

Chop the cylindrical pork fillet into bite-sized slices measuring about 4 cm by ½ cm. Put the slices in a bowl and stir in 1 tablespoon of the rice wine, 1 tablespoon of the light soy sauce, the sesame oil, the cornflour, a large pinch of salt and several grinds of the peppermill until everything is well mixed. Leave to sit on the working surface to marinade quickly 15 minutes while you put together the rest of the ingredients and have a cup of tea.

Cut the white parts of the spring onion into thin coins, and put in a bowl. Chop the green parts finely and set aside. Chop the chillies finely, and make sure that the other ingredients are all within easy reach of the stove top.

Heat the oil to a high temperature in your wok, and stir fry the pork for three minutes. Remove the pork to a bowl with a slotted spoon. Add the cashew nuts to the wok and stir fry until they are turning gold (about one minute). Now add all of the other ingredients except the green parts of the spring onions. Return the pork to the pan and stir fry everything for another two minutes. Serve immediately, sprinkled with the green parts of the spring onions.

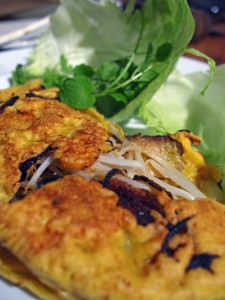
Banh xeo – Vietnamese savoury crepe

Banh xeoPancake day is coming up on March 8. I’m all for a lovely dessert crepe, but this year, I feel like ringing the changes a bit and making pancakes a savoury course.

I’ve been obsessing a bit about Vietnamese food ever since tasting the best pho I’ve ever had in California last month. Conversations have been had on Twitter (which revealed that your best bet for a Vietnamese meal in London is probably Viet Grill in Shoreditch – I’ve not had a chance to go yet, but I’m assured by a huge number of London diners that it’s as good as you’ll find in the UK), and while mulling over just how well the Vietnamese work soup, sandwiches and other staples, it struck me that they also make a pretty damn fine savoury crepe, just right for Shrove Tuesday.

Banh xeo are a spectacularly tasty plateful, with a scattering of sweet prawns, tender onions and savoury pork – this is another use for any leftover roast belly pork you might not have got through in Monday’s stir fry – and a shatteringly crisp batter flavoured with coconut and turmeric. Rice flour is what glues the whole thing together and gives it its light crispness; despite the visual similarity to an omelette, there are no eggs in this particular pancake, which makes it a good choice if you’ve got someone who can’t eat them visiting at this time of year.

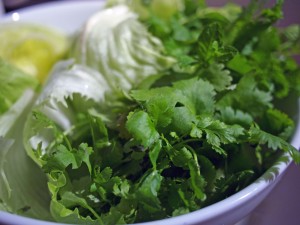
Chunks of banh xeo are traditionally eaten wrapped up in a lettuce leaf with some herbs, then dipped in a bowl of nuoc cham – a spicy, piquant, salty sauce made from fish sauce, limes, garlic and chillies. I’ve included a recipe for the sauce below. This is one of the few occasions on which an iceberg lettuce is a variety I’ll actually recommend – its texture is great here. Take the stem out with the tip of a knife and chop the lettuce in half . You can now separate the large leaves of the lettuce into cups just the right size and shape for wrapping things up in. I’ve suggested you use mint and coriander because they’re easily available in the UK, but if you can get your hands on any other Vietnamese culinary herbs, they’re wonderful here. Try Vietnamese Herbs for pictures and more information on herbs for growing and eating.

I used a 20cm non-stick frying pan to make these, and served two to each person. You’ll be working a bit of a production line, so you’re best off eating in the kitchen – serve each pancake as it comes ready, and be prepared to jump up and down a bit from the table to get the next one ready as you eat. To make eight pancakes, you’ll need:

Banh xeo
375g rice flour
1 heaped teaspoon turmeric powder
400ml coconut milk (1 can)
400ml cold water
1 teaspoon salt
350g roast pork belly
350g raw peeled prawns
300g beansprouts
2 medium onions
Flavourless oil or (preferably) lard, especially if you can save some from roasting the pork, to fry.

To serve
1 iceberg lettuce
1 large handful fresh coriander
1 large handful fresh mint

Nuoc cham
75ml water
2 heaped tablespoons soft brown sugar or palm sugar
75ml fish sauce
Juice of 4 limes
1 tablespoon rice vinegar
2 fresh birds eye chillies
4 cloves garlic

Lettuce and herbs
Lettuce and herbs for wrapping the banh xeo

The pancake batter needs half an hour to rest, which gives you plenty of time to get all the pancake ingredients ready to go. Everything should be chopped and positioned to cook immediately; things move quite fast once your ingredients are in the pan.

Sieve the rice flour and turmeric into a large mixing bowl with the salt. Combine the coconut milk and water in a jug and beat it into the rice flour mixture bit by bit with a hand whisk until you have a smooth batter about the texture of double cream. Set aside at room temperature to rest.

While the batter is resting, slice the pork belly into about 32 thin slices, and halve and slice the onions. To make the nuoc cham dipping sauce, pour the water, straight from the kettle, over the sugar and stir until all the sugar is dissolved. Leave to one side to cook a bit while you chop the chillies and garlic, then pound them in a mortar and pestle. Add the chillies and garlic to the sugar and water with all the other liquid ingredients and put to one side until you are ready to eat. Put the lettuce leaves and herbs in a serving dish in the middle of the table.

When the batter has rested for half an hour (you can leave it for up to four hours if you want), get your frying pan as hot as you can on top of the stove, and melt a tablespoon of lard in it. Throw in four slices of pork, four prawns and a small handful of onion pieces (about a quarter of an onion), and stir-fry for a minute or two until the prawns are pink and the onion is starting to soften off. Use a ladle to pour a thin layer of the batter over the ingredients in the bottom of the pan, and scatter a small handful of beansprouts over the surface of the pancake.

Allow the pancake to sizzle away for 5-7 minutes, until the bottom is golden-brown and very crisp, and the softer top cooked through. Fold in half around the beansprouts and slide onto a plate to serve immediately, to be wrapped in pieces in the lettuce with some herbs, and dipped in the nuoc cham.

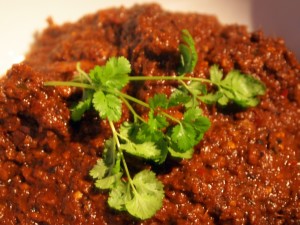
Beef rendang

Beef rendangIt’s my firm belief that every culture in the world has at least one dish which looks like something the cat dragged in, ate, digested, and left as a gift on the hall carpet twelve hours later. Beef rendang is Malaysia’s offering to this noble pool.

I’ve not come across a dish like rendang anywhere else in the world. Beef is simmered in a thick mixture of spices, browned coconut and coconut milk until nearly dry, soaking up huge amounts of flavour during the simmering process; the cooking method turns from simmering to frying as the mixture reduces and the oils from the coconut leach out. You end up with a thick, rich, dark brown sauce, packed with herbs and sweetness from shallots and roasted coconut. It’s a dish that takes a while to prepare, so make plenty and freeze what you don’t eat immediately.

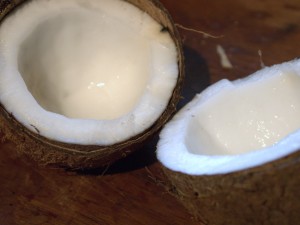
CoconutYou’ll need to tackle a raw coconut for this recipe. Opening coconuts doesn’t have to be anything like the palaver we seem to make of it in the UK – all that business with towels and hammers. As you can see from the picture, my coconut was bisected neatly. All you need to do to achieve the same thing from yours is to hold it over a bowl, and, using a meat cleaver or large knife (cleavers are available very cheaply at Chinese supermarkets, if you have one in the neighbourhood), tap hard with the blunt edge along the equator of the coconut – the pointy tuft at one end and the three “eyes” at the other are your north and south poles. Keep tapping with the blunt side, not the blade, as hard as you can, turning the coconut as you go, and once you’ve circled it about five times (by which point you will be sweating and swearing that all this work hasn’t made a blind bit of difference) the coconut will split neatly in half, the juice inside falling into your cleverly pre-positioned bowl. It’s magic. Give it a shot.

A word on that coconut juice. It’s not the same thing as coconut milk (the stuff you find in a can), which is the grated white flesh of the coconut, moistened and squeezed. Coconut juice is very pleasant on a beach somewhere when your coconut is green and straight off a tree, a nice man has sliced the top off it with a machete, and you have a few shots of rum and a straw; but once your coconut has turned brown and been shipped to the UK, it will be bitter and horrid. Drink it if you must. If you’re smart, you’ll pour it down the sink.

Coconut milk is a different matter. For this recipe, it’s more important than ever that you buy some without emulsifiers – you’ll be using the thick, creamy part of the milk separately from the more watery part. I always buy cans of Chaokoh, a Thai brand. If you’ve difficulty tracking it down locally, you can find it (and a paradise of other Chinese, Malaysian, Korean and Japanese ingredients) at Wai Yee Hong, an oriental supermarket in Bristol with an internet shopping arm – I order from them every couple of months, and they’re super-reliable.

To serve four, you’ll need:

1 coconut
600g beef topside
1 tablespoon soft dark brown sugar
1½ teaspoons tamarind block (surprisingly enough, I found some at Tesco)
10 blanched almonds OR 2 candlenuts, peeled
2 teaspoons turmeric powder
2 Kaffir lime leaves
2 stalks lemongrass
1 in piece galangal
1 in piece ginger
10 small shallots
3 fresh red chillies
8 dried red chillies (look for Malaysian cili kering in an oriental grocer)
2 cloves garlic
1½ tablespoons palm sugar (or soft dark brown sugar)
2 tablespoons dark soy sauce
1 can coconut milk
Salt and pepper
Boiling water

Open the coconut according to the instructions above. Pry the white flesh away from the shell, and use a sharp knife or a vegetable peeler to remove the brown skin from the flesh. Grate the white flesh and dry-fry, stirring regularly, until dry and dark brown but not burned.

While the coconut is frying, soak the tamarind in enough boiling water to cover, poking with a fork until the tamarind is soft. Pick out the seeds.

Cut the beef into pieces and marinade in all but 2 tablespoons of the toasted coconut, the tamarind and its liquid, two teaspoons of sugar and a teaspoon of salt. Set aside while you prepare the other ingredients.

Put the remaining toasted coconut in the bowl of the food processor with the almonds, turmeric, lime leaves, lemongrass, galangal, ginger, peeled shallots, chillies and garlic. Whizz until everything is reduced to a fine paste. Put the paste in a thick-bottomed saucepan with the runny, milky part of the coconut milk, 100ml boiling water, the palm sugar, another teaspoon of salt, a generous grating of pepper and the dark soy sauce. Stir well and bring to the boil over a moderate heat. Add the meat with any juices, and bring back to a simmer. Continue to cook, without a lid, for an hour, stirring frequently to prevent burning. Most of the liquid will have reduced away by this point.

After an hour, add the creamy part of the coconut milk to the mixture and stir well. Add a lid and continue to cook over a reduced heat for another hour, stirring occasionally. The finished rendang should have a thick, dense sauce, and look oily, the fat having come out of the coconut, almonds and coconut milk to fry off the other ingredients.

Devilled eggs with bacon and chilli

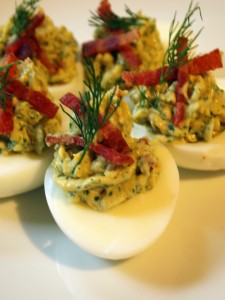
Devilled eggsA couple of weeks ago, I was footling around in the sun at Ciudad, one of my favourite restaurants in LA, with a Margarita and some devilled eggs. (This goes some way to explain the recent hiatus at Gastronomy Domine; I went away for a week and forgot my laptop, then caught something filthy from one of the insanitary people on the plane on the way home and spent all of last week in bed. To be honest, enforced absence from the internet has been great – I highly recommend it.)

I have some friends who claim they don’t like eggs, and whose idea of picnic hell is a plate of devilled eggs. This recipe, inspired by the two helpings of Ciudad’s spectacular and spectacularly expensive jalapeño and bacon devilled eggs that I ended up face down in, is not for them. If you are a fan of devilled eggs, you’ll be pleased to learn that these keep well, refrigerated, for a couple of days. They’re a great outdoor food – just pack them in the bottom of a plastic box before you go, and make sure you keep it the right way up.

To prepare 12 eggs, you’ll need:

12 eggs
2 tablespoons Dijon mustard
2 tablespoons mayonnaise
2 tablespoons creme fraiche
½ pickled habanero chilli – or other chillies to taste
6 spring onions, white and pale green parts only
1 small handful each dill, parsley and chives
½ stalk celery
½ sweet dill pickled cucumber
8 rashers smoked streaky bacon (a sweet, dry cure is best here – try to get a reasonably thick cut too)

Start by boiling the eggs. Perfect hard-boiled eggs are as easy as anything – just cover all the eggs with cold water in a saucepan, and bring it to the boil with the lid on. As soon as the eggs boil, remove them from the heat, keeping the lid on, and leave to one side for 12 minutes. Put the saucepan in the sink and run cold water over the eggs for a few minutes until they are cold, then peel.

While the eggs are boiling, grill the bacon until it starts to crisp at the edges. Put all the ingredients except the dill pickle and bacon in the food processor, and whizz until you have a creamy paste.

Dice the pickle finely by hand. You’re chopping it rather than processing it so that it adds a bit of crunch to the eggs. If you’re in the UK, Mrs Elswood pickles, which are available in most supermarkets in the pickles section and sometimes in the kosher section, are excellent. (Like Betty Crocker and Sara Lee, the Mrs Elswood pictured on the label is a fiction – the name is a portmanteau of Elstree and Borehamwood, where the company is based. They’re still damn good pickles.) Dice the bacon finely with a sharp knife, reserving one rasher. Slice that rasher finely to use as a garnish and reserve. Add the diced pickle and bacon to the whizzed ingredients in a large bowl and taste for seasoning. You may find you don’t need to add any salt.

Halve the peeled eggs and pop their yolks out into the bowl with the other ingredients. Use a fork to squish the yolks into the creamy mixture, and stir vigorously to combine everything. Put the mixture in a piping bag with a medium nozzle and pipe dollops into the empty egg halves. Use a squeeze-down-up motion for the best results – you don’t need to twist the bag or nozzle as you work. If you don’t have a piping bag, just spoon the mixture into the eggs or pop it in a freezer bag with the corner snipped off and use that instead – it won’t look as pretty, but it’ll taste just as good.

Sprinkle some herbs and the reserved bacon over the top, and serve cold.

Glass noodle salad

Glass noodle saladA friend complained the other week that there aren’t enough noodle recipes on this blog. So here, just for you, Andras, is a noodle salad.

The noodles in this salad are glass noodles, made from mung beans (the same beans that beansprouts…sprout from). Don’t be tempted to substitute rice noodles, which have a very different texture. You’re unlikely to find glass noodles at your local supermarket, but any oriental grocer will carry them – they are sometimes marked “bean thread” or “pea thread” noodles. Check the packet – the only ingredient should be beans, or bean flour.

Texture’s all-important in this salad. The moist crunch of the lettuce against the dry crunch of crispy shallots, the slip of the noodles and the dense pieces of chicken and prawn all add up to a world-beating mouthfeel. A Thai-style dressing, with herbs, fish sauce, palm sugar, chillies and limes, gets the tastebuds in every part of your tongue working. We ate this as a main dish; it’s great as a side-dish too. For some reason, this is one of those recipes which demands to be eaten outdoors, so consider making it for a picnic or to serve at a barbecue.

To serve two to three as a main course or six as a side-dish, you’ll need:

8 large, raw prawns
2 chicken breasts, without skins
1 tablespoon tom yum paste
1 iceberg lettuce
100g glass noodles
1 handful (25g) coriander
1 handful (25g) mint
Juice of 4 limes
3 tablespoons fish sauce
2 teaspoons palm sugar (substitute soft brown sugar if you can’t find any)
1 red chilli
3 banana shallots

Stir the tom yum paste into the prawns and leave to marinade while you prepare the noodles (about 10 minutes).

Pour boiling water over the noodles to cover, and leave for 5 minutes until they are soft. Drain in a sieve, rinse in cold running water and transfer to a bowl. Use scissors to snip into the noodles so they are cut into pieces about an inch long. Cover and refrigerate.

Heat a tablespoon of oil in a very hot frying pan, and cook the prawns until pink. Remove to a bowl. In the same pan, which will have retained some of the paste, sauté the chicken until it is brown outside and cooked through. Remove to another bowl. Leave the prawns and chicken to cool while you prepare the crispy shallots and dressing – when you come to make the salad, they’ll be close to room temperature.

Slice two long shallots into very thin rings, and shallow-fry in a couple of centimetres of oil, stirring occasionally, until they are brown and sweet (10-15 minutes). Remove from the oil with a skimmer and drain on kitchen paper. Set aside.

Slice the third shallot in half lengthways, and chop very finely. In a bowl, mix it with the herbs, chopped very finely, the sugar, lime juice, fish sauce and finely chopped chilli. Stir the dressing into the chilled noodles. Chop the chicken into dice the size of the top joint of your little finger, and toss the pieces, along with any juices from the chicken, with the noodles.

Slice the lettuce, straight from the fridge, as thinly as possible, and lay it in the bottom of a large serving bowl. Cover with the noodle mixture, and arrange the prawns on top. Sprinkle the crispy shallots over the dish and serve, making sure that some of every layer makes it onto the plate.

Refried beans with salsa and chorizo

This photo reminds me that the kitchen really, really needs painting in a colour that doesn’t look like bloodless frogs.

Anyway. About the food. This is my slightly European-ised (and it’s no worse for that) take on Mexican refried beans. You can serve yours in chi-chi little towers like this if you’re feeling all…retentive, or you can just dollop piles of beans, salsa and avocado/crème fraîche on the plate however you fancy. I have a sense that life is probably too short for chi-chi little towers.

This recipe makes more in the way of beans than you’ll eat at one sitting; you’ll probably get two or three meals for four out of the amounts below. (The salsa amounts below are for one meal.) This is because the long simmering of the beans and the making of the sauce that flavours them is quite time-consuming, so it’s worth making plenty and freezing the remainder before you mash them to cook quickly at a later date if you want to save yourself some work. To keep the chorizo crisp, you’ll need to fry some up each time you make this (although you can, of course, leave it out, especially if you have a vegetarian to feed); chopping and frying the sausage is not so much of a hardship, though, given how good it tastes.

Refritos, despite the title of this post, doesn’t actually mean ‘refried’, but ‘well-fried’. These are really worth the effort; they’re silky-smooth in the mouth, and intensely savoury: a billion times better than anything you might have had out of a can. Amazingly, they also do not make you fart. To make a large panful of beans for three meals and enough salsa for one meal, you’ll need:

Beans
500g pinto beans
3 bay leaves
5 cloves
2 dried chillies
1 large onion
1.5l water
1 can tomatoes
4 banana shallots
6 anchovies (yes, even for anchovy-haters – see below)
1½ tablespoons smoked Spanish paprika
2 tablespoons chipotle chillies in adobo
Bacon fat or chorizo fat to fry
1 dried chorizo

Salsa
Six medium tomatoes (vine-ripened is your best bet at this time of year)
½ banana shallot
1 small handful (about 15g) coriander
A squeeze of lime juice
1 avocado
crème fraîche

Chop the onion into rough dice and put it in a large saucepan with the rinsed beans, bay leaves, cloves, dried chillies and water. Bring to a simmer, put the lid on and simmer for 2½ hours, until the beans are soft. Check during cooking to make sure there is plenty of water for the beans to swim around in, adding a little more if you think they need it.

When the 2½ hours is up, halve the shallots and cut them into half-moons. In a large frying pan, saute them in two tablespoons of bacon fat or chorizo fat (using these fats does simply astonishing things to the flavour of this dish, but you can use olive oil if they make you nervous or if you are not the sort of person who keeps jars of such artery-clogging things in the fridge) with the anchovies. The anchovies will melt and break down. They will not make the dish taste at all fishy – they just add an unidentifiable and delicious richness and depth to its structure. Keep sauteeing, stirring every now and then, until the shallots are golden. Add the tin of tomatoes to the pan with the chipotles in adobo and Spanish paprika, and simmer until thickened. Using two different kinds of smoked chillies may look like overkill, but they both have very different characters, the chipotles dark and chocolatey in their heat, and the paprika much brighter. Together they’re fantastic here.

Add the thickened mixture to the beans pan with a tablespoon of salt (smoked Maldon salt is good, but isn’t totally necessary) and return it to the heat, this time uncovered. Simmer, stirring occasionally, until the liquid in the pan takes on a texture like the sauce in a can of baked beans. You’ll be able to tell when it’s ready; it can take anything from 45 minutes to a couple of hours.

You can serve the beans now as a kind of baked bean. This is also the point at which you should stop to reserve two thirds of the beans for cooking later on. Set the third you are using for refried beans aside until you are nearly ready to eat.

For the salsa, just peel and seed the tomatoes, dice and mix with the diced shallot and chopped coriander, and squeeze over lime juice to taste. Chop a chorizo into coins, quarter each of these coins and dry-fry them until they are crisp and rustling in the pan. Set aside in a small bowl, reserving the fat for another go at the beans.

To fry the beans, eat 2 tablespoons of bacon or chorizo fat in a large saucepan until very hot. Mash the beans in their sauce with a potato masher. They shouldn’t be completely smooth, but work at it until most of the beans are reduced to a paste. Dollop the paste into the hot fat. It will hiss and spit. Use a wooden spoon to stir the beans around in the frying pan, and keep stirring every couple of minutes until all the fat is absorbed and the liquid from the beans has evaporated to leave them thick and dense.

Stir the crispy chorizo into the beans and serve with a hearty spoonful of the salsa, some sliced avocado and a good dollop of crème fraîche. This makes a great meal on its own. If you’re feeling greedy, it’s also a brilliant accompaniment for a steak.

Chilli choc chip cookies

Chillies and chocolate have a lovely affinity; they’re a traditional pairing in South America, where the locals really know how to treat their cocoa. I was making up a traditional toll house cookie recipe – actually, it’s the traditional toll house cookie recipe, as I’ll explain below – yesterday with Dr W (the family that bakes together stays together), and decided to augment the recipe with some fresh Scotch bonnet chillies. Wonderful and potent little balls of fire, they’re one of my favourite chillies. If you’ve not tried them before, be cautious, especially if you find chillies hard to tolerate; these are hot, rocking up at between 100,000 and 350,000 Scoville Units. (The humble jalapeño only rates at between 2,500 and 8,000 Scoville Units, for the sake of comparison.)

Scotch bonnets are closely related to the habanero, but have a very distinct flavour and aroma, fruity and sweet behind all the heat, which I think is just wonderful against chocolate. I’ve only used one here, chopped very finely and creamed in with the butter so its powerful capsaicin (the stuff that burns your tongue off), which is fat-soluble, can work its way smoothly through the cookie dough. The chocolate chunks are a good milk chocolate – nice and smoothly cooling on your tongue against the chilli heat.

The basic recipe I’ve used here is the original toll house cookie recipe – I’ve never found a better. The Toll House was a restaurant in Whitman, Massachusetts, where Ruth Wakefield, one of the owners, was responsible for all the recipes. She came up with this recipe around 1930. Nestle bought the rights to the recipe in 1939 – this ingredients list is from Ruth’s original recipe from the 1947 edition of Toll House Tried and True Recipes, where she calls them Toll House Chocolate Crunch Cookies. (As well as adding the chillies, I have left out a cup of chopped pecan nuts from the recipe – if you want to use them, stir them in with the chocolate bits.) Ruth preferred very tiny, crisp cookies, and only used half a teaspoon of batter for each one, with a much shorter spell in the oven. I like them quite a lot bigger for the squashy middle, and suspect you will too – if you want to make teeny cookies, reduce the cooking time.

To make about 20 cookies, you’ll need:

1 Scotch bonnet pepper
2¼ cups plain flour
1 teaspoon salt
1 cup unsalted butter, softened
¾ cup granulated sugar
¾ cup firmly-packed light brown sugar
1 teaspoon vanilla extract
2 large eggs
1 teaspoon baking soda
2 cups plus 2 tablespoons chocolate morsels (I used two bars of Green & Black’s cook’s milk chocolate, walloped into rough chunks with a rolling pin while still in the wrappers)

Preheat the oven to 190°C (375°F).

Chop the chilli very finely, discarding the seeds if you want to cut the heat down a bit. Sift the flour and salt together in one bowl. In a large mixing bowl, cream the butter and the chilli with an electric mixer (this should take about 2 minutes). Add the sugars gradually, creaming the mixture together until light and fluffy. Beat the vanilla and eggs (one at a time) into the mixture, then the baking soda. Turn the speed of your mixer down to low and add a third of the flour, then gradually add the rest. Stir in the chocolate pieces and drop heaping tablespoons of the mixture onto baking sheets about 2 inches apart to leave space for the cookies to spread.

Bake for between 8 and 10 minutes, until the edges and tops are just turning golden. Allow to cool on the baking sheets for a few minutes so they can firm up a little, then use a spatula to move the cookies to cooling racks (or direct to your mouth).

These are a lovely, crumbly, squashy cookie. They’ll keep in an airtight container for about a week.

Crispy Thai lime chicken with fresh chilli sauce

I am currently all a-tizz about kaffir lime leaves. They’re hard to find out here in the sodden fen; not all oriental grocers stock the fresh leaves (which are very pretty and look like a pair of leaves growing on the same central rib). When I have spotted them in shops, they have often been a bit elderly, and not as aromatic as you’ll want them to be for cooking. Happily, you’ll find them shredded and frozen in some supermarket freezer cabinets; there are currently a couple of packs in my freezer at home. They have a wonderful citrus fragrance, almost as if you were sniffing fresh lime zest through an olfactory magnifying glass. (The zest of a kaffir lime is astonishingly good stuff, but sadly I’ve only seen the fruit for sale in Malaysia, which isn’t much help for UK home cooks.)

In most cooking, we use kaffir lime leaves in a similar way to bay leaves – as an aromatic to be infused in a wet mixture like a curry, then discarded before eating. The shredded leaves gave me an idea, though – how about using them to make a crispy crust with panko breadcrumbs for a neutral-tasting meat like chicken? Paired up with a fresh Thai chilli and ginger sauce, this turns out to be exactly how summer eating should be.

I’ve butterflied the chicken breasts and beaten them flat with a rolling pin to give them a bigger crispy surface area; this also helps them to cook really fast, preserving all the lovely lime flavour. I would like to believe that one per person is a sensible helping, but these were so good we ended up eating two each. To make four breaded, butterflied chicken breasts, you’ll need:

Chicken
4 skinless, boneless chicken breasts
4 heaped tablespoons flour
1 egg
8 heaped tablespoons panko breadcrumbs (if you can’t find Japanese panko crumbs, just use slices of white bread and whizz them to shrapnel in the food processor. Panko has a brilliant crispiness, though, and is worth seeking out.)
4 tablespoons shredded kaffir lime leaves (frozen or fresh – don’t get the dried ones, which will leave you feeling as if you are cooking with cardboard)
Peanut oil or a flavourless oil for frying

Fresh Thai chilli sauce
1 piece of ginger the length of your thumb
Juice of 2 limes
4 fat, juicy cloves garlic
½ stalk of peeled lemongrass
2 birds eye chillies (reduce amount if you don’t like your sauce too hot)
4 tablespoons Thai fish sauce
4 tablespoons palm sugar (most supermarkets seem to be stocking this now) or soft light brown sugar
1 small handful mint

It’s easiest to make the sauce before you start on the chicken, which will need your attention for the very short time you’ll be cooking it. Just put all the sauce ingredients except the mint in a mortar and pestle or (easier) a food processor or liquidiser, and process until you’ve a slightly chunky, wet sauce. Unlike commercial sauces, it won’t be red – but it’s none the worse for that. Chop the mint and sprinkle it over the sauce.

Start work on the chicken by butterflying your chicken breasts. This is far easier than you may have been expecting – just lay them flat, push a small, sharp knife into the thicker side of the chicken breast and make a horizontal cut almost all the way through to the other side. You should be able to open your chicken breast out like a book, with the fatter edge of the breast acting as the book’s spine. Place the butterflied chicken breast between two pieces of cling film on a chopping board (the cling film stops them from sticking) and wallop the hell out of them with your rolling pin, until the chicken is a thin, even escalope, about half a centimetre thick. Don’t worry about raggedy edges – the breading you’re about to apply is amazingly forgiving.

Put the flour, seasoned with some salt and pepper, in one bowl, the beaten egg in a second and the crumbs, mixed well with the lime leaves, in a third. Dip the chicken in the flour, then the egg, then the crumbs, making sure it’s coated well at every stage. Fry over a high heat for 2-3 minutes per side, until the crumbs are golden and crisp, and serve with the sauce, a salad or some stir-fried veg, and your choice of rice or noodles.