Black Forest trifle

Black Forest trifleI was sent a lovely big jar full of Kirsch-soaked Griottine cherries to try a few weeks ago. The brand’s new in the UK, and they’re very good – big, boozy, stoned Balkan Morello cherries steeped in a heck of a lot of Kirsch for six months. These Griottines are available online in the UK; you can also use cherries you’ve steeped yourself in this recipe if you do a bit of forward planning in the summer.

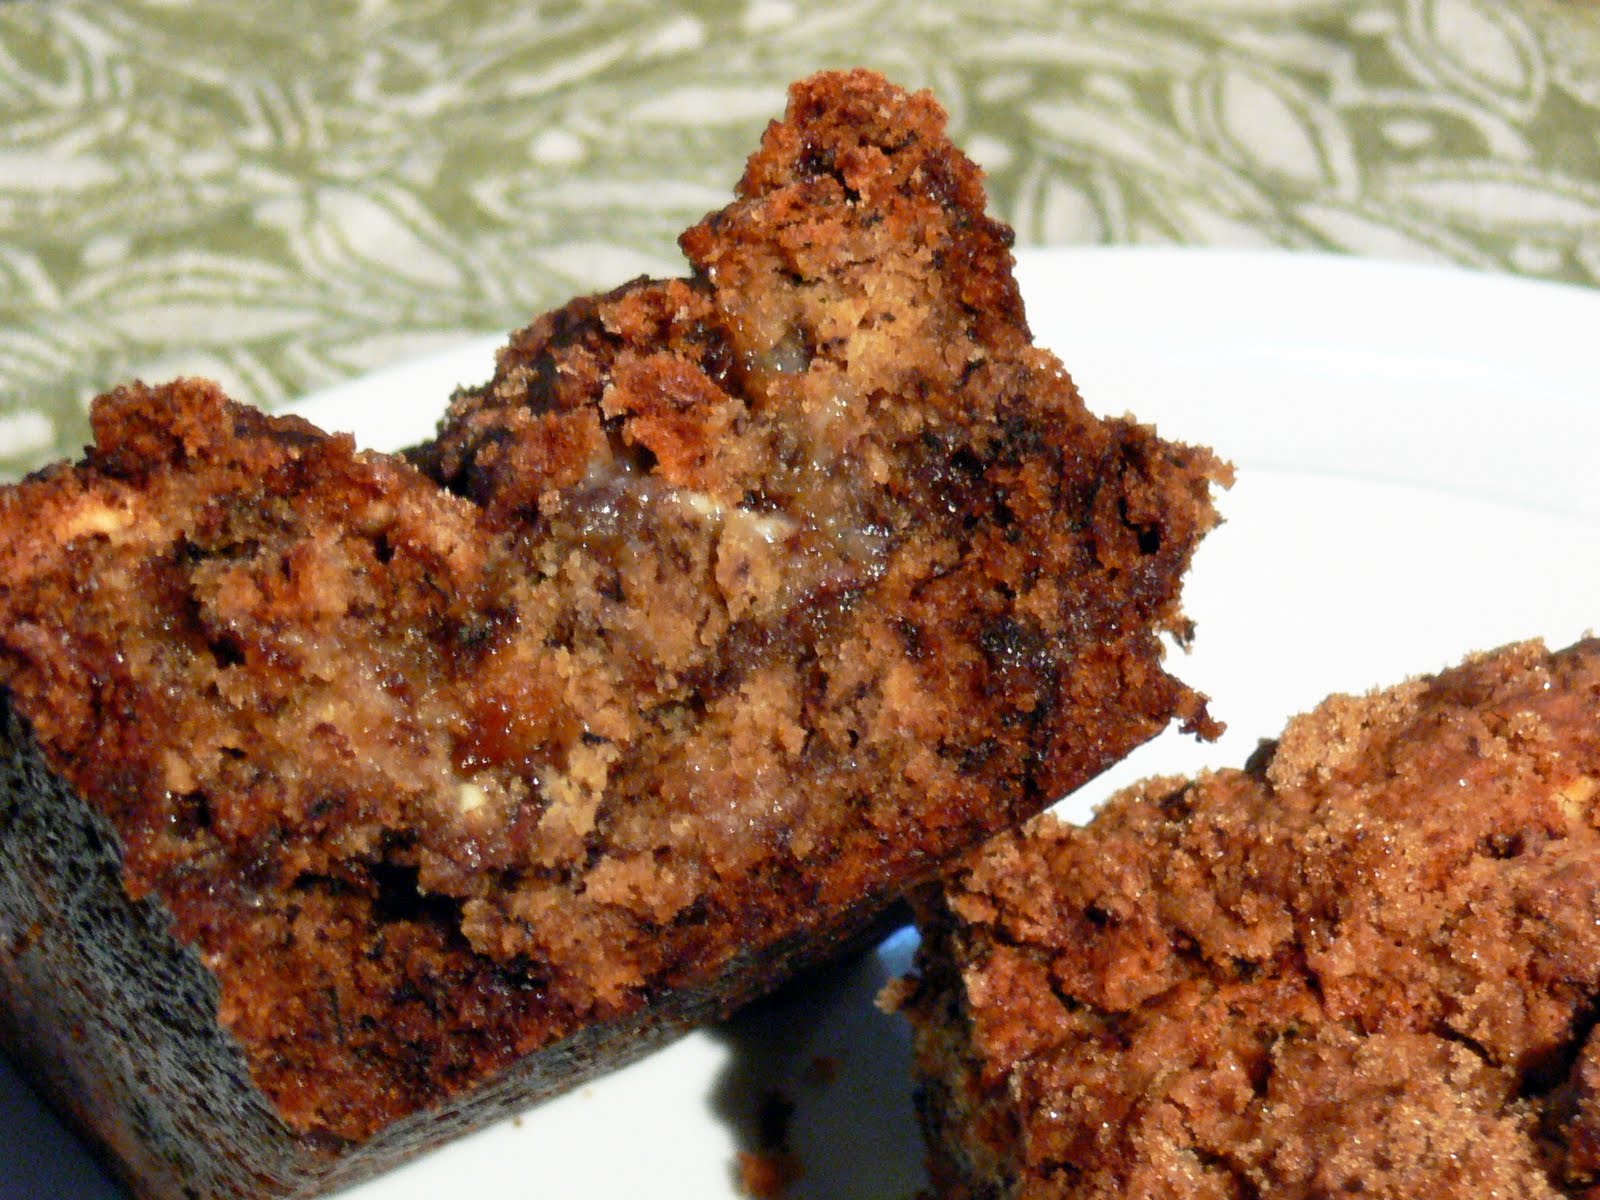
I do love a Black Forest cake, but it’s the non-cake bits I enjoy the most: the cherries, the chocolate, a creamy filling. So I decided to use them in a Black Forest trifle, which also gave me the excuse to make a chocolate custard, stick it in a bowl and call it art. There are several stages in making this trifle, and making everything from scratch will, of course, give you the best end results; but you can cheat a bit if you want by buying a chocolate cake rather than making one, or by using a pre-made custard as the base for the two custard layers before you add the chocolate, vanilla and marscapone. I promise not to tell anyone.

To serve eight or thereabouts – this is a party dish – you’ll need:

Cake
85g cocoa powder
170g plain flour
240g caster sugar
1½ teaspoons bicarbonate of soda
¾ teaspoon baking powder
2 medium eggs
180ml milk
60g softened butter
1 teaspoon almond extract

Custard base
2 tablespoons Bird’s custard powder
1 vanilla pod
500ml milk
4 egg yolks
2 tablespoons vanilla sugar

You will also need
75g good dark chocolate
750g marscapone
250ml whipping cream
About 400g (the contents of a Griottines jar) cherries and their very alcoholic soaking liquid. I say “about” because I found myself busily scoffing them as I put them into the trifle, so the resulting dish didn’t contain a whole jarful.

Preheat the oven to 180ºC while you prepare the cake mix. Grease a 25 cm loaf tin.

Sieve together all the dry ingredients in a large bowl, add the eggs, milk, butter and almond extract, and beat with an electric mixer for about five minutes until you have a thick, smooth batter. Scrape the batter into your prepared tin  bake for 1 hour. When the cake is done, a toothpick poked into the middle should come out clean. Cool for a few minutes and invert onto a wire rack to finish cooling.

Make up the custard base, which you will use for both the vanilla and chocolate custards, while the cake is cooking. Some purists abhor Bird’s custard. I love the stuff. If you can’t bring yourself to use it (or if you don’t live in the UK and can’t find any in your local shops), use 2 tablespoons of cornflour instead. Mix the sugar and custard powder/cornflour in a bowl with a little milk taken from the pint until you have a smooth paste. Bring the rest of the milk to a bare simmer (it should be giggling rather than chuckling) and pour it over the mixture in the bowl. Return the whole lot to the saucepan over a low heat and, whisking hard, add the egg yolks and the seeds from inside the vanilla pod to the mixture. Keep cooking until the custard thickens and remove from the heat. Transfer to a jug, lay a piece of cling film directly on top of the custard’s surface, and chill until cool.

When the custard is chilled and the cake is cool, melt the chocolate in the microwave. Pour half the custard into a separate bowl, and beat it with the chocolate and 250g marscapone with your electric whisk until smooth. Beat the other half of the custard with another 250g marscapone and set aside.

In a third bowl, beat the remaining 250g of marscapone with the whipping cream and sugar until the mixture is stiff.

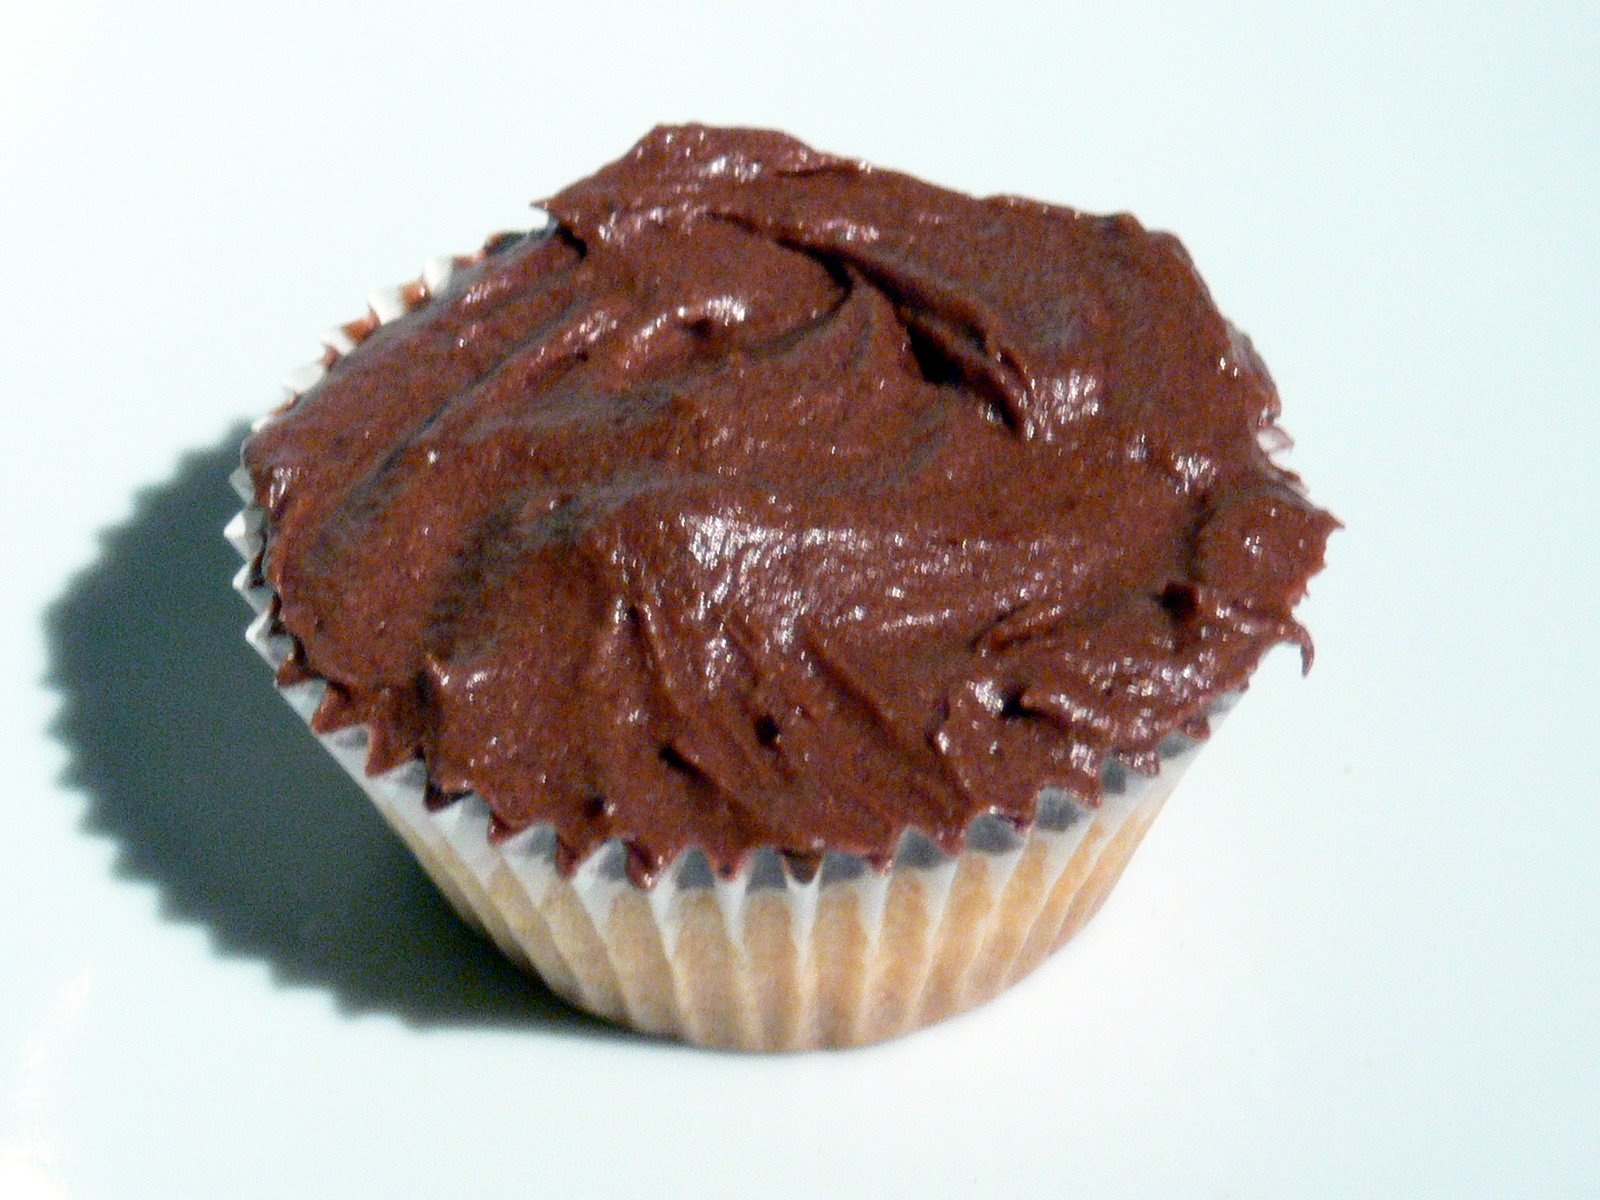
To construct the trifle, cut the cake into slices and line a large glass bowl (mine broke a while ago, which is why the picture at the top of the page is of a single portion of trifle) with it. Sprinkle the liquid from the cherries all over the cake to soak it, and scatter over a quarter of the cherries. Smooth the plain custard layer over with a spatula, adding a few more cherries as you go. Make sure plenty of the cherries are pressed up against the glass sides of the bowl. Add the chocolate custard with some more cherries, and finish with the layer of cream and marscapone, scattering more cherries on top.

Chocolate banana bread

Bananas, white and milk chocolate chunks, and a sugary, crispy crust. What’s not to like? This is a pleasingly easy recipe, and I was very pleased with the reaction when I came up with it the other evening – the entire loaf vanished before I was able to boil the kettle for a pot of tea.

For one disappearing banana miracle loaf, you’ll need:

3 ripe bananas
100g white chocolate
100g milk chocolate
180g plain flour
150g soft light brown sugar + 2 tablespoons to sprinkle
40g salted butter (softened)
1 teaspoon baking powder
1 teaspoon bicarbonate of soda

Preheat the oven to 190°C (375°F). Grease a 9×5 inch loaf tin.

Sift the flour from a height into a large bowl with the bicarbonate of soda and baking powder. In another bowl, use an electric mixer to cream the sugar and butter together until they are pale in colour. Use the back of a fork to mash the bananas, and use the mixer to whip them into the butter and sugar mixture for two minutes.

Wallop the chocolate, still in its packets, with a rolling pin to reduce it to chunks. (This is a lot cheaper than buying dedicated chunks for baking, and the chocolate will probably be of a higher quality too.) Use a spatula to fold the chocolate chunks and contents of the banana bowl into the flour as gently as you can – if you’ve ever eaten a disappointingly solid banana bread it’s almost certainly because the batter has been overhandled. Use the spatula to shuffle the mixture into the loaf tin, sprinkle the top with the extra sugar and bake on a middle shelf of the oven for 45 minutes. Check a skewer comes out clean – if it doesn’t, pop a piece of tin foil on top of the tin to stop the top from going too brown and add another 10 minutes to the cooking time. Cool for quarter of an hour in the tin, then move to a rack to finish cooling (or eat immediately, which is what we did, and very nice it was too).

Chilli choc chip cookies

Chillies and chocolate have a lovely affinity; they’re a traditional pairing in South America, where the locals really know how to treat their cocoa. I was making up a traditional toll house cookie recipe – actually, it’s the traditional toll house cookie recipe, as I’ll explain below – yesterday with Dr W (the family that bakes together stays together), and decided to augment the recipe with some fresh Scotch bonnet chillies. Wonderful and potent little balls of fire, they’re one of my favourite chillies. If you’ve not tried them before, be cautious, especially if you find chillies hard to tolerate; these are hot, rocking up at between 100,000 and 350,000 Scoville Units. (The humble jalapeño only rates at between 2,500 and 8,000 Scoville Units, for the sake of comparison.)

Scotch bonnets are closely related to the habanero, but have a very distinct flavour and aroma, fruity and sweet behind all the heat, which I think is just wonderful against chocolate. I’ve only used one here, chopped very finely and creamed in with the butter so its powerful capsaicin (the stuff that burns your tongue off), which is fat-soluble, can work its way smoothly through the cookie dough. The chocolate chunks are a good milk chocolate – nice and smoothly cooling on your tongue against the chilli heat.

The basic recipe I’ve used here is the original toll house cookie recipe – I’ve never found a better. The Toll House was a restaurant in Whitman, Massachusetts, where Ruth Wakefield, one of the owners, was responsible for all the recipes. She came up with this recipe around 1930. Nestle bought the rights to the recipe in 1939 – this ingredients list is from Ruth’s original recipe from the 1947 edition of Toll House Tried and True Recipes, where she calls them Toll House Chocolate Crunch Cookies. (As well as adding the chillies, I have left out a cup of chopped pecan nuts from the recipe – if you want to use them, stir them in with the chocolate bits.) Ruth preferred very tiny, crisp cookies, and only used half a teaspoon of batter for each one, with a much shorter spell in the oven. I like them quite a lot bigger for the squashy middle, and suspect you will too – if you want to make teeny cookies, reduce the cooking time.

To make about 20 cookies, you’ll need:

1 Scotch bonnet pepper
2¼ cups plain flour
1 teaspoon salt
1 cup unsalted butter, softened
¾ cup granulated sugar
¾ cup firmly-packed light brown sugar
1 teaspoon vanilla extract
2 large eggs
1 teaspoon baking soda
2 cups plus 2 tablespoons chocolate morsels (I used two bars of Green & Black’s cook’s milk chocolate, walloped into rough chunks with a rolling pin while still in the wrappers)

Preheat the oven to 190°C (375°F).

Chop the chilli very finely, discarding the seeds if you want to cut the heat down a bit. Sift the flour and salt together in one bowl. In a large mixing bowl, cream the butter and the chilli with an electric mixer (this should take about 2 minutes). Add the sugars gradually, creaming the mixture together until light and fluffy. Beat the vanilla and eggs (one at a time) into the mixture, then the baking soda. Turn the speed of your mixer down to low and add a third of the flour, then gradually add the rest. Stir in the chocolate pieces and drop heaping tablespoons of the mixture onto baking sheets about 2 inches apart to leave space for the cookies to spread.

Bake for between 8 and 10 minutes, until the edges and tops are just turning golden. Allow to cool on the baking sheets for a few minutes so they can firm up a little, then use a spatula to move the cookies to cooling racks (or direct to your mouth).

These are a lovely, crumbly, squashy cookie. They’ll keep in an airtight container for about a week.

Chocolat Chocolat, St Andrew’s St, Cambridge

I’ve wittered on at length here before about the sad fact that Cambridge is something of a food desert. Restaurant-wise, we could still improve a lot, but if you’re a food shopper, things seem to be looking up considerably. Besides long-standing old favourites like the excellent Cambridge Cheese Shop in All Saint’s Passage, the increasingly impressive offerings at the daily market, Origin8 (a deli where you can find some obscenely good pies and organic hogroast) and local village offerings like the River Farm Smokery in Bottisham (look out for Dan on The Great British Menu on the BBC) and the farm shop at Burwash Manor Barns, the city has just found itself home to one of the loveliest chocolate shops I’ve ever set foot in. This is a very splendid thing, and I hereby upgrade Gastronomy Domine’s assessment of Cambridge’s food situation from desert to leafy wetland.

Chocolat Chocolat (which is so new that it doesn’t have a website yet, and so good that they named it twice) is on St Andrew’s St, just by the entrance to the Grand Arcade. Isabelle and Robin Chappell have imported a sugary morsel of France to the city – Isabelle prepares Bayonnaise slabs of chocolate at her tempering machine by the window, Robin serves up what I am certain is Cambridge’s best icecream (the Alfonso mango sorbet is rich, curiously creamy and made me consider driving the car over and stealing the freezer), and the whole shop ripples with gorgeously selected frou frou.

The main event is, of course, chocolate, and here you’ll find tiny tongs and little wooden punnets which you can fill with hand-made chocolates from several chocolatiers, hand-picked by Isabelle and Robin. There are also chocolaty offerings from Dolfin, Bovetti and Willie Harcourt-Cooze – the Bovetti black mustard seeds enrobed in dark chocolate (there’s also coriander seeds in milk chocolate and anis in white) and the Dolfin bar flavoured with masala spices are must-tries. Robin says that Bovetti’s paté a tartiner (imagine Nutella, but approximately a thousand times nicer) sold out pretty much as soon as they opened, but more is on the way. There’s so much on offer here that it’ll take even the most dedicated chocoholic weeks to work their way through the whole selection – which is precisely as it should be.

Isabelle is originally from France, and alongside the chocolates, she and Robin have imported some sugary nibbles I’ve never seen on this side of the Channel before. Fight through the inevitable crowd of French students to get to the Carambars (a stick of caramel which should be familiar to anyone who’s ever been on a French exchange), the chocolate-coated marshmallow bears and the utterly divine callisons. There are Cote Garrigue jams in flavours like lavender and Cavaillon melon; nougat straight from Montelimar, scented with rose, violet and pistacho; Anis de Flavigny cachous; Palets Bretons (the world’s butteriest, most friable biscuit) and Madeleines from Commercy. Robin doesn’t know it, but in promising Pain d’Epice (gingerbread – but so much better than what you’re used to) direct from Dijon soon he made my heart flutter like a schoolgirl’s.

I plan to head back as soon as possible to apply a further good, hard sugar shock to my pancreas. Chocolat Chocolat is one of the most exciting additions to the town centre I’ve seen in years – head over there as a matter of urgency if you’re in town, and tell them I sent you.

Chocolate orange fairy cakes

I eat precisely one Terry’s Chocolate Orange every year, at Christmas. Here, for non-festive times of year, is the same thing in cake form.

There will be no post here on Monday; it’s a Bank Holiday, and I shall be spending the day on a boat.

To make 16 little cakes, you’ll need:

Cake
100g soft butter
100g caster sugar
2 eggs
100g self-raising flour
1 teaspoon baking powder
Grated zest of 1 oranges

Icing
75g dark chocolate (I used Hotel Chocolat’s amazing 100% cocoa solids bar from the Purist range)
50g butter
75ml double cream
Grated zest of 1 orange

Preheat the oven to 200° C. Beat all the cake ingredients together with an electric whisk until the mixture is pale, light and fluffy. Divide it between 16 paper cake cases and bake for 20-25 minutes until the cakes are pale gold in colour, and a toothpick inserted into the centre of one comes out clean. Set the cakes to cool on a rack while you make the icing.

Melt the butter and chocolate together in a bowl over some boiling water. Stir in the orange zest and a tablespoon of the cold cream, and begin to beat with the electric whisk on medium. Pour in the cream in a thin stream as you beat, and when all the cream is incorporated, continue to beat air into the chocolate until the mixture is pale, spreadable and light.

Spread the icing over the cooled cakes with a knife (or, if you don’t hate washing up, pipe it on). These cakes keep well in an airtight container for a few days.

Chocolate puddle pudding

This is a rich chocolate pudding, which makes its own sauce when cooked and rises like a chocolate sponge island in a syrupy chocolate sea. Your mother probably made chocolate puddle pudding. I’ve been asking around, and everybody’s mother seems to have had a similar recipe – and what sensible mothers they were, because this is rich and delicious, malevolently chocolatey and so quick and easy that my cats could make it (given opposable thumbs, the ability to read recipes and access to some weighing scales, an oven, bowls and…you get the idea). To serve six, you’ll need:

6 tablespoons cocoa powder
150 g self-raising flour
1 teaspoon baking powder
200 g vanilla sugar (or 200g caster sugar and a few drops vanilla essence)
30 g salted butter
75 g dark chocolate (use something with a high proportion of cocoa solids)
150 ml milk
150 g soft brown sugar
500 ml hot water

Preheat the oven to 180° C (350° F).

Measure the flour and vanilla sugar into a large mixing bowl with two tablespoons of the cocoa powder and the baking powder. Melt the butter and chocolate together, and when melted, add them to the bowl with the milk. Stir with a wooden spoon until everything is well blended, and spread the mixture (which should be a thick paste) into the bottom of a baking dish. (I used a 20×30 cm dish.)

Mix the soft brown sugar with the remaining four tablespoons of cocoa, and sprinkle them over the top of the sponge mixture. Pour over the hot water (this should be hot from the kettle but not boiling) and put in the oven for 45 minutes. The sponge pudding will rise through the puddle of chocolate sauce. Serve with vanilla ice cream or a big dollop of cream.

Chocolate fondue

Thanks for all the kind emails – I’m still recovering from the flu and am decidedly wobbly, but a whole lot better than I was at the start of the week. Just as well, because next week I’ll be in Helsinki, on the lookout for reindeer, vendace roe, rye bread and soused herrings.

Cooking’s been beyond me since my encounter with this horrible germ, and my tastebuds are still not giving any kind of sensible feedback to my brain – most things are still either tasteless or, oddly, extremely bitter. Happily, there’s one foodstuff that even the flu can’t ruin for me: chocolate. So it’s out with the new fondue set.

If you’re making your own chocolate fondue, try dipping cantucci, those hard little Italian biscuits; dried pear, marshmallows and fresh, ripe bananas are also great. I’m not a huge fan of strawberries in any chocolatey context; they’re too acid, especially out of season, to work well with chocolate. I’m aware that I’m in a minority here though – if you like strawberries dunked in chocolate, dip away.

To serve four, you’ll need:

250 g good quality dark chocolate
100 ml double cream
2 tablespoons Amaretto
Fruits, biscuits, fresh almonds etc. to dip

Hopelessly easy, this. Put your chocolate in a sealed bag and wallop the hell out of it with the end of a rolling pin, until it’s reduced to little bits. Stir the chocolate bits into the cream in your fondue pot, and melt together with the cream over a low heat on the hob, stirring all the time. Transfer to a low flame on the fondue stand and stir in the Amaretto. Proceed to fight over who gets the pink marshmallows.

Easter chocolate competition

Easter is coming around the corner very quickly and everyone wants that extra special Easter Egg! Gastronomy Domine has teamed up with Hotel Chocolat to offer you a chance to win some of Hotel Chocolat’s extra special, Extra-Thick Easter Eggs. To enter, click here and simply answer six questions which will take you on an Easter egg hunt to find the secret code. Once you have answered each question, use the first letter of each answer to reveal the secret code. If you have found the right answer you stand a chance to win one of Hotel Chocolat’s stunning Extra Thick Easter Eggs!

Easy chocolate truffles

It’s heartening to realise that the richest, velvety-est, most sinful chocolate truffles you can imagine are very easy indeed to make. There’s no faffing around with tempering or measuring fat/solid ratios – just some melting and chilling.

These dense little balls of silky paradise are full of things that make the animal bits of your brain go tick. The chocolate itself, packed with theobromine, stimulates the release of feel-good endorphins. The creamy, cocoa rush that emerges when they melt fatly on your tongue makes the hairs on the back of your neck stand up. If the way to someone’s heart really is through the stomach, these are the digestive equivalent of a scalpel: precise and potentially deadly.

You’ll need to keep these in the fridge and eat within about three days of making them for maximum freshness. If, unaccountably, you can’t manage to get through this volume of chocolate in half a week, these truffles freeze very well.

To make 50 truffles (depending on how many you find yourself eating as you roll them) you’ll need:

300g good quality, dark chocolate
300ml double cream plus 2 tablespoons
50g salted butter
Cocoa to roll

choc crumbsStart by preparing the chocolate by blitzing it in the food processor until it resembles very delicious-smelling breadcrumbs (see the picture for the sort of texture you’re aiming for). If you don’t have access to a food processor, you can grate it with the coarse side of your grater – this is laborious, but works well. Remove the chocolate to a large mixing bowl.

Using a thick-bottomed pan, bring 300ml of thick cream and the butter slowly to simmering point. I like to use salted butter in a ganache; the small amount of salt is undetectable in the finished product, but it lifts the flavour of the chocolate. Stir the hot cream mixture well and transfer it to a jug.

ganacheTo make the ganache that will form your truffles, pour the hot cream and butter into the bowl full of chocolate in a thin stream, stirring all the time. The chocolate will melt and combine with the cream, and you’ll end up with a very runny, silky, dark brown mixture. Finish by stirring two tablespoons of cold cream into the mixture (this helps to prevent the mixture from seizing, or becoming granular) until the ganache is evenly coloured. Cover the bowl and place in the refrigerator to firm the ganache up.

At this point, you have a choice. You can take the ganache out of the fridge and use an electric whisk to beat it to soft peaks about an hour into the chilling time. Be careful not to overbeat to avoid the dreaded seizing. This will result in soft, airy, fluffy truffles, and will also add volume to your mixture so you’ll have more truffles at the end. (You’ll find that many shop-bought truffles are the beaten kind – you need much less chocolate per truffle, so it works out cheaper for the manufacturer.) I much prefer my truffles dark, dense and silky, so I prefer to leave the ganache without beating.

If you are not whisking the ganache, leave it in the fridge for at least four hours or overnight. You’ll find you now have a nice stiff mixture. If you want to add flavourings or bits of nut, citrus zest, crystallised ginger or other spices, now is the time to do it, using the back of a fork to mush any well-chopped additions into the ganache. (Again, I like my truffles dark, dense and above all chocolatey, so I don’t adulterate them.)

Lay out petits fours cases and put a couple of heaped tablespoons of cocoa on a plate. Use clean hands to mould teaspoons of the ganache into balls, then roll them in the cocoa – this stops them from sticking and makes them look tidy. Place each one in a little case. Those feeling daring can roll their truffles in crushed nuts, shredded coconut or demerara sugar instead of cocoa. Presto – you’re finished. I think these are at their absolute best with a hot cup of freshly brewed coffee.

Chocolate fudge cake

Chocolate fudge cakeIcing a cake neatly is a stressful task, so a recipe like this, where a soft, fudgy icing is just slathered all over the cake with a spatula is much more fun than obsessional piping. The cake in the middle of all that icing is a lovely light, moist spongy affair, made rich with plenty of butter and cocoa. This is probably not great for your New Year’s diet, but I’d suggest doing what Dr Weasel is doing today, and making one to take to the office in order to scotch the weight-loss ambitions of your colleagues.

You’ll need:

Cake
3 tablespoons cocoa
6 tablespoons boiling water
175 g softened unsalted butter
175 g caster (superfine) sugar
3 large eggs
175 g self-raising flour
1½ teaspoons baking powder

Fudge icing
50 g softened unsalted butter
35 g cocoa
3 tablespoons milk
225 g icing (confectioner’s) sugar

Preheat the oven to 180° C (350° F). Grease and line a 25cm round cake tin – I like to use a springform tin, which makes turning the cake out later much easier.

Mix the cocoa with the hot water from the kettle in a mixing bowl, and leave aside to cool. Sift the flour into the bowl and add the butter, sugar, eggs and baking powder. Beat with an electric whisk on high for about two minutes, until the mixture is stiff and pale. Spoon into the lined cake tin and bake for 35 minutes. Check for done-ness by pushing a skewer into the middle of the cake. If it comes out clean, with no chocolatey bits adhering, the cake is done. Turn out onto a metal rack and remove the greaseproof paper to cool.

To make the icing, melt the butter in a small saucepan and stir in the cocoa. Cook, stirring well, for about a minute. Remove from the heat and stir in the milk and icing sugar. Beat with a wooden spoon until the mixture is smooth, and cool until thick enough to spread over the cooled cake.

If you like, you can cut the cake in half horizontally at this point and glue the halves together with some of the icing. Dr Weasel, who is in charge of cakes in our house, decided to use the fudgy mixture to ice the top and sides of the cake – and very delicious it was too.