Bruschetta al pomodoro – tomato bruschetta

Tomatoes and bread have an amazing affinity, from Basque slices of toasted sourdough rubbed with the cut side of a tomato, to British teatime tomatoes on toast. For me, though, a garlicky, herby Italian bruschetta is the very king of bread and tomato preparations.

There is a simple trick in making this sunny, fresh appetiser. You need to marinade the cut tomatoes with the aromatics and a hearty amount of your very best olive oil the night before you mean to eat – but that marinade should contain absolutely no salt. Salting the bruschetta just before serving means that the tomatoes’ texture will remain firm and juicy. The oil will have absorbed a fabulous wallop of tomato flavour (no salt, you see, so the juices of the tomato won’t all run out and separate), the tomatoes will be redolent with fragrant oil, herbs and garlic, and your tastebuds will want to shake your hand.

It’s very important that you select tomatoes with the maximum flavour. If you’ve grown your own, these will be by far the best. Otherwise, buy tomatoes which are ripe and have been kept on the vine after picking. That glorious smell you get in tomato greenhouses is from the green stalk and leaves, and doesn’t seem to make it into the fruit itself. If you buy vine tomatoes, they will be riper, and you can use the stalk in the marinade to inject some of that greenhouse flavour into the finished bruschetta. I’ve used some yellow tomatoes alongside regular red ones because it’s pretty, but you can use any good, ripe tomatoes you can find.

To serve four, you’ll need:

1kg vine tomatoes
2 fat, juicy cloves garlic
1 large handful basil leaves
2 tablespoons chopped fresh oregano
100ml olive oil
Freshly ground black pepper
1 ciabatta
Salt to finish

Chop the tomatoes into small bite-sized pieces, and put them and any juices in a large bowl. Crush the garlic and the herbs, and stir them into the tomatoes with the olive oil and a generous amount of freshly ground black pepper. Add the vines from the tomatoes, mix well, cover with cling film and refrigerate overnight.

When you are ready to make up the bruschetta (don’t do this too far ahead of eating, or they will go soggy) grill slices of slightly stale ciabatta and cool on racks. Fish the stalks out of the marinade and discard. Heap the tomato mixture onto the slices with a tablespoon, sprinkle with fleur de sel or another crystalline salt like Maldon, and serve immediately. There are very unlikely to be any leftovers.

Pommes Sarladais – French garlic potatoes

In my mental spreadsheet of The Very Best Things You Can Do With A Potato (everyone should have one of these), Pommes Sarladais come in near, if not at, the very top. If you visit the Dordogne region of France, you’ll find these on every menu; in this area where duck and goose farming is so common, and the fat from those birds so ubiquitous in cookery, this preparation of potatoes comes as naturally as breathing.

This is an intensely rich, garlicky recipe. The peeled potatoes are par-boiled, then sautéed in generous amounts of duck or goose fat until golden and crisp. In the last few minutes, pulverised garlic is briskly stirred through the hot fat and crunchy potatoes, and finally the finished dish is tossed with a handful of aromatic, fresh parsley. This is an ideal accompaniment for duck confit, roast chickens, dense and boozy stews – almost anything rich and European. (Insert Silvio Berlusconi joke here.)

Choose a floury potato for this recipe. I like King Edward potatoes here – if you can’t find any, try Desiree, which have a pleasant sweetness that works well against the robust flavour of the garlic. I’m recommending a more generous amount of potato per person than you might expect here, simply because this is so tasty that people do tend to overeat. The semolina dusting doesn’t make it into the standard French recipe, but I gave it a whirl after hearing about the Nigella Lawson semolina trick with English roast potatoes, and found that it raises the golden crispiness to a simply heavenly level around the soft interior of each bite – this dish is the mouth-feel equivalent of about 80 naked, silky angels bopping lewdly to the best bits of ABBA. Admittedly, Pommes Sarladais are full of all those things you’re meant to be avoiding after Christmas like animal fat and carbs, but I’m convinced that the joyful endorphins you’ll produce while munching on them more than make up for that. So to serve four, you’ll need:

1kg King Edward or Desiree potatoes
5 heaping (and I mean heaping) tablespoons duck or goose fat
5 large, juicy cloves garlic
1 large (hand-sized) bunch flat-leaf parsley
1 tablespoon semolina flour
Generous amounts of salt

Peel the potatoes, and cut them into squares of about 1 inch. Bring a large pan of water to the boil and drop the potatoes in. Bring back to the boil and simmer for four minutes. While the potatoes are simmering, bring the duck or goose fat to a high temperature in your very largest frying pan. (If you don’t have one large enough to house all the potato chunks in a single layer, split the dish between two pans.)

Drain the potatoes well in a colander, and return them to the saucepan you parboiled them in. Sprinkle over a heaped tablespoon of semolina flour and toss the potatoes well. The semolina should be coating the potato chunks unevenly – tossing the potatoes will have caused their edges to bang up against each other and become craggy and fluffy.

Ladle the semolina-coated potatoes into the hot fat in a single layer. Cook, turning every few minutes, until the potatoes are evenly crisp and gold (about 20 minutes). As you turn, you may feel that the pan is becoming dry – if this is the case, add another tablespoon of duck or goose fat.

While the potatoes are cooking, pulverise the garlic by crushing or grating. When the potatoes are gold, add the garlic to the pan and toss the potatoes around the pan for four minutes to make sure all the garlic cooks and is distributed throughout the whole dish.

Remove the cooked potatoes to a large bowl and toss with the chopped parsley and a generous sprinkling of salt (these can take a lot of salting, which is an excellent excuse to do some tasting as you season). Serve immediately.

Garlic butter roast chicken

I’m back in Portland for the week (and I’m spending the next few weeks in the US too, so look forward to some restaurant reviews). I’ve a couple of recipes from last week to post, and in the meantime I am applying myself assiduously to Portland’s fantastic cafés, in order that I can supply those of you who visit the city with a good round-up of places to pootle around in an intellectual fashion, getting caffeinated and taking advantage of free wireless internet.

Anyway. The chicken. This is a chicken flash-cooked at a very high temperature with a garlic butter under the skin. This technique results in a moist, juicy bird which you don’t need to baste or turn, and a gorgeously crisp, garlicky skin. The pan juices are fantastic for making a gravy with, but they’re also delicious just drizzled over the carved chicken as they are.

The cooking time below will be good for a bird weighing about 1.5kg (3lb) – enough to serve three or four people. To roast one chicken, you’ll need:

1 chicken weighing about 1.5kg
5 large, juicy cloves of garlic
Zest of 1 lemon
125 g softened salted butter
2 tablespoons finely chopped parsley
1 tablespoon olive oil
Salt and pepper

Preheat the oven to 230°C (450° F). Crush the garlic (I used something called a Garlic Card – a little grating device the size of a credit card which my mother-in-law Santa gave me for Christmas), zest the lemon and chop the parsley, and blend them with the butter using the back of a fork.

Starting at the neck of the chicken, use your fingers to loosen the skin from the breast. You should be able to separate it from the flesh by pushing with your fingertips until you’ve made a pocket that covers the whole breast. Take the softened garlic butter mixture and push it into the pocket you’ve made, making sure it covers the breast evenly. Reserve two teaspoons of the butter, and push them into the space between the bird’s legs and body. Salt the outside of the bird generously and drizzle it with olive oil.

Put the chicken on a baking tray high in the hot oven, and roast for one hour. Check that the chicken is cooked by pushing a skewer into the fattest part of the bird, just behind the thigh. The juices should run clear; if they are still pinkish (which is highly unlikely), roast for another ten minutes and repeat the test.

Rest the bird for ten minutes before carving. I served this with Pommes Sarladaise, a wonderful garlicky French potato dish – watch this space for the recipe!

Roast garlic

I noticed last week that although I’ve included roast garlic as an ingredient in a few recipes here (use the search tool at the top right of the page if you want to try some when you’ve made this), I’ve never dedicated a post to it. This needs to be addressed, because roast garlic, slipped out of its skins onto crusty bread and popped straight into the mouth, still warm, is one of those things that tastebuds were invented for.

Roast garlic is at its best when you use a bulb of fresh (or ‘green’) garlic – not dried, like the papery garlic you usually buy in the supermarket, but still cream, green and pink, with flexible, cool-feeling skin. Some markets and supermarkets carry it at this time of year and also around October. I’ve seen it in Sainsbury’s, Waitrose and the main market in Cambridge, so with a bit of sniffing around (it is very pungent) you should be able to find some. If it’s out of season, never fear; you can also use a dried bulb, and it will still be very good indeed. If you do use dried garlic, try to find a variety that has big, fat cloves. The Really Garlicky Company do a fantastic product, and you can sometimes order fresh garlic from them as well (currently their website says it should be ready in July). As well as mail order, they have a stockists list on the page. Their Patagonian garlic is available in my local Waitrose, and it’s a very superior bulb with huge, juicy cloves which are fragrant and easy to peel.

Picking out herbs to cook with the garlic is fun. I’ve used thyme, oregano, parsley, rosemary and bay from the garden, but you’re not limited to these. Sage is also good, and it’s worth experimenting with whatever green herbs you have to hand. The odd chilli tucked between the cloves can also be good. I’ve used butter to lubricate here, but goose or duck fat is also glorious in this dish. If you decide to use some, use 200g duck fat and 200g butter.

We are greedy when faced with roast garlic, and can get through three bulbs each with some good bread. You may find that six bulbs will happily serve three, or want to keep a couple back as an ingredient for a later recipe. To roast six bulbs you’ll need:

Six bulbs green garlic
3 bay leaves
1 small handful each fresh thyme, oregano and parsley (reserve a little parsley to garnish at the end)
3 large sprigs rosemary
250g butter
Olive oil to drizzle
Salt and pepper

Slice each bulb of garlic in half across its equator and arrange in a heavy-bottomed roasting tin, tucking the clean spices all around the garlic. Make sure some of the pieces of garlic have their cut sides in the air, and some against the roasting tin, for a lovely variation in texture and stickiness. Dot the butter all over them (I know this is a lot of fat, but you’ll thank me when you taste what’s at the bottom of the dish when you’re done cooking) and drizzle a couple of tablespoons of olive oil over to moisten any non-buttery bits. Sprinkle over salt and pepper.

Roast for 40 minutes at 180° C, opening the oven to baste the garlic with the juices three or four times. The house will smell strongly, so open a window. When the garlic is done, the ends of the cloves should be a gorgeous caramel brown. Serve the bulbs up immediately with some really good bread and a little salt for everyone to spike their own garlic with, keeping the cooking dish on the table for dipping in the juices (possibly the most delicious cooking liquid ever). You should be able to pop each clove out of its skin easily, and mash it onto the bread with the ends of a fork.

Roast garlic and a jar of infused honey

Smoked garlicI managed to get my hands on a couple of bulbs of fat, golden, oak-smoked garlic this weekend. (Cambridgeshire readers should head straight over to the River Farm Smokery in Bottisham for more smoked goodies.) It’s beautifully pungent stuff; years ago, I bought a plait of smoked garlic for my parents, who ended up having to keep it in the garage to prevent the whole house from taking on a smoky, garlicky taint. If you’ve not tried smoked garlic before, it’s pretty easy to imagine, but the reality is always a little startling. This is a fiercely flavoursome product. You can make a little go a long way, but I really like to use whole cloves of it in casseroles or around roast dishes. Much of this bulb found itself being used in a roast lamb dish with beans – just follow this recipe and add about eight whole cloves of smoked garlic in place of the chopped fresh stuff – you’ll need a couple of extra cloves to stuff into the skin of the lamb as well.

Garlic cloveWhen garlic is smoked, its cloves soften a little and turn a lovely buttery yellow. The smoking process forces some of the natural sugars in the garlic cloves to bead on the surface of the clove, under the papery skin, becoming sticky, tacky and sweet. You can use these cloves wherever you’d use raw garlic; the whole bulb is also exceptionally good roasted. Try making roast garlic and fresh tomato pasta with a smoked bulb for great depth of flavour. I really like the roast cloves popped out of their skins and spread on a good crusty bread, sprinkled with a little salt. The squashed, roast cloves are also fantastic stirred into mashed potatoes.

Infused honeySmoked garlic and honey are two flavours which, for me, seem to have been invented for each other. I kept five cloves of the garlic back to make a jar of smoked garlic honey baste. To make your own, you’ll need a jar of honey (mine is some of our local wildflower honey – anything with a delicate, flowery flavour will do, though; try clover, orange blossom or lime blossom honey) and five unblemished cloves of smoked garlic. Empty the jar of honey into a saucepan and warm it with a jam thermometer in the pan until it reaches 100° C. Put the whole garlic cloves at the bottom of a sterilised jar and pour the hot honey over them, then cover and refrigerate. The garlic will start to give its smoky fragrance up to the honey almost immediately, and the honey will have a noticeable flavour after a day or so, but for best results the jar should be left for around a month before using. Brush the infused honey over meats before roasting or grilling, use as a surprisingly delicious dressing for baked apples, or spread on some toast and nibble with a glass of whisky for a midnight snack.

Fragrant garlic-grilled pork medallions

This is a great dish for those trying to avoid too much fat in their diet. Pork fillet is a very lean (and pleasingly inexpensive) cut of meat, but marinated and grilled like this it stays moist. It’s delicious, especially if you allow the edges to caramelise under the hot grill, and is a brilliant dish for garlic lovers.

One fillet will serve two people. For every fillet you cook, you’ll need:

1 pork fillet
4 tablespoons light soya sauce
2 tablespoons dark soya sauce
4 tablespoons oyster sauce
2 tablespoons hoi sin sauce
2 tablespoons soft brown sugar
1 red chilli
1 head garlic
Coriander or spring onion to garnish

Slice the long fillet into discs about a centimetre thick. Place in a bowl with the sauces, honey, sliced chilli and finely chopped garlic, stir well to coat and leave in the fridge overnight.

Place the medallions of pork under a hot grill or on a barbecue, and cook for four minutes per side, basting with the marinade. Bring any remaining marinade to the boil in a small pan, and use as a thick sauce. Serve over rice, with some crisp steamed vegetables.

Sticky Thai garlic-chilli prawns

Sticky Thai garlic-chilli prawnsOne of the things the area I live in really lacks is a good fishmonger. As a result, raw prawns with the shells still on are very hard to find, so whenever I spot them in the supermarket I grab about six bags and freeze them.

Why do I want to keep the shells on, you ask? It’s perfectly simple; cooked like this, the shells not only add rich flavour to the flesh of the prawns, but become delicious in their own right. They’re a little crunchy, a little chewy, and extremely tasty, so don’t bother peeling your prawn – eat it shell and all. I wish my prawns has also had heads (ask any Chinese person; the head is the best bit), but head-on raw prawns are increasingly hard to find these days.

I was planning on barbecuing these little guys, but the summer of torrential rain shows no signs of abating, and I’ve barely been able to use the barbecue at all this year. If the weather’s this bad where you are, put the prawns under the conventional grill. Lucky readers living where there’s sunshine and enough warmth to eat outdoors should drag out the barbecue for this one.

To cook enough prawns for a very substantial meal for two (or a sensibly sized meal for three) you’ll need:

500g raw, defrosted prawns with the shells on (raw frozen prawns will be blue-grey, not pink)
4 tablespoons light soya sauce
2 tablespoons sweet dark soya sauce (kejap manis)
4 tablespoons oyster sauce
2 tablespoons Thai fish sauce
2 tablespoons honey
1 bird’s eye chilli
1 head garlic
1 large handful coriander, chopped

Use a sharp knife to butterfly the prawns – make a slit between the prawn’s legs from the base of the tail to the place where the head was, slicing through the flesh, but not through the shell on the prawn’s back. Flatten the prawns out with your hand. Cutting the prawns like this will maximise the surface area, helping them to take up the flavour of the marinade.

Mince all the cloves from the head of garlic with a large, sharp knife. (This is very easy – just lay the cloves on a chopping board and, holding the knife at the tip and the hilt and using a rocking motion, ‘walk’ the blade up and down the board for about five minutes. You’ll find the garlic is chopped finely and evenly. It’s probably not best to eat this immediately before going on a date.) Chop the chilli finely and mix it and the garlic with all the liquid ingredients. Stir the marinade mixture well to blend everything, then tip the prawns in, stirring to make sure they’re well covered. Refrigerate for 40 minutes. This is quite a penetrating marinade, so don’t leave the prawns for more than an hour or they will taste too strong.

When you are ready to cook the prawns, reserve the marinade and place them on a barbecue or under a very hot grill for three or four minutes per side, until they turn pink and the skins start to caramelise a little. Meanwhile, bring the marinade to a strong boil for about thirty seconds. Drizzle a little of the wonderfully garlicky cooked marinade over the prawns to serve, and dress with plenty of fresh coriander…and remember to eat those delicious shells!

Chicken Kiev

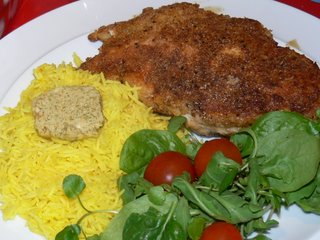
Chicken KievThis is a rather special Chicken Kiev. It has a super-crisp coating and is bursting with a garlic butter full of extra flavours. (You will notice that I am overdosing a little on saffron rice at the moment. It’s lovely with chicken dishes – just cook your rice as usual, but add a large pinch of saffron, which you’ve soaked in an eggcup of water from the kettle for twenty minutes, with the rest of the cooking water.)

The flavoured butter carefully packed inside this chicken (and balancing cheekily on top of that lovely saffron rice) is worth making in bulk and keeping in the freezer. You can slice it direct from the frozen roll and use it to melt over steaks, to baste roast chickens, to flavour couscous, to fill a baked potato, and anywhere you need rich flavour and lovely moist butteryness. If roasting the garlic for the butter is just too much faff for you, use an extra three cloves of raw garlic instead.

Use the largest chicken breasts you can find for this recipe; this will make it much easier to keep the pool of butter inside the bird until you cut it on your plate. Waitrose is currently selling a chicken called the Poulet d’Or – a massive and delicious behemoth of a bird which grows slowly (and ethically, at Leckford Farm, an enterprise owned by Waitrose’s parent company) – it’s fed an organic, corn-rich diet, allowed to forage and roam free, and is slaughtered at around 90 days rather than the usual four weeks. It’s a big bird, but it’s tender and extremely flavourful – I’ve read comparisons to Poulet de Bresse, and for special occasions I will be very happy to spend the £12 again on two breasts. (A whole bird comes in at about twice that price, but I’d estimate that it would very happily feed six people, so the effective price is high but not unreasonable.)

To make half a pound of garlic and herb butter, and two Chicken Kievs, you’ll need:

Garlic and herb butter
1 pat of good, salted butter (2 sticks in America), plus a tablespoon of butter to roast the garlic
1 head of garlic (to roast)
3 cloves of garlic (to be kept raw)
2 bay leaves
1 large sprig thyme
1 tablespoon chopped fresh tarragon
1 tablespoon chopped fresh chervil (leave this out if you can’t find any)
1 tablespoon chopped fresh parsley
1 fresh red chilli
½ teaspoon paprika
Juice and zest of 1 lemon
1 tablespoon light soya sauce
Large pinch of salt

Chicken
2 large chicken breasts, skinned and boned
Crumbs from two slices of white bread (blend in a food processor to make crumbs)
An equal volume of polenta or cornmeal
5 tablespoons grated parmesan
4 extra tablespoons polenta or cornmeal
2 eggs, beaten
Salt and pepper
1 teaspoon chilli flakes

Start by roasting the garlic for the butter. Slice the bulb of garlic in half across its equator and put the tablespoon of butter, the bay leaves and the thyme on the cut side of the bottom half, seasoning generously. Place the top half of the garlic bulb on top, making a herby sandwich. Roast at 180° C for 40 minutes. Remove from the oven and cool.

Pop the soft, roast cloves of garlic out into the food processor, and add the raw garlic; the tarragon, parsley, chervil and basil; the chilli and paprika; the lemon zest and juice; and the soya sauce. Drop in the half pound of butter and blend until everything is amalgamated and finely chopped into the butter.

Make a long sausage of the flavoured butter on a piece of tin foil. Wrap tightly and place in the freezer for at least an hour.
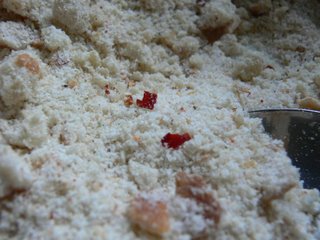
Breading mixtureWhen the butter has chilled, start on the chicken. Begin by combining the breadcrumbs and an equal volume of polenta in one bowl with the parmesan and chilli flakes. Put the four tablespoons of polenta in a separate bowl, and beat the eggs in a final bowl.

Take your smallest knife. Sharpen it vigorously. Use it to make a slit down the side of one chicken breast, creating a pocket inside the muscle. Be very careful not to cut all the way through. Remove the little fillet strip from underneath the breast and set it to one side.

Slice a disc of butter from the frozen butter sausage and tuck it inside the pocket. You may be able to fit more than one disc in, but be careful not to overstuff the breast, or the butter will leak out in cooking. If the butter sticks out at all, just trim it carefully so it’s firmly inside the meaty pocket.

Dip the fillet strip in the polenta, then back in the egg. Dip the chicken breast in the polenta, then the egg, and sprinkle the area where the slit is with a bit of extra polenta. Use the polenta and egg to glue the fillet strip around the slit. Roll the whole sticky assembly in the breadcrumbs mixture, patting plenty on around the slit/fillet area to make a good seal and ensuring everything is covered well. Repeat the process with the other breast.

Heat two tablespoons of butter and two of olive oil in a heavy, large frying pan. Bring the pan to a high temperature and carefully slide the chicken pieces in, slit/fillet area facing down. Turn the heat down to just below medium and leave the chicken breasts for 15 minutes, without poking or moving. After 15 minutes, flip them over (the bottoms will have turned an amazing golden crisp) and leave for another 15 minutes. Serve immediately. The melted butter will have formed a delicious pool inside the chicken breasts, and will pool out when you slice into the meat with your knife. Make sure you have plenty of rice to soak it all up.

Salt and pepper prawns

Salt and pepper prawns

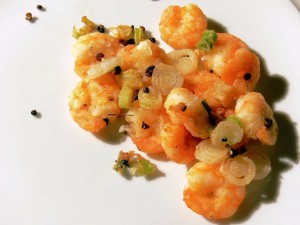
This Chinese appetiser is one of my favourites, and it’s surprisingly easy to make at home. Szechuan peppercorns are toasted in a dry pan until they release their amazing fragrance, then combined with flours and some other seasonings to make a feathery crisp and light coating for the prawns. Garlic and aromatic spring onions (scallions for American readers) are dusted in the flour coating and fried, making a crisp and delicious garnish for the prawns.

Those American readers are probably also wondering what these prawn things I’m on about are. Sometimes these linguistic differences become downright annoying. The United Nations (not somewhere I usually visit for culinary advice, but surprisingly helpful in this instance) informs me that:

…in Great Britain the term “shrimp” is the more general of the two, and is the only term used for Crangonidae and most smaller species. “Prawn” is the more special of the two names, being used solely for Palaemondiae and larger forms, never for the very small ones.

In North America the name “prawn” is practically obsolete and is almost entirely replaced by the word “shrimp” (used for even the largest species, which may be called “jumbo shrimp”). If the word “prawn” is used at all in America it is attached to small species.

So there you have it. Every time I say ‘prawn’, please substitute ‘large shrimp about the size of your thumb, once the head has been removed’, and get frying. For salt and pepper shrimp for two, you’ll need:

500g raw, shelled prawns
2 tablespoons Szechuan peppercorns
1 tablespoon freshly ground black pepper
3 tablespoons rice flour (rice flour will give your coating an amazing crispness)
3 tablespoons cornflour
2 tablespoons fleur de sel, Maldon salt or any salt with a flaky, crystalline form
4 spring onions (scallions)
6 cloves garlic
Flavourless oil to shallow fry

Begin by toasting the Szechuan peppercorns over a medium flame in a dry frying pan until they start to release their fragrance (about 4 minutes). Combine the toasted whole peppercorns in a large bowl with the black pepper, rice flour, cornflour and salt. This sounds like a great deal of salt, but this dish requires a lot, and you may actually find that you want to sprinkle a little more over at the end, so be generous.

Chop the garlic very roughly, and slice the spring onions into little discs.

De-vein (actually de-intestine) the prawns if you want – if I am confident with the source of my shellfish, I don’t usually bother. Dredge them in the seasoned flour. Heat up a 2cm depth of oil in a thick-bottomed pan, and fry the prawns in small batches when the heat is searingly hot, turning until the coating is golden and crisp. Transfer to a kitchen paper-covered plate in a warm oven to drain and keep warm as the other prawns are cooking.

When all the prawns are ready, dredge the garlic and spring onions in the seasoned flour, using a slotted spoon to remove them from the flour bowl. Saute them in the oil you cooked the prawns in until their coating is also turning golden. Remove from the oil with the rinsed and dried slotted spoon and place on kitchen paper to remove any excess oil.

Arrange the prawns on plates, sprinkle over the onion and garlic mixture, and serve immediately.

Pasta with anchovy crumbs and gremolata

A great no-money recipe for the end of the month, when all the money has gone on beer and skittles. You probably have all these ingredients in the storecupboard already. This is a fiercely savoury dish, where the contrasting textures of crisply fried anchovy breadcrumbs and the soft pasta come together to make something really special.

Gremolata is a bit like a salsa verde – a finely-chopped Italian mixture of herbs, lemon zest and something sharp like capers. It’s delicious with meats, and I love it with this pasta, where its freshness lifts the richness of the crumbs and infused oil.

It’s important that you choose a good, well-flavoured olive oil for this recipe. Although it is tempting to use the oil you fried the crumbs in for infusing the garlic and chilli, it’s best to use fresh extra-virgin olive oil instead. The heat that the breadcrumbs oil is subject to over the cooking period will change its flavour slightly, and you’ll find you achieve a much fresher, more aromatic flavour from the infusing oil if you use a fresh batch and only allow it to warm gently.

To serve two you’ll need:

2 slices white bread
8 anchovy fillets
4 fat cloves garlic
4 dried chillies
1 small handful parsley
1 small handful basil
Zest of 1 lemon
2 teaspoons capers
2 servings of your favourite pasta
Parmesan cheese to taste
Salt and pepper
Plenty of olive oil

Put the bread in the food processor and whizz until you’ve got coarse breadcrumbs. In a large frying pan, fry the anchovies in about half a centimetre of olive oil until they ‘melt’ and come to pieces. Add the breadcrumbs to the pan, stir them well to combine them with the anchovies, and add more olive oil to the pan until the breadcrumbs are just covered. (Don’t worry; we’ll be draining this oil later.) At this point, the contents of the pan will look like a wet mess. Turn the heat to medium and leave, stirring every minute or so: gradually the wet mess will turn into golden, crisp, anchovy flavoured crumbs (10-15 minutes). Turn the oil and breadcrumbs into a sieve and leave the sieve over a bowl for ten minutes for as much oil to drain out as possible.

While the crumbs are cooking, prepare the infused oil by crushing the garlic and frying it gently in a little olive oil until it releases its scent (about thirty seconds). Remove from the heat and add half a wine glass of extra-virgin olive oil to the pan. Bash the chillies in a mortar and pestle until they are flaked and add them to the oil. Return the pan to the heat and warm the oil gently, then leave it in a warm place to infuse until the pasta is ready to be served.

To prepare the gremolata, chop the herbs finely, and mix with the lemon zest and chopped capers in a small bowl. This is one of the rare occasions where I prefer capers preserved in a briny vinegar to the salted kind – use whatever you have to hand.

Cook the pasta as usual, drain and return to the pan you cooked it in. Pour over the garlic and chilli oil, then spoon into serving bowls. Dress generously with the crumbs and gremolata, check for seasoning, and serve with lots of parmesan cheese to grate over.