Parmesan, leek and thyme scone bread

Cut parmesan sconeInspiration comes from funny places, on this occasion Dr W’s nostalgic thoughts about a parmesan and leek scone that Starbucks sold when they first arrived in the UK and we all discovered Frappuccinos and comfy chairs. I remember that scone dimly, and it seems the scone in my imagination and the scone in his are not the same thing at all. The scone I remember was a dry and sad production with not enough cheese, not enough leek, and a miserable little pot of cream cheese to smear inadequately on the cut surface to moisten it. Dr W remembers it as some sort of delicate überscone, a scone of youth and freedom. I love him, so I came up with a scone bread for his dinner that might remind him of the original (not too closely, obviously, because I didn’t like the original much – this one’s much moister and packs a lot more flavour).

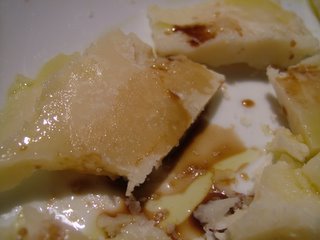
You shouldn’t need any butter to moisten this scone; it’s very rich. Treat it as a bready accompaniment to go with ham, some hard cheese, chutney and a salad for a quick supper. It’s best served warm from the oven, but it’s terrific cold, and will be great the next day in a lunchbox too. A bread leavened with baking powder like this is great for those who are nervous around yeast, and, because it doesn’t need long periods of proving and rising, is much quicker to make than a yeasty bread too.

To make enough for six portions, you’ll need:

240g plain flour
1 tablespoon baking powder
1 teaspoon salt
100g salted butter
100g leeks, green and white parts
1 tablespoon fresh thyme leaves, picked from stems
75g Parmesan cheese
50g Cheddar cheese
2 large eggs, plus one to glaze
120ml semi-skimmed milk

Parmesan leek sconePreheat the oven to 190°C (375°F).

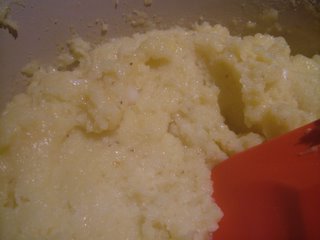
Sieve the flour, salt and baking powder into a large bowl. Cut the cold butter into little pieces in the flour bowl and rub them into the flour with your fingers until the mixture resembles breadcrumbs.

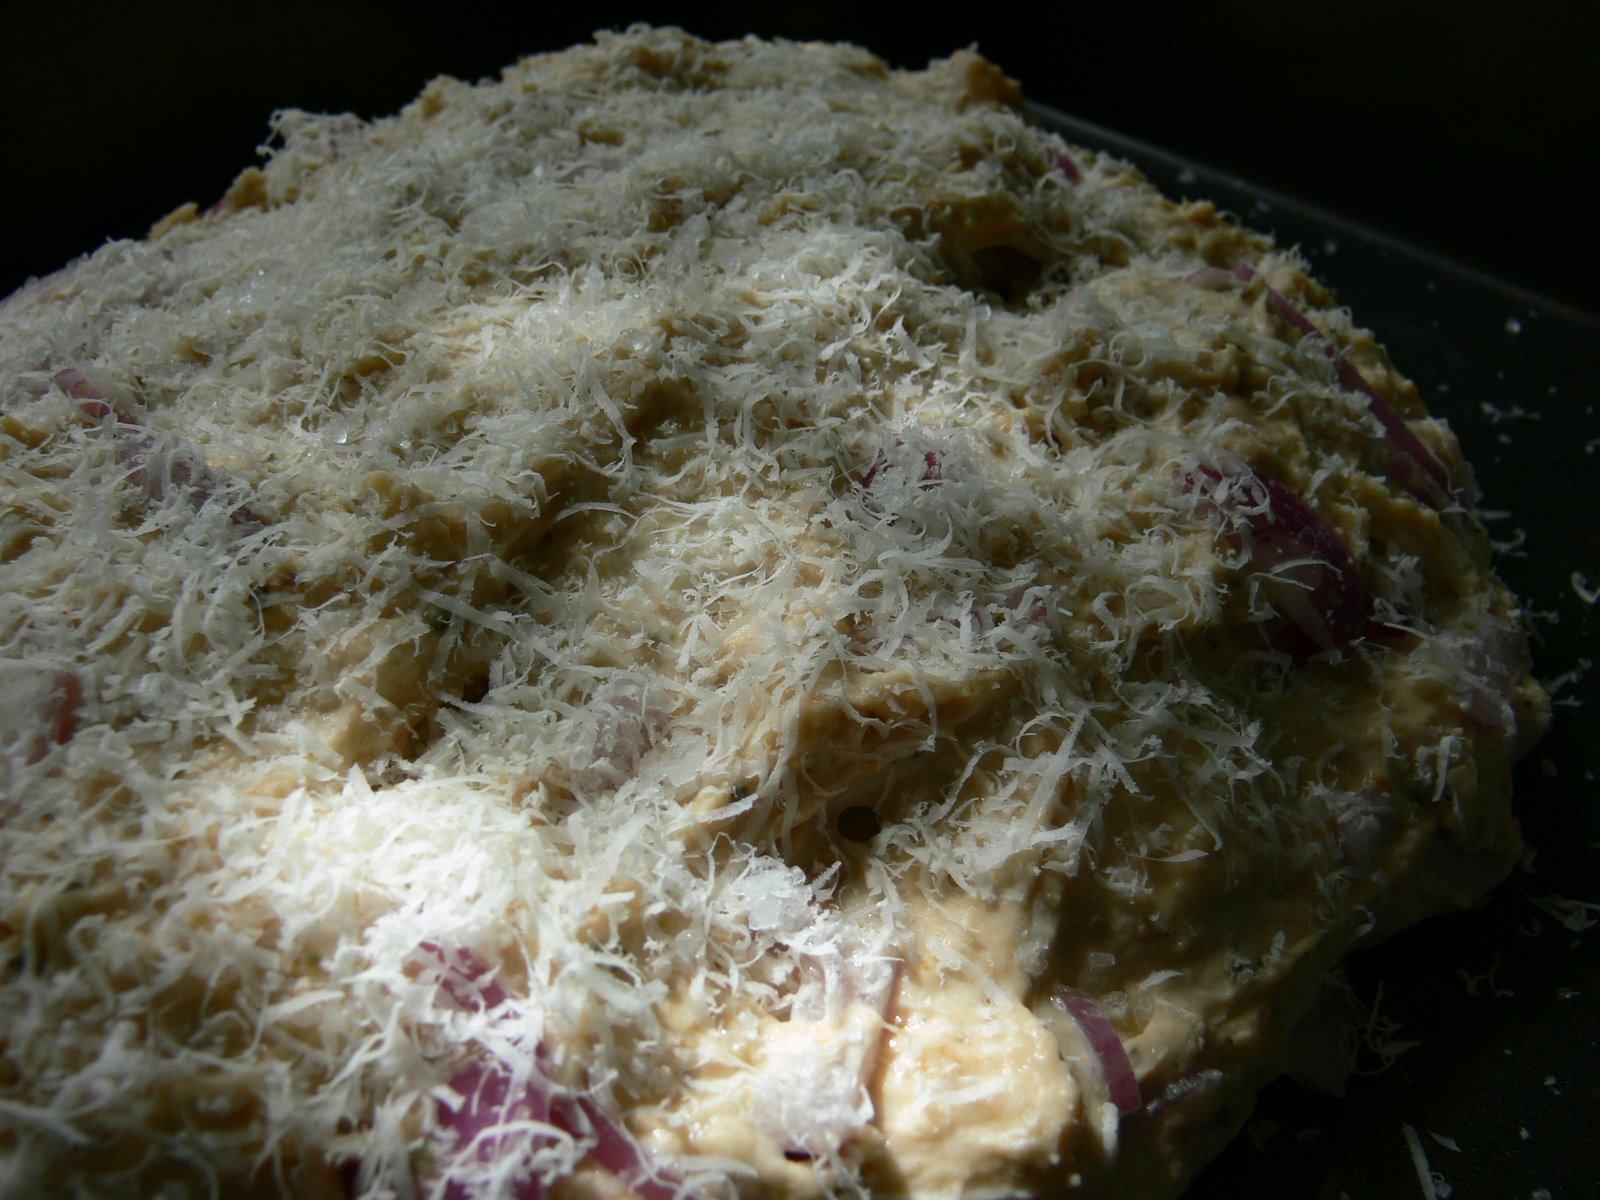
Chop the leek into very small dice and grate the cheeses. Stir the leek, cheese and thyme into the flour and butter mixture.

In a small bowl, whisk two eggs and the milk together. Pour into the dry mixture and use your hands to bring ingredients together gently until you have a ball of dough.

On a greased tray lined with parchment paper, press the ball of dough into a flat, round loaf shape. Beat the egg for glazing and brush it over the surface of the loaf.

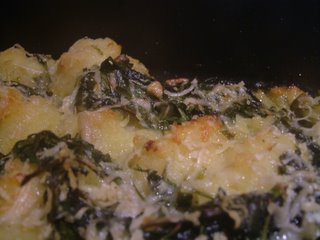
Bake for 35 minutes until pale gold. A skewer inserted into the middle should come out clean – if it doesn’t, keep cooking for 5 minutes and check again until the scone bread is done.

When the scone bread is ready, remove it to a cooling rack and leave it for twenty minutes to cool off a little. Slice into six pieces and serve warm.

Ambrose Heath’s Anchovy Biscuits

If you’ve been following me on Twitter, you may have noticed a few references to Edwardian savouries and a writer called Ambrose Heath this week. The savoury used to be a course served at the end of a formal English meal. Salty, umami and often highly spiced, the savoury was packed in by English gentlemen after dessert while they discussed hats and feudalism. A salty nibble was meant to cleanse the palate of whatever gelatinous pudding you’d just eaten so you could happily assault it with a cigar and too much port.

The savoury didn’t survive the period of rationing during and after the Second World War (a period which rendered English food completely joyless – it’s only started to recover recently). A grave shame, especially for those, like me, who lack a particularly sweet tooth; I’d far sooner eat a bacon sarnie than an ice-cream. Recipes for savouries are, these days, pretty hard to find, but I have several in a pre-war book by Andre Simon, and I couldn’t believe my luck when I found a copy of Ambrose Heath’s Good Savouries in a second-hand book shop last week.

Ambrose Heath was a prolific food writer: there are more than 70 books to his name. One of the first cookery books I owned was his book on sauces, which, along with his other books, appeals to the systematising, cataloguing part of my soul that lives somewhere on the autistic spectrum. His books are exhaustive and meticulous treatments of their subjects – there are multiple recipes with tiny tweaks for many of the dishes, alternative approaches and ingredient substitutions, and a lovely sense of a rather plump, happy man behind the pen. (And isn’t that a gorgeous cover illustration?)

Most of the savouries in this book are based around salty ingredients like ham, bacon, anchovy or bloaters; they’re usually spiced vigorously with curry powder or chutney, and are presented sitting on a fried crisp of bread, a puff of pastry or a hollowed roll buttered and baked crisp. This recipe for anchovy biscuits reads as follows:


To make the pastry for the cheese straws, Heath says you’ll need:

2oz plain flour
2oz grated parmesan
2oz butter
Yolk of 1 egg
A dash of mustard
Salt and pepper

His recipe will have you rubbing the butter into the flour/parmesan/mustard mixture, binding with the egg yolk and a little water, then baking for ten minutes. I changed the method a little, freezing the butter for 15 minutes and shredding it on the coarse side of the grater into the flour/parmesan mixture (to which I’d added a teaspoon of Madras curry powder), stirring everything together with a knife and binding the resulting mixture with the egg yolk and some ice-cold water mixed with four anchovies pounded in the mortar and pestle. I rested the pastry in the fridge for half an hour before rolling it out very thinly, cutting out 48 rounds with my smallest cookie cutter, and baking at 200°C for 12 minutes until golden. Rub the mixture in if you prefer, but grating in hard butter will give you a puffier, crisper result. I left out salt and pepper – the anchovies and curry powder will provide all the salt and spice you need.

To make the paste to spread on top of the biscuits, I pounded four more anchovy fillets, 1 teaspoon of curry powder (Madras again – Bolsts is my favourite curry powder, but you should use your favourite brand/ferocity), 2 tablespoons of parmesan, 1 tablespoon of chopped capers (in wine vinegar, not salt, which would just be too much with the anchovies), 1 tablespoon of oil from the anchovies and 1 teaspoon of smooth Dijon mustard in the mortar and pestle until smooth. This will give you enough to smear each biscuit with the tip of a knife – look to use a very tiny amount of the topping, which is strong and salty. If you are familiar with Marmite or Vegemite, you need to spread in about the proportions you would spread those on toast. Allow the biscuits to cool before spreading them or they will be too fragile to work with.

Pop the biscuits in an oven heated to 180°C for five minutes. The spread will go slightly puffy. Dress with a little parsley before serving warm. Rather than eating your anchovy biscuits at the end of a meal, I’d suggest you use them as nibbles with drinks – a very dry Fino sherry or a Dirty Martini will work beautifully against them.

Truffled mac and cheese

Back in the dark days of the 1980s, one of the first things I learned to make in home economics class at my all-girls’ school was macaroni cheese. Ours was a class training in the basics of good 1980s wifery – white sauces like the Mornay that forms the base of this dish, bread, pastry, and, bizarrely, the correct ironing of a man’s suit. (I like to think that I’m an excellent 2000s wife, but surely the ironing of suits is the dry cleaner’s job – or that of the suit owner?) I remember bringing a large carton of macaroni cheese home, and eating it with my proud parents. I also remember the girl who left her carton of macaroni cheese at school in her locker at the back of the classroom, and forgot to retrieve it until the smell became so strong that everyone thought that one of the rats from the biology department had escaped and died somewhere.

Last year, my excellent brother bought me a white truffle, preserved in a jar, for my birthday. I felt duty-bound to stop keeping it in the cupboard and just looking at it every now and then (when there are very good things in that cupboard I have a horrible habit of not cooking with them in case I come up with a better idea for them later on). I needed to do something with it before my next birthday, so I cast around for something simple that would showcase the truffle in a creamy, cheesy, soothing sort of way. What better than macaroni cheese?

If you have fresh truffles, so much the better. If you have no truffles at all, this dish will still be absolutely delicious; it just won’t be truffled.

A quick note about the truffle oil I’ve used alongside the real truffle here before we begin. Preserved truffles inevitably have less aroma than fresh ones, so I’ve used some white truffle oil alongside my truffle. It’s genuine truffle oil – but most of the truffle oil you’ll see on the market has never been near a real truffle. The stuff you’ll usually see on sale is made with olive oil and Bis-(methylthio)methane or 2,4-dithiapentane, both industrially synthesised versions of odour chemicals occurring in real truffles. It’s not a patch on real truffles, which have hundreds of different chemicals combining with the dismal-sounding Bis-(methylthio)methane and 2,4-dithiapentane to create a much more complex odour and flavour profile than the oil has. It’d be a real shame to use any near your real truffle (although some unscrupulous chefs do use the stuff to vamp up lacklustre truffles). Happily, you can also buy olive oil which has been infused with real truffles; unhappily, it’s far more expensive than the synthetic stuff. Check your label. If it says “truffle essence”, “truffle flavour”, or “truffle aroma”, it’s synthetic. If it’s heartstoppingly expensive and says clearly on the label that real truffles have been used to make it (you can buy the real stuff at e-Foodies, a company I’m very fond of), buy it and use it here. If all you can find is the synthetic stuff, I’ll leave it up to you – use it if you like, but be aware that it doesn’t really taste like truffles; and you should feel absolutely free to leave it out of this recipe.

To serve four, you’ll need:

400g macaroni
500ml milk
1 carrot
1 shallot
5 cloves
2 bay leaves
1 bunch thyme
1 bunch parsley
10 peppercorns
1 tablespoon olive oil
25g butter
25g plain flour
200g Parmesan cheese
75g Cheddar cheese
1 teaspoon Dijon mustard
1 small head broccoli
3 egg yolks
1 truffle (white or black)
2 tablespoons truffle oil
Salt to taste

Start by infusing the milk that will make the base of your Mornay (cheese) sauce with aromatics. Pour the milk into a saucepan with a well-fitting lid, and add the peeled carrot, cut into halves, the halved shallot, studded with the cloves, the bay leaves, thyme and parsley. Add a teaspoon of salt and ten whole peppercorns. Bring the milk to a bare simmer, then turn the heat off and leave the saucepan in a warm place for 3-4 hours. Strain the milk through a sieve.

Boil the macaroni according to the packet instructions with a tablespoon of olive oil. When the macaroni is cooked, rinse it in a colander to remove excess starch and set aside. Divide the raw broccoli into tiny florets and mix with the macaroni.

Preheat the oven to 180°C (350°F).

In a clean, dry saucepan, melt the butter and combine with the flour, stirring over a low to medium heat for three minutes. Stirring all the time (I like to use a balloon whisk), add a small amount of milk and stir until it is incorporated into the sauce and starts to thicken. Keep adding milk in small amounts and stirring vigorously until all the milk is incorporated and you have a smooth, thick sauce. Stir the grated cheeses (reserving a little parmesan to top the dish with) into the sauce with the beaten egg yolks, the finely chopped truffle and the truffle oil (if using). Taste the sauce and add more salt if you think it needs it – the cheese is quite salty, so you may not need any.

Combine the sauce and the macaroni/broccoli mixture in a shallow earthenware dish. Sprinkle the surface with the remaining Parmesan cheese, and bake in the oven for 15-20 minutes, until the top is brown and the sauce is bubbling. Serve immediately, pouring over a little more (real) truffle oil if you fancy.

Cauliflower cheese

There’s something disproportionately impressive about wheeling a whole cauliflower out to the table, glistening in a robe of scented, cheesy sauce. It raises cauliflower cheese from a nursery tea dish to the sort of thing you might serve as a dinner party accompaniment.

I only ever make cauliflower cheese when I can find a pristine cauliflower. The cauli you choose should be firm and white, and still surrounded by its green leaves, which should be stiff, not floppy (floppy leaves mean the cauliflower has been out of the ground for too long). Don’t use a cauliflower with any bruised bits visible.

The Mornay sauce that’s slathered all over the cauliflower is a little more complicated than usual; the milk for the sauce is infused with aromatic herbs for a couple of hours before making the sauce up. It’s worth the tiny amount of extra effort. You’ll end up with a delicately scented, Parmesan-savoury cloud of white curds, a much finer dish than the wet stuff you remember from school.

To serve four as an accompaniment or two as a main course (if you’re eating this as a dish on its own, it’s very good with some toasted sourdough bread to mop up the lovely sauce) you’ll need:

1 large, firm, fresh cauliflower (around 1kg)
300ml whole milk
1 shallot
5 cloves
10 peppercorns
2 bay leaves
1 bunch parsley
75g butter
75g plain flour
A grating of nutmeg
1 teaspoon dry mustard powder
150g grated Parmesan cheese plus a couple of tablespoons for sprinkling
Salt

A few hours before you start to eat, cut the shallot in half and stud it with the cloves. Place it in a saucepan with the bay leaves, parsley and peppercorns and pour over the milk. Bring the milk up to a gentle simmer, put the lid on and remove from the heat, leaving in a warm place for about three hours.

When you are ready to assemble the dish, use a sharp knife to remove all the outer leaves from the cauliflower except the very fine ones from the inner layer of leaves which curl around the curds. Cut the stalk off the bottom of the vegetable so it will sit flat when placed on a plate. Cut two big slashes in a cross shape into the bottom of the stalk – this will help the thickest part of the cauliflower to steam faster, so nothing will overcook and the whole vegetable retains a good texture. (Nothing is worse than a soggy cauliflower cheese.)

Steam the cauliflower in a large pan for twenty minutes, and heat the oven to 180°C (350°F).

While the cauliflower is steaming, make up the Mornay sauce. Melt the butter in a heavy-based saucepan with the flour, and stir well over a low heat for three or four minutes – do not allow the roux (flour/butter mixture) to brown. Strain the milk and discard the aromatics. Add the milk to the pan very gradually, stirring all the time, until you have a thick white sauce. Stir the cheese, mustard and nutmeg through the sauce to finish.

Place the steamed cauliflower in an ovenproof serving dish, and spoon the thick sauce all over the cauliflower. Bake in the hot oven for 30 minutes – the sauce will be bubbling. Finish the dish by spooning some more of the sauce from the dish over the cauliflower and sprinkling over the extra grated parmesan, then placing under the grill until the cheese is golden and bubbling. Serve immediately.

Cheese scones

Cheese scones, English, savoury and light, were one of the first things I learnt how to cook in school home economics lessons. The scones we turned out at school were really pretty awful – there was not enough cheese, and they were full of margarine. But a good cheese scone, properly spiced, made with butter and plenty of strong cheese, can be very different, such that Dr W will eat three, buttered, in one go and then make strange contented sighing sounds for the next couple of hours.

This is (as my home economics teacher doubtless realised, despite her margarine/cheese stinginess problems) a great recipe for kids. It’s easy, it introduces them to the rubbing-in method they’ll use when they’re feeling advanced enough to attempt pastry, and it’s hard to mess up. And what child doesn’t get a huge kick out of baking something to go in his own lunchbox?

We ate these as part of a sort of high-tea arrangement late on Sunday afternoon. I like them with lots of butter and a little Marmite, which really makes the parmesan and cheddar in the scones sing. When buying the cheese for these scones, make sure your cheddar is a mature, flavourful variety.

To make 8 cheese scones you’ll need:

225g self-raising flour
½ teaspoon salt
1 teaspoon powdered mustard
½ teaspoon cayenne pepper
50g softened, salted butter
50g cheddar, grated
25g parmesan, grated
150ml whole milk, plus a little to glaze

Preheat the oven to 230° C (450° F).

Sift the flour, salt, mustard and cayenne into a bowl (hold the sieve up high – you’re trying to aerate the mixture as much as you can). Cut the butter into pieces and rub it into the flour mixture with your fingertips until you have a mixture that resembles breadcrumbs. Grate the cheeses and stir them into the flour mixture. Pour all the milk into the bowl with the flour and cheese, and use a knife to bring everything together into a dough.

Roll the dough out on a floured surface until it is 1cm thick, and cut into rounds with a fluted 6.5cm cutter. Arrange on a greased baking sheet and brush the top of each scone with milk. Bake for 8-10 minutes, until the scones have risen and are golden. These are fantastic served straight from the oven. If you want to ring the changes, try adding a tablespoon of Herbes de Provence with the cheeses for a cheese and herb scone – really good served with a slice of sharp cheese.

Spiced parmesan parsnips

One of my very favourite Delia Smith recipes is this lovely way with roast parsnips, where she tosses them in grated parmesan and flour before cooking. My Grandma used to make Delia’s parsnips every Christmas, and there was always a fight over who got the last few.

It’s funny, really; in the UK, parsnips are a very ordinary accompaniment to a roast dinner, a slightly posh vegetable to be rolled out only on Sunday lunchtimes. Elsewhere in the world, the parsnip is considered more appropriate for feeding animals than people. Part of this is down to our climate. Parsnips need exposure to frost for their flavour to be fully developed, so in warmer places the parsnip is a less impressive beast, weedy and comparatively flavourless – hence the French tendency to feed them to pigs rather than people.

This is my version of the Delia recipe my Grandma used to cook. I’ve changed the fat used – you’ll get a much better crisp using dripping, and the flavour you’ll achieve with a good butcher’s pot of beef dripping is amazingly good if you serve these next to roast beef . I’ve also upped the ratio of parmesan and added some curry powder (always unbelievably good with a parsnip) and lots of lemon zest and fresh basil, which lifts the whole dish. Result: crunchy, savoury parsnips, sweetly fluffy inside and amazingly crisp outside – and so delicious you too will be fighting over the leftovers.

To serve eight with a roast, you’ll need:

1.25kg parsnips
175g plain flour
100g parmesan, grated finely
1 tablespoon medium curry powder (I like Bolst’s)
Grated zest of 2 lemons
1 heaped teaspoon salt
3 large tablespoons beef dripping
3 tablespoons chopped fresh basil

Preheat the oven to 200°C (400°F). Put a heavy roasting dish containing the dripping in the oven as it heats up. Combine the flour, parmesan, curry powder, salt and lemon zest in a large mixing bowl. Peel the parsnips and cut them in half across their width. Cut the top half of each parsnip into four long pieces, and the bottom half into two.

Cook the prepared parsnips in boiling water for five minutes. Remove the saucepan from the heat and drain the parsnips a few at a time, rolling the steaming-hot parsnips in the flour mixture and setting aside on a plate. When all the parsnips are coated thoroughly, remove the roasting dish from the oven and arrange the parsnips in the hot fat (careful – it may spit). Put the dish of parsnips high in the oven for 20 minutes, turn the parsnips and put back in the oven for another 20 minutes.

When the parsnips are ready, they’ll be a lovely golden colour. Remove them to a serving dish and sprinkle generously with basil.

Parmesan, tomato and onion bread

Parmesan, tomato and onion breadWhen I was a little girl, there was a bakery in our town which made a cheese and onion bread. It was never quite right – the cheese was too mild, there wasn’t enough onion, and it needed very salty butter. All the same, I used to really look forward to eating it, preferably sliced with plenty of cheese and tomatoes layered on top, then baked in the Aga by my Dad.

This week, I decided to try to make my own cheesy, oniony bread, this time with my Dad’s tomatoes baked into it. I used lots of parmesan, a nice big onion and some flavourful sun-dried tomatoes (along with a little of their oil). The results were great – no extra cheese, tomatoes or toasting required. To make one loaf, you’ll need:

210 ml tepid water
1 level teaspoon caster sugar
1 packet easy-blend yeast
350g strong white flour
1 teaspoon fine salt
100g finely grated parmesan
1 ½ teaspoons dried oregano
1 minced clove garlic
1 large onion, sliced finely
5 sun-dried tomatoes in oil, chopped small
1 ½ tablespoons of the tomato oil
½ tablespoon fleur de sel or other coarse salt to sprinkle
Extra parmesan to sprinkle

Mix all the ingredients (except the tepid water and the salt and parmesan to sprinkle on at the end) in a large, warm bowl. Pour in the tepid water and mix well with a wooden spoon until the dough comes together. Transfer to a floured board and knead hard for ten minutes, until the dough is stretchy, glossy and no longer sticky. The onion pieces will snap as you knead, but don’t worry about them.

Bread doughWhen the dough is kneaded, put it back in the bowl and cover with some oiled cling film. Leave in a warm (not hot) place for about 40 minutes, until it has doubled in size. (The dough will take a couple of hours to rise at room temperature if you don’t have a warm place to keep it.)

Take the dough from the bowl and knock it back down to its original size, kneading again for five minutes. If you want a traditional loaf shape, put it in a loaf tin. I decided to make a low, flattish bread in order to make the most of the lovely crust with its sweet caramelised onions poking through, so I shaped the dough on a non-stick baking sheet.

Sprinkle the bread with the salt and extra cheese, and leave to rise again, covered, for 40 minutes in a warm place. Meanwhile, heat the oven to 230° C (450° F).

When the dough has risen, place a large baking tray full of water at the bottom of the oven, and the tray with the bread on a rack in the middle of the oven. Bake the loaf for between 30 and 40 minutes. It will be ready when it sounds hollow when you tap the bottom. Serve with plenty of butter.

Chicken parmigiana

This is, for me, one of the very nicest things you can do with a chicken breast. The chicken is beaten flat with a heavy rolling pin, coated in crumbs and parmesan cheese, and sautéed gently in butter and olive oil until golden and crisp. It’s served on a bed of rich tomato sauce. I love this dish served with some buttered white rice – you can also serve it with pasta.

Parmigiana simply means ‘cooked with parmesan cheese’. If, like me, you find yourself cooking with a lot of parmesan, you should consider investing in a Microplane grater. I love these things (mine was a wedding present and gets used several times a week) – they grate your parmesan very finely, and with no risk to your knuckles. The fine grade is absolutely perfect for parmesan, and it’s also great for reducing garlic to a pulp, for zesting fruit and for grating nutmeg.

To serve four greedy people you’ll need:

Sauce
1.5 kg fresh ripe tomatoes
3 large onions
4 cloves of garlic
1 handful fresh basil
1 handful fresh oregano
1 mild red chilli
1 ½ tablespoons balsamic vinegar
2 teaspoons sugar
1 large knob butter, plus extra to taste
1 tablespoon olive oil
Salt and pepper

Chicken
4 large chicken breasts
4 oz fresh breadcrumbs (about a cup for Americans)
4 oz freshly grated parmesan cheese (ditto)
½ teaspoon paprika
1 teaspoon freshly ground pepper
½ teaspoon salt
1 egg, beaten
1 large knob butter
1 tablespoon olive oil

Begin by peeling and seeding the tomatoes. (This is very easy – use a knife to make a little cross in the skin at the bottom of the tomato, then pour over boiling water and leave for ten seconds. Fish the tomato out with a slotted spoon. You’ll find the skin will come away easily. Slice open to remove the seeds.) Chop the tomato flesh and set aside in a bowl.

Dice the onions and chop the garlic finely, and fry in a large knob of butter until translucent and fragrant. Add the tomatoes and finely chopped chilli to the saucepan and stir to combine everything. Bring to a very low simmer, and reduce (this will take more than an hour) to half its original volume or a little less. Bring the vinegar and sugar to the boil in a small pan and stir it into the sauce. Add the oregano and season with salt and pepper. Taste to check whether you need more salt or sugar. Add another knob of butter for a more mellow flavour if you like. Set the finished sauce aside.

Place the chicken between two sheets of cling film and beat it with the end of a rolling pin to flatten it out. Mix the paprika, salt, pepper, cheese and breadcrumbs well in a shallow dish. Dip the flattened chicken breast into the beaten egg, then dip the eggy chicken into the dish of cheesy crumbs until it is well coated. Set the sauce to reheat.

Heat the oil and butter in a non-stick frying pan until it sizzles, and drop in the breaded chicken pieces. Saute on each side for about 5 minutes, until golden and crisp. Spoon some of the sauce into the middle of a ring of rice on each plate and place a chicken breast on top of it. Dress with a bit of basil, if you’re feeling artistic. Serve immediately with a green salad dressed sharply.

Weekend herb blogging – Gnocchi alla Romana in a herbed butter

Everything in the garden is dead or hibernating. Even the slugs seem to have vanished for warmer climes. So today’s Weekend Herb Blogging post (thanks to Kalyn from Kalyn’s Kitchen for organising things again), although packed with herbs, is packed with herbs from the supermarket. I feel like I’m cheating. Roll on summer.

You might be used to gnocchi as little Italian dumplings made of potato, served in a sauce. Gnocchi alla Romana are the traditional form of dumpling from Rome, and they don’t contain potato; instead, they’re made with semolina, and they’re usually served with a flavoured butter. Clearly going to Prague didn’t manage to put me off dumplings.

Semolina is durum wheat, ground coarsely. In the UK you may find it in the same aisle as the ready-made custard, the jelly and the Angel Delight; it’s used in English cookery to make a sort of sloppy pudding. I’d recommend feigning Italian-ness for the day and using it to make these gnocchi; they’re light, fluffy and infinitely nicer than any doughy pudding. You’ll often see semolina gnocchi baked into sliced or cookie-cut shapes, but I prefer to make them into roughly-textured balls; this way you get a larger surface area, and therefore more delicious crusty bits.

The gnocchi are roasted in a garlic-flavoured butter which has been infused in a warm place with handfuls and handfuls of herbs. This time I used great gouts of flat-leaved parsley, basil and tarragon; use whatever comes to hand in yours. Chervil is excellent if you you can get your hands on any. Rosemary and sage are also very good in this.

To serve between four and six people (depends on levels of hunger; frankly, I’ve had three people finish a dish this size in about five minutes flat, making self-satisfied gargling noises), you’ll need:

Herbed butter
1 pack butter (1/2 lb)
1 glug olive oil (about a shot glass full)
5 cloves garlic, crushed and chopped
Around 4 large handfuls fresh herbs – I used parsley, tarragon and basil
Salt and pepper

Gnocchi
1 and a half pints milk
12 oz semolina
1/2 lb grated parmesan (plus some extra to sprinkle)
2 eggs
Freshly grated nutmeg
Salt and pepper

Start by melting the butter with the olive oil over a very, very gentle heat. (I realise this is an awful lot of fat. Personally, I don’t find this terribly upsetting, but if you are the sort to be upset by butter, please still try it; you can spend the week following your triumph eating rice cakes.) Stir in all the herbs and garlic until they’re coated with the butter and leave in a warm place for an hour or so.

While the butter is infusing, grate a little nutmeg into the milk, sprinkle in some salt and pepper, and bring the milk to a simmer. When it starts bubbling, keep it on a low heat and pour the semolina into it in a very thin stream, stirring all the time. Keep pouring and stirring until you have a thick paste that you can stand a spoon in. Take it off the heat, beat the eggs and the parmesan into the semolina mixture, and leave the pan until the mixture is cool enough to handle.

Form the mixture into little balls (try for something a bit smaller than a ping-pong ball) with your hands. Don’t make them too smooth; a rough surface is better for making the lovely crispy bits. Place them in one layer in a roasting tin, pour over the butter (which will now have infused with the gorgeous rich flavour of the herbs and garlic), sprinkle with parmesan cheese, and put in an oven at 200 C (390 F) for fifty minutes until everything is brown and bubbling. Serve to loud applause.

Balsamic vinegar

Elizabeth David describes a Piedmont Pepper which I make quite frequently for a starter. It’s very easy – you halve a red pepper (sometimes you may find that cutting the pepper along the ribs which divide it naturally and dividing it into three or four instead works better for you, especially if you have a lot of people to feed), and place in it a slice of raw tomato, a slice of raw garlic, a piece of preserved anchovy as small as your little fingernail, a drizzle of olive oil and a little knob of butter. The whole lot is then baked in a medium oven until the peppers are soft and sweet (about 45 minutes).

My Mum suggests augmenting this recipe with a disk of goats’ cheese cut from one of those logs you can buy in the supermarket, some toasted pine nuts and a drizzle of balsamic vinegar, which is what you can see in the picture. Lovely stuff – the salty, sharp cheese contrasts with the sweet peppers, and the texture of the pine nuts works beautifully with these soft ingredients.

For once, I didn’t have to reduce the balsamic vinegar to get the consistency I needed for drizzling in a sweet, treacly swirl. My brother has recently spent six months living in Modena, and when our parents last visited him, they spent an awful lot of money on a minuscule bottle of balsamic vinegar which, aged in a barrel for 40 years, was considerably older than I am. It’s amazing stuff.

Balsamic vinegar this old is a rare and precious thing. A true balsamic vinegar’s only ingredients are grapes – some cheaper varieties will add caramel for flavour, colour and texture, but a genuine bottle will only contain Trebbiano and Spergola grapes. The grapes are simmered over an open fire in copper cauldrons until they lose more than half their water content, and the resulting syrupy grape must is placed in wooden barrels with a starter of already-aged balsamic vinegar, which helps fermentation.

The barrels are subject to strict controls; only oak, cherry, chestnut, mulberry, acacia, ash and juniper woods are approved for the aging process. The vinegar takes on deep flavour from the wood it’s stored in. A young balsamic vinegar is aged for three to five years – the oldest can be up to 150 years old.

There is an ancient tradition of producing balsamic vinegar in Modena; the earliest reference to the vinegar was made in 1046AD, when a barrel was given as a precious gift to the King, later Emperor Enrico II of Franconia. Its gastronomic application hasn’t always been appreciated – balsamic vinegar pops up in historical texts as a panacea to be smeared on festering body-parts or drunk for sore throats and labour pains, and as an antiseptic.

If you are lucky enough to come into possession of a good bottle of old balsamic vinegar, try drizzling a tiny amount on some thin slices of parmesan cheese I’ve added some truffle-infused olive oil here too) and eating with a glass of something red and robust. Dip a strawberry into a drop. Lean back, smile, and consider how blessed Emperor Enrico was, with his whole barrel of the stuff.