Pouding chomeur – maple syrup sponge pudding

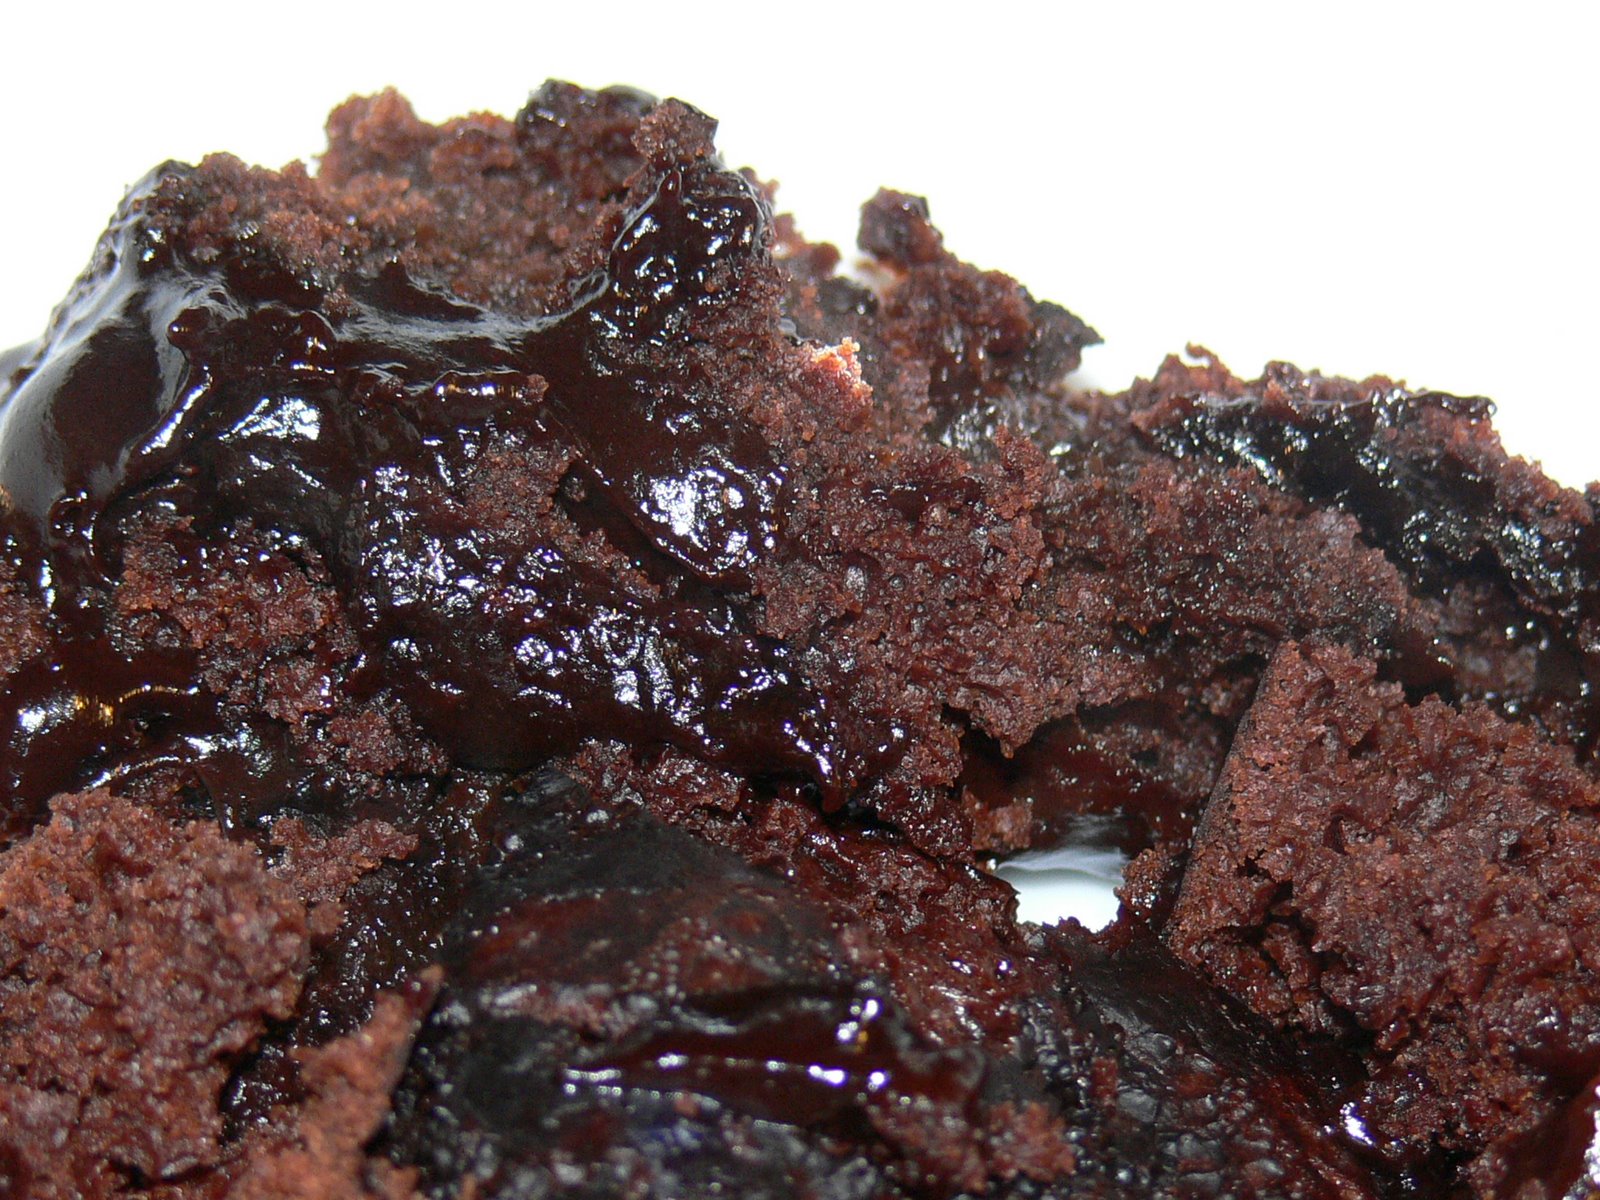
The chocolate puddle pudding I wrote about a few weeks ago went down so well that I felt duty-bound to make another self-saucing dessert for you to try at home. Pouding chomeur (French for poor man’s pudding) is a French Canadian dish, dating from an era when poor men could afford maple syrup. Maple syrup has been pretty pricey stuff for as long as I remember, and I suspect that this pudding was named when dinosaurs still roamed the Latin Quarter of Montreal.

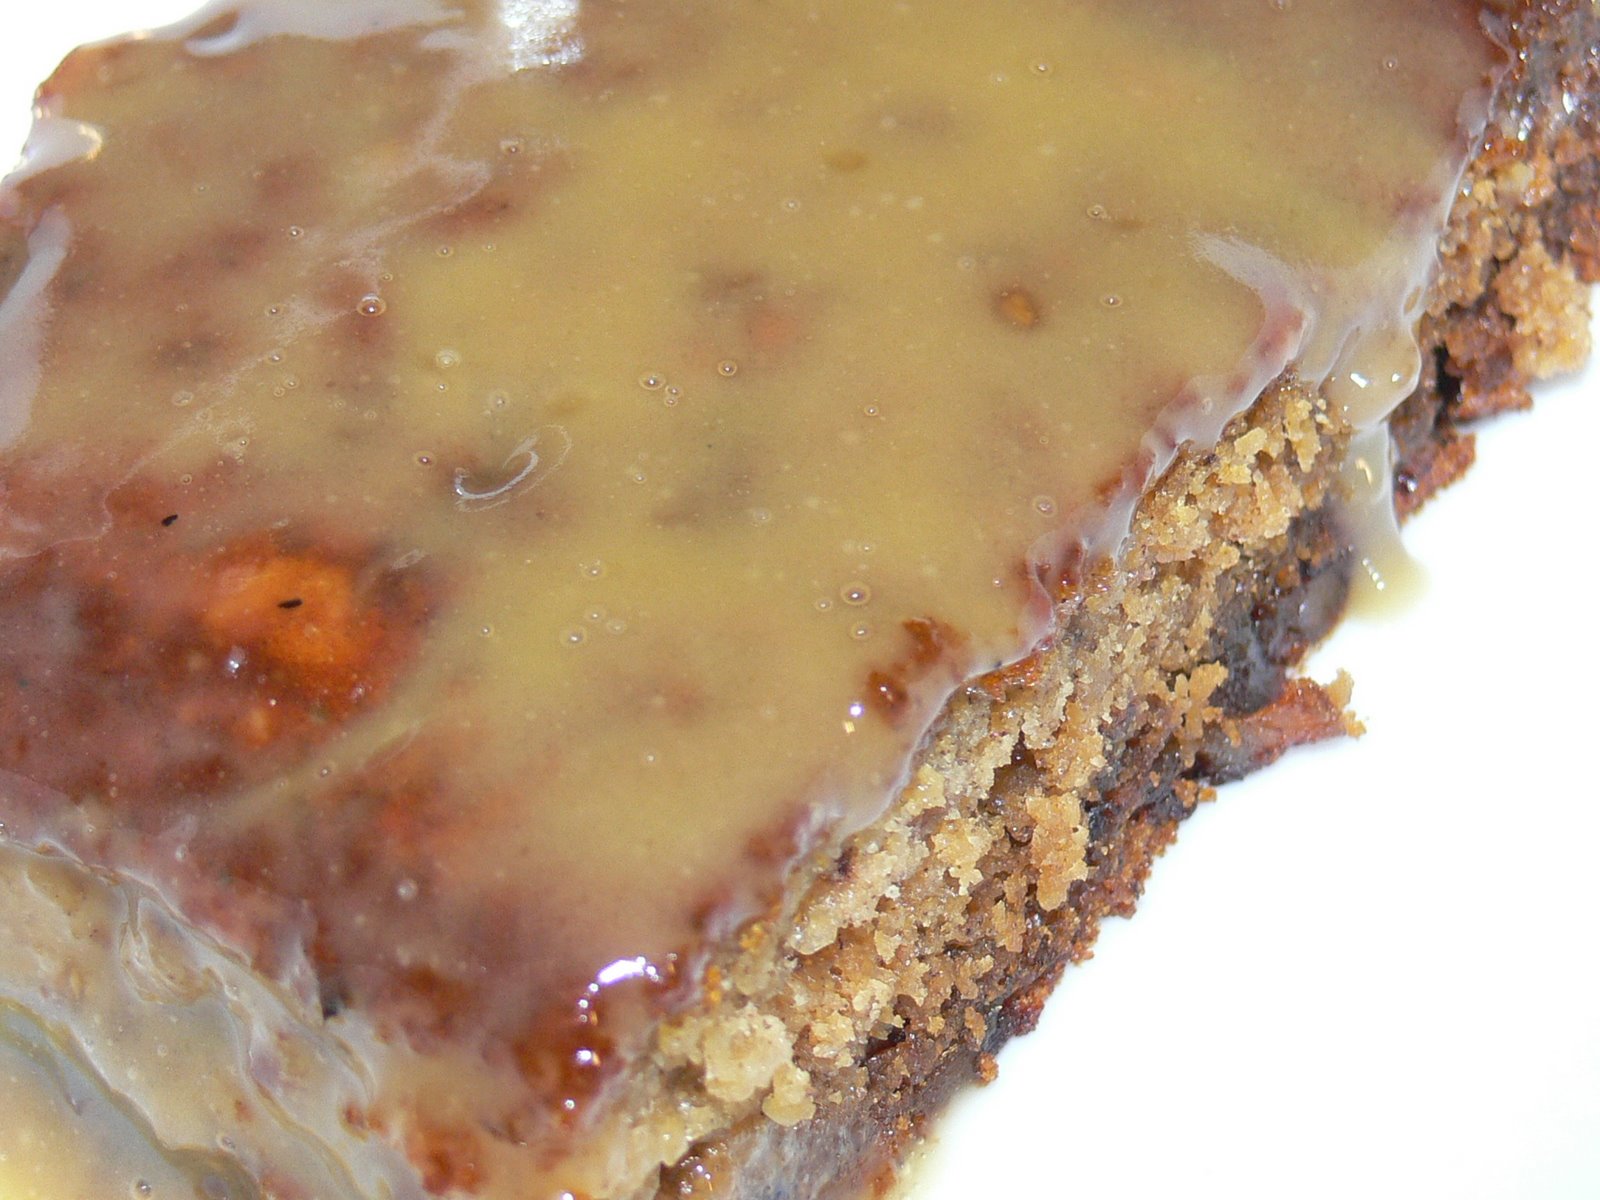
You’ll be making an easy sponge, and pouring a maple syrup and cream sauce over it before putting it in the oven. The liquid magically swaps places with the sponge while the pudding is cooking, and you’ll end up with a lovely moist cake layer on top of a thick, syrupy, mellow and gloriously sweet sauce.

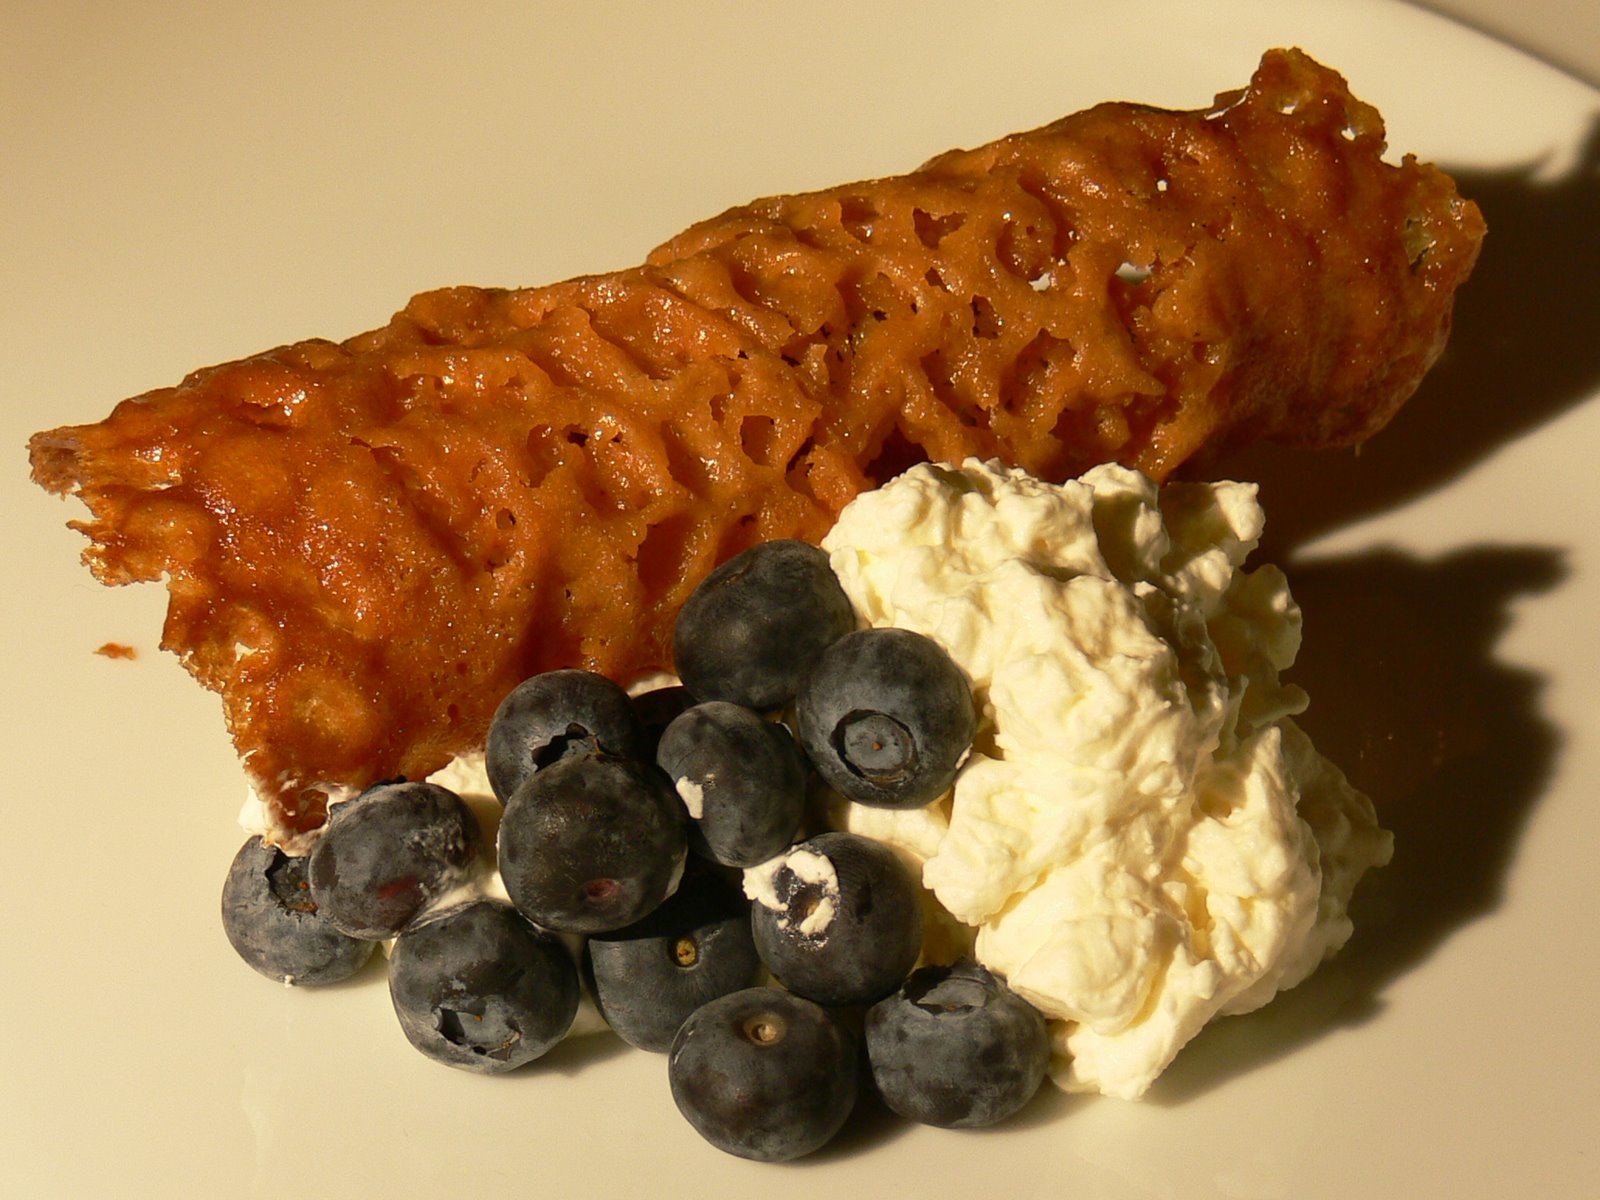
A warning – this is, by design, a very sweet dessert. I recommend cutting through the sweetness by sloshing cream over the warm cake before you eat it, or by having a glass of cold milk by your plate.

To make an amazingly sweet cake from the time of the dinosaurs, you’ll need:

Sauce
375 ml maple syrup (I used Grade A syrup, but Grade B will be great here too)
250 ml double cream
1 tablespoon cider vinegar
Pinch of salt

Cake
170 g caster sugar
90 g butter
225 g self-raising flour
2 teaspoons baking powder
180 ml milk
1 egg
1 teaspoon vanilla extract
¼ nutmeg, grated
Zest of 1 lemon

Preheat the oven to 180° C (350° F).

Bring the syrup, cream, vinegar and salt to the boil in a saucepan and immediately remove from the heat. Set aside.

Cream together the butter and sugar with an electric whisk in a large mixing bowl, until the mixture is pale and soft. Add the egg, vanilla extract, lemon zest and nutmeg to the bowl and beat in well with the whisk. Sieve the flour and baking powder in another bowl. Continue to whisk the creamed butter mixture on a medium to high speed, adding the milk and flour a tablespoon at a time until all the milk and flour are used up and the sponge mixture is light and fluffy.

Use a spatula to spread the sponge mixture in the bottom of a 20 cm square cake tin. Pour the sauce gently over the top. Don’t worry if it appears to disturb the sponge mixture – magic will happen as soon as you shut the oven door.

Put the cake tin on a middle shelf of the oven and bake for 45-50 minutes (it may take ten minutes or so longer – test the cake with a toothpick in the centre; if it comes out clean, the cake is done). Serve warm with an insulin drip.

Chocolate puddle pudding

This is a rich chocolate pudding, which makes its own sauce when cooked and rises like a chocolate sponge island in a syrupy chocolate sea. Your mother probably made chocolate puddle pudding. I’ve been asking around, and everybody’s mother seems to have had a similar recipe – and what sensible mothers they were, because this is rich and delicious, malevolently chocolatey and so quick and easy that my cats could make it (given opposable thumbs, the ability to read recipes and access to some weighing scales, an oven, bowls and…you get the idea). To serve six, you’ll need:

6 tablespoons cocoa powder
150 g self-raising flour
1 teaspoon baking powder
200 g vanilla sugar (or 200g caster sugar and a few drops vanilla essence)
30 g salted butter
75 g dark chocolate (use something with a high proportion of cocoa solids)
150 ml milk
150 g soft brown sugar
500 ml hot water

Preheat the oven to 180° C (350° F).

Measure the flour and vanilla sugar into a large mixing bowl with two tablespoons of the cocoa powder and the baking powder. Melt the butter and chocolate together, and when melted, add them to the bowl with the milk. Stir with a wooden spoon until everything is well blended, and spread the mixture (which should be a thick paste) into the bottom of a baking dish. (I used a 20×30 cm dish.)

Mix the soft brown sugar with the remaining four tablespoons of cocoa, and sprinkle them over the top of the sponge mixture. Pour over the hot water (this should be hot from the kettle but not boiling) and put in the oven for 45 minutes. The sponge pudding will rise through the puddle of chocolate sauce. Serve with vanilla ice cream or a big dollop of cream.

Currant cakes

I love currants. The little dried rabbit-dropping things, I mean, not the tart currants that we grow in England, which are all very well in Cumberland sauce and so on, but lack the sweet seductiveness that you really need for an excellent cake. The currants I am talking about are Zante currants, which are tiny, tiny dried grapes grown absurdly sweet in the Greek sunshine. They’re the fruit you’ll find in Eccles cakes, and they have a wonderfully sweet and mildly tangy flavour, quite different from other dried vine fruits.

Horrifyingly, especially if you share my tidy British habit of compartmentalising foods, I discovered when living in France that on mainland Europe nobody differentiates between currants, sultanas and raisins. If it’s small, dark and wrinkly, it’s called a raisin, so if you are in France and want some currants, you’re going to have to do a bit of light mime in the grocer if you want to buy proper, tiny Zante currants rather than horrible giant American golden raisins, which are processed with sulphur and taste rubbish. The golden raisin sometimes masquerades as a sultana in the UK too – beware.

I’ve iced these currant cakes with a really easy buttercream, which is deliciously mellow with the tartness of the dried fruit. To make about 18 cakes, you’ll need:

Cakes
100g softened butter
100g caster sugar
100g self-raising flour
1 teaspoon baking powder
2 medium eggs
50g currants

Buttercream
175g softened butter
350g icing sugar
2 tablespoons warm water

Preheat the oven to 200° C (400° F). Lay 18 little paper cake cases in bun tins, and beat all the cake ingredients together in a mixing bowl with an electric whisk for two to three minutes, until the cake mixture is pale, smooth and fluffy. Divide the mixture between the cases (they should each be about half-full).

Bake in the hot oven for between 15 and 20 minutes. Devotees of this blog should be familiar with the Dr Weasel Aural Method of cake testing – when your little cakes come out of the oven, bring an ear close to them and listen carefully. If the cake is making tiny prickling noises, it is not ready: return it to the oven for a couple of minutes. A finished cake is silent. As Emily points out in the comments, a finished cake may not be *entirely* silent. Minimal prickling noises are allowed – do not allow your cakes to carbonise.

Put the cakes in their paper cases on a wire rack to cool. While they are cooling, make the buttercream icing by using your electric whisk to beat the butter, water and icing sugar together until it too is pale, smooth and fluffy. Spread the icing on the cakes when they are cold, and decorate any way you like.

Chocolate fondue

Thanks for all the kind emails – I’m still recovering from the flu and am decidedly wobbly, but a whole lot better than I was at the start of the week. Just as well, because next week I’ll be in Helsinki, on the lookout for reindeer, vendace roe, rye bread and soused herrings.

Cooking’s been beyond me since my encounter with this horrible germ, and my tastebuds are still not giving any kind of sensible feedback to my brain – most things are still either tasteless or, oddly, extremely bitter. Happily, there’s one foodstuff that even the flu can’t ruin for me: chocolate. So it’s out with the new fondue set.

If you’re making your own chocolate fondue, try dipping cantucci, those hard little Italian biscuits; dried pear, marshmallows and fresh, ripe bananas are also great. I’m not a huge fan of strawberries in any chocolatey context; they’re too acid, especially out of season, to work well with chocolate. I’m aware that I’m in a minority here though – if you like strawberries dunked in chocolate, dip away.

To serve four, you’ll need:

250 g good quality dark chocolate
100 ml double cream
2 tablespoons Amaretto
Fruits, biscuits, fresh almonds etc. to dip

Hopelessly easy, this. Put your chocolate in a sealed bag and wallop the hell out of it with the end of a rolling pin, until it’s reduced to little bits. Stir the chocolate bits into the cream in your fondue pot, and melt together with the cream over a low heat on the hob, stirring all the time. Transfer to a low flame on the fondue stand and stir in the Amaretto. Proceed to fight over who gets the pink marshmallows.

Sticky toffee pudding

Way back in the early 1980s, my mother used to get a magazine (now sadly defunct) called A La Carte. It was some serious aspirational 1980s stuff – all glossy pages, gorgeous photos and recipes full of exotic (for the 80s) things like sun-dried tomatoes. Long after the rest of her collection had vanished, one issue of the magazine stayed downstairs on the cookery book shelves. It was Easter, so there was a fluffy rabbit frolicking in salad leaves on the front, and a bold headline saying ‘Lettuce play’. Page upon page of salad with more bunny porn followed – along with a recipe for something called an Ooey, Gooey Sticky Toffee Pudding – the sole reason for preserving this issue of the magazine for thirty years.

These were the dark days of the Falklands and the miners’ strike. Nobody else in Bedfordshire seemed very interested in food. At school and at my friend’s houses, pudding was always instant Angel Delight, a scoop of fatty, pink ice-cream or jelly. At home, it was different – where the other children were eating bowls of instant custard with a banana chopped into them, my lovely Mum was making sticky toffee pudding, and we had the most inventive salads in town.

To make sticky toffee pudding for six, you’ll need:

Pudding
150g stoned dates
250ml hot water from the kettle
1 tsp bicarbonate of soda
60g softened unsalted butter
60g caster sugar
2 large eggs
150g self-raising flour

Sauce
200g butter
400g soft brown sugar
1 vanilla pod (or a few drops of vanilla essence)
250ml double cream

Heat the oven to 180°C (370°F).

Chop the stoned dates finely with a small sharp knife and put in a bowl. Sprinkle over the bicarbonate of soda and pour over the hot water, stirring well. Set aside for ten minutes while you prepare the rest of the cake mixture.

Cream the butter and sugar together, then beat the eggs into the mixture. Gradually stir in the sifted flour, then fold in the date mixture. Pour the batter, which will be quite loose, into a greased, 20 cm square cake tin, and bake for 35-40 minutes, until a skewer comes out clean. The cake will have risen, but not dramatically – this is quite a dense pudding.

Make the sauce while the cake is baking. Melt the sugar and butter together with the vanilla pod and cook over a medium heat, stirring, for five minutes. Stir in the double cream and bring to a low simmer for another five minutes.

Make holes in the top of the cake with your skewer and pour over half of the sauce. Serve immediately with extra sauce to pour over at the table, and a jug of cold double cream. (Some like this dish with ice cream, but I like cream best.)

Brandysnaps

I’ve never met a person who doesn’t love brandysnaps. They’re a buttery, toffee-crisp, lacy bit of teatime royalty. Fox’s, the English biscuit people, started manufacturing these in the 1850s to sell to fairground traders, but they’re a much older recipe (the owner of Fox’s borrowed a family recipe from his neighbour in Yorkshire), which used to be cooked in the home. You can still buy them in packets – but they’re much, much nicer when they’re homemade.

There’s no brandy in the recipe – from what I can make out, brandysnaps never contained any at any point in their history. Some modern recipes will suggest that the cream you serve them with should have a couple of tablespoons of brandy whipped into it, but after some experimentation I’ve decided that this is overkill (and inauthentic overkill at that). The gentle spicing of the brandysnap can be overwhelmed by a strong-tasting filling, so I have used a simple Chantilly (which is just cream whipped with sugar and vanilla) alongside them. These fragile little gingery curls are delicious with cream and soft fruit as a dessert, but they’re also near-perfect eaten completely unadorned, alongside a cup of good coffee.

To make about 20 brandysnaps, you’ll need:

75 g caster (superfine) sugar
125 g golden syrup
125 g salted butter
90 g plain flour
1½ teaspoons ground ginger
Zest of one lemon

Start by measuring out the sugar in your measuring bowl, and spread it carefully over the bottom of the bowl. Then measure out the golden syrup into the same bowl, on top of the sugar. This will stop the golden syrup from sticking to your bowl, and will ensure that you don’t lose any because it’s adhering. Tip the sugar and syrup straight out into a small saucepan, add the butter to the pan and cook them all together over a low flame, stirring with a wooden spoon, until the butter is melted and you have a smooth paste. Don’t allow the mixture to boil. When it is smooth, remove the pan from the heat and tip in the flour, ginger and lemon zest. Stir vigorously until you have what looks like a smooth, thin batter.

Set the pan aside for about 30 minutes, until the mixture is cool, and heat the oven to 190° C (375° F). Grease a baking tin thoroughly.

You’re going to be cooking the brandysnaps four at a time -the mixture spreads out so four just about fill a baking tin, and you will have to curl them while they are still warm – handling more than four at a time is very difficult because they harden quickly, and if you cook more than one tray at a time, by the time you get to your fifth it is likely to have set solid.

Place four heaped teaspoons of the mixture, about four inches apart, on the greased baking tin and put in the oven for ten minutes, until the brandysnaps are bubbly and lacy. Remove the tin from the oven and allow the brandysnaps to cool for about a minute, until they are stiff enough to manoeuvre. Use a spatula to release each flexible brandysnap from the tin, and wrap them around the handle of a wooden spoon to create the tube shape. Cool on a wire rack. (If you want brandysnap baskets rather than curls, drape them over an upturned ramekin rather than wrapping them round a spoon.)

Repeat the process for the rest of the mixture.

I served my brandysnaps with Chantilly (150 ml whipping cream whisked into stiff peaks with 2 teaspoons of vanilla sugar, or 2 teaspoons of caster sugar and a few drops of vanilla essence) and blueberries. You can pipe the cream into the little tubes or serve it alongside them, but don’t fill them more than about half an hour before serving, or the brandysnaps will lose their crispness. Surprisingly, brandysnaps freeze very well once cooked, maintaining their crunch.

Pineapple upside-down cake

Pineapple upside-down cakeTwo cake recipes in a week! This is blog democracy in action – many of you have asked for more dessert recipes, so in response, I have been baking like a demon.

This is a handsome cake. The caramel and fruit layer on a pineapple upside-down cake looks positively jewel-like, and tastes glorious, soaking into the cake to add a rich moistness to an already toothsome sponge. If, like me, you significantly lack cake-decorating skills, you’ll like this recipe, which produces a foolproof but rather beautiful piece of baking. If you can get pineapple tinned in syrup rather than juice, use that for an extra kick of gloss and sweetness; however, if all that’s available near you is the kind in juice, that will work perfectly well. (It’s what I used here.)

To make one pineapple upside-down cake, you’ll need:

50g salted butter
50g soft brown sugar
1 can pineapple rings (in syrup if possible)
Glacé cherries
3 tablespoons milk
175 g softened unsalted butter
175 g caster (superfine) sugar
3 large eggs
175 g self-raising flour
1½ teaspoons baking powder
Vanilla essence

Pineapple upside down cakePreheat the oven to 180° C (350° F).

Begin by greasing and lining a 25cm round cake tin with greaseproof paper. Don’t use a springform tin – there is caramel in the pineapple layer which will dribble out of a tin with a loose bottom when heated.

Prepare the caramel by melting the salted butter, a couple of drops of vanilla essence and the soft brown sugar together in a small pan and boiling hard for five minutes. (Watch out here – the caramel will be very hot.) Pour the caramel into the bottom of the lined tin, and tip the tin carefully to make sure that it covers the base well.

Arrange the pineapple rings in a tight pattern on the bottom of the tin (see pictures), and put a glacé cherry in the middle of each one. Set the tin aside while you prepare the cake batter.

Put the milk, unsalted butter, sugar, flour, eggs and baking powder in a large bowl and beat with an electric mixer for two minutes, until the batter is pale and stiff. Spread the batter out over the pineapple pieces with a spatula and bake the cake for 50 minutes, until a skewer pushed into the centre of the cake comes out clean.

Allow the cake to cool for about ten minutes in its tin, until it is cool enough to handle (this sponge can be quite fragile when very hot), then place a plate over the top of the cake tin, hold it there firmly and turn the whole assembly upside down, so the cake slips out, upside-down, onto the plate. Slide the cake off the plate onto a cooling rack until it is completely cold.

Chocolate fudge cake

Chocolate fudge cakeIcing a cake neatly is a stressful task, so a recipe like this, where a soft, fudgy icing is just slathered all over the cake with a spatula is much more fun than obsessional piping. The cake in the middle of all that icing is a lovely light, moist spongy affair, made rich with plenty of butter and cocoa. This is probably not great for your New Year’s diet, but I’d suggest doing what Dr Weasel is doing today, and making one to take to the office in order to scotch the weight-loss ambitions of your colleagues.

You’ll need:

Cake
3 tablespoons cocoa
6 tablespoons boiling water
175 g softened unsalted butter
175 g caster (superfine) sugar
3 large eggs
175 g self-raising flour
1½ teaspoons baking powder

Fudge icing
50 g softened unsalted butter
35 g cocoa
3 tablespoons milk
225 g icing (confectioner’s) sugar

Preheat the oven to 180° C (350° F). Grease and line a 25cm round cake tin – I like to use a springform tin, which makes turning the cake out later much easier.

Mix the cocoa with the hot water from the kettle in a mixing bowl, and leave aside to cool. Sift the flour into the bowl and add the butter, sugar, eggs and baking powder. Beat with an electric whisk on high for about two minutes, until the mixture is stiff and pale. Spoon into the lined cake tin and bake for 35 minutes. Check for done-ness by pushing a skewer into the middle of the cake. If it comes out clean, with no chocolatey bits adhering, the cake is done. Turn out onto a metal rack and remove the greaseproof paper to cool.

To make the icing, melt the butter in a small saucepan and stir in the cocoa. Cook, stirring well, for about a minute. Remove from the heat and stir in the milk and icing sugar. Beat with a wooden spoon until the mixture is smooth, and cool until thick enough to spread over the cooled cake.

If you like, you can cut the cake in half horizontally at this point and glue the halves together with some of the icing. Dr Weasel, who is in charge of cakes in our house, decided to use the fudgy mixture to ice the top and sides of the cake – and very delicious it was too.

Panna cotta with fresh raspberries

Panna cottaPanna cotta is Italian for cooked cream. It’s a light mixture of cream, milk and sugar (along with some honey in my version – I love the combination of milk and honey), set with gelatine and served cold. If you see panna cotta moulds for sale, buy a few – they make the job much easier. If you don’t have panna cotta moulds, ramekins work well too, but you will have to be a bit more patient when it comes to turning the set puddings out.

The vanilla is important here – I’ve used both vanilla sugar (sugar which has been stored with a vanilla pod buried in its jar) and the seeds from a vanilla pod in this recipe. Vanilla is expensive, but there’s nothing like the fragrance of the real stuff in this dessert. If, however, you can’t find any or prefer not to shell out for the real thing, a few drops of vanilla essence will work here too.

To serve six, you’ll need:

1 tablespoon powdered gelatine (from the cake-making shelves at the supermarket)
200 ml whole milk
600 ml double cream
Seeds from one vanilla pod
5 tablespoons honey
1 tablespoon vanilla sugar
Pinch salt
Raspberries or strawberries to garnish

Put the milk in your heaviest-bottomed saucepan and sprinkle the surface with the gelatine. Leave for ten minutes away from the heat for the gelatine to soften.

When the gelatine has softened, put the pan on a low heat and, stirring continually, warm until the milk is heated through and the gelatine dissolved. The milk should not boil at this stage. Add the cream, vanilla seeds (slit the pod down its length and use the handle end of a teaspoon to scrape all the seeds out – you can keep the pod and put it in another sugar jar), honey, vanilla sugar and salt to the pan and stir until the sugar has dissolved.

Divide the mixture between six panna cotta moulds. Cover and put in the fridge until set (it’s best to leave the mixture at least overnight to make sure it’s completely firmed up). To turn out the moulds, dip their undersides in water from the kettle to loosen the mixture and pop a plate over them, then turn the whole assembly upside-down. Decorate with berries and serve chilled.

Elderflower fritters

I spent yesterday making this year’s batch of elderflower cordial. The wet weather earlier this year in the UK seems to have been a great thing for the elder bushes, which are positively groaning under the weight of all their flowers. The flower heads were so heavy with creamy pollen that I picked six extra heads to turn into fritters.

Foraging is brilliant. There is nothing like the warm glow you get from eating food which is, to all intents and purposes, free; it’s also a great pleasure to know that the food you’re eating is from a healthy environment (be careful to pick your elderflowers well away from any roads, and, as always, leave plenty of flowers on the bush – you’ll want them to turn into berries later in the year) and is perfectly fresh. Look for blossoms which are in full flower, and which have not yet started to brown or drop petals. For fritters, try to pick the heaviest, most pollen-filled flower heads you can find about three hours before you cook them. Pop them in the fridge in a plastic bag. Their scent will develop after picking and they’ll be very perfumed when you come to cook them (don’t leave the flowers in the fridge any longer than three hours or their scent will start to turn in the direction of cat wee).

To make six large fritters, you’ll need:

1 egg
200g flour
50g sugar
1 pint (450ml) milk
Six large elderflower heads
Flavourless oil to fry
1 tablespoon honey
Juice and zest of 1 lemon

Using a fork, beat the egg, flour, sugar and milk together with the lemon zest. Squeeze the lemon and put its juice aside. Let the batter rest for an hour.

In a large, non-stick frying pan, heat about ½ cm of oil over a high flame. Check the elderflowers for any arthropod inhabitants, but don’t wash them (you want to hold on to that pollen). Hold a head of elderflowers by the stalk and dip the flowers into the thick batter, then drop them, flower side first, into the hot oil. Fry the fritters in pairs so you don’t crowd the pan; they’ll brown better this way.

Turn the fritters after about two minutes – the flower side should be a golden, crisp brown. Fry until the stalk side is also crisp, then remove from the pan and drain on kitchen paper.

Remove to a serving plate and scatter the perfumed fritters with some fresh elderflowers, pulled from their stalks, and drizzle with the honey and lemon juice. Serve piping hot and crisp.