Seaside snacking in Blakeney

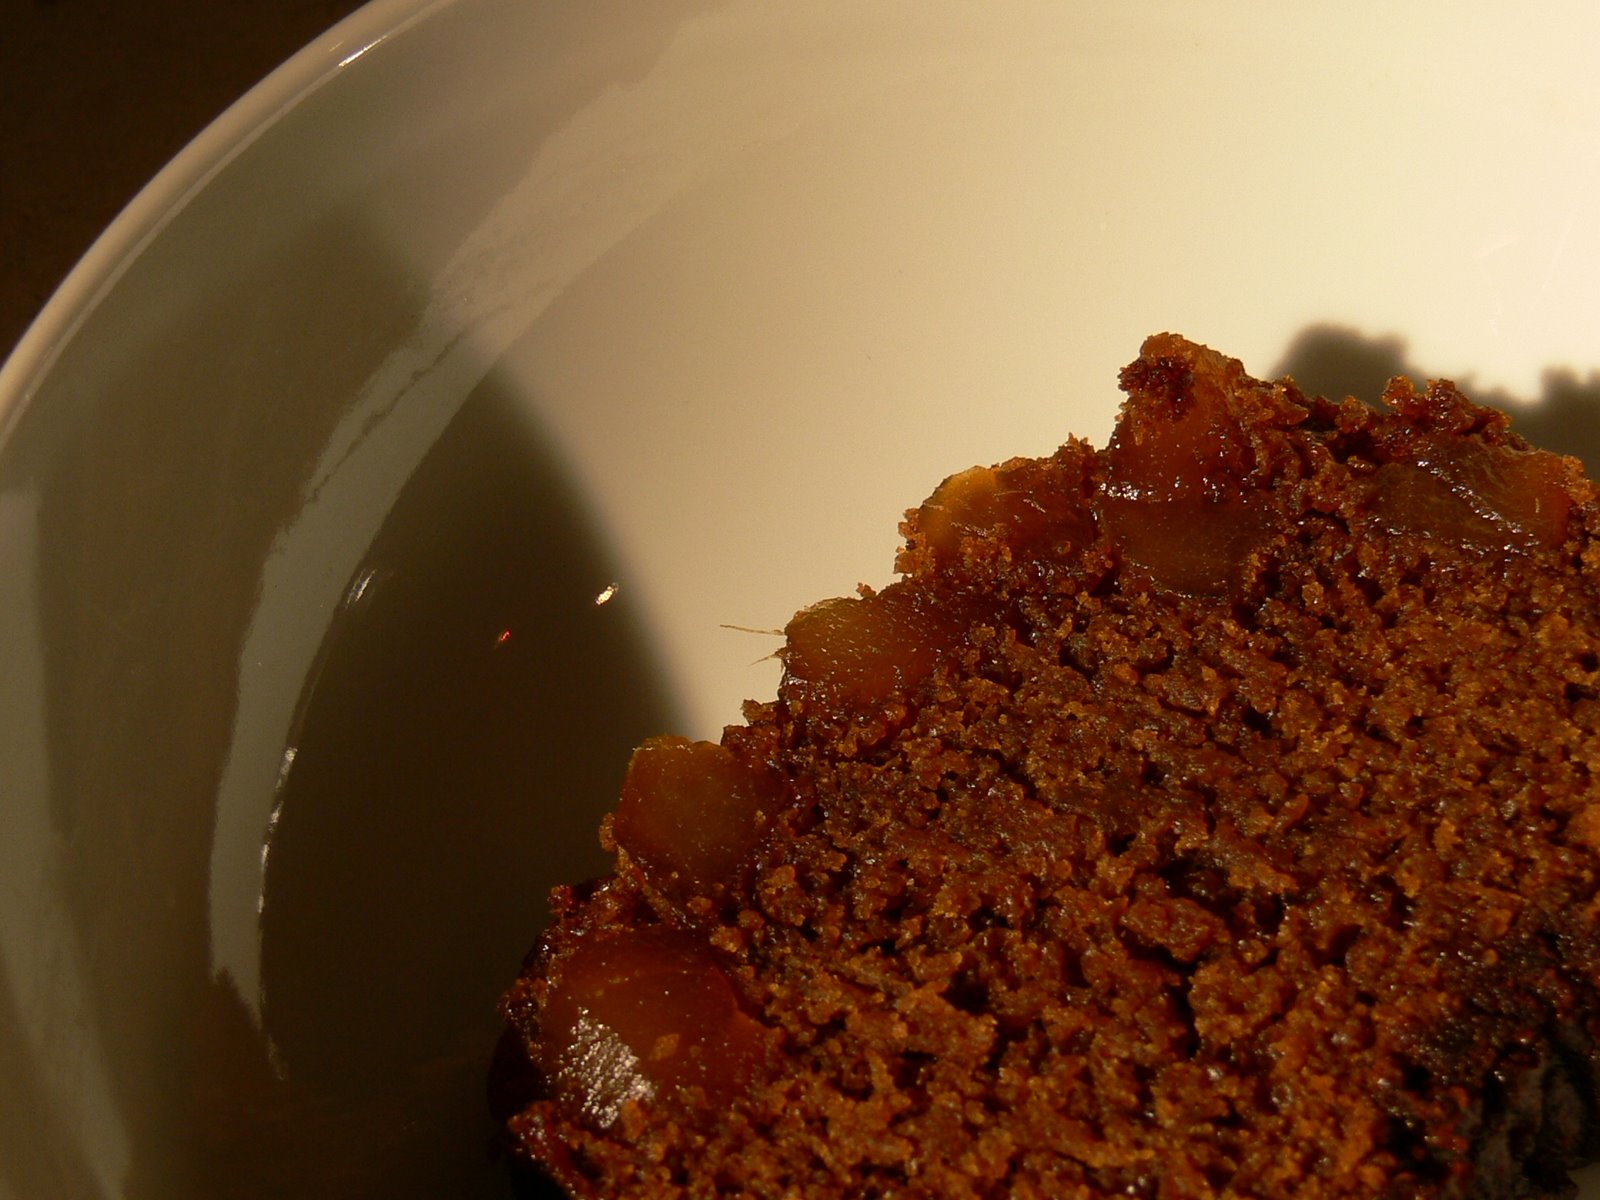
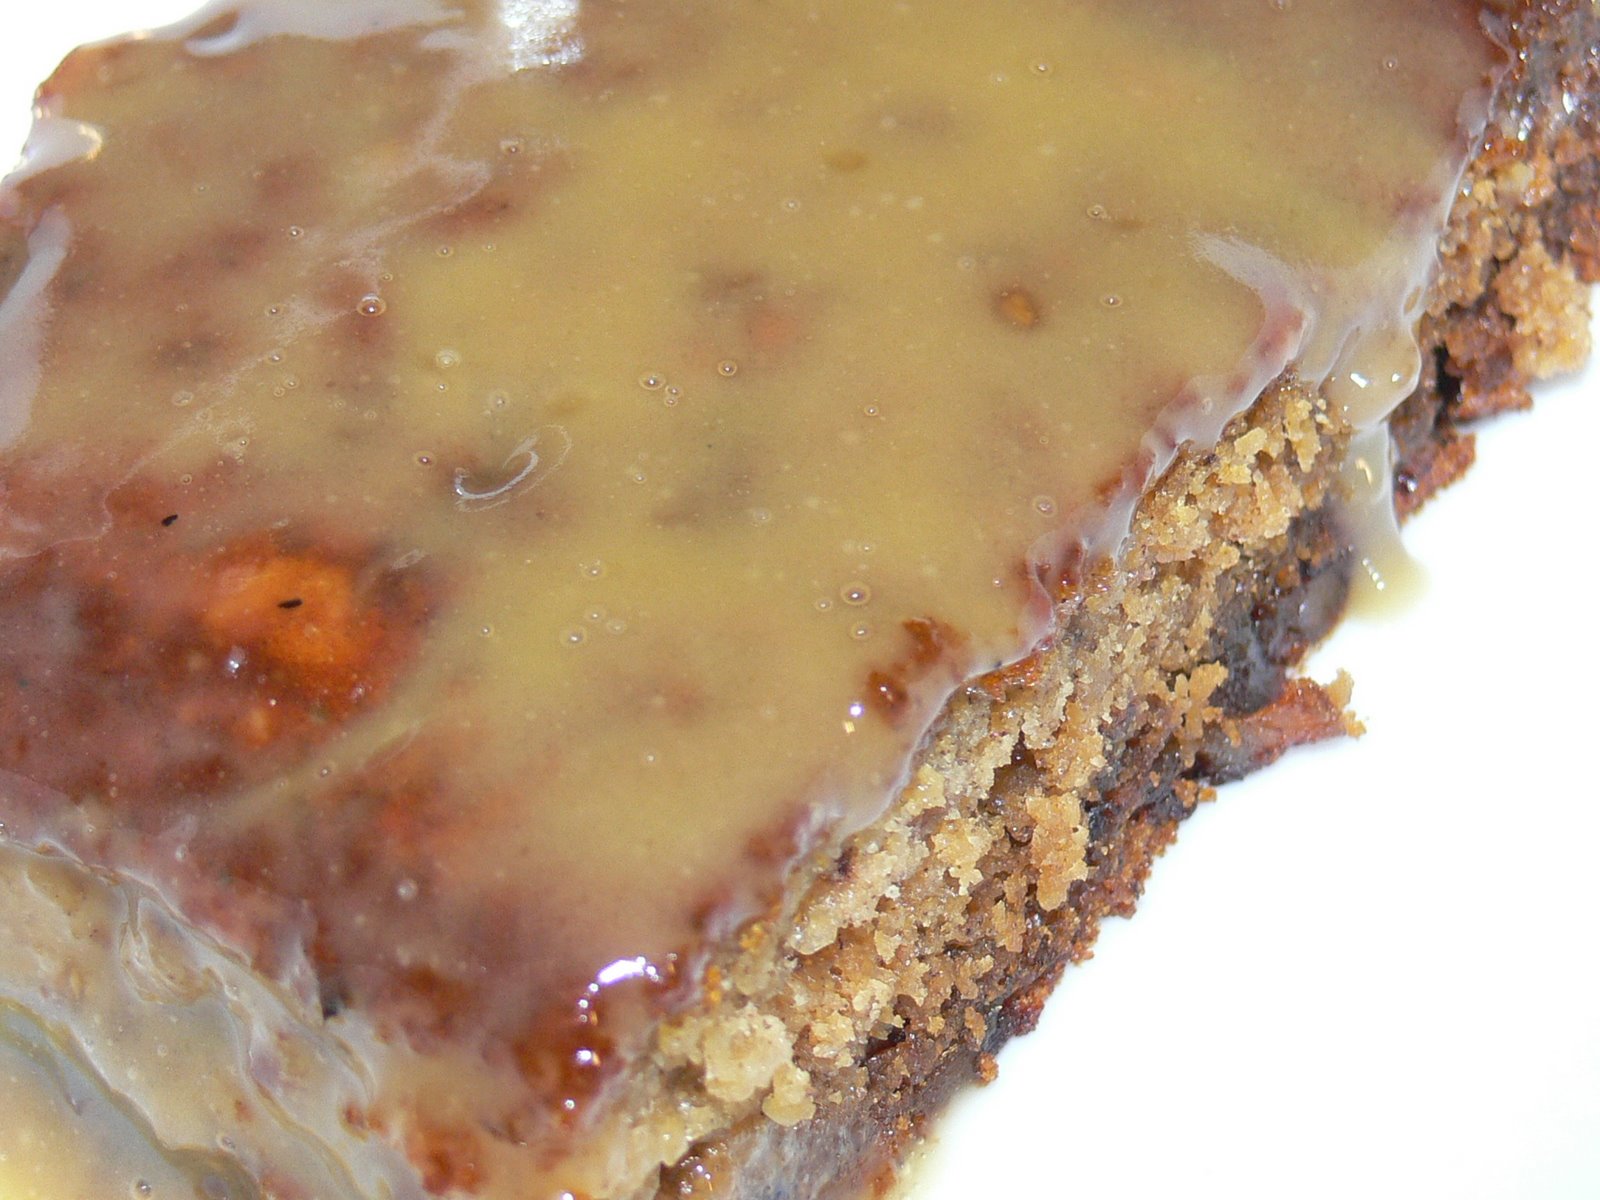
I really like the Norfolk coast at this time of year – all bluster, leaden skies and empty salt flats. We were surprised to find Blakeney unexpectedly packed with visitors at half term weekend, and couldn’t find a lunch table at any of the local restaurants. Not such a disaster, it turns out: we equipped ourselves with bottles of dandelion and burdock and pork pies at Blakeney Delicatessen at the top of the High Street, where I also found myself hypnotically drawn to to a moist, sticky slice of orange syrup cake.

Down the hill to the quayside, where we ate our impromptu picnic. Mopping up the cake crumbs to the accompaniment of howls from a little boy whose fishing net had just fallen into the harbour, we looked up to notice that the fish van in the car park at the bottom of the High Street was open and doing good business. Twelve oysters later, we also bought half a pint of brown shrimp (skins on), wrapped up in paper. We slipped the shrimp into a plastic bag, popped them in a pocket and started to hike out along the salt flats. The perfect afternoon: walk for an hour through National Trust coastal landscape, sit on your coat with a good friend, and share a bag of sweet, sweet shrimp. These tiny brown shrimp are best picked up in the hand, the head and tail pinched together between your fingers, and the flesh nipped off between your teeth. The shells are fine and edible; a shrimp with the shell still on will be sweeter and more delicious, although the nice man at the fish van will also sell you peeled shrimp if that’s more your thing.

Back to the village, and we found a nice old gentleman in a booth next to the medieval guildhall, selling seaside sweeties. He sold me a couple of sticks of rock – if you’re not familiar with the English seaside, you’re missing a treat in sticks of rock. A brittle, insanely sweet cane of boiled sugar and peppermint, pulled and folded when still hot until it becomes slightly aerated, rock usually has the name of the town you’ve bought it in written through its length in pink, sticky letters. The words are folded into sticks of rock by hand, a bit like making (deliciously minty) millefiori glass – it’s quite a skilled job, and some of the people making rock have been doing it for fifty years or more.

Up the hill again to The Moorings, a local bistro, for afternoon tea (in my case a toasted teacake and a pot of Earl Grey – the iron-stomached Dr W managed a whole cream tea). We went to the chandler’s to buy a souvenir fridge magnet shaped like a lighthouse, and waddled back to the car via a church fete where I bought a pudding basin. It shouldn’t be the case that a day spent hiking over salt marshes should end with you feeling fatter than when you started, but I managed it with aplomb.

Spiced parmesan parsnips

One of my very favourite Delia Smith recipes is this lovely way with roast parsnips, where she tosses them in grated parmesan and flour before cooking. My Grandma used to make Delia’s parsnips every Christmas, and there was always a fight over who got the last few.

It’s funny, really; in the UK, parsnips are a very ordinary accompaniment to a roast dinner, a slightly posh vegetable to be rolled out only on Sunday lunchtimes. Elsewhere in the world, the parsnip is considered more appropriate for feeding animals than people. Part of this is down to our climate. Parsnips need exposure to frost for their flavour to be fully developed, so in warmer places the parsnip is a less impressive beast, weedy and comparatively flavourless – hence the French tendency to feed them to pigs rather than people.

This is my version of the Delia recipe my Grandma used to cook. I’ve changed the fat used – you’ll get a much better crisp using dripping, and the flavour you’ll achieve with a good butcher’s pot of beef dripping is amazingly good if you serve these next to roast beef . I’ve also upped the ratio of parmesan and added some curry powder (always unbelievably good with a parsnip) and lots of lemon zest and fresh basil, which lifts the whole dish. Result: crunchy, savoury parsnips, sweetly fluffy inside and amazingly crisp outside – and so delicious you too will be fighting over the leftovers.

To serve eight with a roast, you’ll need:

1.25kg parsnips
175g plain flour
100g parmesan, grated finely
1 tablespoon medium curry powder (I like Bolst’s)
Grated zest of 2 lemons
1 heaped teaspoon salt
3 large tablespoons beef dripping
3 tablespoons chopped fresh basil

Preheat the oven to 200°C (400°F). Put a heavy roasting dish containing the dripping in the oven as it heats up. Combine the flour, parmesan, curry powder, salt and lemon zest in a large mixing bowl. Peel the parsnips and cut them in half across their width. Cut the top half of each parsnip into four long pieces, and the bottom half into two.

Cook the prepared parsnips in boiling water for five minutes. Remove the saucepan from the heat and drain the parsnips a few at a time, rolling the steaming-hot parsnips in the flour mixture and setting aside on a plate. When all the parsnips are coated thoroughly, remove the roasting dish from the oven and arrange the parsnips in the hot fat (careful – it may spit). Put the dish of parsnips high in the oven for 20 minutes, turn the parsnips and put back in the oven for another 20 minutes.

When the parsnips are ready, they’ll be a lovely golden colour. Remove them to a serving dish and sprinkle generously with basil.

Toad in the hole with onion gravy

Our friend Simon (the same Simon that hates tofu) is a man of set habits. Every Friday, he makes toad in the hole for supper. He has been doing this for about fifteen years now, and has developed some strongly held feelings about how the perfect toad is constructed. I quote directly from a very involved post he wrote about doing the Listener crossword a while ago – the toad recipe pops up somewhere in the middle when he gets briefly stuck on 29 across.

“All these celebrity chefs publish recipes for toad-in-the-hole, and they are, without exception, rubbish. Most involve too many eggs, and end up the texture of leather. So, here is the definitive recipe – bear in mind I’ve made this every Friday night for about 15 years, so I know what I’m talking about…

Get a metal baking tin, preferably non-stick. Rectangular is best, about 30cm by 40cm. Put a pound of Tesco’s Finest Pork & Herb sausages in it, along with a large splash of vegetable oil (or a lump of beef dripping if you’re daring.) Put it in the oven at 200 degrees C (180 degrees if fan-assisted) – no need to preheat, just bung it in from cold.

Put 4 oz of cheap plain flour into a glass jug. Add a pinch of salt, and break in an egg. Add about a quarter of a pint of full-fat milk, and whisk to a smooth paste – the best tool is a French whisk, those things that look like a big metal spring. Once you’ve got a smooth paste, add another quarter pint of full fat milk and whisk like mad to get some air into it. Leave to stand for 20 minutes, by which time the sausages should be browning and the fat should be hot.

Rapidly remove the pan from the oven, pour in all the batter, and quickly return to the heat. Leave for about 25-30 minutes, until the pudding has risen and is golden brown. Remove from the tray and serve with lashings of HP Fruity sauce. Vegetables are unnecessary. The quantity above serves one, with a couple of cold sausages left over for breakfast on Saturday.”

I am grudgingly grateful, because Simon’s Yorkshire pudding batter, which forms the ‘hole’ part of a toad in the hole (sausages, for some reason, are the ‘toad’ bit – English food etymology baffles me) is bleedin’ terrific. Simon – your basic proposal is sound, I applaud your use of beef dripping and the batter is, admittedly, fantastic – but HP Fruity? Tesco’s Finest sausages? Vegetables are unnecessary? I made my toad in the hole to Simon’s basic recipe using some sausages from the butcher’s, but stirred a tablespoon of grainy Dijon mustard and a teaspoon of chopped sage into the batter just before pouring it into the tin. I also made an onion gravy to moisten the lovely puffy batter so that I could avoid the HP Fruity, and stir-fried a thinly sliced Savoy cabbage with some lardons of bacon fried until crisp. We found that with the gravy and bacon-spiked cabbage, the amounts above were more than enough for two. (This is not to say we did not clean our plates. Toad in the hole just invites you to overeat.)

Onion gravy is fantastic stuff. It’s a delicious and incredibly savoury way to lubricate those meals that don’t produce much in the way of liquids themselves (try some with a pork chop or over naked, hole-less sausages some time). Just make sure you’ve got some decent stock hanging around. If you don’t have any home-made stock, try Knorr’s concentrated liquid stock in the brown bottles – it’s really pretty good. To make enough for two, you’ll need:

2 large onions
½ teaspoon salt
1 tablespoon beef dripping (or goose fat)
2 teaspoons plain flour
300 ml chicken stock
1 glass white wine
1 tablespoon dark soy sauce

Melt the beef dripping in a frying pan and saute the sliced onions with the salt for about half an hour, until they are turning a lovely brown. Sprinkle the flour over and stir well to make sure it’s distributed well around the pan, and pour over the stock, stirring slowly all the time. Pour the wine in and bring to a gentle simmer for five minutes, until the gravy is thickened and the alcohol has burned off. Stir in the soy sauce and serve.

I much prefer to use dark soy for gravy-browning purposes – those browning granules you can buy don’t add anything at all in the way of flavour, where dark soy will give a rich background (which doesn’t taste recognisably Chinese) to your sauce along with its great colour.

Bubble and squeak

Update, Jan 2009: Gordon Brown has just announced that bubble and squeak (or, specifically, rumbledethumps, the Scottish name for the dish) is his favourite meal. I’ve gone right off the stuff.

I mentioned to a group of friends from America that I was planning on cooking bubble and squeak for supper. They all chorused: “What the hell?” One said that the name suggested the boiling of mice. I suspect that this is one of those recipes which needs a short introduction.

Bubble and squeak is a traditional English supper dish made from the leftovers of a roast dinner. It should always contain potatoes and a brassica (I like spring cabbage for its sweetness, but other, more robust cabbages are often used, and some people like – gulp – Brussels sprouts). There is usually some meat – often whatever you roasted the night before, sometimes anointed with a little gravy. The idea is that first the potatoes and cabbage will have been boiled (bubble), and that when packed down hard into a sauté pan, the mixture should squeak.

What I cooked strayed pretty far from tradition – I didn’t used leftover boiled potatoes, but grated some raw ones, rosti-style. I didn’t have any leftovers from a roast, so I used some lovely smoky lardons of bacon and a dollop of beef dripping – a fat you can buy from your butcher in tubs and should always have in your fridge. Along with some sweet cabbage, spring onions and plenty of pepper and nutmeg, you’ve got a panful of fried English goodness fit for the Queen.

To serve four as an accompaniment for some good sausages, you’ll need:

6 medium potatoes
1 sweetheart cabbage
10 large spring onions (scallions)
150g smoked bacon lardons
2 tablespoons beef dripping
A generous grating of nutmeg
Salt and pepper

A note here – if you’re using leftover boiled potatoes, just mash them roughly into chunky bits with a fork before starting, rather than grating and squeezing them, and reduce the cooking time by five minutes on each side.

Put the lardons in a dry frying pan and cook over a medium temperature, turning occasionally, until golden (about ten minutes). Set aside.

Grate the potatoes. You don’t need to peel them first. The easiest and quickest way to do this is to use the grating blade on your food processor. Take handfuls of the grated potato and squeeze it hard over the kitchen sink. A lot of liquid will be forced out. Put the squeezed potato shreds in your largest mixing bowl and fluff them up with your fingers so they’re not in squeezed blocks any more – this will make mixing the other ingredients with them easier later on.

Shred the cabbage finely (a bread knife is, for some reason, much easier to shred a cabbage with than a cook’s knife). Shred the spring onions finely too. Use your hands to mix the cabbage, spring onions and lardons thoroughly with the potato, adding about a teaspoon of salt, a generous grating of nutmeg and plenty of freshly ground black pepper.

Heat a tablespoon of dripping in a large, non-stick frying pan over a high flame until it begins to shimmer. Pile the bubble and squeak mixture into the pan and use a spatula to push the mixture into a rosti-like patty, packing it down hard into the edges of the pan. Lower the flame to medium/low, and leave to cook for 20 minutes.

When 20 minutes are up, you’ll notice that the vegetables on the top surface of the bubble and squeak are turning translucent. Put a large plate on top of the frying pan and turn the whole arrangement upside-down, so the bubble and squeak turns out neatly onto the plate. Turn the heat back up, add the remaining tablespoon of dripping and, when it is shimmering, slide the bubble and squeak back into the pan, uncooked side down, turn the heat down to low and cook for 20 minutes.

Serve with some good butchers’ sausages and some apple sauce, preferably while wearing a bowler hat or other symbol of Britishness.

Gingerbread

Massive apologies for the gap in posting. Something dreadful happened: Dr W bought me a copy of Spore, and my week subsequently vanished. It wasn’t just the week that disappeared – with it went my ability to sleep or get anything besides evolving, building cities, murdering pirates, searching for the Grox and colonising several star systems done. Still – I’m back now, and the really good news is that next week I will be blogging from Montreal, where I’ll eating at Toque! (apparently one of Canada’s best restaurants), Au Pied de Cochon (foie gras, duck, pigs’ feet, poutine), Schwartz’s Charcuterie Hebraique and plenty of other interesting spots, as well as hunting down some markets and delis. Spore is not coming with me to Montreal, so I’m all yours. This time, I’ve booked a suite hotel, specifically because it came with a kitchen. How many times have you been on holiday and found yourself antsy because you don’t have a fridge or oven to keep or cook that amazing and fascinating thing you found someone selling?

Anyway. Onto the gingerbread. This is a southern English gingerbread, not the northern parkin, which usually includes oatmeal along with the treacle. This gingerbread is a lovely dense, moist, dark cake, which will keep perfectly for more than a week if you wrap it tightly in greaseproof paper and tinfoil. Don’t eat this on the day that you make it – wrap it up and put it to one side for a day, and your gingerbread will become even moister and stickier overnight.

The pieces of crystallised ginger will sink in the tin, but this actually creates a very pretty jewel-like layer of ginger at the bottom of the gingerbread loaf. Turn it upside-down to serve so the jewelled surface is on top. To make gingerbread to fill a 1l loaf tin, you’ll need:

110g golden syrup
110g treacle
110g soft brown sugar
280ml milk
230g self-raising flour
1 ½ teaspoons bicarbonate of soda
1 teaspoon ground ginger
1 teaspoon ground cinnamon
½ teaspoon ground cloves
1 teaspoon ground mixed spice
110g salted butter
1 egg
150g crystallised ginger in syrup, drained and chopped

Preheat the oven to 180°C (350°F).

Grease the bowl of your weighing scales, and measure out the treacle and syrup. Pour them into a saucepan (patting yourself on the back for having had the foresight to grease the bowl) and warm gently, until the mixture reaches body heat. In another pan, dissolve the sugar in the milk over a low heat and set aside.

Sieve the flour, spices and bicarb together, and rub the butter into the mixture, as if you were making pastry, until you have a fine mixture resembling breadcrumbs. Add the ginger pieces and mix thoroughly. Use a balloon whisk to beat the milk and sugar mixture, then the treacle and syrup mixture, into the flour. Finally, beat the egg into the gingerbread batter with your whisk.

Pour the mixture into a greased and lined loaf tin, and bake for 1-1¼ hours, until a toothpick inserted into the middle of the gingerbread comes out clean. Cool in the tin, turn out and wrap tightly for 24 hours before eating.

Asparagus with hollandaise sauce

Isn’t eating at this time of year brilliant? The rhubarb is still sprouting away, and now the asparagus is shooting up as well. If you live in Cambridgeshire, it’s well worth making a trip to Burwash Manor Barns in Barton, just outside Cambridge, where they grow tonnes of the stuff. It’s picked fresh daily and sold on-site at the Larder (a very nice deli), where you’ll find a lady outside trimming the stems of an enormous heap of asparagus fresh from the fields, and packing it in wrappers for sale. If you cook it as soon as you get home so the sugars don’t have a chance to turn into starch, you’ll find it amazingly sweet. Supermarket (and, sadly, market) asparagus is never available this fresh.

English asparagus is a real delicacy. Unlike asparagus grown in hotter climates, it pops up out of the ground relatively slowly, allowing the plant to build up a much greater concentration of sugars. Burwash asparagus is available as Class I and Class II (50p cheaper than the Class I this year) – I’d recommend the Class II packs, which taste exactly the same as the Class I asparagus, but contain spears which are a bit bendier than the ruler-straight Class I. (See picture for extent of bendiness.) The thickness of spear you choose is entirely a matter of personal taste, but do make sure that all the asparagus that you steam is the same thickness, or else it won’t cook evenly.

Of course, dressing your asparagus with melted butter or just dipping each spear into the yolk of a soft-boiled egg makes for a perfectly delicious starter. That said, dressing them with a hollandaise sauce – essentially just butter and yolks with an acidic spike of reduced vinegar – somehow works out to be about ten times as delicious as either butter or yolk on their own.

Hollandaise sauce is a rich emulsification of butter and good vinegar (or lemon juice in some recipes), held together by egg yolks. I always add a little boiling water to loosen the sauce and prevent it from becoming too solid – a very thick hollandaise can be overpoweringly rich.

Making hollandaise isn’t as intimidating or difficult as some make out, but it will need your full attention, so you need to make sure the answering machine gets any phone calls and ignore any cries of ‘I can’t find my shoes!’ from the family for the ten minutes or so it takes to make.

Hollandaise is cooked at a very, very low heat. In order to stop the yolks from getting too hot and turning into an omelette, you’ll be making the sauce in a bain marie or double boiler. I don’t own one of the expensive dedicated double boilers – sitting a mixing bowl on the rim of a pan part-filled with simmering water works just fine and doesn’t take up any extra precious cupboard space. To dress asparagus for four, you’ll need:

2 egg yolks
2 tablespoons boiling water
3 tablespoons good white wine vinegar (I used Maille, which, for no very good reason, keeps turning up at my local branch of TK Maxx.)
225g (half a pat) good butter
2 peppercorns
1 bay leaf
Salt to taste

The quality of your butter is all-important here. I used Bridel from Normandy. Bridel or Beurre d’Isigny is fantastic here because of its rounded and smooth flavour.

Make sure the water for steaming the asparagus is ready and boiling on the hob as you make the sauce – you’ll need a couple of spoonfuls of it for the hollandaise. Throw the asparagus into the water and put the lid on as you start to whisk the butter into the hollandaise – it only wants a little cooking, and should be bright green and ready when you finish the sauce.

Put the vinegar in a small pan with the peppercorns and bay leaf, and simmer it gently until it has reduced to about a tablespoon-full. Remove from the heat but keep warm. Melt the butter and put it in a warm jug.

Place a mixing bowl on top of a saucepan part-filled with water. The water should not touch the bowl. Bring the water to a simmer while beating the egg yolks vigorously with a hand whisk in the bowl. As the bowl warms, you will notice that the yolks start to thicken. Add a tablespoon of the boiling water to the yolks and continue beating until they begin to thicken again. Add another tablespoon and beat until the yolks are thickening once more, then add the vinegar with the bay and peppercorns removed, beating all the time until the sauce starts to thicken up again.

Pour the butter into the egg mixture in a very thin stream (as if you were making mayonnaise). Continue to whisk as you pour until all the butter is amalgamated, then remove the bowl from the heat. Taste for saltiness and acidity. If you want a little more bite to the sauce, squeeze in a few drops of lemon juice. Remove the asparagus from its water and serve with the sauce either drizzled over or as a dip.

Hollandaise sauce freezes well – when you want to use it, just bring it back to room temperature slowly.

Sticky toffee pudding

Way back in the early 1980s, my mother used to get a magazine (now sadly defunct) called A La Carte. It was some serious aspirational 1980s stuff – all glossy pages, gorgeous photos and recipes full of exotic (for the 80s) things like sun-dried tomatoes. Long after the rest of her collection had vanished, one issue of the magazine stayed downstairs on the cookery book shelves. It was Easter, so there was a fluffy rabbit frolicking in salad leaves on the front, and a bold headline saying ‘Lettuce play’. Page upon page of salad with more bunny porn followed – along with a recipe for something called an Ooey, Gooey Sticky Toffee Pudding – the sole reason for preserving this issue of the magazine for thirty years.

These were the dark days of the Falklands and the miners’ strike. Nobody else in Bedfordshire seemed very interested in food. At school and at my friend’s houses, pudding was always instant Angel Delight, a scoop of fatty, pink ice-cream or jelly. At home, it was different – where the other children were eating bowls of instant custard with a banana chopped into them, my lovely Mum was making sticky toffee pudding, and we had the most inventive salads in town.

To make sticky toffee pudding for six, you’ll need:

Pudding
150g stoned dates
250ml hot water from the kettle
1 tsp bicarbonate of soda
60g softened unsalted butter
60g caster sugar
2 large eggs
150g self-raising flour

Sauce
200g butter
400g soft brown sugar
1 vanilla pod (or a few drops of vanilla essence)
250ml double cream

Heat the oven to 180°C (370°F).

Chop the stoned dates finely with a small sharp knife and put in a bowl. Sprinkle over the bicarbonate of soda and pour over the hot water, stirring well. Set aside for ten minutes while you prepare the rest of the cake mixture.

Cream the butter and sugar together, then beat the eggs into the mixture. Gradually stir in the sifted flour, then fold in the date mixture. Pour the batter, which will be quite loose, into a greased, 20 cm square cake tin, and bake for 35-40 minutes, until a skewer comes out clean. The cake will have risen, but not dramatically – this is quite a dense pudding.

Make the sauce while the cake is baking. Melt the sugar and butter together with the vanilla pod and cook over a medium heat, stirring, for five minutes. Stir in the double cream and bring to a low simmer for another five minutes.

Make holes in the top of the cake with your skewer and pour over half of the sauce. Serve immediately with extra sauce to pour over at the table, and a jug of cold double cream. (Some like this dish with ice cream, but I like cream best.)

Celeriac purée

Celeriac pureeThese days, few of the vegetables you’ll find in the supermarket are truly seasonal. We’ve got year-round mange tout peas (I remember the days when my parents grew them in the garden – the season only lasted for about about a month, but my, were we sick of peas at the end of that month); year-round broccoli and year-round cauliflower. Spring cabbage appears in the shops in summer, autumn and winter, and out-of-season asparagus is there whenever you want it. It doesn’t taste of anything, but if you want it, it’s there.

Happily for those outraged by man’s twisting of nature, here are a few season-specific things that you won’t find all year round. Some English root vegetables in particular are only easy to find in the winter (for the most part – there’s always bound to be someone bussing turnips in from Australia in high summer), and they’re wonderful in the cold months. It makes sense really – these roots are the energy store of the plants, and so they’re full of sugars and other nutrients.

Celeriac is one of my favourite winter roots. It’s the taproot of a celery plant (not the same one you use to dip in your hummus or to stir your Bloody Mary), but tastes much richer, deeper, creamier and sweeter than celery. I know people who can’t bear celery, but who will happily munch on celeriac; they’re really very different flavours. This vegetable isn’t readily found outside Europe, but if you are an American reader and happen upon one in a market, snap it up so you can impress your friends with your cosmopolitan cooking.

Although modern ‘best before’ stickers tend to suggest you can only keep your celeriac for a week or so, the root will actually keep in the fridge for a month or so if wrapped in plastic to keep it nice and humid- inside your fridge it is dark and cold, which fools the root into thinking it’s still underground – the celeriac won’t be any the worse for it.

celeriacThe celeriac is a knobbly, rough-skinned vegetable, and its flesh is very hard. Make sure you have a very sharp knife to remove all the skin and nubbly bits, and to cut through the solid root. It makes a lovely soup (which I really ought to blog some time), and it’s great raw in coleslaw. One of the very nicest of French crudités is simply grated raw celeriac blended with a little home-made mayonnaise. But for my money, one of the best things you can do with a chunk of celeriac is to cook it until soft, mash it with a little potato, push the resulting mixture through a sieve and whip it with butter and cream for a very fine and rich side dish.

To make celeriac purée as an accompaniment for four, you’ll need:

1 large celeriac, about 20 cm in diameter (anything larger than this may be a bit woody)
2 medium potatoes (choose a variety which is good for mashing)
100 ml double cream
2 heaping tablespoons salted butter
2 level teaspoons salt (plus more to taste)

Using a very sharp knife, peel the celeriac and cut it into 2 cm square chunks. As soon as you have cut a piece, put it in a saucepan of cold water to stop it from oxidising and turning brown. Peel the potatoes and cut them into chunks about twice the size of the celeriac pieces, and add them to the pan. Warm a mixing/serving bowl.

Bring the potatoes and celeriac to the boil, put the lid on the pan and simmer for 15 minutes. Poke the vegetables with a fork to check they are soft (if they are not, cook for another 5 minutes). Drain and use a potato masher to mash the celeriac and potatoes until they are as even as you can manage.

Melt the butter and cream together in a milk pan, and bring to a very low simmer as you sieve the purée.

Push the mashed mixture through a sieve using the back of a ladle. You can also use a mouli or food mill if you have one. The resulting purée will be extremely smooth. Put the purée into the warmed bowl and use a hand whisk to whip the butter and cream mixture into the purée with the salt, and serve immediately. This is particularly good with rich meat dishes and roasts.

Sage and onion roast chicken with gravy and crispy sage leaves

I’ve been experimenting with roast chickens. You’ll notice that the method here is rather different from other roast chicken recipes on this site; this time I’m getting you to stuff a buttery mixture under the skin and then blast the chicken at a very high temperature for a much shorter cooking time than usual. I’m amazed at the difference this makes to the finished product. The skin is crisp and flavourful – absolutely the best I’ve ever achieved on a roast bird – and the flesh is incredibly juicy and moist, taking on flavour from the butter, herb and shallot mixture, but requiring no basting or turning upside-down and juggling in the oven.

I had a great email conversation over Christmas with an American gentleman in Japan who was wondering about typically English flavours to cook his Christmas goose with. Sage and onion is one of the classic English mixtures, and here it goes to make a boring old chicken really festive. I’d be very happy serving this as a Christmas dinner for people who (like me) don’t go a bundle on turkey. The gravy here is also typically English – it’s thickened with flour and makes a lovely, glossy, boozy glaze for the meat. I served a side of mashed potato with this to soak up lots of the gravy (because mashed potato and gravy is one of the best things in the world, right up there with sex and roller coasters), some easy stuffing balls to reflect the sage and onion flavours, and a really tart salad to cut through all the lovely butter.

To roast one chicken weighing about three pounds (around 1.5 kg), which should serve three or four, you’ll need:

Chicken
1 chicken
1 lemon
2 small (round) shallots or 1 large (banana) shallot
125 g (¼ lb) softened salted butter
12 fresh sage leaves
2 medium onions
Salt and pepper

Gravy
1½ dessert spoons flour
1 small glass dry white wine
100 ml chicken stock

Sage leaves
8 sage leaves
Olive oil to fry

Chicken method
Preheat the oven to a blistering 230°C (450° F). Dice the shallots as finely as possible – think micro-dice – using your sharpest knife, and combine them thoroughly in a bowl with the zest of the lemon, a teaspoon of salt and the butter. Use your fingers and the back of a teaspoon to separate the skin over the breast of the chicken from the muscle, starting at the bottom (leg) end of the bird, where the cavity opens. You should be able to make a large pocket between skin and flesh over each breast. Use fingers to stuff this pocket with all but two teaspoons of the soft butter, then slide six whole sage leaves under the skin as well, on top of the butter mixture. Push the remaining two teaspoons of butter and two more sage leaves into the space where the chicken’s legs meet the body.

Chop the zested lemon in half and slice the onions roughly. Remove any lumps of fat from inside the chicken and discard. Push half the lemon and half an onion into the chicken’s cavity with four more sage leaves and some salt and pepper. Make a pile of the onion pieces in the centre of your roasting tin and balance the chicken on top, then rain another teaspoon of salt all over the skin of the bird and roast for an hour.

When the hour is up, use a skewer to poke into the fattest part of the chicken’s thigh. If the juices run clear, remove from the oven; if there is any pinkness, return the bird to the oven for another ten minutes and repeat. Remove the chicken to a warmed platter and leave it in a warm place to rest for ten minutes while you make the gravy and the crispy sage leaves.

Gravy method
Pour any juices from the cavity of the chicken into a small frying pan over a medium flame, along with all the fat, juices and onion bits from the roasting tin. Do not discard any of the flavourful butter and fat from the roasting tin – if you feel guilty after having overdone it at Christmas, go for a run tomorrow rather than deprive yourself of flavour here.

Bring the contents of the pan up to a gentle simmer, and sprinkle over the flour. Use a wooden spoon, making tiny circles in the pan, to work the flour into the fatty mixture until no floury lumps are visible. (There will be onion pieces and bits of chicken kicking around in there – these are fine; you just don’t want any floury bits.)

The liquid in the pan will start to thicken dramatically. Pour over the glass of wine and continue to stir for a couple of minutes to burn off the alcohol. Pour in the chicken stock and continue to stir for a couple more minutes, then taste for seasoning. Tip in any juices which the chicken has released while resting, and get someone to start carving.

Sage leaves method
These are as easy as anything. Just heat the oil in a little pan and throw in the sage leaves for a few seconds. They will frizzle and crisp. Drain on kitchen paper and sprinkle over the carved chicken.

Devilled chicken

Devilling is a Victorian technique for resurrecting drab leftovers. It involves making a spicy paste from mustard, Indian chutney and other storecupboard standards, dressing cold, roast meats with the paste, then grilling until the whole confection is hot. The Victorians were wont to devil anything they could get their hands on; breakfast kidneys were devilled, eggs, hams, mutton chops: let’s be honest here. It was really a way to disguise food which was a bit elderly and didn’t taste that great any more.

In North and South, Elizabeth Gaskell describes some devilled chicken which “tasted like saw-dust”. The cook must have been low on mustard that day. Disraeli’s curiously awful Sybill describes the requirement for a cool glass of water with spicy devilled biscuits (I am still not quite clear on how precisely you’re meant to devil a biscuit – he probably meant that the biscuits were heavy on the chillies). These days, we don’t really use this technique much any more, although I do remember a home economics class at school which culminated with a slightly boingy hard-boiled egg piped full of a gritty orange yolk, mayonnaise and raw spice mixture. Unsurprisingly, I haven’t devilled anything since.

Never say never. Having mentally consigned devilled-anything to the ‘unlikely to be delicious’ pile, I found myself browsing through some of my antique recipe books at the weekend (a very cheap obsession, should you get bitten by the collecting bug; they’re usually available for pennies in bric a brac shops and they’re fascinating; who knew that powdered millipedes were good in a sort of soup for hysteria?) and read through a devilled chicken recipe. It actually sounded pretty good. I looked up another one. It sounded fantastic. Time to swallow my prejudice and get devilling. All the same, I decided to roast the chicken specifically for the dish rather than using leftovers. It was amazingly and unreservedly good, and it’s going to become a regular on our supper table. To devil my four chicken leg and thigh joints (these are almost always the bits left over when you have a roast) I made sure that unlike Mrs Gaskell, I didn’t skimp on the mustard, and that like Disraeli, I had a cold glass of water standing by. You’ll need:

4 chicken thigh and drumstick joints, pre-roasted or raw (see below)
1 ½ generous tablespoons Dijon mustard
1 ½ tablespoons good Indian chutney. I used Patak’s brinjal (aubergine) pickle, but any good mango chutney or similar will also be excellent here.
1 tablespoon chilli sauce
2 tablespoons butter
1 tablespoon Worcestershire sauce
A generous amount of pepper and salt
Flour (optional)

I realise this ingredients list sounds pretty peculiar. Persevere with it; Victorian flavours can seem oddly foreign to modern palates, but remain extremely good.

If your chicken is raw, put it in a roasting tin and roast, drizzled with plenty of salt, pepper and olive oil, at 180° C (350° F) for 40 minutes until crisp and golden, and set aside in the roasting tin to cool. If you’re using pre-cooked chicken, just place it in the cold roasting tin and start cooking the sauce.

Melt the butter in a small saucepan and stir in the mustard, chutney, chilli sauce and Worcestershire sauce until you have a thick paste. Remove from the heat. Cut deep diagonal gashes into the meat of the chicken, with another set of gashes across them. Push the paste into the slits in the meat, and spread it generously all over the skin of the chicken. If there’s any paste left, put a dollop under each chicken joint.

Place the roasting tin under the grill about 4 inches from the flame, and grill for 10 minutes until the paste is starting to brown and the meat is hot. André Simon suggests dredging the chicken pieces with flour after you’ve smeared them with the paste in order to achieve a crispy finish. You might want to try this if you’re using yesterday’s chicken, but chicken you’ve just cooked should have a lovely crisp skin underneath the paste, so extra crispiness isn’t really necessary.

Serve with buttered rice or new potatoes and a sharply dressed salad.