Vietnamese caramel pork

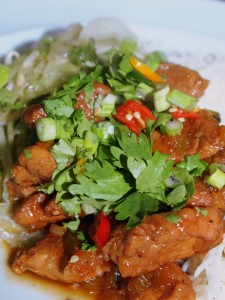
Vietnamese caramel porkI’ll be frank here: my fear of caramel can’t really be described as healthy. I’m scared silly of the stuff and won’t cook it without gauntlet oven gloves, my biggest pair of glasses, an apron and long sleeves. So I like to think of this recipe as a sort of delicious therapy – and it tastes so good that I’m finding myself forced to cook it regularly. (Mostly by Dr W, who likes it so much that he’s insisted we have it again tonight.)

This way with caramel is a traditional Vietnamese saucing. You’ll end up with a surprisingly low-fat dish which, just to scotch any diet ambitions you had, contains five tablespoons of sugar. The caramel itself is available as a ready-made sauce in bottles in Vietnam, but if you’re cooking this dish at home you’ll have to make your own. The ready-made caramel will only save about ten minutes of your time, so this isn’t really much of a hardship.

The sauce is sweet, but not overwhelmingly so; with a bowl of white rice, you’ll find the balance between salt from the fish sauce, sweetness from the caramel and sour from the lime juice works beautifully to create a very aromatic, rich sauce. If you’re not a chilli-head, you can reduce the amount in the recipe below – but if you are, you’re in for a treat. This recipe comes together quickly, so make sure all your ingredients are chopped and prepared before you start to cook.

To serve two, you’ll need:

450g pork fillet
5 tablespoons caster sugar
2 tablespoons fish sauce
Juice of 1 lime
10 spring onions, white parts only
3 cloves garlic, crushed
2 bird’s eye chillies, chopped finely
25ml chicken stock
1 teaspoon sesame oil
1 handful fresh coriander (about 25g) and some of the green parts of the onions to sprinkle

Chop the pork into bite-sized pieces, and set aside in a bowl. Chop the spring onions and separate the white and green parts. Crush the garlic (I use a Microplane grater for garlic; it’s quicker, easier and much easier to clean than one of those garlic-squashing devices), chop the chillies, and combine the fish sauce, lime juice and chicken stock in a mug.

Put five tablespoons of sugar in the bottom of a dry saucepan, and place over a medium heat. Keep an eye on the sugar as it turns into caramel without stirring. When all the sugar has melted and is the colour of strong tea, throw the pork into the pan. Stir well to coat the pork as much as you can (the caramel will start to solidify, so you may not be able to coat all the pork), and pour in the wet ingredients. Continue to cook, stirring, for two minutes. The caramel should be dissolving in the sauce; if some solid bits are left at this stage, don’t worry about it. They’ll dissolve into the sauce as the dish continues to cook.

Throw in the spring onions, garlic and chillies with a teaspoon of salt, the sesame oil and a few turns of the peppermill. Stir to combine. Bring the sauce to a simmer and continue cooking and reducing the sauce until most of the liquid has gone, and the pork has a sticky coating of sauce.

Serve the pork over rice with a generous sprinkling of fresh coriander leaves and some of the green parts of the spring onions. This dish works very well with a cooling vegetable stir-fry – look out for a recipe later this week.

Stupendous tomato sauce

Tomato sauceStupendous because, really, there is no other word for this stuff. It’ll take you the best part of a day to make, although there’s not much real work involved, just a bit of stirring every half hour or so – if you’re going to be around the house all day, just carry a timer with you set to go “bing” every half hour to remind you to go and stir the sauce. You’ll use up two kilos of those tomatoes you’ve got ripening away in the greenhouse, and you’ll finish with a sauce that tastes like pure condensed summer. It freezes well – I have a few boxes of this sauce in the freezer to be hauled out in the middle of winter, when tomatoes are indistinguishable from potatoes.

The idea here is to drive as much of the moisture as possible out of sweet, summery peppers and tomatoes, encouraging their natural sugars to caramelise. The tomatoes you choose should be the very best you can find. This recipe is fantastic for gardeners with a glut of tomatoes, but you can make it with good tomatoes from the market too. Just make sure you use the sort of tomatoes that you’d be happy to snack on raw; the sort where you suddenly discover you don’t have any left because they were so good you accidentally ate them all without noticing.

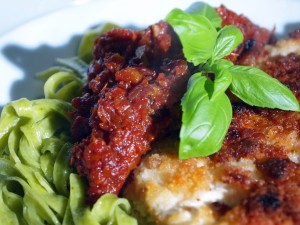
This sauce is beyond fabulous on its own, dressing some pasta – if you can find Giovanni Rana fresh pasta at your local supermarket or deli, the basil and spinach fettuccine is a great match, with its intense basil aroma. For plain pasta, throw a few basil leaves and maybe some oregano over when you serve. I also love it as a sauce for chicken breasts that have been butterflied, beaten flat, breaded and fried crisp (you don’t need a recipe for those – just put the butterflied breasts between two pieces of cling film; wallop the hell out them with a rolling pin; then flour, egg and crumb them before frying for five minutes on each side); it’s great mixed with some grilled vegetables or as a sauce for grilled, oily fish too. You can use it as a dip, in sandwiches, as an enriching ingredient for other sauces, as a base for soups – versatile, delicious, wonderful stuff.

To make about 12 servings (you’ll be freezing these in individual portions, and with something that takes so long to cook it seems a waste to make any less) you’ll need:

6 bell peppers (orange, red or yellow)
2kg tomatoes
100g butter
150ml olive oil
2 large onions
1 head garlic
Salt and pepper

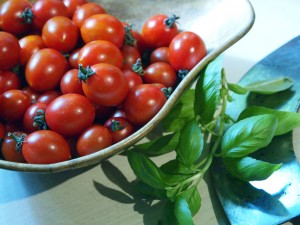
Tomatoes and basilBlitz the bell peppers with the onions in the food processor. You’re aiming for a rough, wet puree. Put the resulting glop in your biggest saucepan (preferably something with a heavy base that will disperse the heat evenly – I have a giant le Creuset casserole which is perfect for this sort of thing) with the butter and cook over a medium flame without a lid, stirring occasionally, for about an hour. Eventually, the peppers will start darkening in colour, most of the liquid will have been cooked off, and the whole arrangement will have a jammy texture. It may take more than an hour to get to this stage, depending on the water content of your peppers and the diameter of your pan.

Puree the tomatoes with the peeled garlic. Add them to the jammy contents of the saucepan with the olive oil and stir well to make sure everything is combined. Now go and busy yourself doing whatever it is you do when you’re not cooking, being sure to return to the pan every half hour to stir it, scraping the bottom and moving the sauce around the pan. After a few hours, as the sauce thickens, start returning to the pan every 15 or 20 minutes if you feel it is in danger of sticking when left for half an hour.

Again, timing here varies on your tomatoes and your pan, but around six hours (maybe more) after you first put the tomatoes on the hob, the contents of the pan will have reduced by more than half. The sauce will be fabulously gloppy when stirred, and will be darkening and beginning to give up its oil.  No tomato juice will rush to the surface when you press down on the sauce with a wooden spoon. Taste the sauce, which should look a bit like rusty sun-dried tomato paste, try not to jump too high for joy at the intense, umami flavour, and season.

I freeze this sauce in 250g bags – enough to serve two generously. Your yield should be about six bags, give or take. Unfrozen, the sauce will keep in the fridge for about a week.

Pea and edamame falafel

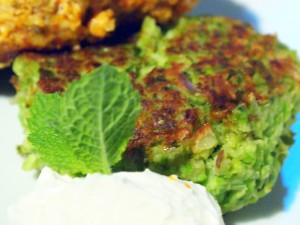
Pea and edamame falafelFalafel? Well, kind of, although I don’t think anyone from the Middle East, or anywhere else where they’re a staple, would necessarily agree with me. I threw this together after eating something advertised as a pea falafel wrap at Harvey Nichols cafe in Leeds last week. I felt the Harvey Nicks version could do with some work – it was underseasoned, underspiced and crying out for a squeeze of lemon and some mint, but had the makings of something really rather good, as I discovered after some experimentation with a bag of peas and some soybeans back home.

Frozen peas and edamame cooked like this make a very quick store-cupboard supper, and the results taste as if you’ve spent much, much longer on them than the few minutes these take to throw together. This is a great dish to whip out when you’ve been landed with an unexpected vegetarian guest (like my poor parents-in-law, who were told that the foreign students they were hosting a few weeks ago were Germany’s only veggies barely a day before they arrived), and a good burger substitute for vegetarian barbecue-goers. Lacto-ovo vegetarians who do it for moral reasons befuddle me. What do they think happens to the calves who were going to drink the milk, and the chickens who weren’t female enough to lay eggs? I can guarantee you that they’re not all prancing in the sun and nibbling on tender shoots, shepherded by the consciences of unimaginative veggies. Cue comments storm.

Anyway. These falafel make for a great side-dish, or a main event on their own. Stick them in a wrap, once they’ve cooled, for an easy and uncharacteristicly healthy lunch, if you have any left over.

To make 12 burger-proportioned falafel, you’ll need:

200g sweet frozen peas (the frozen ones are almost always sweeter than fresh, unless you’re picking straight from your own garden and shelling immediately)
100g frozen edamame (soy beans) without pods
1 medium onion
1 teaspoon cumin seeds
1 teaspoon coriander seeds
1 small handful (about 20g) fresh mint leaves
50g fresh breadcrumbs
Zest of 1 lemon
Juice of ½ lemon
1 egg
Salt and pepper
Olive oil to fry

Defrost the peas and beans, throw all the ingredients into the bowl of the food processor and pulse until you have a rough paste. Use your hands to bring the paste together into patties about the size of a burger.

In a non-stick pan, heat the olive oil until it shimmers and starts to give up its fragrance. Slide in the patties and cook for a couple of minutes per side, until golden on the outside. Serve with a big dollop of Greek yoghurt and some lemon to squeeze over.

Crisp sweetcorn fritters

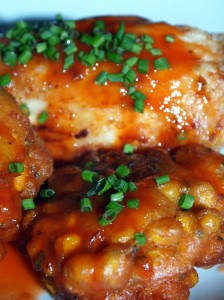
Sweetcorn frittersEverybody gets those days when happiness is not achievable without some fried chicken, and I wanted something horribly unhealthy to accompany it. Remembering fried chickens past, especially the ones I ate about a year ago at Lolo’s, a soul food restaurant in Phoenix, I decided that something with a sweet/savoury finish and a bit of spicing that would stand up to being drizzled with my own approximation of Lolo’s hot sauce was just what the chicken breasts I was cooking needed. The resulting fritters are crisp and puffy, and fall somewhere between an Indian pakora, a Thai fritter and a New Orleans beignet.

These are not not awfully good for you. Don’t make them too often.

To make ten once-a-year fritters and some killer honey hot sauce, you’ll need:

Fritters
1 large egg
60g plain flour
60ml milk
½ teaspoon salt
1 teaspoon baking powder
340g tin sweetcorn OR kernels from 2 fresh cobs sweetcorn
4 spring onions
1 teaspoon ground turmeric
1 teaspoon fennel seeds
1 teaspoon coriander seeds
1 small handful (about 15g) fresh chives
Oil to fry

Sauce
150ml bottle Frank’s original hot sauce (available in several UK supermarkets or online)
3 tablespoons runny honey

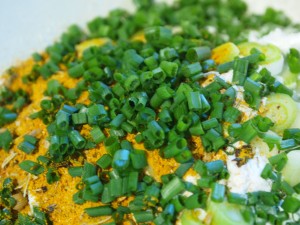
IngredientsBeat the egg into the milk. Grind the spices in a mortar and pestle with the salt, and mix with the flour, baking powder, chives and finely chopped spring onions in a large bowl. Use a whisk to beat the egg and milk into the flour mixture until you have a batter. Use a spoon to stir the corn kernels through the batter.

Drop heaped tablespoons of the batter mixture into your deep fryer, and cook a couple of minutes on each side, until crisp and golden.

To make the sauce, just combine the honey and hot sauce in a small pan and bring to a simmer, stirring well as you go. Cool before slathering generously all over your chicken and fritters. You can rebottle any extra.

Singapore noodles with miso chicken

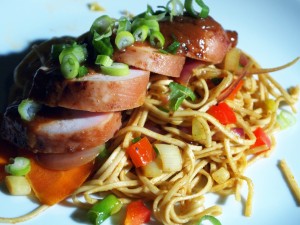
Singapore noodles with miso chickenSingapore noodles are another dish with a misleading name. They don’t appear at all in Singapore, despite their ubiquity on Hong Kong, UK, US and other Chinese restaurant menus. It’s unclear where the recipe originates, but it’s now a take-away standard. I suppose it makes sense; Singaporean and Malaysian food is characterised as being a bold, mish-mash of cultures, and this dish fits that description well.

Given that noodles in this style are something of a made-up dish, I allowed myself some latitude when I couldn’t find all the ingredients I wanted to use. You’ll see beansprouts in the ingredient list below, and they do make for a much more interesting mouthful, so include them if you can. There appears to be a beansprout drought in these parts at the moment, so you won’t see any in the photo. I’ve used a wheat/egg ramen noodle rather than the traditional rice vermicelli you often find in restaurants; this isn’t such an odd choice, and you’ll find many UK Chinese restaurants using a wheat noodle, but some do prefer vermicelli, so substitute them if you’re a particular fan. As always with curry powder, find the best you can. There’s a world of difference between those jars from Sharwood’s and Bart’s and a good curry powder from a small producer. Malaysian curry powder is preferable here, if you can find it, for its complex and herbaceous aromatics.

The chicken, sweet and intensely umami, is a lovely foil to the noodles. Marinate it overnight if possible. The marinade, boiled through thoroughly, makes a fine dipping sauce to go alongside this meal, or can be spooned over in small quantities. The sauce is packed with flavour, so you won’t need much. You can, of course, cook the chicken separately from the noodles; it’s fantastic cold and makes a very good sandwich filling or, diced, a Chinese salad addition.

To serve two, you’ll need:

Noodles
200g thin ramen or rice vermicelli
6 spring onions
1 medium red onion
1 red pepper
1 carrot
75g beansprouts
3 cloves garlic
2 tablespoons of  your favourite curry powder
30ml rice wine
2 tablespoons light soy sauce
Small amount of oil to stir fry

Chicken
2 skinless, boneless breasts
2 tablespoons white miso
2 tablespoons rice wine
2 tablespoons oyster sauce
1 tablespoon light soy sauce
1 tablespoon soft brown sugar
1 teaspoon sesame oil

Marinate the chicken overnight in all the chicken ingredients (or for at least six hours). Remove from the marinade and grill under a medium flame for 8-10 minutes per side until done while you cook the noodles. Put the remaining marinade in a little pan and bring it to a rolling boil for a couple of minutes, then put to one side until you are ready to serve.

Chop the spring onions into coins, chop the garlic, slice the onion, dice the pepper and cut the carrot into thin diagonal slivers. Prepare the noodles for stir-frying by following the instructions on the packet. In your wok, take a little groundnut or grapeseed oil, and fry the spring onions, garlic, onion and pepper with the curry powder over a very high heat, moving everything around all the time, until the onion takes on a little char at the edges (only a few minutes). Add the noodles, carrots and beansprouts to the wok. Stir-fry until everything is well mixed, then add the liquid ingredients. Stir through again, turn the heat down and put a lid on the pan for 2 minutes before serving.

Dish the noodles out and slice the chicken breasts on the diagonal before placing them on top of the noodles with a little of the cooked marinade. Serve immediately.

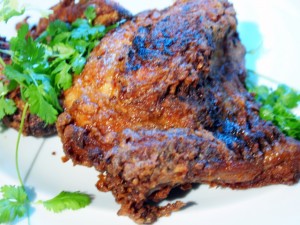
Malaysian fried chicken – inche kabin

Inche kabinI’m on a bit of a Malaysian kick at the moment. I’ve not been back in six years, and it’s getting to me. The best thing to do in these circumstances is to head for Rasa Sayang in London’s Chinatown, where, if you half-close your eyes and relax, you can imagine you’re eating in Kuala Lumpur. (In one of the clean bits.) Failing that, you can get out your wok.

To serve four, you’ll need:

1 jointed chicken OR 200g chicken wings
2 tablespoons soft brown sugar
4 tablespoons coconut milk (this is an occasion on which the brands with emulsifier work best)
2 heaped tablespoons curry powder
2 inches ginger, grated and squeezed for the juice
2 tablespoons light soy sauce
50g rice flour
Oil for deep frying – I used grape seed oil, which has a very high smoke point and a neutral flavour

Try to find a Malaysian curry powder like Linghams which is meant for chicken – they have a very specific and delicious flavour. Failing that, Bolst’s Madras curry powder is always an excellent fallback.

Marinate the jointed chicken or wings in the sugar, coconut, curry powder, ginger juice and soy overnight in the fridge. If you were in Malaysia, you’d take the chicken outside at this point and lay it in the blistering hot sun for half an hour or so, until the marinade had dried onto the meat, and then fry. Fat chance of that in Cambridgeshire.  So I use a tip I picked up from one of my cousins, and dredge the wet, marinaded meat with rice flour. Rice flour gives this dish a fantastic crunch, and also retains that crunch when the chicken is cold, making this a brilliant selection for a picnic.

Heat enough oil in your wok to half-submerge the pieces of chicken (or use your deep fryer), and bring to a frying temperature (about 180°C/360°f). Fry the chicken, turning regularly, for about 12 minutes, until cooked through and tender.

Serve immediately, or cool and eat as part of a cold supper or picnic. Worcestershire sauce is a common accompaniment for this, but I much prefer a bowl of soy sauce with some green bird’s eye chilli snipped into it to dip the chicken pieces into.

Beef rendang

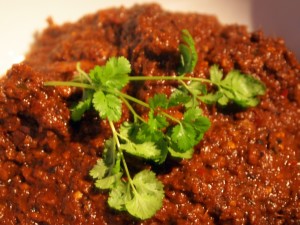
Beef rendangIt’s my firm belief that every culture in the world has at least one dish which looks like something the cat dragged in, ate, digested, and left as a gift on the hall carpet twelve hours later. Beef rendang is Malaysia’s offering to this noble pool.

I’ve not come across a dish like rendang anywhere else in the world. Beef is simmered in a thick mixture of spices, browned coconut and coconut milk until nearly dry, soaking up huge amounts of flavour during the simmering process; the cooking method turns from simmering to frying as the mixture reduces and the oils from the coconut leach out. You end up with a thick, rich, dark brown sauce, packed with herbs and sweetness from shallots and roasted coconut. It’s a dish that takes a while to prepare, so make plenty and freeze what you don’t eat immediately.

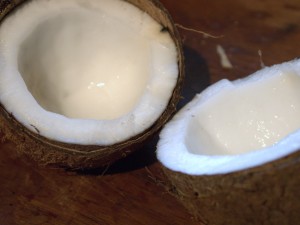
CoconutYou’ll need to tackle a raw coconut for this recipe. Opening coconuts doesn’t have to be anything like the palaver we seem to make of it in the UK – all that business with towels and hammers. As you can see from the picture, my coconut was bisected neatly. All you need to do to achieve the same thing from yours is to hold it over a bowl, and, using a meat cleaver or large knife (cleavers are available very cheaply at Chinese supermarkets, if you have one in the neighbourhood), tap hard with the blunt edge along the equator of the coconut – the pointy tuft at one end and the three “eyes” at the other are your north and south poles. Keep tapping with the blunt side, not the blade, as hard as you can, turning the coconut as you go, and once you’ve circled it about five times (by which point you will be sweating and swearing that all this work hasn’t made a blind bit of difference) the coconut will split neatly in half, the juice inside falling into your cleverly pre-positioned bowl. It’s magic. Give it a shot.

A word on that coconut juice. It’s not the same thing as coconut milk (the stuff you find in a can), which is the grated white flesh of the coconut, moistened and squeezed. Coconut juice is very pleasant on a beach somewhere when your coconut is green and straight off a tree, a nice man has sliced the top off it with a machete, and you have a few shots of rum and a straw; but once your coconut has turned brown and been shipped to the UK, it will be bitter and horrid. Drink it if you must. If you’re smart, you’ll pour it down the sink.

Coconut milk is a different matter. For this recipe, it’s more important than ever that you buy some without emulsifiers – you’ll be using the thick, creamy part of the milk separately from the more watery part. I always buy cans of Chaokoh, a Thai brand. If you’ve difficulty tracking it down locally, you can find it (and a paradise of other Chinese, Malaysian, Korean and Japanese ingredients) at Wai Yee Hong, an oriental supermarket in Bristol with an internet shopping arm – I order from them every couple of months, and they’re super-reliable.

To serve four, you’ll need:

1 coconut
600g beef topside
1 tablespoon soft dark brown sugar
1½ teaspoons tamarind block (surprisingly enough, I found some at Tesco)
10 blanched almonds OR 2 candlenuts, peeled
2 teaspoons turmeric powder
2 Kaffir lime leaves
2 stalks lemongrass
1 in piece galangal
1 in piece ginger
10 small shallots
3 fresh red chillies
8 dried red chillies (look for Malaysian cili kering in an oriental grocer)
2 cloves garlic
1½ tablespoons palm sugar (or soft dark brown sugar)
2 tablespoons dark soy sauce
1 can coconut milk
Salt and pepper
Boiling water

Open the coconut according to the instructions above. Pry the white flesh away from the shell, and use a sharp knife or a vegetable peeler to remove the brown skin from the flesh. Grate the white flesh and dry-fry, stirring regularly, until dry and dark brown but not burned.

While the coconut is frying, soak the tamarind in enough boiling water to cover, poking with a fork until the tamarind is soft. Pick out the seeds.

Cut the beef into pieces and marinade in all but 2 tablespoons of the toasted coconut, the tamarind and its liquid, two teaspoons of sugar and a teaspoon of salt. Set aside while you prepare the other ingredients.

Put the remaining toasted coconut in the bowl of the food processor with the almonds, turmeric, lime leaves, lemongrass, galangal, ginger, peeled shallots, chillies and garlic. Whizz until everything is reduced to a fine paste. Put the paste in a thick-bottomed saucepan with the runny, milky part of the coconut milk, 100ml boiling water, the palm sugar, another teaspoon of salt, a generous grating of pepper and the dark soy sauce. Stir well and bring to the boil over a moderate heat. Add the meat with any juices, and bring back to a simmer. Continue to cook, without a lid, for an hour, stirring frequently to prevent burning. Most of the liquid will have reduced away by this point.

After an hour, add the creamy part of the coconut milk to the mixture and stir well. Add a lid and continue to cook over a reduced heat for another hour, stirring occasionally. The finished rendang should have a thick, dense sauce, and look oily, the fat having come out of the coconut, almonds and coconut milk to fry off the other ingredients.

Smoked salmon and laverbread canapes

CanapesThe fine folks at Kinvara smoked salmon sent me a big goodie bag full of their organic Irish salmon last week. I get through quite a lot of smoked salmon at home (damn the expense, it’s full of brain-feeding, joint-lubricating goodness), and I was enormously and very pleasantly surprised at just how good the Kinvara fish was. The smoke is a gentle one, letting the flavour of the salmon itself sing, and the firm slices of fish have a robust and delicate flavour all at once. I don’t mention all the foods I get sent to try on this blog, but this one was a doozy, and I’ll be ordering more from them (smoked salmon by post – how splendid is that?) shortly.

Something this good deserved a special-occasion recipe, so here, just in time for the next party you host that’s posh enough for canapes, are some classy little nibbles to impress your boss with.

To make 20 canapes, you’ll need:

100g smoked salmon
50g pancetta cubes
1 x 125g tin laverbread (for more on laverbread, see this post – I am charmed by the fact that my spellchecker suggests that what I really wanted to type here was “weaverbird”)
75g medium or fine-milled oatmeal
1 large onion
1 jar salmon roe
1 jar lumpfish roe (or caviar, if you really want to push the boat out)
250g crème fraîche
Bacon fat (you really should be keeping a jar in the fridge; it’s amazing stuff for adding flavour) or olive oil to fry

Dry-fry the pancetta in a large, non-stick frying pan until golden, and remove to a mixing bowl, keeping the fat it has released in the pan. Chop the onion finely and saute it over a low to medium heat until dark gold and sweet. Dice the salmon and add it with the onion, laverbread and oats to the pancetta bowl.

Use a spoon to stir the mixture until everything is well blended. If you want to serve these canapes in the evening, you can prepare the dish up to this stage earlier in the day and refrigerate the mixture until you are ready to assemble them later on. Use your hands to make 20 little round patties from the mixture, and fry them in a couple of tablespoons of hot bacon fat or olive oil until golden, turning once (about ten minutes).

Arrange the crisp patties on a serving dish, and put a dollop of crème fraîche on top of each one. Spoon some salmon roe on half of them, and some lumpfish roe on the other half. Serve warm.

Stir-fried chicken in XO sauce

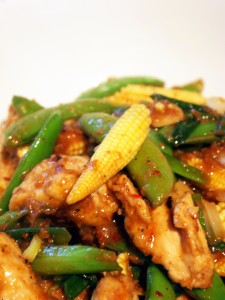
XO chickenOf all the bajillion little bottles and jars of stuff littering my fridge and kitchen cupboards, the jar of XO sauce is probably my favourite. You know – the one you’d take to a desert island to make all those coconuts more interesting.

XO originates in Hong Kong, and gets its name from the Hong Kong taste for cognac. In cognac terms, XO means “extra old”; in Hong Kong terms, it means “really very delicious and pricey, like cognac”. The sauce itself doesn’t taste like or contain cognac; it’s made from dried seafood and preserved meat (usually scallops, shrimp and wind-dried ham), garlic, chillies, shallots and oil. Until fairly recently, you’d have to make your own or go to a restaurant to try it, but good XO sauces are now available bottled; I like the Lin Lin brand, which you should be able to find at a good oriental grocery. If you’re interested in making your own, the superb recipe from David Chang at Momofuku in New York is online at this tribute blog. Despite all that dried seafood, the resulting sauce isn’t particularly fishy; it is, however, a wonderfully savoury, spicy, rich and flavourful thing to cook with, and it’s a good way to pack flavour into a dish quickly. This should take you all of ten minutes to make – a great dish for an exhausted end-of-the-week supper.

To serve four, you’ll need:

500g boneless chicken, cut into bite-sized pieces (I like thigh best here – brown meat carries much more flavour)
5 tablespoons plain flour
½ teaspoon Madras curry powder (I like Bolsts)
6 spring onions
100g sugar-snap peas
100g baby corn
3 cloves garlic
50ml Chinese cooking wine or sherry
3 tablespoons light soy sauce
2 heaped tablespoons XO sauce
Salt and plenty of black pepper

Mix the flour with the curry powder, a good pinch of salt and several grinds of the peppermill, and toss the chicken in it in a large bowl. Set aside while you chop the other ingredients. Cut the white parts of the spring onions into coins, and put in a bowl with the chopped garlic. Cut the rest of the spring onions and the baby corn into pieces on the diagonal.

Heat a couple of tablespoons of ground nut oil (or another flavourless oil) in a wok over a high heat, and fry the spring onion bottoms with the garlic for a few seconds until they start to give off their scent. Add the chicken to the pan and stir-fry for about 2 minutes, until there is no pink visible. Add the green parts of the spring onions, the baby corn and the peas to the wok, stir-fry for about 30 seconds and throw in the Chinese wine and soy sauce. Stir-fry for another 30 seconds and stir in the XO sauce. Put a lid on the wok and cook for another minute or so, until the chicken is cooked through.

Serve immediately with steamed rice.

Devilled eggs with bacon and chilli

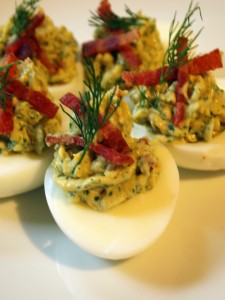
Devilled eggsA couple of weeks ago, I was footling around in the sun at Ciudad, one of my favourite restaurants in LA, with a Margarita and some devilled eggs. (This goes some way to explain the recent hiatus at Gastronomy Domine; I went away for a week and forgot my laptop, then caught something filthy from one of the insanitary people on the plane on the way home and spent all of last week in bed. To be honest, enforced absence from the internet has been great – I highly recommend it.)

I have some friends who claim they don’t like eggs, and whose idea of picnic hell is a plate of devilled eggs. This recipe, inspired by the two helpings of Ciudad’s spectacular and spectacularly expensive jalapeño and bacon devilled eggs that I ended up face down in, is not for them. If you are a fan of devilled eggs, you’ll be pleased to learn that these keep well, refrigerated, for a couple of days. They’re a great outdoor food – just pack them in the bottom of a plastic box before you go, and make sure you keep it the right way up.

To prepare 12 eggs, you’ll need:

12 eggs
2 tablespoons Dijon mustard
2 tablespoons mayonnaise
2 tablespoons creme fraiche
½ pickled habanero chilli – or other chillies to taste
6 spring onions, white and pale green parts only
1 small handful each dill, parsley and chives
½ stalk celery
½ sweet dill pickled cucumber
8 rashers smoked streaky bacon (a sweet, dry cure is best here – try to get a reasonably thick cut too)

Start by boiling the eggs. Perfect hard-boiled eggs are as easy as anything – just cover all the eggs with cold water in a saucepan, and bring it to the boil with the lid on. As soon as the eggs boil, remove them from the heat, keeping the lid on, and leave to one side for 12 minutes. Put the saucepan in the sink and run cold water over the eggs for a few minutes until they are cold, then peel.

While the eggs are boiling, grill the bacon until it starts to crisp at the edges. Put all the ingredients except the dill pickle and bacon in the food processor, and whizz until you have a creamy paste.

Dice the pickle finely by hand. You’re chopping it rather than processing it so that it adds a bit of crunch to the eggs. If you’re in the UK, Mrs Elswood pickles, which are available in most supermarkets in the pickles section and sometimes in the kosher section, are excellent. (Like Betty Crocker and Sara Lee, the Mrs Elswood pictured on the label is a fiction – the name is a portmanteau of Elstree and Borehamwood, where the company is based. They’re still damn good pickles.) Dice the bacon finely with a sharp knife, reserving one rasher. Slice that rasher finely to use as a garnish and reserve. Add the diced pickle and bacon to the whizzed ingredients in a large bowl and taste for seasoning. You may find you don’t need to add any salt.

Halve the peeled eggs and pop their yolks out into the bowl with the other ingredients. Use a fork to squish the yolks into the creamy mixture, and stir vigorously to combine everything. Put the mixture in a piping bag with a medium nozzle and pipe dollops into the empty egg halves. Use a squeeze-down-up motion for the best results – you don’t need to twist the bag or nozzle as you work. If you don’t have a piping bag, just spoon the mixture into the eggs or pop it in a freezer bag with the corner snipped off and use that instead – it won’t look as pretty, but it’ll taste just as good.

Sprinkle some herbs and the reserved bacon over the top, and serve cold.