Green curry

Thai green curry is fierce stuff. A green chicken curry is also pretty easy to make at home; with half an hour to spare you can produce a wok full of searingly hot, aromatic deliciousness.

Although you can make your own curry paste from spices and fermented fish paste at home, I’ve found that Mae Ploy’s green curry paste is so good and so convenient I don’t bother any more. Some UK supermarkets stock it (I’ve seen it in Waitrose and Sainsbury’s), you’ll find it in oriental supermarkets as a matter of course, and it’s available online in the UK and through Amazon in the US, where you can buy things to eat while you read your books. Please do not believe what it says on the pot. If you use three tablespoons of this extremely hot paste in a curry of this size, you’ll lose sensation in most of your digestive tract for the rest of the evening (which may be a blessing). I love hot curries, but there’s a point past which even my tastebuds refuse to go.

To serve two you’ll need:

1 can coconut milk
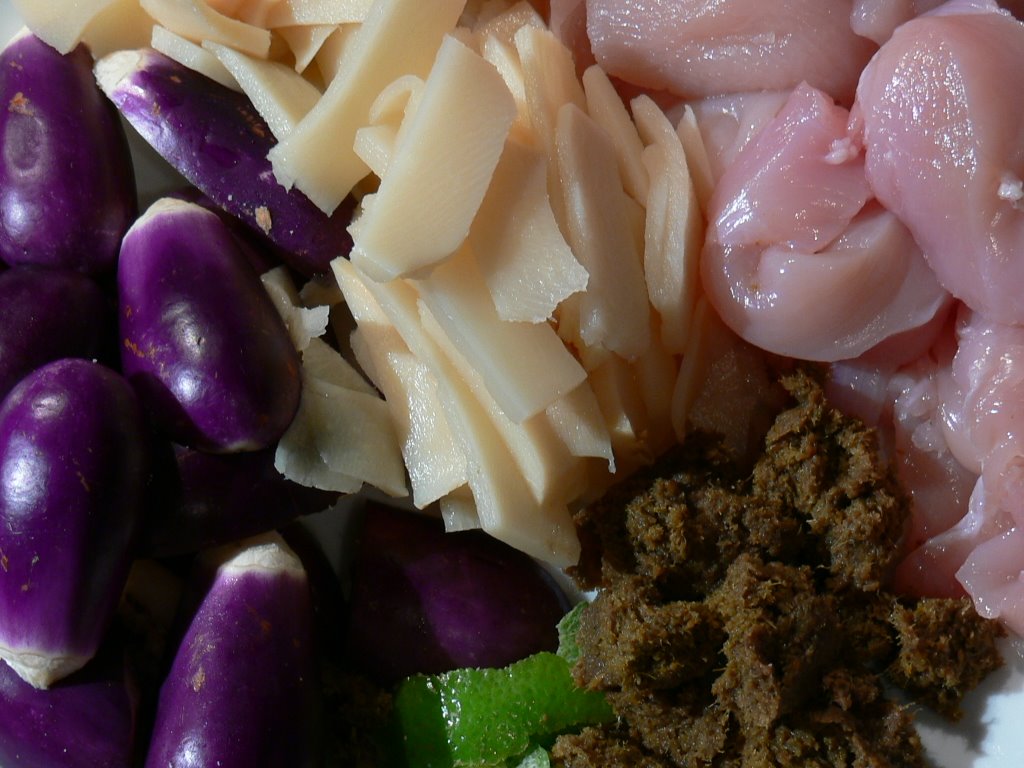
2 tablespoons Mae Ploy green curry paste
2 large chicken breasts, boned and skinned
8 small aubergines, halved, or one large one cut into pieces
1 small can bamboo shoots
1 tablespoon palm sugar (substitute soft brown sugar if you can’t find any)
5 kaffir lime leaves, torn
2 tablespoons fish sauce
1 handful basil leaves

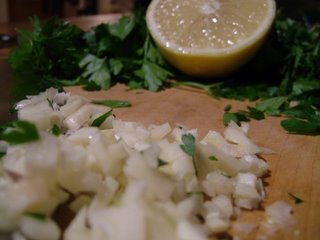
I couldn’t find any kaffir lime leaves – they’d sold out at the Malaysian supermarket I went to in London at the weekend, so I used the pared zest of a lime instead. If your supermarket stocks Bart’s Spices, you should be able to find freeze-dried kaffir lime leaves, which work very well.

I like to use Chaokoh coconut milk (Americans can find it here, and Brits here; it’s very inexpensive and extremely useful in the kitchen, so stock up on plenty). It’s something Rosemary Brissenden’s excellent South East Asian Food put me onto; when cooking a Thai curry, you need to look out for a coconut milk like Chaokoh, without emulsifiers, thickeners and God knows what else. This is because you’ll be cooking with the thick part of the milk, which will float to the top of the can, until it separates and releases its oil – in a coconut milk with added gubbins, the oil will never separate out, no matter how much you cook it. You need this oil for flavour, and because it’s the fat you’ll be ‘frying’ the curry’s ingredients in.

Chop all your ingredients before you start. Put the thick, solid part of the coconut milk in the wok (about half a can of a watery-looking liquid will remain in the can), and cook it, stirring, over a high flame until it is bubbling and the oil has separated from it. Add two tablespoons of curry paste to the wok and carry on stirring until the paste no longer smells harsh and raw – you’ll notice a mellow, aromatic fragrance starts to develop.

Add the chicken to the wok and continue to ‘fry’ until the meat has all changed colour. As you stir, add the remaining liquid from the coconut can, a tablespoon at a time. Add the sugar, fish sauce, lime leaves or zest and vegetables to the wok and turn the heat down. Simmer for about eight minutes, until the meat and vegetables are cooked through and the sauce has thickened a little. Taste a little of the sauce to check the seasoning and adjust if you want to.

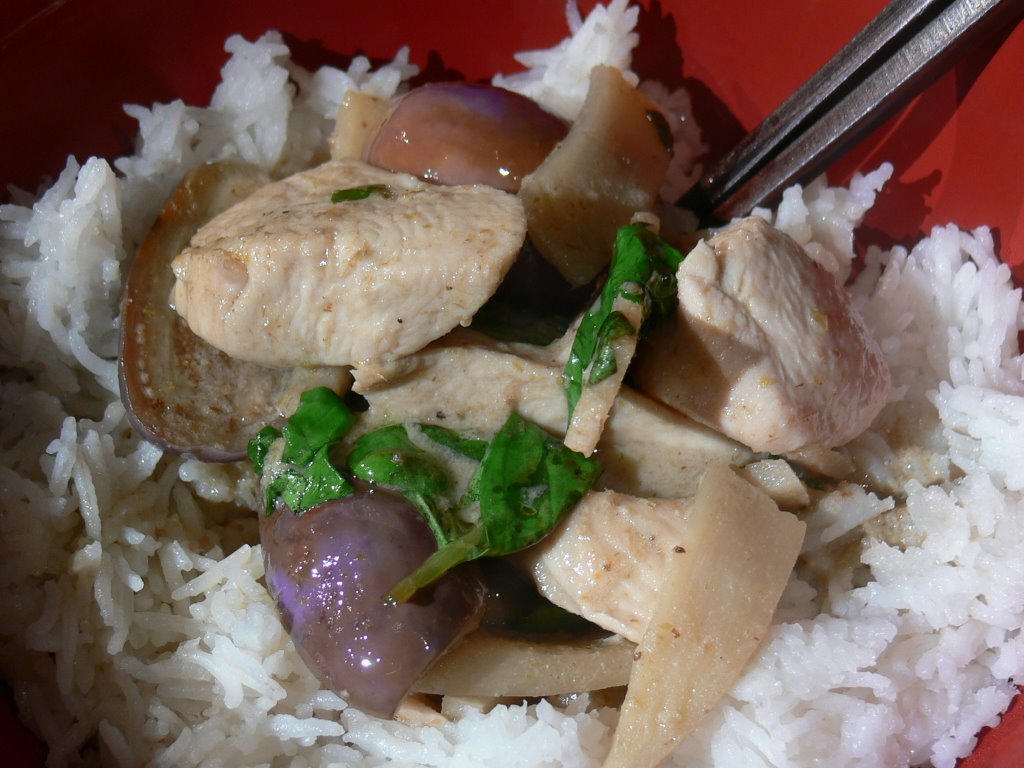
Take the wok off the heat and stir in a large handful of basil, torn roughly. Thai basil is much more fragrant, with a delicious edge of anise, but if you can’t find any, the European sort will be fine. Serve on top of a bowl of rice, and make sure you allow plenty of the delicious sauce to soak into the rice.

Zesty roast chicken

How on earth have I managed to go for so many months without roasting a chicken? I found this beautiful free-range, maize-fed bird in Waitrose. It was calling out in a ghostly chicken voice to be stuffed with zingy, summer aromatics.

Roast chicken using this method is as easy as anything; you only need to spend a few minutes preparing the bird to go into the oven, and it produces so much buttery, herby, oniony juice that you don’t need to make a gravy.

Some people like to roast their chicken with the breast pointing downwards, in order to keep everything moist. You don’t get such a crisp skin with this method, though, so I prefer to roast the chicken the right way up, breast pointing skywards, and baste every ten minutes or so with the buttery juices.

You’ll need:

1 chicken
1 lime, cut in halves
3 red onions, sliced roughly
10 cloves of garlic, skin on
1 handful marjoram from the garden
1 stalk celery
3 tablespoons butter
Sea salt
2 teaspoons flaked dried chilis and freshly ground pepper (I used a grinder of Spirits of Fire mix from the Elements of Spice company in South Africa – a present, along with another five grinders of wonderful things, from our friends Greg and Sienne.)

Preheat the oven to 180°C. Put both halves of the lime, the celery (in pieces), one of the onions, the marjoram, half the garlic, a tablespoon of butter and a teaspoon of chillis and pepper inside the cavity of the bird. You may have to push quite hard, but persevere; it’ll all fit with a bit of squeezing.

Stack the remaining onions and garlic in the bottom of the roasting tin, and place the chicken on top. Dot the rest of the butter on the surface of the chicken, and grind the rest of the spices all over.

You should cook your chicken for 45 minutes per kilo, plus 20 minutes. Baste every 10 minutes or so, and rest the bird for 5-10 minutes when you remove it from the oven. It will have released delicious juices into the tray, which you can spoon over your accompaniments along with the now roast onions and garlic. I served this with a bacon and onion rosti, which soaked up the juices beautifully – watch this space for a recipe.

No sandwich in the world is better than the sandwich you make the day after roasting this chicken with the jellied juices, a little roast onion and the tender meat you’ve stripped from the carcass.

Chicken wrapped in wild garlic leaves and pancetta

Thanks to Kalyn for hosting Weekend Herb Blogging (and I’m sorry I’ve not taken part in a while; the winter has made herb blogging a real stretch of the imagination in the UK!)

Wild garlic isn’t the same plant as the garlic you buy in the supermarket. It belongs to the same family, but wild garlic (Allium Ursinum) has a tiny bulb with no separate cloves, soft leaves and a strong smell but a gentle flavour. Cultivated garlic (Allium Sativum) is a tougher-looking plant, with larger, much more pungent bulbs, and without the soft leaves, instead growing leaves a bit like a leek.

The leaves of wild garlic look a little like the leaves of lily of the valley; a little less glossy and rather softer, but similarly strap-like. In late spring and summer, their extremely pretty white, star-shaped flowers appear – they’re also edible, and are very good as a garnish or in salads. The abundant leaves are very strongly scented, so if you are walking in a wood where there is a patch, you’ll be able to find it with your nose before you spot it. Pick in winter and spring; the plant dies down after flowering. The bruising that happens when you pick the leaf makes the smell even stronger, so don’t leave the container you’ve put your leaves in in the back of the car- consign them to the boot. This smell (and the flavour) becomes softer and sweeter when the leaves are cooked. The leaves will keep raw for several days in the fridge.

I picked a bag of the leaves in Yorkshire, in my mother-in-law’s garden. Wild garlic spreads like crazy, especially in damp shade, and it’s considered a weed when found in gardens. I also dug two clumps and their accompanying soil up, and put them in pots in my own garden. I’m not going to plant them in the ground, because I have a feeling that if I follow my garlicky instincts, in a couple of years I may end up with an all-garlic garden, which isn’t a good look.

Try the leaves in a salad to taste them at their freshest. They’ll also cook beautifully in the same way as spinach (as in the side-dish I prepared to accompany this chicken – saute mushrooms in butter, and add the leaves towards the end, stirring until wilted, then add lemon juice, cayenne pepper and salt), but I think I’ve found the perfect application for them in this chicken and pancetta parcel. I’m very, very pleased with this recipe – if you can get your hands on any wild garlic, give it a try.

You’ll need (per person):

1 chicken breast fillet
5 slices pancetta
1 handful fresh wild garlic leaves
Pepper
1 knob butter

Lay the slices of pancetta out in a rectangle on a piece of greaseproof paper. The slices should overlap so there are no gaps. Lay the wild garlic leaves all over the top, then place the chicken breast on top of that. Grind pepper all over the chicken (you don’t need any salt; the pancetta will be salty enough on its own) and use the greaseproof paper to wrap the pancetta and garlic leaves around the chicken, as if you were rolling a Swiss roll. Use toothpicks to secure the ends of the pancetta.

Melt the butter in a heavy-bottomed, non-stick pan, and when it starts to bubble, saute the wrapped fillets for eight minutes each side. (Start by cooking the presentation side – the one without toothpicks – first.) Garnish with some wilted leaves and pour over the pan juices.

I served the chicken with roast new potatoes, the mushrooms and garlic leaves described above, and a bottle of Pouilly Fuisse. Delicious.

Tortilla Espaniola

We’ve done Spanish omelette before – this one really takes the biscuit, though, and deserves its own spot. Asparagus is appearing in the shops (early – it’s from continental Europe); tiny, sweet sugar snap peas (Kenya – the food-miles-goblin has been doing his work this week) are on the shelves, and suddenly my habit of buying emergency chorizo whenever I see it does not look so daft.

This recipe works best when the vegetables you use are sweet either through long, slow cooking (the onions and red pepper) or through their near-raw freshness (the asparagus and peas). Combined with soft potato, which takes on all the flavour of the onions, and with salty, spicy chorizo, these sweet vegetables become something very special.

I particularly enjoy this dish cold (it’s often served as a cold tapa in Spain). It’s also good hot, but try it if you have a lunch party in the summer; you can make it the night before and serve it at room-temperature alongside other nibbles. This quantity will make enough for six (or for three, hot, for dinner and three, cold, at lunch tomorrow). You’ll need:

2 large onions, sliced finely
2 red peppers, cut into strips
5 small potatoes, peeled (not new potatoes if possible)
2 rings of chorizo, cut into coins
10 stalks asparagus cut into thumb-sized pieces
1 handful sugar snap peas
10 eggs
1 handful cheddar cheese, grated
1 small knob butter
Salt and pepper

Start by sauteeing the onions gently in the butter for ten minutes in a large non-stick frying pan, stirring occasionally. Add the potatoes and the peppers, and continue to cook for another 15-20 minutes, until the potatoes are not so soft they’re collapsing, but pleasantly toothsome. Mix the chorizo, peas and asparagus with the ingredients in the pan, and quickly beat the eggs with some salt and pepper. Pour the eggs over the mixture and cook for another ten minutes.

Sprinkle the tortilla with the cheese (don’t smother it; this is for colour and a kick of flavour, not a duvet) and bung the whole pan under the grill for 5-10 minutes, until the egg mixture is cooked through and the top is bubbling and crisp. Serve with a green salad.

Crispy pasta bake

This is a bit like macaroni cheese, but even nicer. You’ll be making the normal Mornay (cheese) sauce base, but adding sweetly sauted shallots, corn and bacon to the mixture; and topping not with bread, but with croissant crumbs, which form a buttery and crisp top to the baked dish. You’ll need:

1 can sweetcorn
12 rashers smoked streaky bacon
6 shallots, sliced
400g pasta
50g butter
50g plain flour
850 ml (1 ½ pints) mlk
200g cheddar cheese, grated
100g soured cream
1 teaspoon mustard powder
1 grating nutmeg
½ teaspoon cayenne pepper
4 tablespoons grated parmesan
1 ½ croissants, whizzed in blender until reduced to crumbs

Before you start, make sure your croissants aren’t the kind with added vanilla essence. (It won’t necessarily be listed on the packaging, but it the wrapper says ‘flavouring’, don’t buy them.) You want to give a rich sweetness to the crust, not make it taste like patisserie.

Cook the pasta according to the instructions on the pack. Use something with a hollow shape which will hold sauce – I used the shell-shaped conchigle, but you might like to try fusili. At the same time, fry the bacon and shallots together over a high heat until the shallots are brown and sweet, and in a third pan use the butter, flour and milk to make a white (bechamel) sauce.

Turn the pasta, bacon (with its melted fat), shallots and corn from the can into the dish you will bake the pasta in. Melt the grated cheddar cheese into the bechamel with some salt, the soured cream, the nutmeg, mustard and cayenne pepper. Pour the sauce over the pasta mixture and stir to make sure everything is well mixed and coated, then sprinkle the croissant crumbs and parmesan over the top to make a light crust.

Bake at 180°C for 30 minutes, until the crumbs are golden and the sauce is bubbling around the edges of your baking dish.

South-Asian spiced fishcakes

My Mum recited this recipe, which she had just conjured from thin air, down the telephone the other evening. I’m always in the market for good store-cupboard recipes, and this sounded excellent: something to use up that can of good, fatty fish; some mellow and fiery curry spices; last night’s mashed potato; the eggs left over from my last cake; and some of the herbs clogging the fridge. This is a recipe where you need a canned fish rather than something fresh; it’s rich and moist but flaky, which is exactly what you require here.

I love Mummy’s fishcakes. They made a regular appearance on the table when I was a little girl, and since then she’s refined and tweaked them into something quite fantastic. They’re also very quick to prepare if you have some mashed potato hanging around, so next time you prepare some as an accompaniment, make a pound or so extra so you can try these the next day.

The little patties are dusted with cornflour to make them crisp and golden; we eat them with rice and some very serious feelings of gratitude. For about 16 fishcakes you’ll need:

1 can Alaskan red salmon (I went for Alaskan salmon because I’d just been reading Legerdenez, a perfume blog from Alaska which I commend to you – if you’re not in the mood for salmon, a good fatty tuna will also do well.)
6 small shallots
4 cloves garlic
1 large handful fresh coriander
1 ½ teaspoons curry powder (I use Bolsts)
1 red chilli
Zest of 1 lime
1 ½ tablespoons grated fresh ginger
2 eggs
1 lb mashed potato
1 teaspoon salt
Cornflour to dust
Butter and olive oil to fry

Put all the fishcake ingredients except the potato in the blender, and blitz until everything is roughly chopped. (The fish is quite salty already, so be careful not to oversalt.) Remove to a mixing bowl and use your hands to combine everything until well-blended.

Shape the mixture into patties the size of your palm, and dip in cornflour. Refrigerate for half an hour, then fry for five minutes each side until golden. Serve with rice and a sweet chilli sauce, or a wedge of lime .

Crostini al funghi – mushrooms on toast for grown-ups

Mushrooms on toast is a noble and ancient English nursery tea. When I was tiny, I read Alison Uttley’s Little Grey Rabbit and loved it dearly; Little Grey Rabbit would peel the pinky-beige satin skins off field mushrooms and stroke them before cooking them on her stove. In love with the bunny, I developed a fascination with mushrooms.

I’m grown up now. I can’t eat mushrooms on toast without being all post-ironic about it. In this form, though, kiddies’ mushrooms on toast becomes elevated to a dinner party amuse bouche; a gorgeous, silky, creamy, rich cloud of mushrooms on crisp slices of grilled ciabatta.

I still eat it for tea. What the hell; I’m posh.

To serve three for a grown-up nursery supper, you’ll need:

1 large knob of butter
1 punnet small chestnut mushrooms, sliced thin
1 punnet shitake mushrooms, sliced thin
4 shallots, chopped finely
3 cloves garlic, minced
1 small handful (palmful, really) dried porcini mushrooms, soaked
A glug of Marsala
1/4 pint cream
Juice of half a lemon
1/2 teaspoon cayenne pepper
1/2 teaspoon Dijon mustard
1 large handful chopped parsley
Salt and pepper
1 ciabatta

Melt the butter over a medium heat in a non-stick pan until it’s bubbling gently, and turn the fresh mushrooms, shallots and garlic into it. Saute, stirring frequently, until they soften and give up their juices. Add the soaked porcini, and continue to saute until all the juices have evaporated.

Add the Marsala (about a shot-glass full) and simmer until it’s all evaporated and the alcohol has burned off. Add the cream, cayenne pepper and mustard, and stir in the lemon juice, tasting all the time (you might want to use more or less than half a lemon). Simmer until the mixture bubbles and thickens, stir in the parsley off the heat, and season to taste.

While you cook the mushrooms, slice a ciabatta diagonally into ten, and toast the slices until crisp. Pile the mushrooms on the ciabatta slices, and serve immediately. Little Grey Rabbit was missing a trick.

Spice-crusted chicken with Boursin stuffing

Regular readers will note that I’m very fond of Boursin – the garlic-spiked cream cheese which comes in a dear little corrugated tinfoil hat. It’s got a lot more kick than the Philadelphia variety, and I find it much more robust in cooking than other cream cheeses.

It may be a mass-produced cheese, but Boursin actually has quite a history behind it. It’s been around for more than forty years, and was the first large-scale soft cheese production business in France. François Boursin took the idea behind the meal of fromage frais and herbs eaten in French villages (it was a popular meal in Gournay, his own home town), and turned it into “All-natural Gournay cheese”. The ad campaign with the “Du pain, du vin, du Boursin” tagline has been around for nearly as long; it started in 1968, and you can still buy wedge-shaped bits of Boursin for your cheeseboard, if you are the sort of person who has a cheeseboard and thinks Boursin belongs on it.

I like it very much on bread, but Boursin really comes into its own when it’s hot, and acting as a hard sauce.

For this dish you’ll need (per person):

1 breast joint of chicken with skin and bones
1/2 round Boursin
1 teaspoon coriander seeds
1 teaspoon cumin seeds
Butter, olive oil, salt

Push your fingers under the skin of the chicken until it’s loosened and you’ve got a little pocket under all the skin. Push the Boursin under it, squashing and flattening until you’ve forced it all into the pocket. (This is a lot of cheese for a little chicken; just keep going until it’s all packed in there.) Smear any that’s left over the outside of the breast – it’ll help the crust to stick.

Bash the coriander, cumin and a pinch of salt in a pestle and mortar; you’re aiming for a rough grind, so don’t go mad with it. Press the spices and salt into the skin side of the chicken breast (which you have cleverly prepared by making it sticky with cheese).

Melt butter (about a teaspoon per breast) and a slug of olive oil in a large, non-stick frying pan which will fit in your oven (if you don’t own one, use a non-stick roasting tin on the hob) over a high heat, and put the chicken breasts in it, skin side up, for three minutes. Turn the breasts skin-side down when your three minutes are up, and put the whole pan in the oven at 180c for 25 minutes.

You’ll end up with a sweet, toothsome chicken breast annointed with a creamy garlic sauce, and a crisp, herbed skin. Serve with rice, to soak up the cheese and the chicken’s spicy juices.

Incidentally, the corn in this picture, which I served with the chicken, is white corn (maïs blanc) which I found in France, produced by good old Green Giant. The kernels are paler, smaller and longer than normal niblets, and they’re delicious; buttery and sweet. If anybody has seen any in the UK, please let me know. I’ve only got two tins left, and I seem to have become addicted.

Mushroom risotto

It’s cold. It’s windy. When these conditions prevail, our bodies are programmed to do something rather special. They are programmed to crave stodge.

One organism, the mushroom, does better than we do in the cold, leafy months. The supermarket shelves are overflowing with punnets upon punnets of mushrooms, and they’re quite reasonably priced. On top of this, almost everybody I know seems to have a cold at the moment, and I think some garlic, said to have a mild antibiotic effect, is in order. Stodge, mushrooms and garlic. This is a perfect excuse for some mushroom risotto.

Carnaroli is my favourite risotto rice. It’s a fat, short grain which will absorb more than its own weight in stock, and cooks to a fluffy, swollen, creamy risotto. If you can find carnaroli rice, do try using it instead of arborio, which is more often sold as a risotto rice in supermarkets.

For six people, I use:

500g fresh mushrooms, sliced
1 small handful dried cepes (porcini), soaked, the soaking water reserved
5 cloves of garlic, chopped
1 tablespoon fresh thyme, chopped
1 large handful parsley, chopped
1/2 a teaspoon cayenne pepper
juice of 1/2 a lemon
2 pints of stock
5 shallots, chopped
3 stalks celery, chopped
400g carnaroli rice
1 glass marsala
2 tablespoons creme fraiche
4 heaped tablespoons grated parmesan
3 large knobs of butter
Olive oil
Seasoning

I used shitake mushrooms (meaty, robust little beasts which keep a good, toothsome texture; they don’t melt to a slime) and oyster mushrooms (less good, honestly, but still pretty darn nice). I don’t wash them, but wipe them instead with kitchen towel so that they don’t absorb unwanted water. I fried all the mushrooms (including the cepes) with two of the cloves of garlic and half the thyme in a mixture of butter and olive oil, and when they were cooked, stirred in the parsley, squeezed over the lemon and sprinkled over a little salt and some cayenne pepper.

While the mushrooms were frying, I made the risotto base. The celery, shallots, the rest of the garlic and the rest of the thyme were sauteed in oil and butter, and when soft the rice was added, and then fried gently, without changing colour, for a couple of minutes until transluscent.

I added the marsala, and stirred until it was all absorbed. Then I added the soaking liquid from the cepes and stirred until that was all absorbed. The two pints of stock were then added a ladle at a time, each time stirring and stirring until all the liquid had gone before adding another ladle.

After about twenty minutes, the liquid was all absorbed, and the rice creamy and tender. I stirred in the mushrooms, cheese and creme fraiche. Serve this quickly, while it’s still hot and moist. I have managed to convert at least one mushroom-hater with this risotto – try it yourself, and open your arms and welcome winter.