Iced sugar cookies

These little cookies are delicious, easy to make, fun to ice, and will keep for about a week in an airtight tin. What’s not to like? Even I, who singularly lack artistic skill, a steady hand or any visual imagination at all, had a total blast making a big batch of these for Dr W’s birthday.

You’ll be using royal icing and flood icing to colour these in. Piped lines of royal icing make little reservoirs which you will later fill with flood icing – royal icing which has been watered down a very little to make it flow into the shape you’ve outlined. I like to use squeezy bottles for icing rather than an icing bag (much less messy). Bottles are available at most cookware shops for under £2, and they come with a plastic piping nozzle which is perfect for this job. The amount of icing in the recipe below should be sufficient for filling six bottles in different colours, first for outlining, then, with a little water, for flooding.

It’s important to use food colouring that won’t dilute and loosen your icing. Gel icings, which come in tiny round pots to be added to your plain icing with a toothpick, are simply brilliant. I got Wilton’s set of eight gel colours from good old Amazon, and used a licorice pen (from the Elizabeth David shop in Cambridge) for black detail like eyes and buttons. Eight colours will probably be more than you’ll need for any single project, and the pots, although tiny, last for a very long time; you only need the tiniest dot of colouring for a batch of icing. Make sure that you blend the colour with the icing as thoroughly as you can; you don’t want any streaky bits.

Sugar cookies
300g plain flour
2 teaspoons baking powder
230g vanilla sugar
230g butter
1 egg
½ teaspoon vanilla extract

Royal icing (see instructions below for flood icing)
1lb powdered sugar
5 tablespoons meringue powder (available at cookware shops and some supermarkets)
2 tablespoons water

Start by baking the cookies. Preheat the oven to 180°C (350°F). Sieve the flour and baking powder together and put to one side. Cream the sugar and the room-temperature butter with an electric whisk. Add the egg and vanilla extract, and continue to whisk until everything is blended together. Gradually add the flour mixture, beating gently until it is all incorporated.

Roll the dough onto a floured board and use cookie cutters to cut out shapes. Lay out on greaseproof paper on baking sheets and bake for about 12 minutes. Leave the cooked cookies on the sheet for a few minutes to cool a little and firm up, then use a spatula to transfer them to a cooling rack.

While the cookies cool, make the icing by beating together the sugar, meringue and water with your electric whisk until the mixture reaches stiff peaks (this can take several minutes). The icing will keep, covered, in the fridge for a week, so you can make and colour it before making the cookies if you fancy. Colour the icing according to the instructions on the gel colouring pack. Divide the icing between squeezy bottles, and get to work piping outlines on all your cookies – make sure there are no gaps in your outlines for the flood icing to dribble out of later.

The piped icing should dry quite quickly, so you can start filling in with flood icing as soon as you’re finished outlining. To turn the royal icing you outlined with into flood icing, add water a drop at a time and mix well until you have an icing just loose enough to flow when drizzled onto a flat surface. Squiggle flood icing into each outlined area, and use a toothpick to encourage it into the corners.

You can drop contrasting colours of flood icing into flood icing that is still wet to create certain effects. Make lines of wet icing and drag with a toothpick for a feathered effect; or try dripping a single drop of icing in a contrasting colour into wet icing for neat dots.

Edible sprinkles are a lovely, lily-gilding addition too. To stick them onto the cookies, wait for the icing to dry, then mix a teaspoon of meringue powder with a couple of drops of water, until you have a sticky paste. Use a kids’ paintbrush to apply this meringue glue to the area you want to stick sprinkles to, and scatter the sprinkles over while the glue is still wet.

When the icing and sprinkly bits are dry, store the cookies in single layers between sheets of greaseproof paper in an airtight tin.

Hot cross buns

I know – hot cross buns are really cheap at the supermarket, so why would you bother making your own at home?

There’s a very easy answer: home-made hot cross buns are unbelievably delicious (unlike the supermarket variety, these are enriched with butter and eggs, and have more in the way of spices and fruit in their dough) – far better than the bought variety. They’re cheap, too. And if you’re interested in cooking something that will make your house smell divine for an afternoon, hot cross buns are just the ticket.

These sweet, yeasty little buns are a treat for Lent. (Pipe a Darwin fish on yours if you do not subscribe to this religious baking stuff.) According to Elizabeth David, the hot cross bun was a cause of great concern among the Protestant monarchs of England – Catholics were rumoured to bake them using communion wafers, and all that doughy symbolism was immensely threatening. The Tudors actually tried to ban them, but the populace would not be fobbed off with toasted teacakes, and eventually Elizabeth I passed a law allowing bakeries to make them at Easter and Christmas.

To make 12 hot cross buns, you’ll need:

Starter
7g (1 sachet) easy-blend yeast
1 teaspoon soft brown sugar
100g strong white flour
200ml blood-hot milk

Dough
350g white bread flour
1 pinch salt
½ nutmeg, grated
2 tsp ground cinnamon
1 teaspoon allspice
Zest of one lemon and one orange
50g salted butter, cut into small pieces
50g light brown soft sugar
90g candied mixed peel
90g sultanas
1 egg

Piping
3 tablespoons plain flour
3 tablespoons caster sugar
Water

Glaze
1 orange
75g caster sugar
100 ml water

Get your yeast going by mixing it with all the starter ingredients in a small bowl, and leave it in a warm place to start working for fifteen minutes while you prepare the rest of the dough for the buns.

Mix the flour for the dough in a large bowl with the spices, pinch of salt and the citrus zests. Rub the butter, cut into small pieces, into the flour and spice mixture as if you are making pastry. When the mixture resembles breadcrumbs, stir through the sugar, peel and sultanas. Check that the yeasty starter mixture has plenty of large bubbles on the surface, and add it and the beaten egg to the dough mixture. Mix well with a wooden spoon, and when everything is amalgamated, start to knead the mixture with your hands.

Knead for ten minutes until you have a soft dough which is no longer sticky, and which stretches easily. (If after five minutes or so of kneading the dough still seems very sticky, add a little more flour – bread doughs will vary enormously in stickiness depending on variables like the humidity outside and the temperature in your kitchen.) Oil a bowl, and put the kneaded dough inside with some oiled cling film or a damp teatowel on top. Leave the dough for about an hour and a half in a warm place until it has risen to double its original size.

Knock the dough down, and make twelve round balls from it. Arrange them evenly in a baking dish, cover again and leave to double in size again in a warm place (between an hour and an hour and a half).

Preheat the oven to 220°C (425°F). When the buns have risen, make a paste for the crosses from flour and caster sugar, adding water until it is stiff and pipable. Using a piping bag or a freezer bag with a hole snipped in the corner, pipe crosses on each bun.

Bake the buns for 15-20 minutes until they are golden. While the buns are baking, take the zest and juice of the orange for the glaze and simmer it with the water and sugar until you have a light syrup. Brush the hot syrup over the hot buns when they come out of the oven.

You can serve these immediately or cool and toast them. Either way, they’re glorious with a big slab of butter.

Lemon curd

Have you ever had one of those days when you’ve suddenly noticed that you’ve accidentally bought fifteen lemons? I had one of those on Friday, and decided to use the lemons life had given me to make some lemonade. (Dead easy – maple syrup and lemon juice in iced water to taste.) There were still lemons left over. I decided to test one of the heavy pans in the new Le Creuset Satin Black glaze that Dr W (the wonderful, thoughtful Dr W) bought me for my birthday; they promise to be good at distributing a very slow, even heat. Perfect for lemon curd.

If you’re lucky enough to be able to get your hands on American Meyer lemons (a superbly lemonsome lemon) or thick-skinned, aromatic Sicilian lemons, you should immediately drop everything else you’re doing and use them to make curd. It’s a wonderful part of the English nursery tea – try it as a spread on some good, crusty toast, along with a cup of Earl Grey tea. The aromatic lemon zest in the curd and the bergamot in the tea are perfect partners.

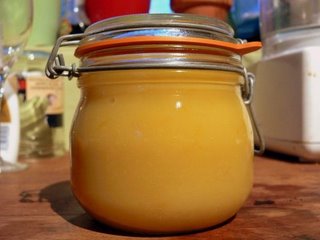
You probably have all the ingredients you need to make lemon curd in the house already (although Meyer or Sicilian lemons are best, any unwaxed lemon will make a delicious curd), and it’s very quick – it should only take you about 40 minutes, at most, from the time you start to zest your lemons to the satisfying moment when you ladle the lovely primrose goo into jars. Home-made lemon curd is a million times nicer than the shop-bought stuff, and lasts for about six weeks in the fridge. To make about 1.25 kg of lemon curd, you’ll need:

4 lemons
4 large eggs
350g caster sugar
250g butter
2 teaspoons cornflour

Start by breaking the eggs into a heavy saucepan away from the heat. Beat the eggs thoroughly with a balloon whisk. Tip the grated zest and juice of the lemons over the eggs with the sugar, the butter, cut into tiny cubes, and the cornflour. (Strictly speaking, the cornflour is a cheat’s ingredient – it doesn’t add any flavour, and all the thickening comes from the eggs, but the cornflour provides a guarantee that your curd will not curdle. I’ve never had a lemon curd go wrong with a small addition of cornflour.)

Put the saucepan over a medium/low heat, and start to go at it with a balloon whisk. Whisk constantly until the butter has all melted. After another eight minutes or so of hard whisking, the curd will start to thicken. Turn the heat down to its minimum and keep on whisking, making sure you get into every corner of the pan, for another three minutes or so, until the curd is deliciously thick (it will continue to thicken as it cools down). Ladle immediately into sterilised jars and refrigerate once cool.

Rhubarb crumble with proper custard

The forced rhubarb is arriving in the shops at the moment. It’s a lovely delicate pink when raw, and can tend to lose its colour a bit when cooked, unlike the very red rhubarb from later in the season – but it tastes deliciously of spring and makes a great crumble (or crisp, as the Americans call it). The lovely buttery, crunchy topping is impossible to get wrong, and this is a good recipe to start kids on before they try to make pastry, so they can get used to the rubbing-in method.

The custard below is made in the traditional way with egg yolks, vanilla and milk, but also includes a spoonful of Bird’s instant custard. The Bird’s, full of cornflour, stabilises the other custard ingredients as well as adding some flavour, so you’ll end up with a supremely custardy custard, rich, silky and packed with vanilla. Alfred Bird, a chemist, came up with his custard powder in 1837, because his wife loved custard but was allergic to eggs: a romantic gesture that’s still going strong after nearly two centuries. Mrs Bird is no longer with us, so additional yolks are not an insensitive addition.

For this first crumble of the year, I wanted the buttery, clear taste of the crumble topping to shine against the fragrant spring rhubarb, so this is a plain topping with a rhubarb-only filling. If you want to jazz things up a bit, try adding a couple of teaspoons of ground ginger to the topping and two or three tablespoons of crystallised ginger to the filling. To serve six, you’ll need:

Crumble
225g plain flour
75g softened, salted butter
75g soft brown sugar
900g trimmed rhubarb
75g caster sugar

Preheat the oven to 180°C (350°F). Slice the rhubarb into one-inch chunks. Place in a saucepan and sprinkle over the caster sugar. Cook gently, covered (you don’t need any extra water because there is so much in the rhubarb) for 15 minutes, stirring occasionally, until the rhubarb is cooked but still chunky.

While the rhubarb is simmering, make the topping in a large bowl by rubbing the butter into the flour gently, using your fingertips, until the mixture resembles breadcrumbs. Stir the sugar through the crumble mixture.

Put the rhubarb in a shallow cooking dish (I like my le Creuset tatin dish for this) and sprinkle the topping over. Scatter a few drips of water from the tips of your fingers over the surface – this roughens up the top and makes things even crispier. Bake for 30-40 minutes until the crumble topping is golden brown.

Custard
2 tablespoons Bird’s custard powder
1 vanilla pod
1 pint milk
3 egg yolks
2 tablespoons vanilla sugar

Mix the sugar and custard powder in a bowl with a little milk taken from the pint until you have a smooth paste. Bring the rest of the milk to a bare simmer (it should be giggling rather than chuckling) and pour it over the mixture in the bowl. Return the whole lot to the saucepan over a low heat and, whisking hard, add the egg yolks and the seeds from inside the vanilla pod to the mixture. Keep cooking until the custard thickens and serve immediately. (If you need to keep the custard warm for a while before serving, lay a piece of cling film directly on its surface to avoid forming a skin.)

English pancakes

Tomorrow is Shrove Tuesday or Mardi Gras, which much of the world celebrates with colourful parades, loud music and women baring their boobs in return for beads. In the UK, we just eat pancakes.

I don’t hold with this giving-things-up-for-Lent business. Pancake Day is meant to be a way to use up all the good things in your larder before embarking on 40 days of mealy-mouthed asceticism. Having given up giving-things-up for Lent myself, I like to eat pancakes year-round, but if you’re one of those for whom this is a once-a-year treat, here’s a recipe for some lovely, lacy pancakes flavoured with orange flower water, which makes them light and delicately floral. In the picture above, I’ve stuffed them with whipped Chantilly cream (whip the cream as usual, but add a tablespoon of caster sugar and a few drops of vanilla essence to every pint) and blueberries, then drizzled them with maple syrup, but there are plenty of other simple fillings you can try:

  • Lemon juice (or lime juice) and sugar
  • A couple of tablespoons of juice straight from an orange with a sprinkle of sugar and a few more drops of orange flower water
  • Melted butter and caster sugar
  • Sweet chestnut purée
  • Maple syrup and bananas
  • Golden syrup
  • Strawberry jam and cream

To make about 12 pancakes, you’ll need:

220g plain flour
½ teaspoon salt
4 large eggs
550ml whole milk
2 tablespoons orange flower water
Shortening or vegetable oil for cooking the pancakes (shortening is best)

Sieve the flour and salt into a bowl, and make a well in the middle. Break the eggs into the well and whisk with a balloon whisk, pouring the milk in gradually. Eventually, you should have a smooth batter about the same consistency as single cream. Stir the orange flower water into the batter. This batter doesn’t need to stand before you use it.

Heat about 1 tablespoon of shortening in a large pan over a high heat. The pan should be as hot as you can get it if you don’t want your first pancake to be a flabby disaster. Swirl about ⅓ of a ladle of the batter around the pan (adjust the amount for smaller pans). You should have not quite enough batter to make it to the edges of the pan if you want to have a lacy pancake with a delicate frilly, crisp edge. Flip the pancake over after about 45 seconds. I always use a spatula for this operation, having experienced a childhood pancake/ceiling incident – if you are brave and strong in the wrist, toss the pancake in the pan. Cook the raw side for another 45 seconds, and slide out onto a plate.

We usually eat these one by one as quickly as I can cook them, but if you want to make a great heap of pancakes and serve them all at once, you can wrap the pancakes in foil and keep them in a very low oven, although this does some violence to the lovely crisp edges. It’s best to eat them straight from the pan for the best texture.

Mrs Charles Darwin’s Recipe Book – Baked apple pudding

I note that every year, all good intentions aside, I encounter a total failure to blog the moment I get on skis. Apologies – put it down to grotty resort food; the protein-hunger you get with after a day of exercise which kills off any ability to distinguish between the delicious and the simply calorific; and general exhaustion. (Honestly; you’re lucky I’m blogging now. I swear that jetlag only gets worse as you get older.)

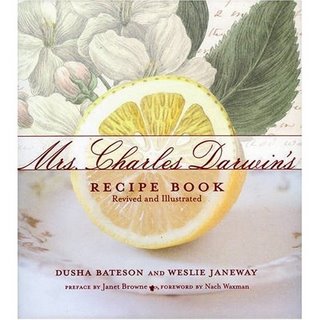
I’ve a few more posts from my American odyssey to bring you, but I’ll intersperse them with some recipes and non-US reviews – like today’s. Just in time for the Darwin bicentennial, I was invited to the launch of a new edition of Mrs. Charles Darwin’s Recipe Book: Revived and Illustrated in Cambridge. I cursed a bit about not being able to make it (I was at Disneyland that day – which although fabulous, doesn’t have any food worth writing about besides candy floss, popcorn and California’s greasiest wurst), and was delighted to find a copy of the book on the doorstep when I got back home.

When we consider the lives of the great and the good, it doesn’t usually occur to us to wonder what they ate. I mean – think of Darwin, and what comes to mind? I bet it’ll be a list along the lines of On The Origin of Species, Galapagos finches, the Beagle, beards – we dehumanise our icons and reduce them to a series of cyphers.

Emma Darwin’s little recipe notebook offers a fascinating and humanising glimpse into the family’s domestic life. They’re commonplace, simple Victorian recipes – it’s the notebook of a charmingly ordinary woman. This edition expands the little book into a good-sized, handsome cookbook by reproducing many of her handwritten pages, alongside some great food photography, some very pretty contemporary prints of ingredients like chickens and celery, and detailed notes by the editors on each recipe. There are fascinating peeps into the Darwins’ domestic life here – you may well be aware that Darwin sufferered for much of his life from a mysterious illness he is thought to have picked up in Brazil, but probably didn’t know that his doctors forbade him from eating pork (he ignored them in the case of bacon), or that he blamed rhubarb for some of his stomach problems.

Here’s Emma’s recipe for a baked apple pudding in batter. The editors suggest you use well-flavoured dessert apples, and serve with a sprinkling of sugar and plenty of cream. To serve six, you’ll need:

6 apples
2 tablespoons sugar, plus more for sprinkling
½ teaspoon finely grated lemon peel
1 tablespoon butter
3 ounces (75 g) flour
1 cup (250 ml) milk
2 eggs

Grease an ovenproof dish deep enough to hold the apples and batter. Preheat oven to 350°F (175°C).

Peel and core the apples. Place them in the prepared dish. In each hole, put a teaspoon of sugar, a little grated lemon peel, and top with a small piece of butter. Bake for 20 minutes. Remove the apples from the oven and raise the temperature to 400°F (200°C).

While the apples are baking, sift the flour into a bowl and make a well in the centre. Add the milk, a little at a time, and mix to a smooth batter. Beat in the eggs, one at a time.

Pour the batter over the apples and bake for about 30 minutes, or until well risen and brown on top. Sprinkle with sugar and serve at once with cream.

Cherry-marzipan Christmas cookies

This one’s for marzipan lovers. I love almonds and cherries, and there’s something undeniably Christmas-y about the combination. To kick the Christmas angle up a notch, I spent a while experimenting with marzipan, and I’ve worked out a method that makes marzipan pieces melt into the cookie dough in a gooey, puffy fashion.

I’ve used sweetened, dried sour cherries, which are now readily available in the baking sections of supermarkets in little metallised plastic packets. They’re a very different beast from glacé cherries, and retain a tart bite and juicy plumpness, which is a brilliant contrast to the sweet marzipan and sugary cookie dough. Ground almonds and egg whites give these a near-macaroon texture. They’re light and have a lovely crisp on the outside with a slightly gooey, squashy centre – absolutely irresistable.

The plan was to make 30 of these, to eat a couple for dessert, and spend the rest of the week eating a few a day so I could tell you how long they’ll last in an airtight box. Sadly, they turn out to be rather moreish, and I discover that as of this morning Dr Weasel and I have both been fishing surreptitiously in the box when we thought the other person wasn’t looking. There are only ten left. I think I need to get the exercise ball out before I start to resemble it.

To make about thirty cookies, you’ll need:

110g ground almonds
110g plain flour
½ teaspoon baking powder
150g golden marzipan
225g salted butter
225g caster sugar
1 egg white
½ teaspoon almond extract
80g dried sour cherries

Mix the ground almonds, flour and baking powder in a large bowl, and chop the marzipan into tiny cubes (about half a centimetre on each side). Mix the marzipan with the dry ingredients carefully, so each little cube is coated and separate, and set the bowl aside.

In another bowl, cream the softened butter and sugar together with an electric whisk in another bowl. Add the egg white and almond extract and keep at it with the whisk until the mixture is pale and fluffy. Use a wooden spoon to stir the flour and marzipan mixture into the butter mixture with the cherries.

At first the mixture will look as if it won’t form a dough, but if you keep at it you’ll find it will eventually come together smoothly (in part thanks to the oils in the marzipan and ground almonds). Bring the dough together into a ball with your hands and put it in a freezer bag, seal and leave in the fridge overnight.

When you are ready to bake the cookies, preheat the oven to 180°C (350°F). Take the dough out of the fridge and make neat balls of about an inch in diameter between your palms, ensuring that every ball has at least a couple of cherries in it. Arrange the balls on grease-proof paper on baking sheets with a gap of 2 inches between each one, and bake for about 25-30 minutes until the cookies are turning golden (see photograph). Remove from the oven and leave to cool on the baking sheets until the cookies start to firm (about five minutes). Use a spatula to move them onto racks to finish cooling.

Gingerbread

Massive apologies for the gap in posting. Something dreadful happened: Dr W bought me a copy of Spore, and my week subsequently vanished. It wasn’t just the week that disappeared – with it went my ability to sleep or get anything besides evolving, building cities, murdering pirates, searching for the Grox and colonising several star systems done. Still – I’m back now, and the really good news is that next week I will be blogging from Montreal, where I’ll eating at Toque! (apparently one of Canada’s best restaurants), Au Pied de Cochon (foie gras, duck, pigs’ feet, poutine), Schwartz’s Charcuterie Hebraique and plenty of other interesting spots, as well as hunting down some markets and delis. Spore is not coming with me to Montreal, so I’m all yours. This time, I’ve booked a suite hotel, specifically because it came with a kitchen. How many times have you been on holiday and found yourself antsy because you don’t have a fridge or oven to keep or cook that amazing and fascinating thing you found someone selling?

Anyway. Onto the gingerbread. This is a southern English gingerbread, not the northern parkin, which usually includes oatmeal along with the treacle. This gingerbread is a lovely dense, moist, dark cake, which will keep perfectly for more than a week if you wrap it tightly in greaseproof paper and tinfoil. Don’t eat this on the day that you make it – wrap it up and put it to one side for a day, and your gingerbread will become even moister and stickier overnight.

The pieces of crystallised ginger will sink in the tin, but this actually creates a very pretty jewel-like layer of ginger at the bottom of the gingerbread loaf. Turn it upside-down to serve so the jewelled surface is on top. To make gingerbread to fill a 1l loaf tin, you’ll need:

110g golden syrup
110g treacle
110g soft brown sugar
280ml milk
230g self-raising flour
1 ½ teaspoons bicarbonate of soda
1 teaspoon ground ginger
1 teaspoon ground cinnamon
½ teaspoon ground cloves
1 teaspoon ground mixed spice
110g salted butter
1 egg
150g crystallised ginger in syrup, drained and chopped

Preheat the oven to 180°C (350°F).

Grease the bowl of your weighing scales, and measure out the treacle and syrup. Pour them into a saucepan (patting yourself on the back for having had the foresight to grease the bowl) and warm gently, until the mixture reaches body heat. In another pan, dissolve the sugar in the milk over a low heat and set aside.

Sieve the flour, spices and bicarb together, and rub the butter into the mixture, as if you were making pastry, until you have a fine mixture resembling breadcrumbs. Add the ginger pieces and mix thoroughly. Use a balloon whisk to beat the milk and sugar mixture, then the treacle and syrup mixture, into the flour. Finally, beat the egg into the gingerbread batter with your whisk.

Pour the mixture into a greased and lined loaf tin, and bake for 1-1¼ hours, until a toothpick inserted into the middle of the gingerbread comes out clean. Cool in the tin, turn out and wrap tightly for 24 hours before eating.

Chocolate orange fairy cakes

I eat precisely one Terry’s Chocolate Orange every year, at Christmas. Here, for non-festive times of year, is the same thing in cake form.

There will be no post here on Monday; it’s a Bank Holiday, and I shall be spending the day on a boat.

To make 16 little cakes, you’ll need:

Cake
100g soft butter
100g caster sugar
2 eggs
100g self-raising flour
1 teaspoon baking powder
Grated zest of 1 oranges

Icing
75g dark chocolate (I used Hotel Chocolat’s amazing 100% cocoa solids bar from the Purist range)
50g butter
75ml double cream
Grated zest of 1 orange

Preheat the oven to 200° C. Beat all the cake ingredients together with an electric whisk until the mixture is pale, light and fluffy. Divide it between 16 paper cake cases and bake for 20-25 minutes until the cakes are pale gold in colour, and a toothpick inserted into the centre of one comes out clean. Set the cakes to cool on a rack while you make the icing.

Melt the butter and chocolate together in a bowl over some boiling water. Stir in the orange zest and a tablespoon of the cold cream, and begin to beat with the electric whisk on medium. Pour in the cream in a thin stream as you beat, and when all the cream is incorporated, continue to beat air into the chocolate until the mixture is pale, spreadable and light.

Spread the icing over the cooled cakes with a knife (or, if you don’t hate washing up, pipe it on). These cakes keep well in an airtight container for a few days.

Pouding chomeur – maple syrup sponge pudding

The chocolate puddle pudding I wrote about a few weeks ago went down so well that I felt duty-bound to make another self-saucing dessert for you to try at home. Pouding chomeur (French for poor man’s pudding) is a French Canadian dish, dating from an era when poor men could afford maple syrup. Maple syrup has been pretty pricey stuff for as long as I remember, and I suspect that this pudding was named when dinosaurs still roamed the Latin Quarter of Montreal.

You’ll be making an easy sponge, and pouring a maple syrup and cream sauce over it before putting it in the oven. The liquid magically swaps places with the sponge while the pudding is cooking, and you’ll end up with a lovely moist cake layer on top of a thick, syrupy, mellow and gloriously sweet sauce.

A warning – this is, by design, a very sweet dessert. I recommend cutting through the sweetness by sloshing cream over the warm cake before you eat it, or by having a glass of cold milk by your plate.

To make an amazingly sweet cake from the time of the dinosaurs, you’ll need:

Sauce
375 ml maple syrup (I used Grade A syrup, but Grade B will be great here too)
250 ml double cream
1 tablespoon cider vinegar
Pinch of salt

Cake
170 g caster sugar
90 g butter
225 g self-raising flour
2 teaspoons baking powder
180 ml milk
1 egg
1 teaspoon vanilla extract
¼ nutmeg, grated
Zest of 1 lemon

Preheat the oven to 180° C (350° F).

Bring the syrup, cream, vinegar and salt to the boil in a saucepan and immediately remove from the heat. Set aside.

Cream together the butter and sugar with an electric whisk in a large mixing bowl, until the mixture is pale and soft. Add the egg, vanilla extract, lemon zest and nutmeg to the bowl and beat in well with the whisk. Sieve the flour and baking powder in another bowl. Continue to whisk the creamed butter mixture on a medium to high speed, adding the milk and flour a tablespoon at a time until all the milk and flour are used up and the sponge mixture is light and fluffy.

Use a spatula to spread the sponge mixture in the bottom of a 20 cm square cake tin. Pour the sauce gently over the top. Don’t worry if it appears to disturb the sponge mixture – magic will happen as soon as you shut the oven door.

Put the cake tin on a middle shelf of the oven and bake for 45-50 minutes (it may take ten minutes or so longer – test the cake with a toothpick in the centre; if it comes out clean, the cake is done). Serve warm with an insulin drip.