Pepper-hot apple cake

The apples are falling off my trees as fast as I can core, peel, slice and bag them for freezing. At this time of year, when you’ve apples galore, try recipes like this which are extremely generous with the fruit; a cake crammed with them will be darkly moist and juicy.

Freshly ground black pepper and a tiny pinch of cayenne lift the cinnamon in this cake and somehow make the apples taste all the more applesome. I’ve made a cream cheese icing for no other reason that that it’s my favourite. If you want to try something different, try a buttercream icing with two teaspoons of ground cinnamon worked through it instead.

You’ll need:

Cake
4 large cooking apples, peeled, cored and diced into ½-inch squares
2 eggs
4 oz softened butter
4 fl oz (8 tablespoons) milk
1 lb castor sugar
½ teaspoon salt
2 teaspoons bicarbonate of soda
2 teaspoons cinnamon
6 twists of the pepper grinder
1 pinch cayenne pepper
1 lb flour

Icing
8 oz cream cheese
10 oz icing sugar

Place all the cake ingredients except the apples in a large bowl, and mix thoroughly using a hand blender or a wooden spoon and elbow grease. When the ingredients are well blended, add the apple chunks to the bowl and combine with the other ingredients. Pour everything into a greased springform tin, and bake at 180° C for an hour. After an hour, test with a skewer (if the skewer comes out sticky, the cake is not finished). When the cake is cooked, set aside to cool.

Blend the cream cheese and icing sugar and spread over the surface of the cake when it has cooled. This cake is especially nice in the afternoon with a big cup of tea.

Cherry clafoutis

This clafoutis recipe is great at this time of year, when cherries are in the supermarkets in superabundance. The punnets are enormous, and several places are offering buy one get one free deals – shop around for your cherries and make sure those you buy are juicy, dark and handsome.

Clafoutis is a traditional dessert from the Limousin region of France, made with fresh fruit (usually cherries) and a thick batter. I’ve made this dish out of season using cherries preserved in kirsch. It’s very delicious that way, but I can’t help finding a clafoutis made with fresh cherries just that bit better. Don’t bother stoning your cherries; they’re a pig to stone (although there is a tool you can buy to help), and the juice from the stoned cherries leaks into the batter. Much better to have a whole cherry burst juicily in your mouth, then spit the stone out, than have it sit there damply, having leaked all its lovely juice pinkly into the rest of the dish.

Credit is due here to Mr Weasel. This is my recipe, but he cooked it because I was busy swearing at a wok full of boiling oil – of which more tomorrow.

To serve six, you’ll need:

4 oz flour
3½ oz caster sugar
6 eggs
2 drops almond essence
½ pint milk
50 cherries (or enough to cover the bottom of your pan)

Preheat the oven to 210°C.

Grease your pan. I used a tarte tatin dish, which is about 10 inches in diameter. Put enough cherries in the bottom of the dish to cover it in a single layer.

Use an electric handwhisk to beat the sugar, almond essence and eggs together. Add the flour to the bowl and drizzle the milk into the mixture, whisking all the time until you have a smooth batter. Pour the batter over the cherries in the dish, and put it in the oven for 45 minutes.

When you remove the clafoutis from the oven, it will have puffed up, a bit like a souffle. Set it aside to subside for a couple of minutes, then dish it up. Serve with cream – and remember not to bite down on the stones.

Elderflower cordial

I love cooking at this time of year. Ingredients are quite literally falling out of the trees into my always-ready pan. Elderflower cordial, diluted with still or sparkling water, is the quintessential English summer drink. It’s also fantastic in many desserts with gooseberries; try adding some to the mixture next time you make gooseberry fool. It’s got savoury applications too, and is good in a chicken marinade.

I’ve recently discovered a very good Martini made with gin (Hendricks for preference), elderflower cordial, lemon zest and lots of ice. This recipe will make you plenty of cordial, so you’ll be able to experiment with it in cooking and cocktails all you like. It’s also joyously cheap, especially when compared with the cordial you buy in the supermarket.

Elder bushes are in flower in June, and you’ll see them all over the place, their flat, white flower heads on display. (You can also cook the flowers in fritters for a delicious dessert.) Pick, if at all possible, away from roads. Be careful that the flower heads you pick are fully open, but not starting to go brown; the plate-like head should not lose any flowers when shaken. Don’t take too many flowers from any one bush. You’ll want some in place to make elderberry and apple pie later in the year. Make the cordial as soon as you get home. The flowers lose their freshness quickly, even in the fridge, and start to smell like nothing so much as a horny tom cat. (Don’t let that put you off; the cordial itself tastes and smells ambrosial.)

To make around 2.5 litres of cordial, you’ll need:

2.5 kg sugar
35 elderflower heads (the plate-shaped mass of flowers)
2 litres water
3 lemons
100g citric acid

Put the sugar and water into a large pan, and slowly bring up to the boil, stirring now and then.

While the pan is coming up to temperature, remove the zest from the lemons and place it in a large bowl (big enough for all the ingredients) or a large pan. Slice each lemon into four and put the slices in the bowl with the zest and the elderflowers. Don’t wash the elderflowers, but do check there aren’t any little creatures living in among them.

When the sugar/water mixture is boiling, stir it to make sure all the sugar is dissolved, and take it off the heat. (It will be disgustingly hot. Be careful.) Use a ladle to pour the sugar syrup over the elderflowers and lemon. When all the syrup is in the bowl, stir in the citric acid and cover with a teatowel (or the lid if you are using a pan).

A note of warning – citric acid has, for some reason, been very hard to get hold of this year. Most chemists should carry it, and brewing supply shops and Indian supermarkets will also sell you packets. The chemists I spoke to this year said that the suppliers have had a problem, and this certainly seemed to be the case; I only found some in my fifth chemist. You need the citric acid as a preservative, so don’t try to make this without it. Tartaric acid (not cream of tartar) can be used instead. (**Update** When making my 2007 batch, I gave up on trolling around all the chemists in Cambridgeshire and ordered the citric acid online from Edict Chemicals, where it’s very inexpensive. Take a look – they’ve got some interesting food and household ingredients on offer.)

Leave the flowers to steep in the syrup overnight. Strain the resulting mixture through a square of muslin in a sieve the next day, and bottle with tight stoppers. This keeps well (especially in the fridge), but just to be sure, I like to freeze some for Christmas, when we all need to be reminded that there is a sun that’s not watery, and that the sky is sometimes blue. Drink deeply. It’s good stuff.

Praline

Almonds in a dark, crisp caramel aren’t just used in European cuisine. They’re a popular Chinese nibble (although the Chinese do not pulverise them as we do in Europe), and gosh, they’re good. Praline is what the European call the powder made from pounding the toasted almonds and caramel. try making the powder, and mix it into ice-cream, a creamy cheesecake topping, chocolate sauces or meringues. Alternatively, do what I did on Saturday, and gobble the crisp little almonds whole.

Chinese caramelised almonds usually keep their little skins, as in the picture. If you’re making European praline, you’ll need to blanch your almonds before you begin. Don’t buy ready-blanched almonds (white almonds with no papery skin). It’s very easy to slip the skins off yourself – just pour boiling water over the almonds, and when everything has cooled down, pop them out of their brown skins. Blanched this way, your almonds will taste sweeter and fresher.

For every cup of almonds, you’ll need:

1 tablespoon butter
4 tablespoons caster sugar
½ teaspoon lemon juice

Put all the ingredients in a non-stick pan. Keeping everything on the move, cook over a medium heat until the almonds are brown and toasted, and the sugar is melted and golden. Keep a careful eye on everything; the almonds can burn very easily. Add the lemon juice at the end to prevent crystals forming.

Turn the contents of the pan out onto a buttered surface. I use a cold, non-stick baking pan, but in Italy and France a marble slab is traditional. Allow the praline to cool at room temperature until it is hard and brittle, then break the almonds up.

If you’re planning to use praline as a powder, put the cooled almonds and caramel into a plastic food bag. Wrap this in a tea towel, and wallop the hell out of it with the end of a rolling pin. Praline powder will keep in an airtight container for a few days, but you’re unlikely to be able to resist eating it for that long.

Rhubarb and cream cheese cake

Before we begin, an apology. The photograph accompanying this post is horrendous. Deciding to photograph dessert after a long and riotous evening in good company with good wine was perhaps not my smartest decision this week. I kept a slice back to take a picture of this morning, but on waking discovered Mr Weasel, an insomniac when there is cake in the house, had got up at 6am and eaten it. I’ll make the cake again at the weekend and take some pictures which make it look more like something you’d like to eat – in the meantime, please be assured that this is an alarmingly delicious cake.

Rhubarb is in season in the UK at the moment. Buy it now, while it’s cheap – there are many things besides fool and crumble you can do with it. This is another cake which is essentially a huge cheat; a quick cheesecake topping is pressed into and cooked with boxed cake mix, prepared so it’s very stiff to counter the gorgeously soft cheese. It takes minutes to prepare and tastes glorious.

You’ll need:

1 box American yellow cake mix
4oz melted butter
2 eggs
1 large carton full-fat cream cheese
Icing sugar (enough to fill the cream cheese carton)
5 stalks chopped rhubarb
3 tablespoons caster sugar
2 tablespoons water

Combine the butter, eggs and cake mix until you have a stiff paste, and pack it into the bottom of a springform cake tin. Use a fork to blend the icing sugar and cream cheese, and press the sweet mixture onto the top of the cake mix, working with a spatula from the centre to make the cheese layer a little thicker in the middle and thinner at the edges. Place in an oven at 180°C for around 40 minutes, or until the top is turning golden and the cake does not wobble when shaken. Leave the cake to cool. It should have a depression in the top where the cheesecake mixture was thickest – this will act as a bowl for the rhubarb.

When the cake is cool, simmer the rhubarb, caster sugar and water together until the rhubarb is tender, pink and coming apart. Spoon the rhubarb into the depression on top of the cake, sprinkle with icing sugar and serve immediately. Don’t leave any in the fridge – it’ll make your husband get up early so he can eat it in secret.

Reach Fair 2006 – toffee apples

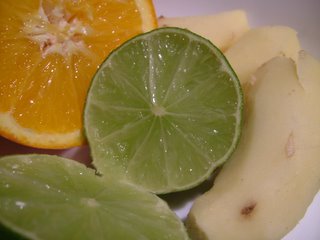
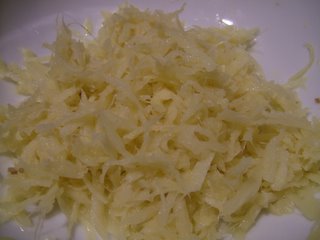
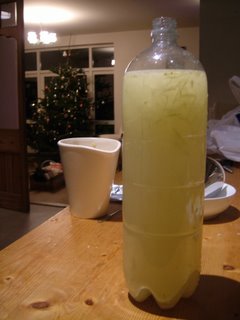
First of all, an apology for not having posted for a week and a bit. A visit from family, a series of busy evenings of unbloggable dinners (at the houses of friends who weren’t seeking Internet fame, at the University where the lights are dim and the meals a bit swillish) and finally a really, really nasty brush with salmonella all conspired to stop me posting. I’m better (and thinner – positively svelte, now I mention it) again now, and I and the seven colleagues who ate the coleslaw at the pub on Perne Road have called Environmental Health in.

Cast your minds back a week and a half.

Astute readers familiar with Cambridgeshire will have worked out by now that I live in Reach, a tiny village about fifteen miles from Cambridge, set around a large green. The village is complete with a Roman canal, a ruined Norman church (I’m looking at it out of the living room window as I type – see above for a picture taken at the end of March – the roundabout on the left is the view out of the front garden from the last week of April) and marks the start of the seven-mile Devil’s Dyke, a perfectly straight chalk earthwork which was put in as defence by Hereward the Wake’s lot. It is, you might gather, a village with a fair old bit of history.

In 1201, King John granted a charter to the village allowing it to host an annual fair on May 1. Historically, the fair had huge significance in the region, and was a big event for those wishing to trade in livestock and the goods which had come down the Roman canal (which, in 2006, is still navigable, although it’s not been used commercially for about a century). Back then, the fair was a three-day affair, drawing visitors from all over the east of England.

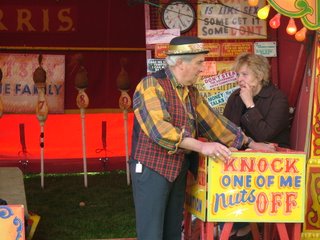
Eight hundred and five years later, the fair is still running every year, although now it’s an old-fashioned funfair which only opens for a day, with a merry-go-round, swingboats, hoopla, a coconut shy and a helter-skelter. The local schoolkids dance around a maypole, the village is infested with morris dancers and squeezebox players, mock battles are held on the playing fields, and there’s a hogroast.

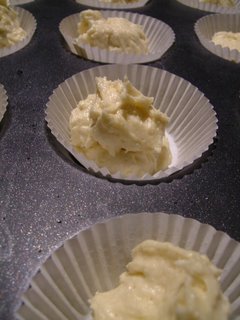
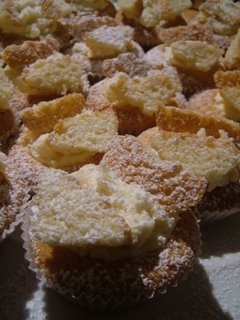
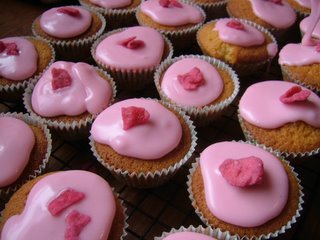
There’s food everywhere you look; excellent local ice-cream, vans full of sweets, the coconuts nobody is winning because they appear to be weighted with lead. Our very splendid local pub also has a beer tent most years. These toffee apples are particularly magnificent, and they’re a staple of the fair. To make your own, you’ll need:

450 g soft brown sugar
50 g butter
10 ml malt vinegar
150 ml water
1 tablespoon golden syrup
6-8 medium-sized apples and the same number of good wooden sticks. (I’ve used pencils in emergencies – and no sticks for your toffee apple is, as far as I’m concerned, an emergency par excellence.)

Put the sugar, butter, vinegar, water, and syrup into a large pan with a heavy base. Stir over a low heat until the sugar has dissolved, then raise the temperature and then boil until the temperature reaches 143°C (soft crack on your jam thermometer). At this temperature a drop of the mixture in cold water will separate into hard threads which are not brittle.

Push the sticks into the clean apples. Dip the apples into the toffee and swirl them around for a few seconds until they are covered in the toffee. Leave to cool on a sheet of greaseproof paper.

I’ll leave you with a photo of the fair in the 1930s. See those people sitting on the verge on the left? These days, that’s my front garden.
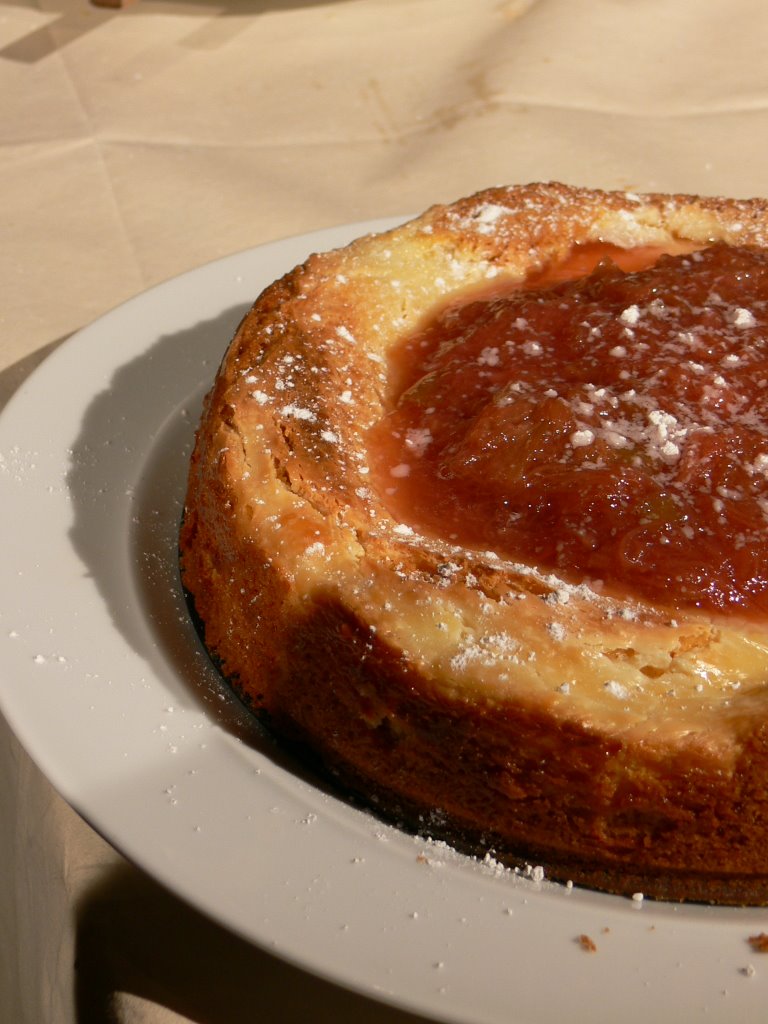
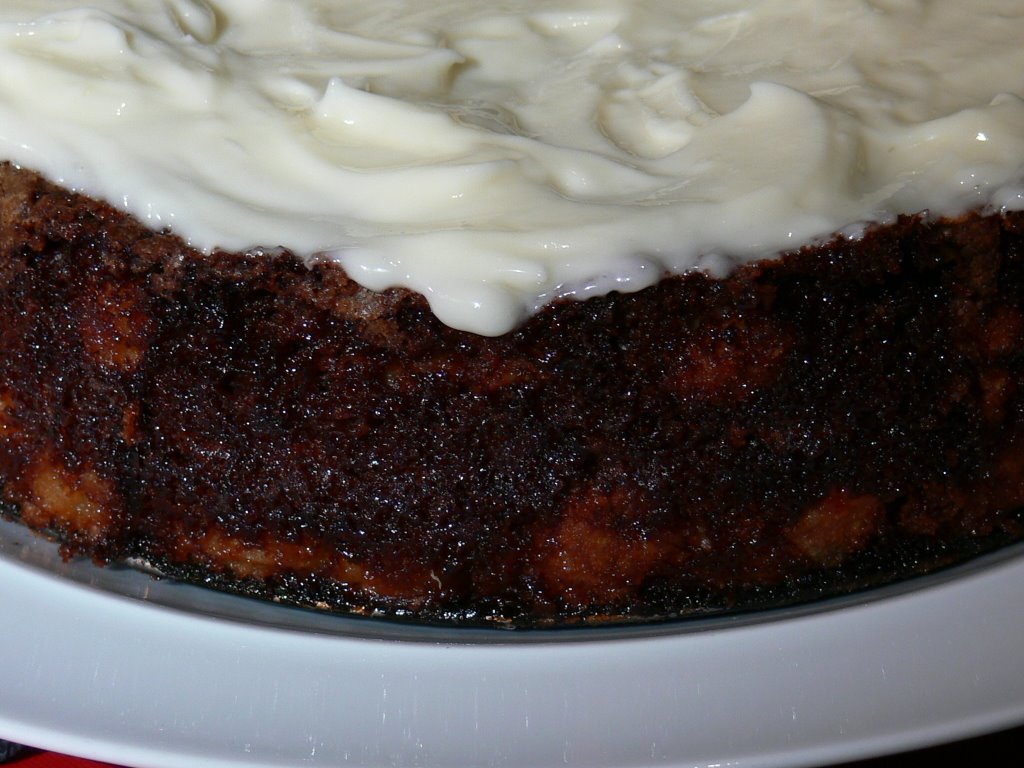
Banoffee pie – homemade dulce de leche

Banoffee pie is one of the easiest desserts to make – there’s no real cooking involved, just some butter-melting, some biscuit-smashing, some pre-emptive tin-boiling, some cream-pouring and some banana-slicing. Easy as . . . pie.

No cream in these photographs; I didn’t get that far before the pie was crumbled into bits by enthusiastic lunch guests. (I prefer my banoffee pie with pouring cream, although you’ll read many recipes which call for whipped cream. Follow your own preference.)

The gloriously gloopy toffee stuff in a banoffee pie is dulce de leche, an Argentinian caramelised milk sauce. You can buy it in jars from Merchant Gourmet in most supermarkets, but it’s very easy to make at home. Just cover an unopened tin of condensed (not evaporated) milk with water in a saucepan and boil for an hour and a half, making sure that the water stays topped up. The can won’t come under enough pressure to go pop. When your dulce de leche is finished, it will keep indefinitely in the can; I like to make several cans full at a time and keep some in the cupboard for my emergency pie needs. Use a permanent marker to identify your boiled tins – the paper will have come off them.

Banoffee pie uses a cheesecake base, which is easy to prepare and freezes well. If you make some spares and freeze them, you’ll have a near-instant dessert for the next time you have visitors.

For one pie, you’ll need:

20 digestive biscuits
3 rounded tablespoons butter
1 tin dulce de leche (see above)
5 bananas
Cream for pouring

Line a springform cake tin with greaseproof paper.

Crush the biscuits into crumbs. This takes a few seconds in the food processor, but if you don’t have one you can put them in a sealed plastic sandwich bag and wallop the bejesus out of them with a rolling pin. Melt the butter and combine with the crumbs until you have a stiff paste. Mould the paste in the bottom of the tin until you have a flan base with shallow sides. Don’t worry about being too tidy; you’ll be covering the base up in a while.Put the cake tin in the fridge for about an hour to harden.

When the pie crust is nice and solid, remove it from the cake tin and spread a whole tin of cooled dulce de leche on the base. Top this with chopped, fresh bananas. Pour over gouts of cream and serve.

Butterfly cakes

These little buttercream-filled fairy cakes were Mr Weasel’s favourite when he was a kid. He’s the baker in the house, and on getting home today he ran for the handmixer, claiming an attack of cake nostalgia.

He claims that being a computer scientist has given him an unparalleled skill for following instructions, and says this is why he’s so very good at baking. I think he was visited by a buxom, greasy-fingered fairy-godmother with cake crumbs in her hair, a wooden spoon for a wand and golden syrup down her apron when he was in his cradle, but who am I to say?

The cake batter which makes the body of these is the same batter we used for the pink cakes at last week’s party. You’ll need:

Cake mixture
100g soft butter
100g caster sugar
2 eggs
100g self-raising flour
1 teaspoon baking powder

Beat the lot together with a handwhisk until pale and airy, divide between 18 cake cases and bake at 200°c for around 20 minutes, until golden. Use the Mr Weasel Aural Method to work out whether your cakes are done – listen to them when they come out of the oven (get close, but don’t burn your ear). If the cakes are hissing and popping, they’re not done. Put them back in for a few minutes and try again.

When the cakes are ready, remove them to a metal rack to cool.

While the little cakes are cooling, make a buttercream icing. You’ll need:

Buttercream icing
175g soft butter (use butter you’ve left out for a while, not the stuff with added vegetable oil in tubs)
350g icing sugar
A few drops vanilla essence

Chop the butter into little pieces, and place in a bowl with the icing sugar and two teaspoons of water. Beat the butter and icing sugar together with an electric whisk until well mixed and pale in colour. That’s it: piece of cake. (Hur hur.)

When the cakes are cool (important, this coolness; a warm cake may be crumbly, but a cool one will slice readily), slice off the top and cut it in half. Put a teaspoon of the icing on the cut cake surface, and put the half-slices of lid back on to look like little wings. Open mouth, insert cake and reminisce about children’s parties.

Party cakes

Mr Weasel has just handed in his PhD thesis. This being a cause for celebration, we have spent the day baking and entertaining everybody we know. Savouries to follow – today I’m concentrating on the cakes.

We made some fairy cakes using my standby cake recipe – this light sponge works equally well in a large tin and as cupcakes. It’s extremely easy – all you need is 100g soft butter, 100g caster sugar, 2 eggs, 100g self-raising flour and a teaspoon of baking powder. If making cupcakes, beat the lot together with a handwhisk until pale and bake at 200°c for around 20 minutes.

I iced them with 350g of icing sugar mixed with 25ml rosewater and enough boiling water to make the mixture gloopy, then placed a crystalised rose petal on top. Gorgeous – the kids present particularly enjoyed them, probably because it’s impossible to be under five and immune to pinkness.

There is nobody on the planet who doesn’t like chocolate cornflake cakes. Take 100g of chocolate, 50g of butter and 2 tablespoons of golden syrup, and melt the lot together. Fold in cornflakes (about 150g – use discretion depending on your liking for chocolate), put in cases and chill. Easy as pie, and as delicious as they come.

Ginger beer

The house is still full of Christmas food. There’s a profusion of citrus fruits and spices, along with the multitude of empty soft drink bottles (my in-laws don’t drink alcohol, but they drink fizzy drinks by the gallon). Time to make some ginger beer.

Ginger beer is another old-fashioned English recipe from the 1700s, fermented with yeast. (Teetotalers shouldn’t be worried about this; yes, there’s fermentation, but the finished product is only about as alcoholic as bread dough.) The method I’m using is a quicker one than that in the traditional recipe, where you’d be feeding a ginger beer ‘plant’ (a yeast culture) with sugar for a week. Here, the ginger beer is still fermented with yeast, but it’s instant bread yeast from a packet, and the fermenting is done in a couple of days or less, depending on how warm you are able to keep the bottle.

A word of warning. Do not use a glass bottle. Plastic is very helpful here because it can stretch and flex, and when the gases in the drink are produced, the bottle will not shatter under the stress as glass might.

For a spicy home-made ginger beer, you’ll need:

2-litre plastic soft drinks bottle
1 cup sugar
3 thumb-sized pieces of ginger
1 lime
1 orange
1/4 teaspoon instant yeast
filtered water

Peel and grate the ginger (use fat pieces if you can find any; they will be jucier) and extract the juice from the fruit. Using a funnel, put the sugar and yeast into the bottle, followed by the ginger and citrus juice. Fill the bottle up to the half-way mark with filtered water and give it a good shake with the lid on until the sugar has dissolved. Top up the bottle with water until there’s about an inch of airspace at the top of the bottle, squeeze this air out and put the lid on as tightly as you can.

Leave the bottle in a warm place (aim for around body temperature – mine went on top of a radiator cat bed, to mews of disgust from the kittens) for between 24 and 48 hours. You’ll know when it’s done because the bottle will have swollen, and dents where you squeezed the air out will have vanished. The bottle will be hard to the touch. Loosen the lid carefully to let out some of the gas, and screw everything up tightly again. Refrigerate the ginger beer (keep any you don’t drink in the fridge, which will stop further fermentation) and strain through a sieve before drinking.

Those who don’t have piles of citrus and ginger lying around the house and who can’t wait two days for their drink might want to buy some ginger beer instead. Try Fentiman’s for an authentic and very spicy drink.