It’s funny how quickly we assimilate food ideas. Salted caramel was considered suspiciously French, a kind of extreme sweetie sophistication, when we first encountered it about ten years ago. Now it’s all over the place – you can even buy jars of the stuff in the supermarket.
Salt caramels are still, as far as I’m concerned, a grown-up’s sweet. Buttery, creamy and velvety on the tongue, the addition of some salt to the mixture lifts the flavour, bringing out the dairy smoothness in a way you just can’t achieve in an unsalted caramel. A little extra salt sprinkled on top makes for a tongue-shockingly good contrast between sweet and salty. They’re easy to make at home, and make a great gift. Try them as an after-dinner nibble – they’re especially good with coffee. Home-made salt caramels are also a very good application for any interesting salt you might have lurking in the cupboard (the red salt in the picture here is Hawaiian volcanic salt I was given as a present just after I got married in 2004. Embarrassingly, this is the first thing I’ve used it in).
I like my caramel to have a hint of smoky bitterness. The best way to achieve this is to use an unrefined sugar in the recipe. If you prefer a lighter caramel, you can substitute another 150g of caster sugar for the light brown sugar below.
The usual boiling sugar warnings apply. Do not lick the spoon or dip your finger in the mixture until it has cooled completely. Keep an eye on the pan at all times to ensure it doesn’t boil over. And your life will be made much easier if you use a sugar thermometer – if you don’t have one, caramel at the hard ball stage should form a squishy ball that can hold its shape but can be squeezed by the fingers when dropped into a bowl of cold water.
You’ll need:
150g caster sugar
150g soft light brown sugar
80g butter (choose something with a good flavour – I used an unsalted Beurre d’Échiré)
200g double cream
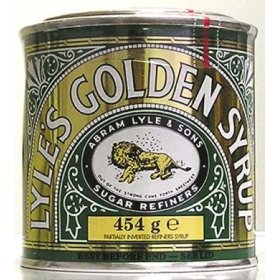
75ml golden syrup
1tsp salt, plus more to sprinkle at the end
Line a square cake tin (mine measures 20cm on each side) with buttered greaseproof paper.
Combine the caster sugar with 30ml water in a saucepan, and bring to the boil over a medium flame. Swirl the pan every now and then, and keep watching it until the sugar starts to change colour. It will quickly work its way from clear to pale gold through to a reddish brown. As soon as it hits the reddish brown point, remove it from the heat and wait for the bubbles to subside.
While the sugar is cooking, melt the brown sugar, butter, cream, syrup and a teaspoon of salt together in a separate pan and stir well. Pour the mixture into the reddish brown caramel and return to the heat with a sugar thermometer. Stir gently to combine the ingredients.
Bring the mixture to a boil and continue to simmer, swirling occasionally, for between 5 and 10 minutes, until the mixture reaches hard ball stage on your sugar thermometer (125°C, 260°F). Remove from the heat and wait for a few minutes until the bubbles in the pan subside. Pour the mixture into the prepared cake tin and cool for an hour or so until the caramel is solid. Cut into pieces and decorate each piece with a pinch of salt. Flaky Maldon salt is fantastic here – and if there’s any Hawaiian volcanic salt in your cupboard, now’s the time to use it.

