Fruit scones for cream tea

One of my sad, sad weekend hobbies is wandering around National Trust properties, buying a sack of books at the inevitable second-hand bookshop and then visiting the tea-room for a handsome cream tea, with fluffy scones, strawberry jam and plenty of clotted cream to slather on top. If you’re in East Anglia, the exquisite Oxburgh Hall, where you’ll find a number of embroideries worked by Mary Queen of Scots and Bess of Hardwick, a priest hole you can clamber into and a very fine garden, has a really fabulous tearoom. Ickworth House (English wines, fantastic gardens, wonderful collection of fans) and Wimpole Hall (organic farm, hot-dogs made from the pigs you have just fed pig-nuts to in the barn) also do a very good line in cream teas – but to my mind Oxburgh’s intimate tearoom, housed in the hall’s old kitchens, complete with antique bread ovens and blue and white crockery displaying pictures of the hall itself, still takes the…cake. All the same, while it’s nice to visit Oxburgh once or twice a year (those gardens change gorgeously in character over the seasons), I can’t really justify driving an hour just for a cup of tea and a scone more regularly than that. Time to get baking.

I usually choose a pot of Earl Grey to go with my scones. So when, in the absence of a National Trust tearoom, I decided to prepare my own cream tea at home this weekend, I decided to use some very strong Earl Grey to soak the sultanas in before adding them to the dough. With a pot of tea, a jar of good strawberry jam (try Tiptree’s Little Scarlet or Duchy Originals Strawberry) and some clotted cream (increasingly available in supermarkets and delis – if you can’t find any, use extra-thick double cream rather than whipped cream, which has exactly the wrong texture), you’ll find yourself in possession of one of the finest things you can eat in the afternoon.

A quick note on the egg in the dough. I was lucky enough to have a box of bantam eggs a neighbour had given me, and used two – bantam eggs are tiny, very yolky and rich, and two are approximately the same volume as a single large hen’s egg. If you can find bantam eggs, I’d recommend using two in this recipe.

To make about 16 scones, you’ll need:

225g plain flour
2½ teaspoons baking powder
50g butter
25g caster sugar
1 large egg OR two bantam eggs
Milk (enough to make up 150ml when added to the beaten egg)
100g sultanas
1 large cup strong Earl Grey tea

Start by brewing the tea (make yourself a cup to drink while you’re at it) and preheating the oven to 220°C (425°F). When the tea is nice and strong, pour it over the sultanas in a bowl and leave them to plump up for half an hour while you prepare the dough for the scones.

Sieve the flour and baking powder into a bowl, and cut the softened butter into it in little chunks. Rub the butter into the flour mixture until it resembles breadcrumbs. Stir in the sugar.

When the sultanas have had half an hour in the tea, drain them in a seive and add them to the flour mixture. In a measuring jug, beat the egg. Top the beaten egg up with the milk until you have 150ml of liquid, and stir it gradually into the flour mixture (you may not need all of it), mixing all the time with a wooden spoon, until you have a soft dough that holds together but is not sticky. Try not to over-handle the dough so that your scones are light and fluffy. Roll the dough out on a floured surface to a thickness of about 1cm, and cut out rounds with a 5cm circular cutter.

Place the rounds onto greased baking sheets and brush the tops with any remaining milk/egg mixture (if you have none left, plain milk will do). Bake for 10 minutes until golden brown.

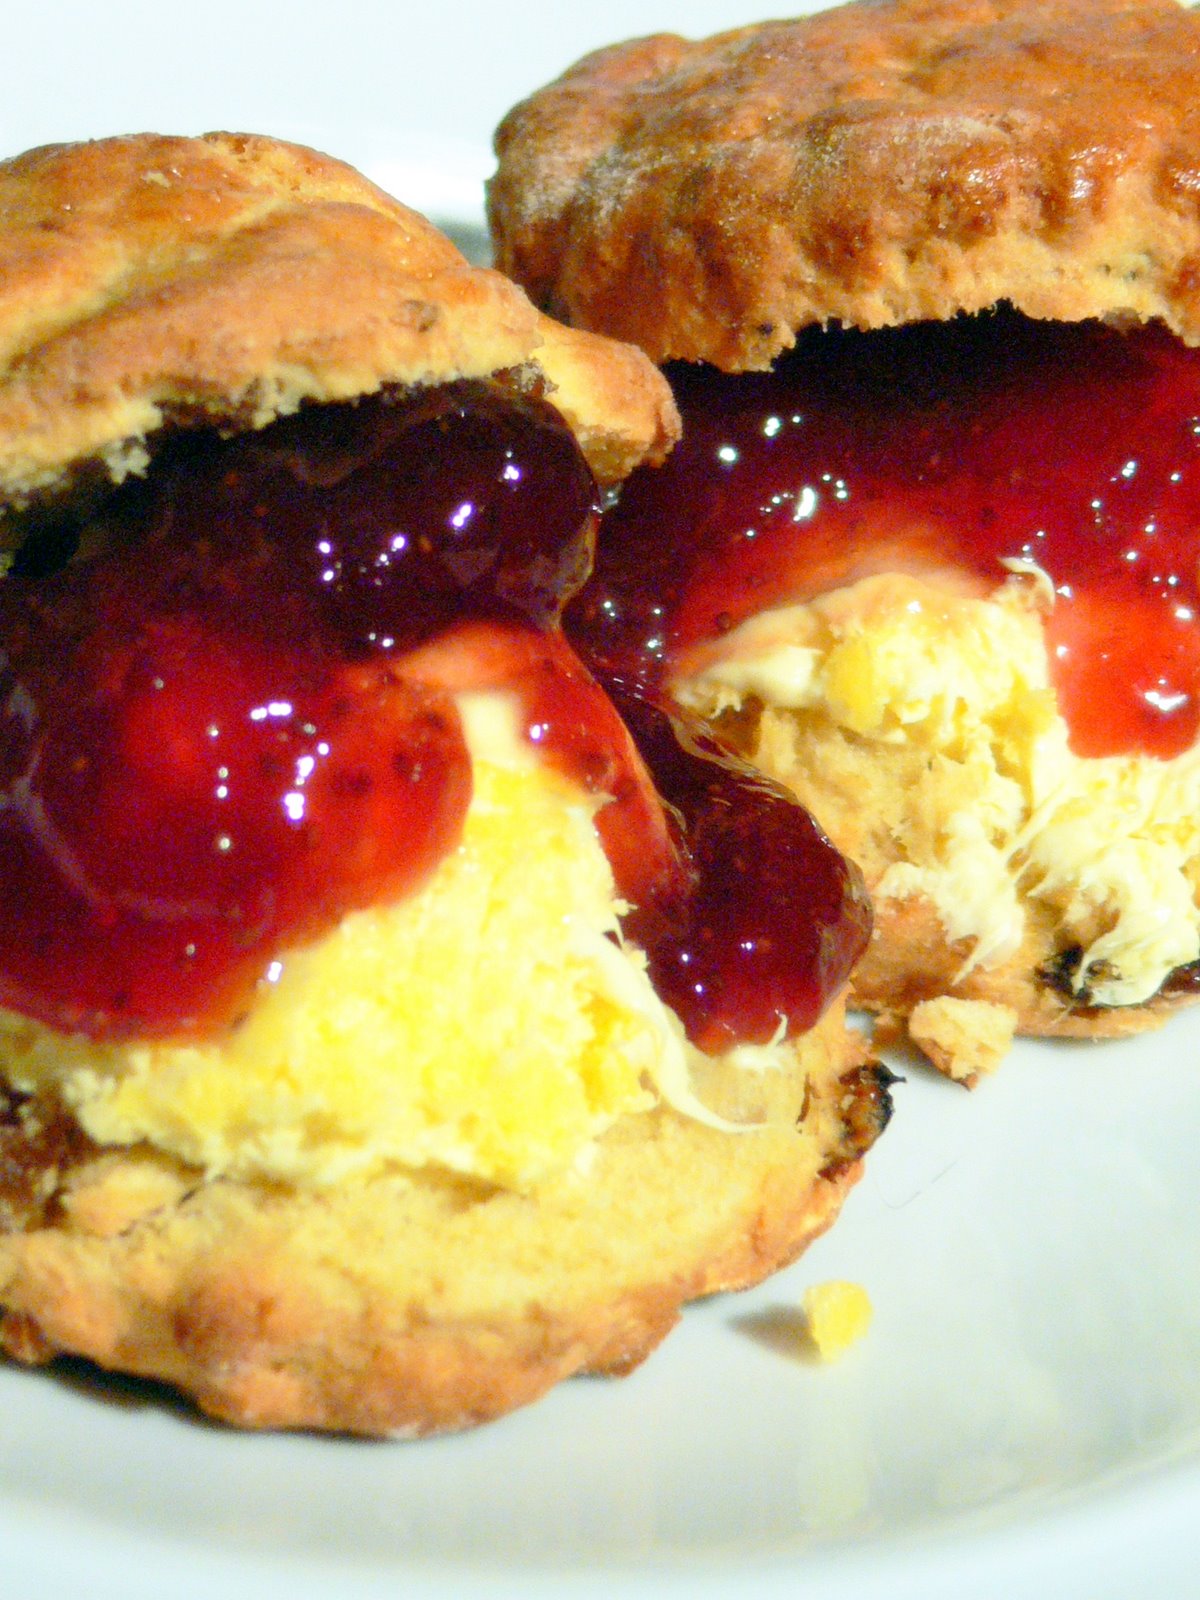
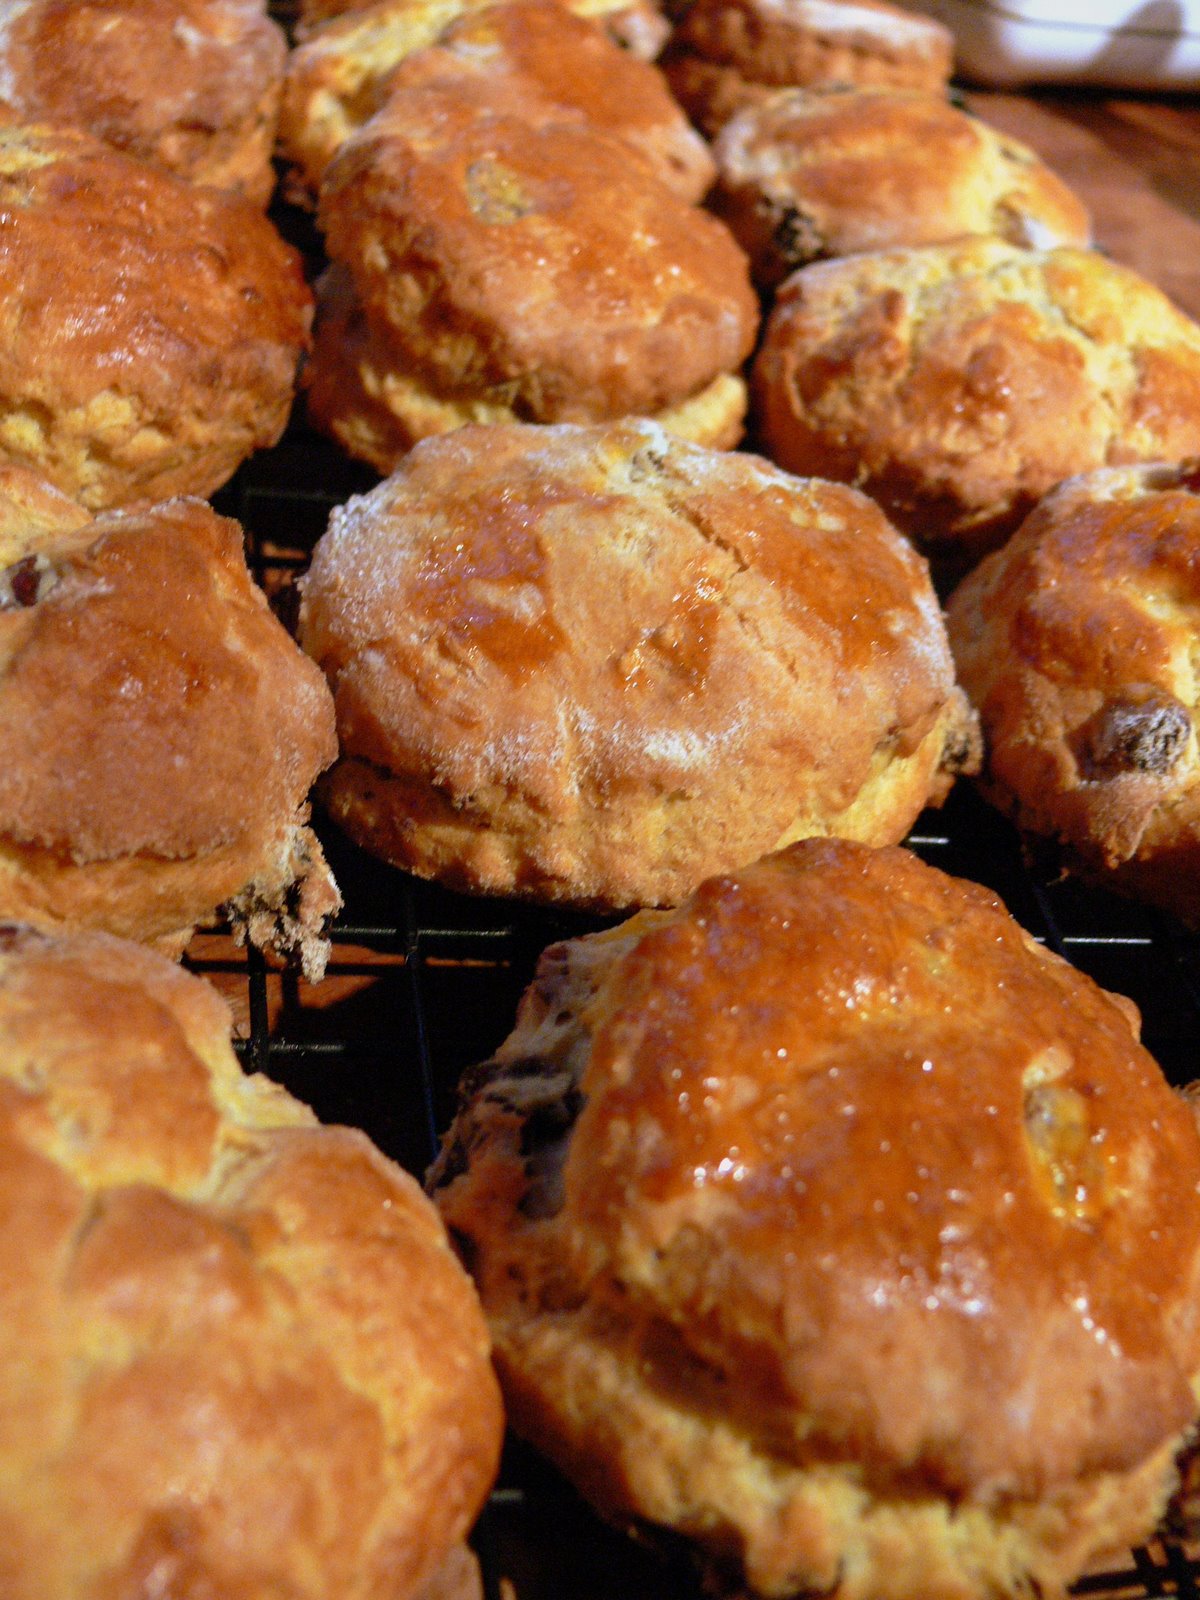
These scones are at their very best served as soon as they come out of the oven, split in half, spread with jam and cream. Once cooled, they’ll keep for a couple of days in an airtight tin.

Bruschetta al pomodoro – tomato bruschetta

Tomatoes and bread have an amazing affinity, from Basque slices of toasted sourdough rubbed with the cut side of a tomato, to British teatime tomatoes on toast. For me, though, a garlicky, herby Italian bruschetta is the very king of bread and tomato preparations.

There is a simple trick in making this sunny, fresh appetiser. You need to marinade the cut tomatoes with the aromatics and a hearty amount of your very best olive oil the night before you mean to eat – but that marinade should contain absolutely no salt. Salting the bruschetta just before serving means that the tomatoes’ texture will remain firm and juicy. The oil will have absorbed a fabulous wallop of tomato flavour (no salt, you see, so the juices of the tomato won’t all run out and separate), the tomatoes will be redolent with fragrant oil, herbs and garlic, and your tastebuds will want to shake your hand.

It’s very important that you select tomatoes with the maximum flavour. If you’ve grown your own, these will be by far the best. Otherwise, buy tomatoes which are ripe and have been kept on the vine after picking. That glorious smell you get in tomato greenhouses is from the green stalk and leaves, and doesn’t seem to make it into the fruit itself. If you buy vine tomatoes, they will be riper, and you can use the stalk in the marinade to inject some of that greenhouse flavour into the finished bruschetta. I’ve used some yellow tomatoes alongside regular red ones because it’s pretty, but you can use any good, ripe tomatoes you can find.

To serve four, you’ll need:

1kg vine tomatoes
2 fat, juicy cloves garlic
1 large handful basil leaves
2 tablespoons chopped fresh oregano
100ml olive oil
Freshly ground black pepper
1 ciabatta
Salt to finish

Chop the tomatoes into small bite-sized pieces, and put them and any juices in a large bowl. Crush the garlic and the herbs, and stir them into the tomatoes with the olive oil and a generous amount of freshly ground black pepper. Add the vines from the tomatoes, mix well, cover with cling film and refrigerate overnight.

When you are ready to make up the bruschetta (don’t do this too far ahead of eating, or they will go soggy) grill slices of slightly stale ciabatta and cool on racks. Fish the stalks out of the marinade and discard. Heap the tomato mixture onto the slices with a tablespoon, sprinkle with fleur de sel or another crystalline salt like Maldon, and serve immediately. There are very unlikely to be any leftovers.

Duck confit

Confit de canard, the French way with duck which is cooked and preserved in its own fat, is unequivocally delicious. French tins of the stuff are scrumptious, and although pricey, not too hard to get hold of. But making your own at home turns out to be surprisingly easy, and it tastes even better than the store-bought variety (the magic is all in the herbs you use to cure the duck before cooking). Making your own also means that even when you’ve finished eating, you end up with lots of herby, aromatic duck fat to use in potato dishes, or even in another confit.

Because the meat is simmered very gently under duck fat, it remains extremely moist and tender, with a skin that crisps up deliciously at the click of a finger. I like mine served, totally unhealthily, with a great big heap of pommes Sarladais and a dollop of quince jelly. Redcurrant, cherry and the other duck-friendly fruits also work really well to cut through the richness of the confit.

To confit six duck legs (with thigh attached) you’ll need:

6 duck leg joints, with thigh
3 heaped teaspoons salt
2 bay leaves
1 tablespoon thyme leaves
1 tablespoon herbes de Provence
1 teaspoon black peppercorns
Duck fat (enough to completely cover the duck legs when melted in a saucepan)

Crush the bay leaves, thyme, herbes de Provence and peppercorns very thoroughly with the salt in a mortar and pestle, and rub the pieces of duck all over with the mixture. Put the duck in a large bowl and refrigerate for 48 hours to achieve a very mild cure.

When you are ready to cook the duck, heat the oven to 150°C and melt the fat in an oven-proof casserole dish on the hob. Slide the duck into the fat as it liquefies, and when it starts to shudder (not boil), move the casserole to the oven. Cook for two and a half hours, or until the duck is tender.

Spoon the cooked duck and its hot fat into a large sterilised jar or crockpot, making sure that the meat is completely covered by the fat, which will stop oxygen and bacteria getting in. Seal and refrigerate. The duck will keep for a few weeks in the fridge (it is, after all, preserved) – it will also be tender, sweet and moist from being poached in that fat.

It’s worth leaving the duck in the fat for a few days before you eat it, in order to allow the flavours to develop. To serve and cook to a crisp, remove the confit from the fat and fry over a medium heat in a saucepan for about 7 minutes per side, with a heavy pan lid weighing the meat down as you fry.

Iced sugar cookies

These little cookies are delicious, easy to make, fun to ice, and will keep for about a week in an airtight tin. What’s not to like? Even I, who singularly lack artistic skill, a steady hand or any visual imagination at all, had a total blast making a big batch of these for Dr W’s birthday.

You’ll be using royal icing and flood icing to colour these in. Piped lines of royal icing make little reservoirs which you will later fill with flood icing – royal icing which has been watered down a very little to make it flow into the shape you’ve outlined. I like to use squeezy bottles for icing rather than an icing bag (much less messy). Bottles are available at most cookware shops for under £2, and they come with a plastic piping nozzle which is perfect for this job. The amount of icing in the recipe below should be sufficient for filling six bottles in different colours, first for outlining, then, with a little water, for flooding.

It’s important to use food colouring that won’t dilute and loosen your icing. Gel icings, which come in tiny round pots to be added to your plain icing with a toothpick, are simply brilliant. I got Wilton’s set of eight gel colours from good old Amazon, and used a licorice pen (from the Elizabeth David shop in Cambridge) for black detail like eyes and buttons. Eight colours will probably be more than you’ll need for any single project, and the pots, although tiny, last for a very long time; you only need the tiniest dot of colouring for a batch of icing. Make sure that you blend the colour with the icing as thoroughly as you can; you don’t want any streaky bits.

Sugar cookies
300g plain flour
2 teaspoons baking powder
230g vanilla sugar
230g butter
1 egg
½ teaspoon vanilla extract

Royal icing (see instructions below for flood icing)
1lb powdered sugar
5 tablespoons meringue powder (available at cookware shops and some supermarkets)
2 tablespoons water

Start by baking the cookies. Preheat the oven to 180°C (350°F). Sieve the flour and baking powder together and put to one side. Cream the sugar and the room-temperature butter with an electric whisk. Add the egg and vanilla extract, and continue to whisk until everything is blended together. Gradually add the flour mixture, beating gently until it is all incorporated.

Roll the dough onto a floured board and use cookie cutters to cut out shapes. Lay out on greaseproof paper on baking sheets and bake for about 12 minutes. Leave the cooked cookies on the sheet for a few minutes to cool a little and firm up, then use a spatula to transfer them to a cooling rack.

While the cookies cool, make the icing by beating together the sugar, meringue and water with your electric whisk until the mixture reaches stiff peaks (this can take several minutes). The icing will keep, covered, in the fridge for a week, so you can make and colour it before making the cookies if you fancy. Colour the icing according to the instructions on the gel colouring pack. Divide the icing between squeezy bottles, and get to work piping outlines on all your cookies – make sure there are no gaps in your outlines for the flood icing to dribble out of later.

The piped icing should dry quite quickly, so you can start filling in with flood icing as soon as you’re finished outlining. To turn the royal icing you outlined with into flood icing, add water a drop at a time and mix well until you have an icing just loose enough to flow when drizzled onto a flat surface. Squiggle flood icing into each outlined area, and use a toothpick to encourage it into the corners.

You can drop contrasting colours of flood icing into flood icing that is still wet to create certain effects. Make lines of wet icing and drag with a toothpick for a feathered effect; or try dripping a single drop of icing in a contrasting colour into wet icing for neat dots.

Edible sprinkles are a lovely, lily-gilding addition too. To stick them onto the cookies, wait for the icing to dry, then mix a teaspoon of meringue powder with a couple of drops of water, until you have a sticky paste. Use a kids’ paintbrush to apply this meringue glue to the area you want to stick sprinkles to, and scatter the sprinkles over while the glue is still wet.

When the icing and sprinkly bits are dry, store the cookies in single layers between sheets of greaseproof paper in an airtight tin.

Aubergines with den miso

Years ago, before I’d even met Dr W, I had a boyfriend whose sister-in-law was Japanese. She and I didn’t agree on much, but we did agree that these aubergines (which she made every time I visited her house) are pretty sublime.

Takako used to make this using those lovely wee Japanese aubergines – the sort that leave you gasping with their visual similarity to eggs and explain the whole eggplant nomenclature thing (not obvious when you are 18 and the only eggplants you have ever met are purple and shaped like a torpedo). Happily for those of us without a supplier of dear little Japanese aubergines, this works very well with the purple sort too. Aubergines are a wonderfully meaty sort of vegetable. Although this works really well as an accompaniment, this lovely meatiness means that you can happily serve this dish as the main event, with rice and perhaps a salad dressed with some rice vinegar. It’s also a good win if you have an unexpected visiting veggie, and, being one of those things you serve at room temperature, I think it’s really, really good as part of a picnic. These do soak up quite a lot of oil, as is common with aubergines, but hell – it’s not like you’re making this dish every day. To serve two, you’ll need:

2 medium aubergines
200g shiromiso (white miso)
2 tablespoons sake (Chinese rice wine is good here if you have no sake)
2 tablespoons sugar
2 tablespoons mirin
6 tablespoons ground nut oil

As usual, if you’re having trouble finding white miso, head for a large independent health food shop. They tend to have a bewilderingly good selection of miso, seaweeds, pickled ginger and the like. I have no idea why, given that most of the other nutty, protein-knitted, fermenty things masquerading as food that the health food shop I use sells are things I have no interest in ingesting at all. Boo hippies.

Start by slicing the aubergines into three lengthways. Slash the cut surfaces diagonally, without cutting all the way through the flesh, and without cutting the skin. Fry in the hot oil over a medium heat, turning halfway through, until the skin and flesh is golden brown, and the aubergine is soft.

While the aubergine slices are frying, make the den miso by combining the mirin, sugar, sake and miso in a small frying pan and bringing to a very gentle simmer, stirring all the time. Cook the sauce for two minutes and keep warm until the aubergines are cooked.

Move the cooked aubergines to a plate and smear the hot den miso all over their upper surface, making sure the paste gets into the slashes. Leave the slices to come down to room temperature before serving – for some reason, this dish is all the more delicious when it’s cold.

Smoked salmon hash

A quick and dirty breakfast dish. This is just perfect for Sunday mornings in bed with a tray, the papers and a very good friend. This hash is all made in one pan, salty from the salmon, studded with tart capers and stickily sweet from the sweet potatoes. A good squirt of lime juice to counter that sweetness and a spoonful of herby crème fraîche – who could ask for more?

If you do plan on making this for breakfast, it’s worth chopping the potatoes and making the crème fraîche the night before so you can operate on autopilot in the morning without having to go anywhere near sharp knives.

To serve two (with some leftovers – we like leftovers round here), you’ll need:

3 large sweet potatoes (make sure these are the ones with golden flesh)
3 large shallots
250g cold-smoked salmon
1 handful chives (plus a teaspoon to garnish)
1 handful parsley (plus a teaspoon to garnish)
½ handful tarragon
200g crème fraîche
2 heaped tablespoons rinsed capers
Juice of 2 limes
1 tablespoon butter
1 tablespoon olive oil
2 eggs
Salt and pepper

Start by making the crème fraîche. Just stir in the chopped herbs, keeping some aside to garnish the finished dish, 1 tablespoon of the capers, 1 raw chopped shallot and the juice of a lime. Set aside in the fridge and stir before serving.

To make the hash, dice the peeled potatoes and cut the remaining shallots into slices. Fry in a large pan over a medium heat in the butter and olive oil mixture, stirring regularly, until the edges of the potato pieces are caramelising and turning a golden brown.

Check that the sweet potato is cooked through (poke with a chopstick to test for softness) and tip the salmon and remaining capers into the pan. Toss with a wooden spoon until the salmon is all opaque, then sprinkle over the juice of the remaining lime. Check for seasoning. Spoon the finished hash into serving bowls, dress with the reserved herbs, add a tablespoon of the crème fraîche and top off with a fried egg.

New blogs, a competition

Some notices today. First up, there are two new blogs in the blogroll at the left of the page. South of France Cooking is written by David, a chef working in the hotel he part-owns near Carcassonne. It’s full of recipes and tips on technique, and I’m finding it absolutely fascinating – drop in and see what you think.

Also on the new blog front, Cait and Jude in Anchorage are busying themeselves making good things like bouillabaisse, and hanging out in bakeries. Check out 907Eat, and marvel at the fact that you suddenly want to go on a culinary tour of Alaska.

Finally, my buddies over at Allrecipes are running another competition. This time, they’re inviting you to post a recipe with a photograph on their site. The writer of the best recipe will win £500. Read the rules and enter here – and good luck!

Laverbread cakes

Laverbread is a real pub quiz question of a food. It’s a Welsh delicacy, an iodine-rich puree made from simmering Porphyra laciniata, a purple seaweed, for hours. The resulting paste looks unprepossessing, but tastes fabulous. Like oysters, its flavour is redolent of the sea – to eat laverbread is to imagine yourself standing on a rockpool-surrounded beach, breathing the salty, ozone-thick spray.

I’m lucky enough to have married into a family full of food-loving Welsh ladies. Dr W’s mum makes sublime Welsh cakes (little griddle cakes packed with currants) when we visit; she even has a special gas burner that lives in the cupboard especially for griddling purposes. (Yes, I plan to steal the recipe one day.) Her sister, Auntie S, still lives in Wales. Because she is totally fabulous, Auntie S sent a Welsh hamper to me here in the grim fens for my birthday. Alongside the tea blend, the Welsh honey, the plum jam, the whisky marmalade and the Caerphilly oatcakes lay a jar of pickled cockles and my first ever tin of laverbread. Straight out of the tin, it’s unprepossessing stuff (see the picture below), but it smells tremendously seaside-y, and licking the end of a finger dipped into it confirms that it’s delicious.

There are always pinhead-milled oats in the cupboard (I like porridge for breakfast), and a favourite Welsh application of laverbread is to mix the dark paste with fine/medium oatmeal to bind it and make it crisp, then to fry it in bacon fat and serve it alongside a cooked breakfast. I also added a non-traditional shallot to the mixture, which was extremely good, adding a base of sweetness against the iodine saltiness of the seaweed. (The shallot is strictly optional and not remotely Welsh.) Making these laverbread cakes took all of ten minutes, and they’re among the tastiest things I’ve eaten in months. To make about eight little cakes (enough to serve two – you’ll want four each because they’re gorgeous) you’ll need:

120g tin laverbread
50g fine/medium oatmeal
1 shallot
A couple of tablespoons of bacon fat

Dice the shallot very finely, and mix well with the laverbread and oatmeal until you have a thick paste. Form the paste into flat patties about five centimetres in diameter and a centimetre thick. Fry in the hot bacon fat in a non-stick pan for about three minutes a side, until the laverbread cakes are crisp and brown. Serve immediately as part of a cooked breakfast.

Hot cross buns

I know – hot cross buns are really cheap at the supermarket, so why would you bother making your own at home?

There’s a very easy answer: home-made hot cross buns are unbelievably delicious (unlike the supermarket variety, these are enriched with butter and eggs, and have more in the way of spices and fruit in their dough) – far better than the bought variety. They’re cheap, too. And if you’re interested in cooking something that will make your house smell divine for an afternoon, hot cross buns are just the ticket.

These sweet, yeasty little buns are a treat for Lent. (Pipe a Darwin fish on yours if you do not subscribe to this religious baking stuff.) According to Elizabeth David, the hot cross bun was a cause of great concern among the Protestant monarchs of England – Catholics were rumoured to bake them using communion wafers, and all that doughy symbolism was immensely threatening. The Tudors actually tried to ban them, but the populace would not be fobbed off with toasted teacakes, and eventually Elizabeth I passed a law allowing bakeries to make them at Easter and Christmas.

To make 12 hot cross buns, you’ll need:

Starter
7g (1 sachet) easy-blend yeast
1 teaspoon soft brown sugar
100g strong white flour
200ml blood-hot milk

Dough
350g white bread flour
1 pinch salt
½ nutmeg, grated
2 tsp ground cinnamon
1 teaspoon allspice
Zest of one lemon and one orange
50g salted butter, cut into small pieces
50g light brown soft sugar
90g candied mixed peel
90g sultanas
1 egg

Piping
3 tablespoons plain flour
3 tablespoons caster sugar
Water

Glaze
1 orange
75g caster sugar
100 ml water

Get your yeast going by mixing it with all the starter ingredients in a small bowl, and leave it in a warm place to start working for fifteen minutes while you prepare the rest of the dough for the buns.

Mix the flour for the dough in a large bowl with the spices, pinch of salt and the citrus zests. Rub the butter, cut into small pieces, into the flour and spice mixture as if you are making pastry. When the mixture resembles breadcrumbs, stir through the sugar, peel and sultanas. Check that the yeasty starter mixture has plenty of large bubbles on the surface, and add it and the beaten egg to the dough mixture. Mix well with a wooden spoon, and when everything is amalgamated, start to knead the mixture with your hands.

Knead for ten minutes until you have a soft dough which is no longer sticky, and which stretches easily. (If after five minutes or so of kneading the dough still seems very sticky, add a little more flour – bread doughs will vary enormously in stickiness depending on variables like the humidity outside and the temperature in your kitchen.) Oil a bowl, and put the kneaded dough inside with some oiled cling film or a damp teatowel on top. Leave the dough for about an hour and a half in a warm place until it has risen to double its original size.

Knock the dough down, and make twelve round balls from it. Arrange them evenly in a baking dish, cover again and leave to double in size again in a warm place (between an hour and an hour and a half).

Preheat the oven to 220°C (425°F). When the buns have risen, make a paste for the crosses from flour and caster sugar, adding water until it is stiff and pipable. Using a piping bag or a freezer bag with a hole snipped in the corner, pipe crosses on each bun.

Bake the buns for 15-20 minutes until they are golden. While the buns are baking, take the zest and juice of the orange for the glaze and simmer it with the water and sugar until you have a light syrup. Brush the hot syrup over the hot buns when they come out of the oven.

You can serve these immediately or cool and toast them. Either way, they’re glorious with a big slab of butter.