
 These little cookies are delicious, easy to make, fun to ice, and will keep for about a week in an airtight tin. What’s not to like? Even I, who singularly lack artistic skill, a steady hand or any visual imagination at all, had a total blast making a big batch of these for Dr W’s birthday.
You’ll be using royal icing and flood icing to colour these in. Piped lines of royal icing make little reservoirs which you will later fill with flood icing – royal icing which has been watered down a very little to make it flow into the shape you’ve outlined. I like to use squeezy bottles for icing rather than an icing bag (much less messy). Bottles are available at most cookware shops for under £2, and they come with a plastic piping nozzle which is perfect for this job. The amount of icing in the recipe below should be sufficient for filling six bottles in different colours, first for outlining, then, with a little water, for flooding.
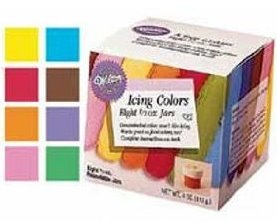 It’s important to use food colouring that won’t dilute and loosen your icing. Gel icings, which come in tiny round pots to be added to your plain icing with a toothpick, are simply brilliant. I got Wilton’s set of eight gel colours from good old Amazon, and used a licorice pen (from the Elizabeth David shop in Cambridge) for black detail like eyes and buttons. Eight colours will probably be more than you’ll need for any single project, and the pots, although tiny, last for a very long time; you only need the tiniest dot of colouring for a batch of icing. Make sure that you blend the colour with the icing as thoroughly as you can; you don’t want any streaky bits.
Sugar cookies
300g plain flour
2 teaspoons baking powder
230g vanilla sugar
230g butter
1 egg
½ teaspoon vanilla extract
Royal icing (see instructions below for flood icing)
1lb powdered sugar
5 tablespoons meringue powder (available at cookware shops and some supermarkets)
2 tablespoons water
Start by baking the cookies. Preheat the oven to 180°C (350°F). Sieve the flour and baking powder together and put to one side. Cream the sugar and the room-temperature butter with an electric whisk. Add the egg and vanilla extract, and continue to whisk until everything is blended together. Gradually add the flour mixture, beating gently until it is all incorporated.
Roll the dough onto a floured board and use cookie cutters to cut out shapes. Lay out on greaseproof paper on baking sheets and bake for about 12 minutes. Leave the cooked cookies on the sheet for a few minutes to cool a little and firm up, then use a spatula to transfer them to a cooling rack.
While the cookies cool, make the icing by beating together the sugar, meringue and water with your electric whisk until the mixture reaches stiff peaks (this can take several minutes). The icing will keep, covered, in the fridge for a week, so you can make and colour it before making the cookies if you fancy. Colour the icing according to the instructions on the gel colouring pack. Divide the icing between squeezy bottles, and get to work piping outlines on all your cookies – make sure there are no gaps in your outlines for the flood icing to dribble out of later.
The piped icing should dry quite quickly, so you can start filling in with flood icing as soon as you’re finished outlining. To turn the royal icing you outlined with into flood icing, add water a drop at a time and mix well until you have an icing just loose enough to flow when drizzled onto a flat surface. Squiggle flood icing into each outlined area, and use a toothpick to encourage it into the corners.
You can drop contrasting colours of flood icing into flood icing that is still wet to create certain effects. Make lines of wet icing and drag with a toothpick for a feathered effect; or try dripping a single drop of icing in a contrasting colour into wet icing for neat dots.
Edible sprinkles are a lovely, lily-gilding addition too. To stick them onto the cookies, wait for the icing to dry, then mix a teaspoon of meringue powder with a couple of drops of water, until you have a sticky paste. Use a kids’ paintbrush to apply this meringue glue to the area you want to stick sprinkles to, and scatter the sprinkles over while the glue is still wet.
When the icing and sprinkly bits are dry, store the cookies in single layers between sheets of greaseproof paper in an airtight tin.
Sounds like a lot of hard work, but they are very pretty!!
Ah, but the feeling of immense, floury satisfaction that you get when you’ve finished more than makes up for the hard work. That and the enormous tin full of delicious biscuits.
Happy birthday to Dr W – I love his penguin biscuit!
I have the perfect person in mind for these.