Game chips

There are occasions on which a roast potato will not do. (I’ll admit that these occasions are few.) For those days, these game chips are very easy to make, deliciously crispy, and packed with flavour from crispy garlic, crushed chillies, and plenty of fresh oregano.

I’ve used smoked Maldon salt here. It’s a relatively recent arrival in UK supermarkets (and I actually saw some speciality delis selling it in Lille, which made me smile), and I’ve been using it in place of ordinary salt in a few recipes. It’s very good here, but if you can’t find some just use ordinary flaky salt. If you can find some, you can make an excellent Martini by adding a pinch of the smoked salt with a teaspoon of lavender honey and a sprig of lavender to a couple of shots of iced Grey Goose.

To serve two as a generous accompaniment, you’ll need:

4 good-sized King Edward potatoes
1 large handful (about 20g) oregano
2 large pinches (use all your fingers when you pinch, not just your forefinger) smoked salt
1 teaspoon crushed Italian chillies
4 fat cloves garlic
Pepper to taste
Olive oil

Pour a generous amount of oil (enough to cover the bottom) into your largest frying pan. Slice the potatoes into eight wedges each. Bring the oil up to a high temperature and lay the potatoes in the pan for about 10-15 minutes, until they are turning gold and crisp. Flip them over and cook them on the other side for another 10-15 minutes.

While the potatoes are cooking, chop the oregano finely and crush the garlic. As always, I’d recommend you use a Microplane grater to deal with the garlic – it’s the fastest, most mess-free way I’ve found to reduce garlic to a pulp, and you won’t get the stringy bits you get with a dedicated garlic crusher.

When the potatoes are crisp and gold on both sides, stir the garlic through them vigorously with a wooden spoon or spatula, until the sticky garlic is distributed properly throughout the pan. Keep moving it around the pan with your spoon until it too is golden – the crispy garlic bits should adhere nicely to your potatoes. Scatter over the chilli, salt and some pepper straight from the grinder, then the oregano. Toss with your wooden spoon and serve immediately. Hopelessly easy, and much nicer than a chip.

I rather like these game chips drizzled with a bit of lemon juice.

Little break in Lille

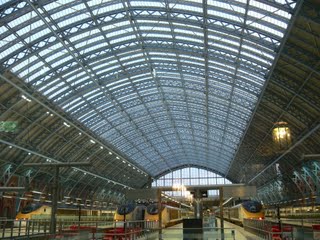
The nice folks at Eurostar and Little Break, Big Difference invited me and a gaggle of other food bloggers to come with them to Lille for a day of foodie tourism. The basic idea here seems to be to demonstrate that destinations like Lille are so close to London that you can hop on a train in the morning, fill a day with Gallic excitement, and then pop back home on that same train in the evening. Once you’re at St Pancras, you’re less than an hour and a half from Lille – and Lille’s station is under five minutes’ walk from the old town centre, so there’s really very little excuse for my not having been before. It’s also, at around £60 a return ticket, far cheaper than I’d realised.

And if you’re the sort of person for whom a day’s food shopping, hunting for French tableware, tasting nibbly bits, soaking up atmosphere and dabbling at cookery lessons sounds just about perfect, you could do a lot worse than emulate the day’s itinerary that was organised for us, perhaps with a slightly later start and an evening meal in France (we left London at 7am, which meant a 5am start for lots of us, and returned before supper time). I don’t usually enjoy pre-organised, structured tourism (I get a lot of pleasure out of organising and planning things myself and get depressingly snobbish about guided tours and package holidays). Fortunately the company was so good and the city so packed with interesting food and drink – breakfast, a lunch cooked by the group at l’Atelier des Chefs, a cheese and beer tasting and an awful lot of pâtisseries – that I found myself enjoying being in something that would have felt a bit like a tour group if everybody hadn’t been quite so single-mindedly seeking out and photographing food.

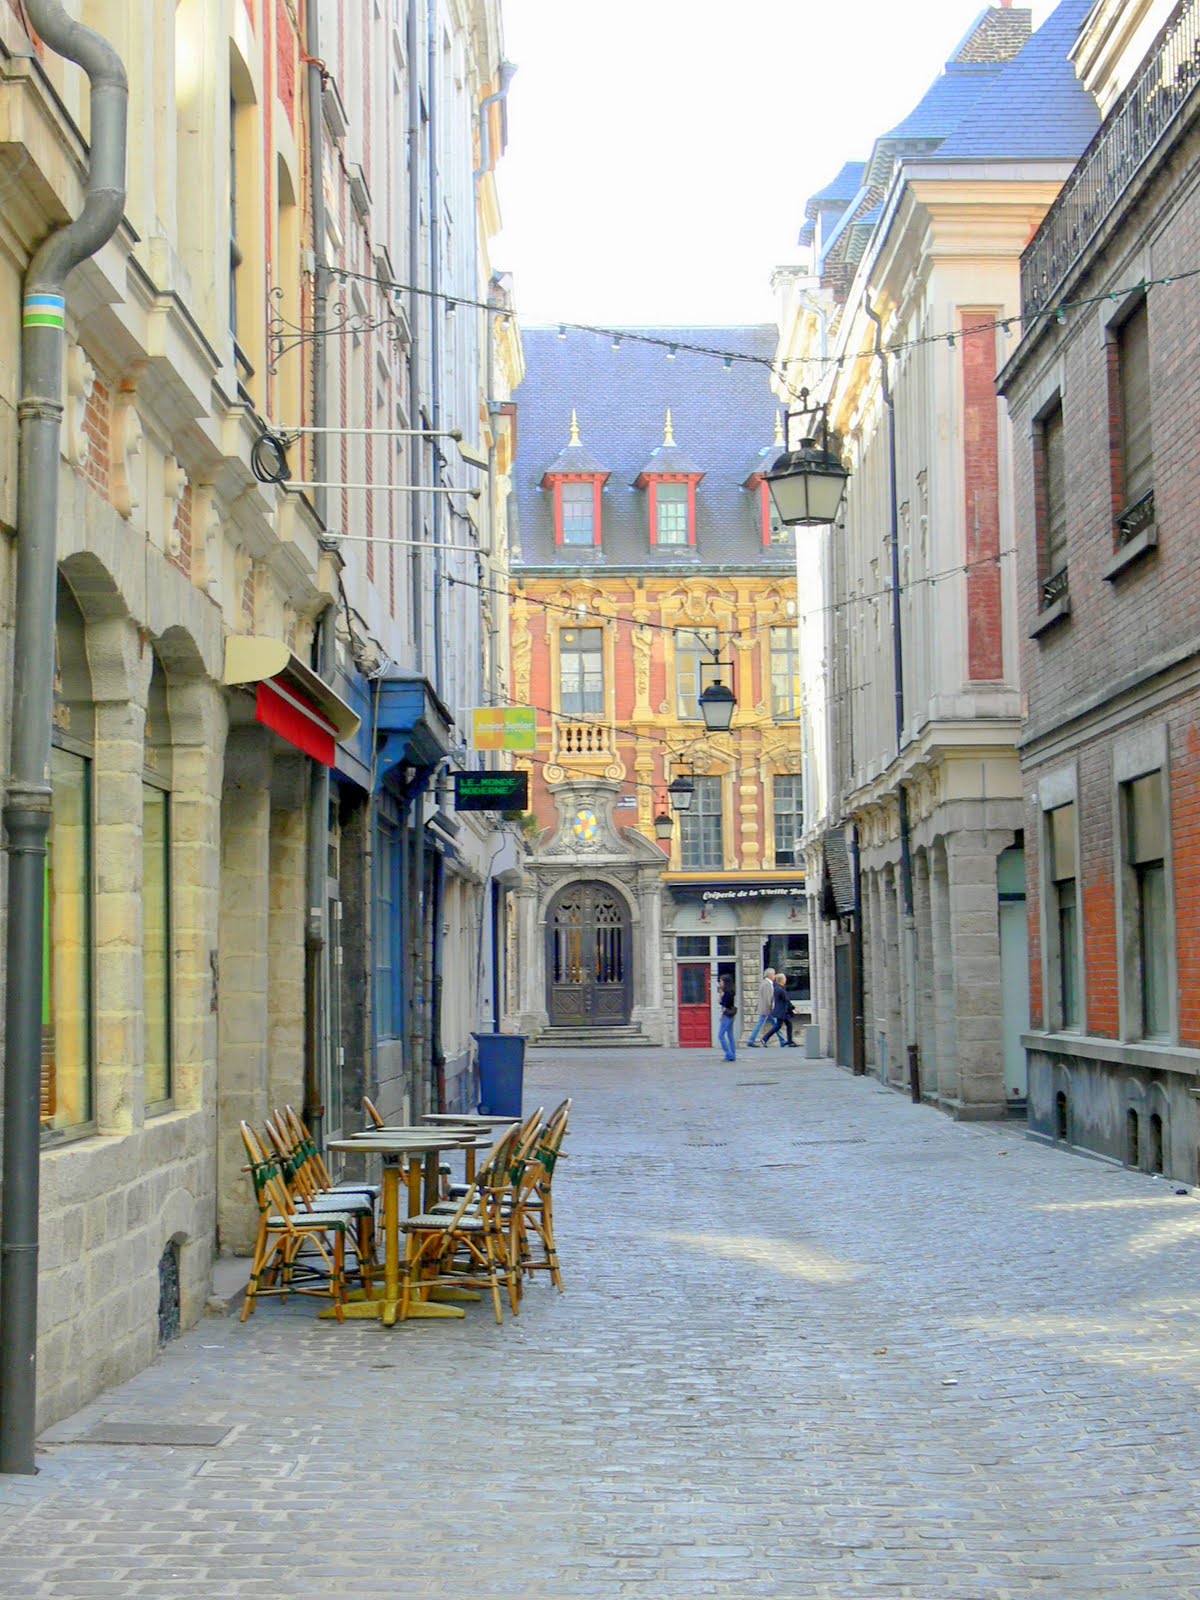
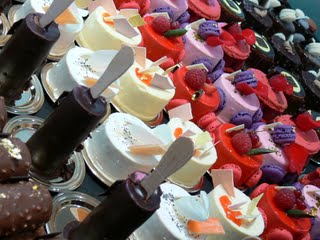
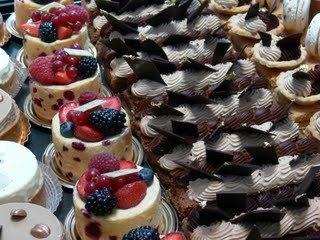
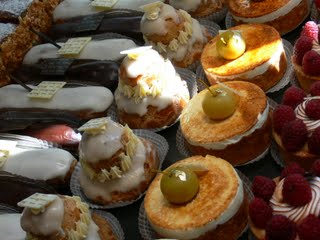
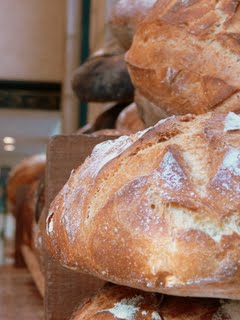
It’s August, so northern France has emptied out. Lille was wonderfully quiet, especially before 10am, when the shops opened, giving us a great opportunity to take some pictures of a quiet, sunny city. We started with a spot of pâtisserie and chocolate shopping; this bread is from Aux Merveilleux de Fred (67 rue de la Monnaie), where fez-sized meringue merveilleuxes, sandwiched together with a dollop of buttercream and encased in chocolate, were also being prepared. (Sadly, a fez-sized meringue does not travel well, so Fred’s merveilleuxes remain unsampled – if you can visit in the morning you’ll have a very enjoyable few minutes watching them being made through the window.) We did buy a baguette here to sample as soon as the shop opened, and it was excellent in the way only something this fresh can be, with a crackling crust, a soft and yeasty crumb, and a total refusal to fit comfortably in anyone’s bag. We then overwhelmed the poor staff at Patrick Hermand (Rue Basse), a modern pâtisserie in a tiny lacquered box of a room, where about twenty varieties of macarons were on offer, alongside these joyous pâtisseries. Note – what you are seeing here is cakes with macarons embedded in them. A large box of macarons came home with me.


On to Meert (27, Rue Esquermoise), a pâtisserie and restaurant opened in 1761, where we sampled deceptively slim and delicate waffles in the beautiful baroque dining room at the back of the shop. They might be slim, but these waffles or gauffres are, unusually, stuffed with an incredibly dense buttercream spiked with flecks of vanilla, and at this time in the morning I could only manage one, praying inbetween bites that death from an overwhelmed gall bladder would wait until I was finished. A photograph of me enjoying a waffle a little bit too much has been put on Flickr by the ladies from Little Break, Big Difference. Note that I’ve only managed one mouthful so far in the picture. Merveilleuxes were available here too, and we split one between four, helped down with some scented, fruity iced tea and a few gallons of coffee. Shopping at Meert is well worth your time even if you don’t choose to sit down for a bite to eat; you’ll find all kinds of pâtisseries, caramels, fruit jellies, chocolates, miniature waffles and some excellent teas and coffees.

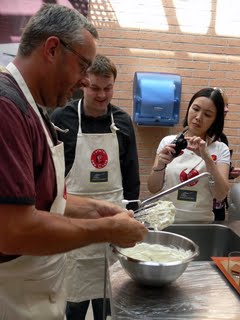
A brisk trot through town, giving us a chance to enjoy the sunny morning, to a cookery class at l’Atelier des Chefs. If I’d been planning the day myself, there’s absolutely no way I’d have been involved in cooking my own lunch, but if you are the sort of person who enjoys casual classes and an introduction to local produce a
nd flavours, you might want to look into a session here. (L’Atelier also runs classes in London and many other cities – check their UK website for details.) Divided into groups of four and clad in very swanky Eurostar-branded aprons, we had a quick drink in a room full of kitchen equipment for sale. Once in the kitchen, we were talked through the preparation of tiramisu made with speculoos, the delicious caramel and cinnamon biscuits you’ll find served alongside coffee in these parts; then we prepared cod flambéed in honey and fleur de bière, a hoppy, floral eau de vie distilled from beer. A pleasant but not fabulous meal (the honey/fleur de bière sauce made for a very unbalanced, candied flavour profile which doesn’t sit well with cod) – and once we were perched on stools to eat our meal at a table surrounded by shelves and shelves of more expensive merchandise, I found myself wishing we’d gone to L’Huîtrière in the old town instead. But I am an avowed grump who does a lot of cooking – as you are doubtless of a sunnier disposition, your mileage may vary.

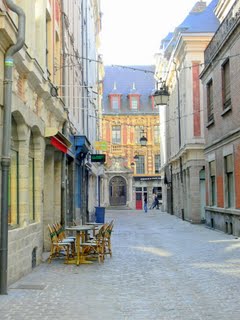
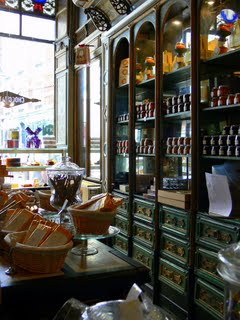
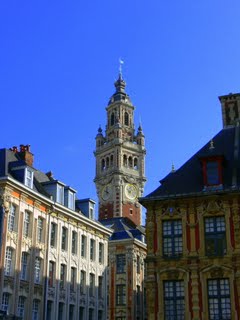
We were met at Le Capsule (25 Rue des 3 Molettes), a fantastically atmospheric little bar full of French emo kids, by Aymeric Gillet-Chevais, the president and founder of ATPUB, the French version of CAMRA. Down in the damp (and very dark, so I’m showing you a picture of the town square instead) cellar, he talked us through French beer culture, and told us about the different producers. The bar is not tied to a specific brewery (unlike a shocking 99% of French bars), so you’ll find 130 beers on the list from minuscule breweries, many very close to Lille itself. We worked our way through four beers; I particularly liked Page 24, from a small brewery 35km outside the city. Chicory is a common addition to northern French beers, says Aymeric, who must have France’s very best name; and this blonde beer packs a bitter punch, rounded off with a lovely coriander nose. Four local cheeses from Philippe Olivier (3, Rue Curé St Etienne) were served too, and it is to my eternal misery that a family emergency had closed the shop for the afternoon, because I would have murdered for a slab of the Maroilles we ate to take home.

We had about twenty minutes before having to dash for the train, so I visited La Capsule’s sister shop, l’Abbaye des Saveurs and stocked up on beers and some other local goodies. Happily for all those of us in the EU, the shop also has an e-commerce arm. Homeware shops, cookware shops and delicatessens proliferate all the way round the old town, so you should be able to find some foodie bits and pieces to take home (save this for the end of the afternoon – if you’re only around for a day, you’ll be doing a lot of walking and this is no fun with four litres of beer, a camera and a bushel of macarons in your bag) no matter how little time you have.

You’ll find more about the day on the blogs listed at the top of the post, and video and more pictures have been unleashed on the Internet by the Little Break Big Difference ladies. I have to admit, I’m not too sure what went on on the train on the way home. I fell asleep.

Gooseberry fool

We English diners aren’t blessed with much, but we’re pretty blessed when it comes to summer fruits. We’ve been through rhubarb, strawberries, cherries and greengages already this summer: now it’s the turn of the gooseberry.

There are several different varieties of this lovely, fragrant berry, some very sharp and best used for cooking (they’re very good simmered down and served with rich meats like duck and goose), and some so sweet they can be eaten raw. Its flavour character and the texture it cooks down to means that it fits well into the sort of recipes you might cook with rhubarb – and if you don’t have any gooseberries, you can make this fool with rhubarb and emerge happy. I very much like the texture of the soft seeds and flesh of the fruit in the mouth, and don’t sieve the gooseberry puree in this recipe to remove them. Try it both ways, and see which you prefer.

Gooseberries have a fantastic affinity with elderflower. It’s just one of those happy coincidences, like strawberries and black pepper (try it some time). If you made the elderflower cordial I encourage you to make every June (or if you have some from the supermarket in the cupboard), use two tablespoons of it in place of the sugar in this recipe. To serve two, you’ll need:

450g dessert gooseberries
2 tablespoons sugar OR elderflower cordial
400ml whipping cream
400ml custard – make the custard using this recipe or buy some from the supermarket chiller cabinet

Top and tail the gooseberries with a sharp knife, and put them in a small saucepan. Add the sugar or elderflower cordial to them and put over a low heat. As they simmer, the berries will collapse into a thick sauce. Remove from the heat, taste for sweetness, adding a little more sugar or cordial if necessary, transfer to a bowl and put the gooseberries into the fridge to chill for a couple of hours. Make up the custard and put it in the fridge to chill with the berries.

When the gooseberries and custard are nice and cold, whip the cream into soft peaks. In glasses, layer the custard, gooseberries and cream to serve. Some like to swirl them in the glass, but I think this is far prettier served in distinct layers.

Granny Sue’s seeded cheese nibbles

Granny Sue, I should explain, is not my granny. She’s the granny of a friend, and creator of the world’s greatest cheese biscuit recipe. Last time we visited, her grandson’s lovely wife produced a dish of Granny Sue’s most excellent biscuits, and kicked half the batch she made up a notch with a sprinkle of cumin seeds. I waited until they were both rendered soft and giving with drink, and demanded the recipe: here it is, unaltered by me aside from the addition of some more whole spices.

The unholy amount of butter and cheese in these makes for an intensely crisp, rich finish – I defy you not to scarf the lot in about five minutes flat.

To make about 25 toothsome little biscuits, you’ll need:

60g plain flour
60g sharp Cheddar cheese
60g salted butter
1 egg yolk
1 heaped tablespoon whole-grain mustard
Water
20g Parmesan cheese
1 tablespoon each fennel seeds, cumin seeds and coriander seeds

Put the butter in the freezer for 20 minutes, while the oven heats to 200°C (400°F). Sieve the flour from a height, making sure you get plenty of air into it, into a large mixing bowl, and grate the Cheddar cheese into it. Grate the frozen butter into the bowl, and use a knife to mix the butter, cheese and flour together well. Add the egg yolk and the mustard to the bowl with a little water (the amount of water you’ll need to make a soft dough will vary according to the conditions on the day you make the biscuits) and mix with the knife until you have a dough which comes together nicely without sticking.

On baking sheets, form teaspoons of the mixture with your fingers into little rounds or lozenges about half a centimetre thick – it’s fussy but rather nice to create a different shape for each of the three different spices you’ll be using. Sprinkle a pinch of grated Parmesan on each one, then a pinch of one of the spices. I made a third of my batch of biscuits with cumin, a third with coriander and a third with fennel. Press the top of each biscuit gently with your finger to make sure the whole spices are firmly engaged with the cheese. Bake for 12 minutes until the biscuits are sizzling and golden. Cool on the baking sheets for ten minutes, then transfer to a wire rack to finish cooling. Serve with drinks before dinner.

Greengage jam

Summer’s been a bit of a washout here, but it turns out that the hot start and wet middle and end of the season have meant that the plum harvest this year has been stupendous. (So has the wasp harvest, so be careful if you’re collecting your own.) I don’t have my own plum tree, but I’ve been scrumping plums from trees in a neighbour’s garden across the green that overhang a footpath, eating them at friends’ houses, and buying bushels of the things at the market.

Greengages are my favourite English plum. They’re (surprise!) pale green, extraordinarily sweet, and wonderfully juicy, with golden flesh when ripe. Like Victoria plums, they’re perfect for jam-making, keeping a lovely plummy fragrance when cooked down. They’re very obliging fruits; they’re full of pectin, so you won’t need to add any setting agents to the jam; and you don’t even need to stone them before cooking, as the stones will loosen themselves for you as the fruit cooks down, floating to the top of the jam so you can skim them off as they bob to the surface.

I like the pure plum flavour you get from this jam, but some people like to add a vanilla pod to the saucepan for some extra fragrance. For me, it’s not the best use of an expensive pod; this jam just employs greengages, water and sugar, and it’s none the worse for that. When selecting your greengages, try to find fruits which are ripe but not over-squishy, and reject any with bruises or mouldy bits, as this will affect the length of time your jam will keep once opened.

I find it hard to think about preserves (especially fruit ones) in terms of kilogrammes and litres, so I’m afraid you’ll need to dig out the imperial weights for this one. To make jam from 2lb of ripe greengages, making about 3lb jam, you’ll need:

2lb greengages
1½ lb granulated sugar
½ pint water

Sterilise some jars before you begin. Put the whole greengages and the water in a large pan, and simmer for 20 minutes, stirring occasionally, until the fruits are very soft. Pour in the sugar, stir well and simmer hard, fishing out the stones as they bob to the surface, until the mixture reaches a jam set (it should measure 110°C on a jam thermometer; if you don’t have one, just dribble a bit of the jam onto a cold saucer and check that it’s reached a jammy texture). Skim any scum off the surface and pour into the sterilised jars, sealing immediately.

This is, of course, gorgeous on toast, crumpets or a croissant; my favourite thing to do with this jam is to dollop a big tablespoonful into the middle of a bowl of plain yoghurt for breakfast.

Steak with sweet pepper salsa

I love the silky, slippery texture of a roasted, peeled sweet pepper. Removing the seeds and skins is a job I relish – a cleaned pepper is velvety-smooth between the fingers, and once it gets to your mouth, that texture combined with the pepper’s natural sweetness makes for an experience far more sensuous than supper should be.

This is a good way to get out of a steak rut (you know the rut I mean – it’s the one with the chips and Hollandaise). I’ve served my steak, rested for a few minutes to allow the meat to soften up and release its juices, over a plateful of undressed pea tops, which you should be able to find in some supermarkets at this time of year. The meat juices and the salsa will dribble into the salad, like a particularly stupendous dressing. I served this with some buttered rice cooked in chicken stock – good, crusty bread will also be good (and this mixture of pea tops, salsa and steak will make a world-beating sandwich).

To serve two, you’ll need:

2 steaks of your choice – I used sirloins
5 sweet peppers – I used 2 pointy piquillo peppers and 3 bell peppers. Try to vary the colours, but don’t use any green ones; they won’t be sweet enough.
12 cherry tomatoes
½ red onion
1 large handful (25g) parsley
1 heaped teaspoon cumin seeds
1½ tablespoons balsamic vinegar
5 tablespoons extra-virgin olive oil
1 pack pea tops, or another sweet, tender leaf
Salt and pepper

Take the steaks out of the fridge before you start and pop them to one side while you deal with the salsa, so they’re at room temperature when you come to cook them.

Rub the whole peppers with a couple of drops of olive oil and arrange in a baking tray. Cook at 180° C (350° F) for 20 minutes, until the skin is browned and blistering, and use tongs to put them in airtight freezer bags. Seal the bags and set aside while you prepare the other ingredients – this will give the steam rising from the flesh of the peppers time to loosen the skin, which will make peeling them much easier when they are cool.

Dice the onion and quarter the tomatoes. Put them in a mixing bowl and stir in the finely-chopped parsley. Toast the cumin seeds in a dry frying pan for a couple of minutes until they are giving up their aroma (be careful not to over-toast and burn them), and stir them into the bowl.

Use your fingers to peel the skins from the roast peppers, and remove their seeds. Discard the seeds and skins, chop the flesh of the peppers into chunks about the size of the pieces of tomato, and add them to the salsa. Pour the oil and vinegar over the other ingredients, stir well and set aside for the flavours to meld while you prepare the steaks.

To cook the steaks, rub them on both sides with salt and pepper, and grill or saute (I chucked mine on the barbecue) for a few minutes on each side until medium rare. Remove to a plate and rest for five minutes to allow the tissues of the meat to relax. Slice on the diagonal and lay the warm steak on a bed of pea tops. Taste the salsa for seasoning, add salt and pepper to taste, then spoon a generous helping on top of the steak. Serve with sunshine and a cold drink.

Chilli choc chip cookies

Chillies and chocolate have a lovely affinity; they’re a traditional pairing in South America, where the locals really know how to treat their cocoa. I was making up a traditional toll house cookie recipe – actually, it’s the traditional toll house cookie recipe, as I’ll explain below – yesterday with Dr W (the family that bakes together stays together), and decided to augment the recipe with some fresh Scotch bonnet chillies. Wonderful and potent little balls of fire, they’re one of my favourite chillies. If you’ve not tried them before, be cautious, especially if you find chillies hard to tolerate; these are hot, rocking up at between 100,000 and 350,000 Scoville Units. (The humble jalapeño only rates at between 2,500 and 8,000 Scoville Units, for the sake of comparison.)

Scotch bonnets are closely related to the habanero, but have a very distinct flavour and aroma, fruity and sweet behind all the heat, which I think is just wonderful against chocolate. I’ve only used one here, chopped very finely and creamed in with the butter so its powerful capsaicin (the stuff that burns your tongue off), which is fat-soluble, can work its way smoothly through the cookie dough. The chocolate chunks are a good milk chocolate – nice and smoothly cooling on your tongue against the chilli heat.

The basic recipe I’ve used here is the original toll house cookie recipe – I’ve never found a better. The Toll House was a restaurant in Whitman, Massachusetts, where Ruth Wakefield, one of the owners, was responsible for all the recipes. She came up with this recipe around 1930. Nestle bought the rights to the recipe in 1939 – this ingredients list is from Ruth’s original recipe from the 1947 edition of Toll House Tried and True Recipes, where she calls them Toll House Chocolate Crunch Cookies. (As well as adding the chillies, I have left out a cup of chopped pecan nuts from the recipe – if you want to use them, stir them in with the chocolate bits.) Ruth preferred very tiny, crisp cookies, and only used half a teaspoon of batter for each one, with a much shorter spell in the oven. I like them quite a lot bigger for the squashy middle, and suspect you will too – if you want to make teeny cookies, reduce the cooking time.

To make about 20 cookies, you’ll need:

1 Scotch bonnet pepper
2¼ cups plain flour
1 teaspoon salt
1 cup unsalted butter, softened
¾ cup granulated sugar
¾ cup firmly-packed light brown sugar
1 teaspoon vanilla extract
2 large eggs
1 teaspoon baking soda
2 cups plus 2 tablespoons chocolate morsels (I used two bars of Green & Black’s cook’s milk chocolate, walloped into rough chunks with a rolling pin while still in the wrappers)

Preheat the oven to 190°C (375°F).

Chop the chilli very finely, discarding the seeds if you want to cut the heat down a bit. Sift the flour and salt together in one bowl. In a large mixing bowl, cream the butter and the chilli with an electric mixer (this should take about 2 minutes). Add the sugars gradually, creaming the mixture together until light and fluffy. Beat the vanilla and eggs (one at a time) into the mixture, then the baking soda. Turn the speed of your mixer down to low and add a third of the flour, then gradually add the rest. Stir in the chocolate pieces and drop heaping tablespoons of the mixture onto baking sheets about 2 inches apart to leave space for the cookies to spread.

Bake for between 8 and 10 minutes, until the edges and tops are just turning golden. Allow to cool on the baking sheets for a few minutes so they can firm up a little, then use a spatula to move the cookies to cooling racks (or direct to your mouth).

These are a lovely, crumbly, squashy cookie. They’ll keep in an airtight container for about a week.

Crispy Thai lime chicken with fresh chilli sauce

I am currently all a-tizz about kaffir lime leaves. They’re hard to find out here in the sodden fen; not all oriental grocers stock the fresh leaves (which are very pretty and look like a pair of leaves growing on the same central rib). When I have spotted them in shops, they have often been a bit elderly, and not as aromatic as you’ll want them to be for cooking. Happily, you’ll find them shredded and frozen in some supermarket freezer cabinets; there are currently a couple of packs in my freezer at home. They have a wonderful citrus fragrance, almost as if you were sniffing fresh lime zest through an olfactory magnifying glass. (The zest of a kaffir lime is astonishingly good stuff, but sadly I’ve only seen the fruit for sale in Malaysia, which isn’t much help for UK home cooks.)

In most cooking, we use kaffir lime leaves in a similar way to bay leaves – as an aromatic to be infused in a wet mixture like a curry, then discarded before eating. The shredded leaves gave me an idea, though – how about using them to make a crispy crust with panko breadcrumbs for a neutral-tasting meat like chicken? Paired up with a fresh Thai chilli and ginger sauce, this turns out to be exactly how summer eating should be.

I’ve butterflied the chicken breasts and beaten them flat with a rolling pin to give them a bigger crispy surface area; this also helps them to cook really fast, preserving all the lovely lime flavour. I would like to believe that one per person is a sensible helping, but these were so good we ended up eating two each. To make four breaded, butterflied chicken breasts, you’ll need:

Chicken
4 skinless, boneless chicken breasts
4 heaped tablespoons flour
1 egg
8 heaped tablespoons panko breadcrumbs (if you can’t find Japanese panko crumbs, just use slices of white bread and whizz them to shrapnel in the food processor. Panko has a brilliant crispiness, though, and is worth seeking out.)
4 tablespoons shredded kaffir lime leaves (frozen or fresh – don’t get the dried ones, which will leave you feeling as if you are cooking with cardboard)
Peanut oil or a flavourless oil for frying

Fresh Thai chilli sauce
1 piece of ginger the length of your thumb
Juice of 2 limes
4 fat, juicy cloves garlic
½ stalk of peeled lemongrass
2 birds eye chillies (reduce amount if you don’t like your sauce too hot)
4 tablespoons Thai fish sauce
4 tablespoons palm sugar (most supermarkets seem to be stocking this now) or soft light brown sugar
1 small handful mint

It’s easiest to make the sauce before you start on the chicken, which will need your attention for the very short time you’ll be cooking it. Just put all the sauce ingredients except the mint in a mortar and pestle or (easier) a food processor or liquidiser, and process until you’ve a slightly chunky, wet sauce. Unlike commercial sauces, it won’t be red – but it’s none the worse for that. Chop the mint and sprinkle it over the sauce.

Start work on the chicken by butterflying your chicken breasts. This is far easier than you may have been expecting – just lay them flat, push a small, sharp knife into the thicker side of the chicken breast and make a horizontal cut almost all the way through to the other side. You should be able to open your chicken breast out like a book, with the fatter edge of the breast acting as the book’s spine. Place the butterflied chicken breast between two pieces of cling film on a chopping board (the cling film stops them from sticking) and wallop the hell out of them with your rolling pin, until the chicken is a thin, even escalope, about half a centimetre thick. Don’t worry about raggedy edges – the breading you’re about to apply is amazingly forgiving.

Put the flour, seasoned with some salt and pepper, in one bowl, the beaten egg in a second and the crumbs, mixed well with the lime leaves, in a third. Dip the chicken in the flour, then the egg, then the crumbs, making sure it’s coated well at every stage. Fry over a high heat for 2-3 minutes per side, until the crumbs are golden and crisp, and serve with the sauce, a salad or some stir-fried veg, and your choice of rice or noodles.