Devilled chicken

Devilling is a Victorian technique for resurrecting drab leftovers. It involves making a spicy paste from mustard, Indian chutney and other storecupboard standards, dressing cold, roast meats with the paste, then grilling until the whole confection is hot. The Victorians were wont to devil anything they could get their hands on; breakfast kidneys were devilled, eggs, hams, mutton chops: let’s be honest here. It was really a way to disguise food which was a bit elderly and didn’t taste that great any more.

In North and South, Elizabeth Gaskell describes some devilled chicken which “tasted like saw-dust”. The cook must have been low on mustard that day. Disraeli’s curiously awful Sybill describes the requirement for a cool glass of water with spicy devilled biscuits (I am still not quite clear on how precisely you’re meant to devil a biscuit – he probably meant that the biscuits were heavy on the chillies). These days, we don’t really use this technique much any more, although I do remember a home economics class at school which culminated with a slightly boingy hard-boiled egg piped full of a gritty orange yolk, mayonnaise and raw spice mixture. Unsurprisingly, I haven’t devilled anything since.

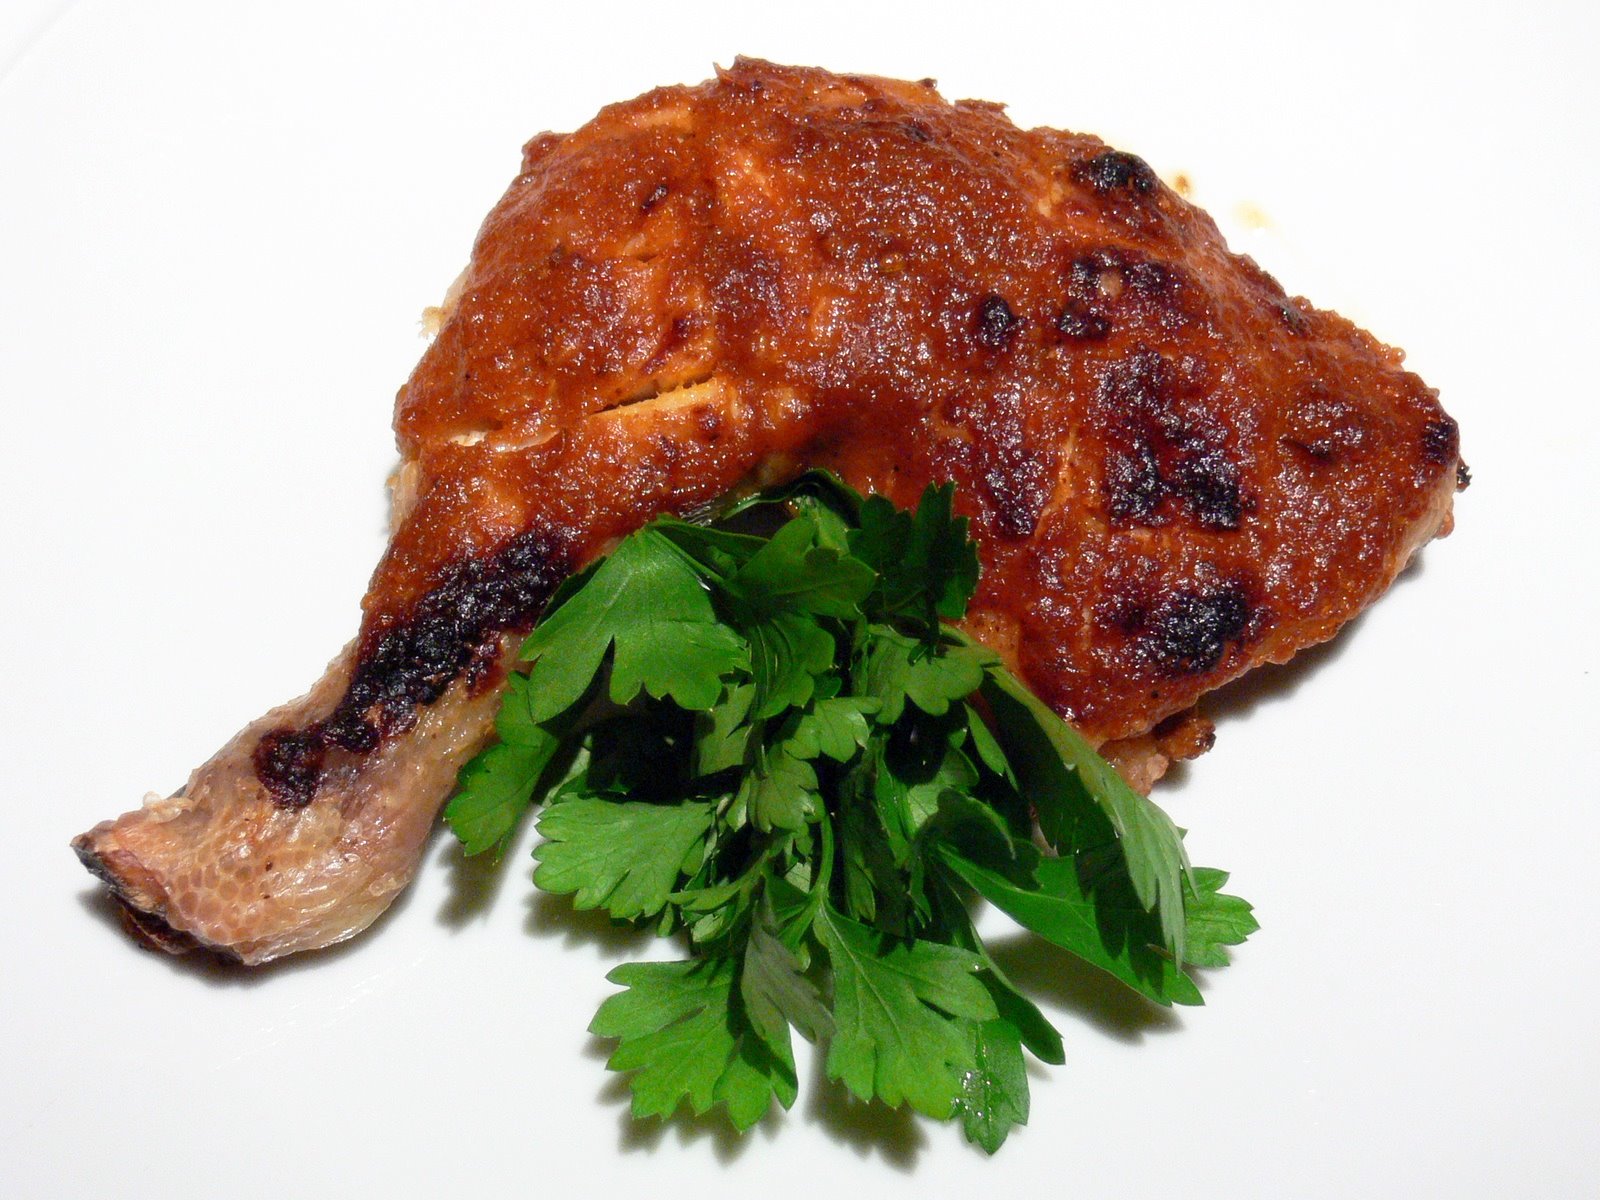
Never say never. Having mentally consigned devilled-anything to the ‘unlikely to be delicious’ pile, I found myself browsing through some of my antique recipe books at the weekend (a very cheap obsession, should you get bitten by the collecting bug; they’re usually available for pennies in bric a brac shops and they’re fascinating; who knew that powdered millipedes were good in a sort of soup for hysteria?) and read through a devilled chicken recipe. It actually sounded pretty good. I looked up another one. It sounded fantastic. Time to swallow my prejudice and get devilling. All the same, I decided to roast the chicken specifically for the dish rather than using leftovers. It was amazingly and unreservedly good, and it’s going to become a regular on our supper table. To devil my four chicken leg and thigh joints (these are almost always the bits left over when you have a roast) I made sure that unlike Mrs Gaskell, I didn’t skimp on the mustard, and that like Disraeli, I had a cold glass of water standing by. You’ll need:

4 chicken thigh and drumstick joints, pre-roasted or raw (see below)
1 ½ generous tablespoons Dijon mustard
1 ½ tablespoons good Indian chutney. I used Patak’s brinjal (aubergine) pickle, but any good mango chutney or similar will also be excellent here.
1 tablespoon chilli sauce
2 tablespoons butter
1 tablespoon Worcestershire sauce
A generous amount of pepper and salt
Flour (optional)

I realise this ingredients list sounds pretty peculiar. Persevere with it; Victorian flavours can seem oddly foreign to modern palates, but remain extremely good.

If your chicken is raw, put it in a roasting tin and roast, drizzled with plenty of salt, pepper and olive oil, at 180° C (350° F) for 40 minutes until crisp and golden, and set aside in the roasting tin to cool. If you’re using pre-cooked chicken, just place it in the cold roasting tin and start cooking the sauce.

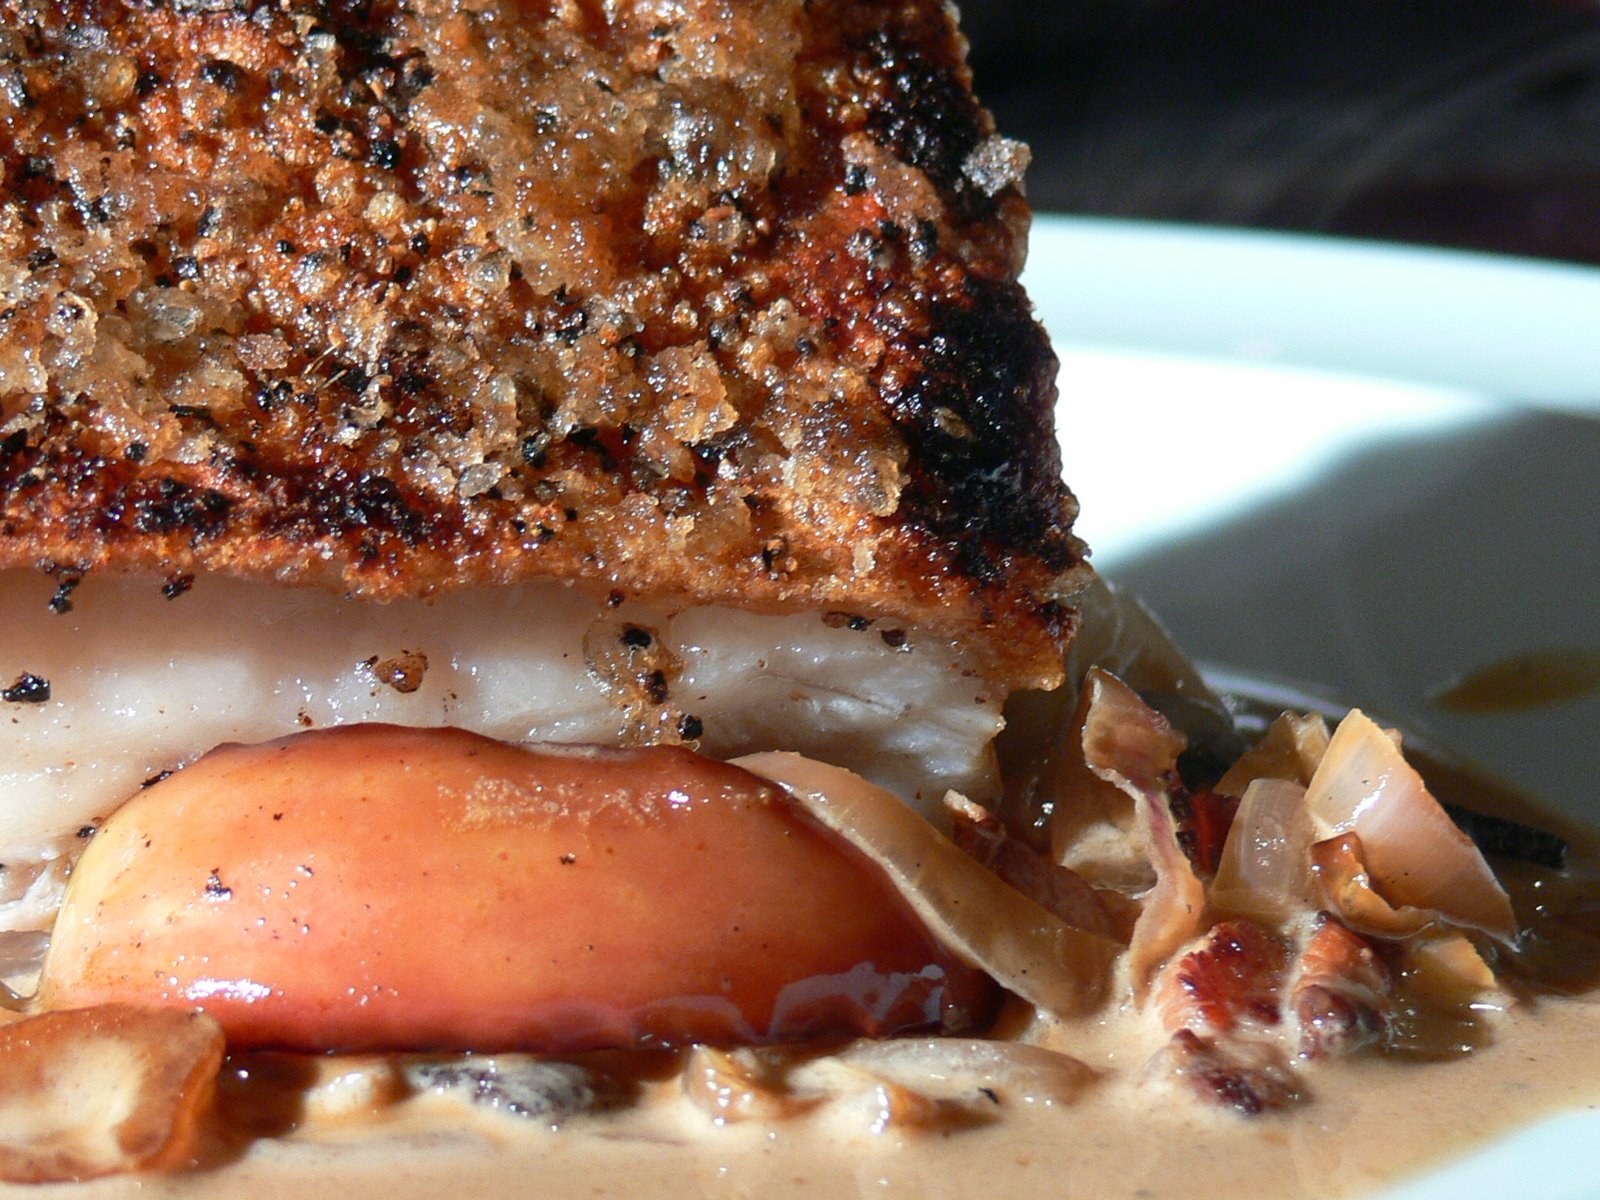
Melt the butter in a small saucepan and stir in the mustard, chutney, chilli sauce and Worcestershire sauce until you have a thick paste. Remove from the heat. Cut deep diagonal gashes into the meat of the chicken, with another set of gashes across them. Push the paste into the slits in the meat, and spread it generously all over the skin of the chicken. If there’s any paste left, put a dollop under each chicken joint.

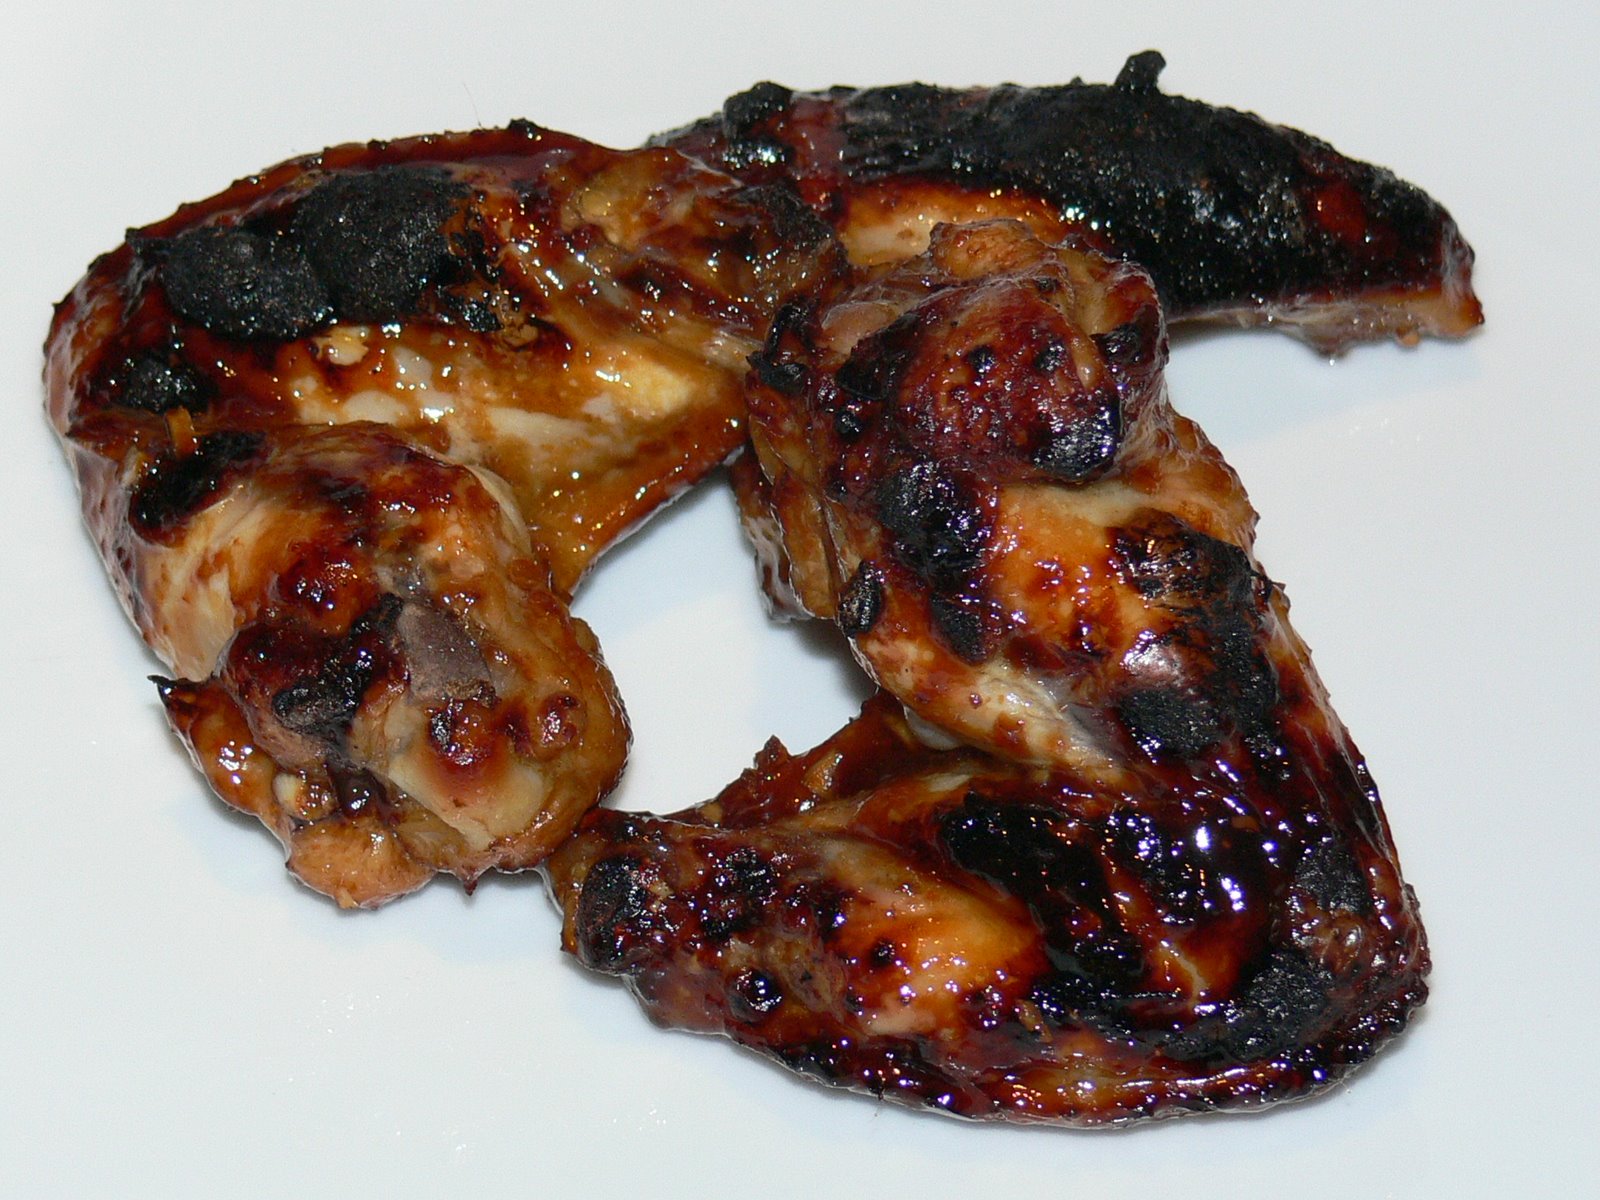
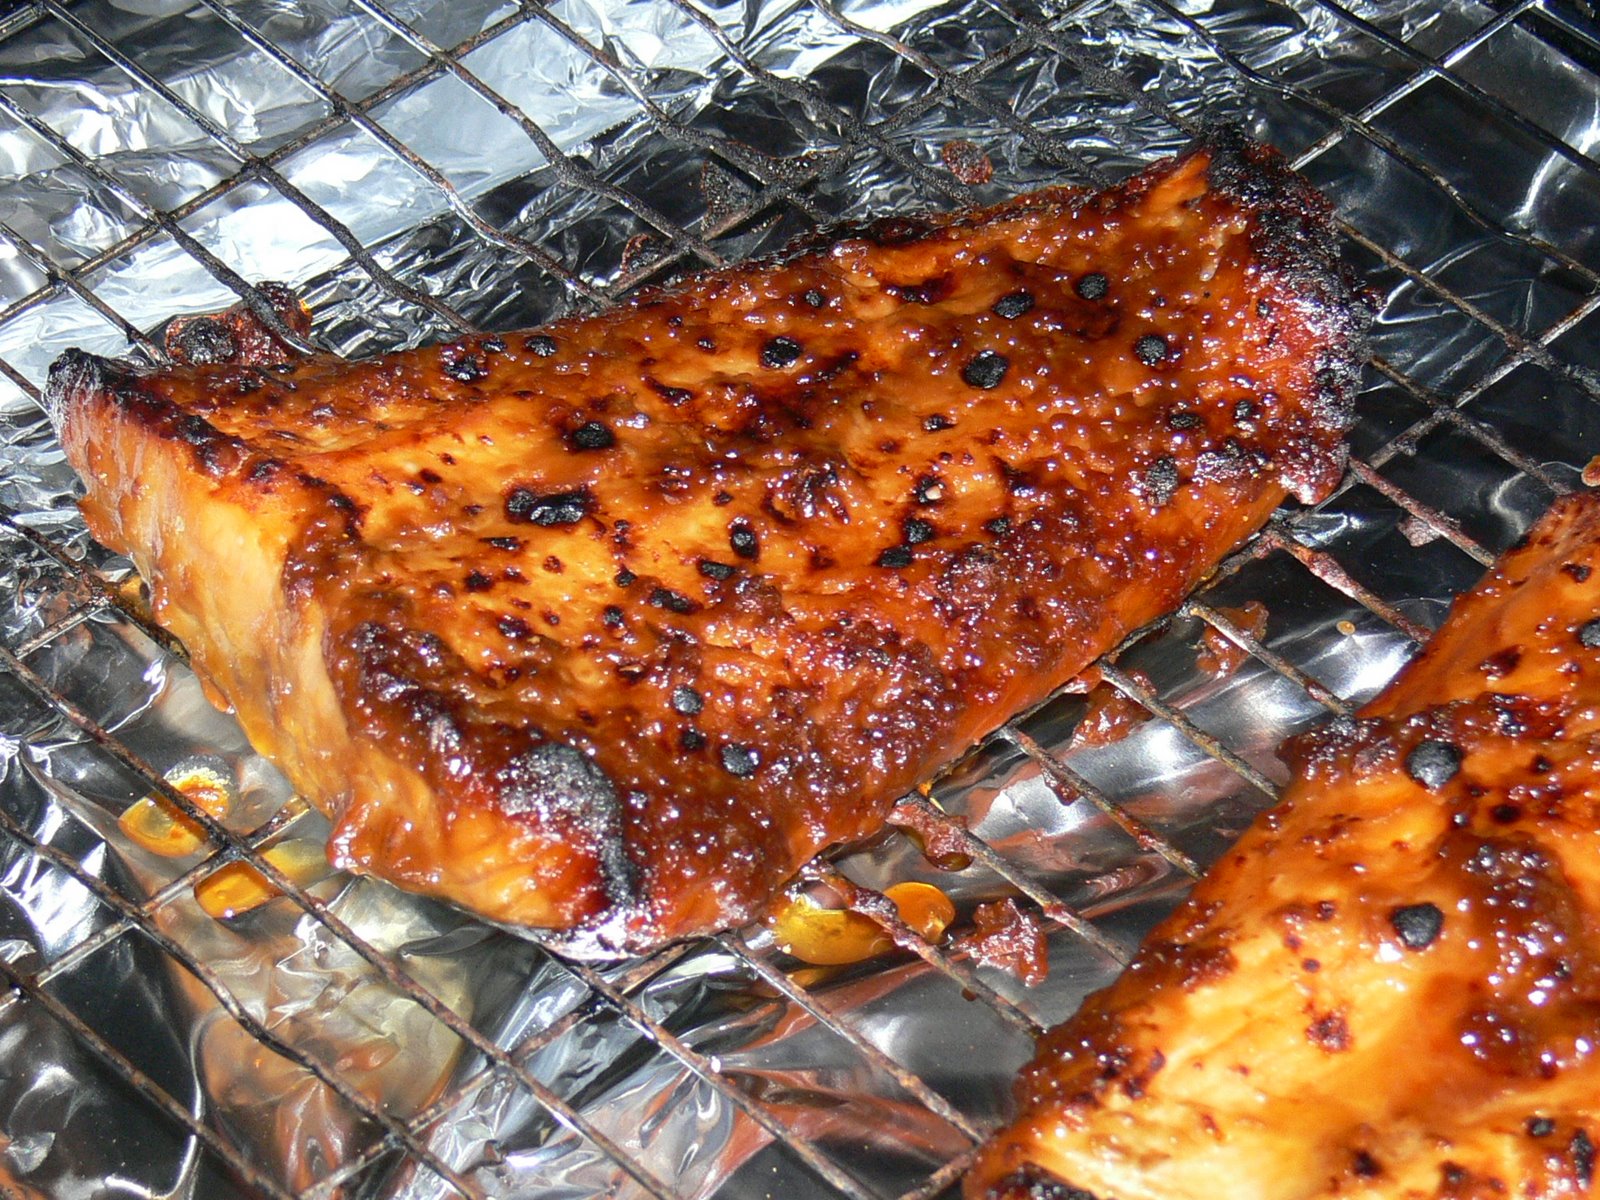
Place the roasting tin under the grill about 4 inches from the flame, and grill for 10 minutes until the paste is starting to brown and the meat is hot. André Simon suggests dredging the chicken pieces with flour after you’ve smeared them with the paste in order to achieve a crispy finish. You might want to try this if you’re using yesterday’s chicken, but chicken you’ve just cooked should have a lovely crisp skin underneath the paste, so extra crispiness isn’t really necessary.

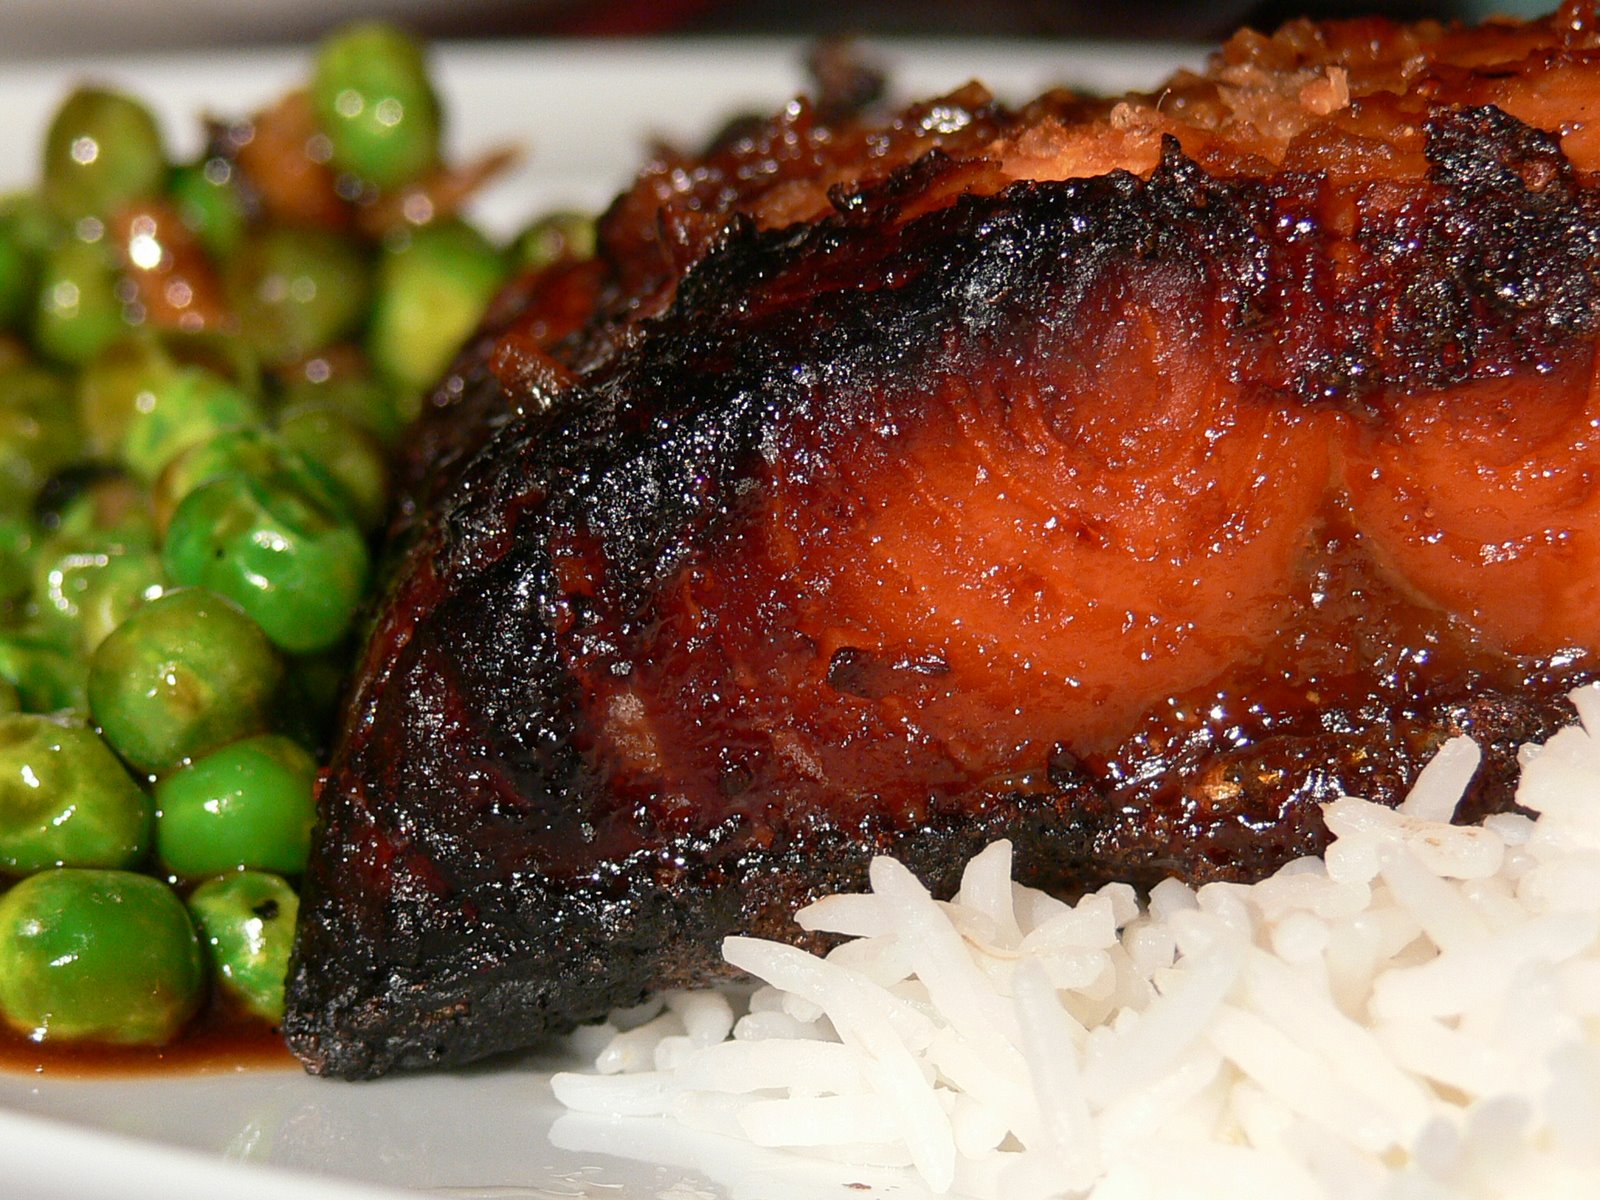
Serve with buttered rice or new potatoes and a sharply dressed salad.

Roast garlic and a jar of infused honey

Smoked garlicI managed to get my hands on a couple of bulbs of fat, golden, oak-smoked garlic this weekend. (Cambridgeshire readers should head straight over to the River Farm Smokery in Bottisham for more smoked goodies.) It’s beautifully pungent stuff; years ago, I bought a plait of smoked garlic for my parents, who ended up having to keep it in the garage to prevent the whole house from taking on a smoky, garlicky taint. If you’ve not tried smoked garlic before, it’s pretty easy to imagine, but the reality is always a little startling. This is a fiercely flavoursome product. You can make a little go a long way, but I really like to use whole cloves of it in casseroles or around roast dishes. Much of this bulb found itself being used in a roast lamb dish with beans – just follow this recipe and add about eight whole cloves of smoked garlic in place of the chopped fresh stuff – you’ll need a couple of extra cloves to stuff into the skin of the lamb as well.

Garlic cloveWhen garlic is smoked, its cloves soften a little and turn a lovely buttery yellow. The smoking process forces some of the natural sugars in the garlic cloves to bead on the surface of the clove, under the papery skin, becoming sticky, tacky and sweet. You can use these cloves wherever you’d use raw garlic; the whole bulb is also exceptionally good roasted. Try making roast garlic and fresh tomato pasta with a smoked bulb for great depth of flavour. I really like the roast cloves popped out of their skins and spread on a good crusty bread, sprinkled with a little salt. The squashed, roast cloves are also fantastic stirred into mashed potatoes.

Infused honeySmoked garlic and honey are two flavours which, for me, seem to have been invented for each other. I kept five cloves of the garlic back to make a jar of smoked garlic honey baste. To make your own, you’ll need a jar of honey (mine is some of our local wildflower honey – anything with a delicate, flowery flavour will do, though; try clover, orange blossom or lime blossom honey) and five unblemished cloves of smoked garlic. Empty the jar of honey into a saucepan and warm it with a jam thermometer in the pan until it reaches 100° C. Put the whole garlic cloves at the bottom of a sterilised jar and pour the hot honey over them, then cover and refrigerate. The garlic will start to give its smoky fragrance up to the honey almost immediately, and the honey will have a noticeable flavour after a day or so, but for best results the jar should be left for around a month before using. Brush the infused honey over meats before roasting or grilling, use as a surprisingly delicious dressing for baked apples, or spread on some toast and nibble with a glass of whisky for a midnight snack.

Honey and sesame glazed chicken wings

Glazed chicken wingsContinuing this week’s things which taste as if they ought to cost a lot more than they did theme, here’s a recipe for chicken wings. They’re a much-overlooked bit of the bird, and this is a shame (or would be if it didn’t mean that they’re amazingly cheap), because they’re wonderfully tasty. Meat from near the bone of a chicken always tastes richer and sweeter. Grilled in a sweet sauce, the skin on the wings becomes crisp and delicious. And somehow, sticky things which demand to be eaten with the fingers are about three times tastier than the ones you can just manage with a knife and fork.

To serve four as a starter or two as a main course with rice, you’ll need:

16 chicken wings
2 tablespoons dark soya sauce
2 tablespoons runny honey
1 tablespoon sesame oil
1 tablespoon light soya sauce
1 tablespoon chilli sauce (choose something sweet here – I used Kampong Koh chilli and garlic sauce, which is made in my grandparents’ town in Malaysia)
3 cloves of garlic, crushed or grated with a Microplane grater
Juice of half a lemon

Remove the pointy end-joint from each wing with a sharp knife. Mix all the other ingredients in a large bowl and marinade the chicken pieces for a few hours or (preferably) overnight.

Place the chicken wings on a rack over some tin foil in a grill pan and grill close to the heat source under a medium flame for about six minutes on each side (or use a barbecue). Baste the chicken with the marinade from the bowl regularly as it cooks. The sauce will caramelise and the skin will bubble. If you want a sauce, put any extra marinade in a small pan and boil vigorously for a couple of minutes, then pour over the wings. Serve with a bowl on the table for the bones and plenty of paper napkins – you’re going to get very sticky fingers!

Truffle wars

TrufflesOne of Gastronomy Domine’s friends over at Hotel Chocolat sent me a link to a news story yesterday. It appears the head chocolatier from Thornton’s (another UK chocolate shop – I like their chocolates much less than Hotel Chocolat’s, but Thornton’s does carry a very good diabetic range which has the added bonus of using sweeteners which induce explosive diarrhoea in the greedy) walked into a Hotel Chocolat shop and used a vindictive thumb to crush the creamy life out of £63.50-worth of truffles. His motives are, thus far, unknown. Perhaps, like me, he didn’t like the Marc de Champagne ones.

He’s since left his job. A shame; I’ve seldom heard a phrase so delightful as Hotel Chocolat’s “This was a extraordinary act of truffle-squishing”.

Normandy roast belly pork

Roast belly porkPork belly is a fabulous cut. It’s striated with layers of fat between the layers of sweet meat, which, when cooked slowly, melt and baste the joint from within. The English finally seem to be catching on to the idea that belly pork is a good, good thing. I challenge you to find a gastropub menu that doesn’t feature belly pork. It pops up much more often in all kinds of restaurants than it used to (I remember a time not so long ago when the only restaurants serving it were in Chinatown), and it’s appearing much more frequently in supermarkets, so you no longer have to ask for it specially at the butcher’s. It’s also a pleasingly inexpensive cut of meat; you’re paying mere pennies for one of the tastiest bits of the pig, which represents real value.

Pork and apples are natural friends, so I’ve served this slow-roasted joint and its crackling with a cidery, creamy shallot and bacon sauce, and slices of sweet fried apple. Gather your windfalls now – this is a perfect autumn dish.

To serve four, you’ll need:

1kg piece of belly pork
2 large onions
5 rashers smoked streaky bacon
1 sweet eating apple
4 shallots
1 wineglass cider
5 tablespoons crème fraîche
Salt and pepper

Preheat the oven to 150° C (300° F). Use kitchen paper to dry the pork rind well. Score rind of the belly pork in lines about half a centimetre apart with a sharp craft knife, and rub it with salt and pepper. Cut the onions in half and place them, flat side down, in a metal roasting tin, then rest the pork on them – the onions should form a platform for the pork so it doesn’t touch the hot tin and sit in its own fat.

Put the pork in the oven for 3 hours and forget about it. When the time is up, turn the heat up to 200° C (400° F) for a final 20 minutes. Remove the pork from the oven and put it under a hot grill until the skin crackles evenly (about five minutes). Keep an eye on the pork under the grill – it is easy to singe the skin. Finally, leave the pork in a warm place to rest while you prepare the sauce.

Normandy roast belly porkChop the bacon into little lardons and fry without any oil in a non-stick frying pan. When the bacon is crisping up, remove it to a bowl, keeping any bacon fat in the pan. Slice and core the apple, leaving the skin on. Fry the apple slices in the bacon fat until golden and set aside. (If the bacon hasn’t released enough fat, use a spoonful of pork fat from the roasting tin.) Finally, slice the shallots finely and brown them in the bacon fat over a medium flame. Keeping the pan on the heat, add the bacon to the pan, pour over the cider and bring it to the boil for two minutes to burn off the alcohol. Add the crème fraîche to the pan and stir well, and finally add the cooked apples.

Serve the pork on a bed of the sauce and apples with some mashed potato and a green vegetable.

Panna cotta with fresh raspberries

Panna cottaPanna cotta is Italian for cooked cream. It’s a light mixture of cream, milk and sugar (along with some honey in my version – I love the combination of milk and honey), set with gelatine and served cold. If you see panna cotta moulds for sale, buy a few – they make the job much easier. If you don’t have panna cotta moulds, ramekins work well too, but you will have to be a bit more patient when it comes to turning the set puddings out.

The vanilla is important here – I’ve used both vanilla sugar (sugar which has been stored with a vanilla pod buried in its jar) and the seeds from a vanilla pod in this recipe. Vanilla is expensive, but there’s nothing like the fragrance of the real stuff in this dessert. If, however, you can’t find any or prefer not to shell out for the real thing, a few drops of vanilla essence will work here too.

To serve six, you’ll need:

1 tablespoon powdered gelatine (from the cake-making shelves at the supermarket)
200 ml whole milk
600 ml double cream
Seeds from one vanilla pod
5 tablespoons honey
1 tablespoon vanilla sugar
Pinch salt
Raspberries or strawberries to garnish

Put the milk in your heaviest-bottomed saucepan and sprinkle the surface with the gelatine. Leave for ten minutes away from the heat for the gelatine to soften.

When the gelatine has softened, put the pan on a low heat and, stirring continually, warm until the milk is heated through and the gelatine dissolved. The milk should not boil at this stage. Add the cream, vanilla seeds (slit the pod down its length and use the handle end of a teaspoon to scrape all the seeds out – you can keep the pod and put it in another sugar jar), honey, vanilla sugar and salt to the pan and stir until the sugar has dissolved.

Divide the mixture between six panna cotta moulds. Cover and put in the fridge until set (it’s best to leave the mixture at least overnight to make sure it’s completely firmed up). To turn out the moulds, dip their undersides in water from the kettle to loosen the mixture and pop a plate over them, then turn the whole assembly upside-down. Decorate with berries and serve chilled.

Chicken with cardamom and preserved lemons

Chicken with cardamom and preserved lemonsRemember those Moroccan preserved lemons from a few months back? They turned out very nicely indeed – salty, zingy skins infused with the scents of the spices in the jar. One of the spices I used in the preserved lemons was cardamom, and I’ve used more in this dish; along with the lemons and some flowery olive oil, it lifts and brightens the flavour of this chicken dish. Pure sunshine in a bowl – and that’s just what I feel like in dismal October. Be sure when choosing your ingredients that you use an olive oil with a good flavour.

I’ve used a box of the tiny fillets (sometimes called chicken tenders) you’ll find to one side of a chicken breast here. They’re a very easy piece of meat to work with if you’re in a hurry – no skinning or chopping necessary. To serve two, you’ll need:

450g chicken fillet pieces
3 shallots
3 tablespoons polenta or cornmeal
8 cardamom pods
1 preserved lemon
4 tablespoons good extra-virgin olive oil
1 handful parsley, chopped
Salt and pepper

Preserved lemonStart by scraping the pulp out of the inside of the preserved lemon (the pulp of these is too salty to eat). Dice the skin and pour over three tablespoons of the olive oil, then set aside while you prepare the rest of the meal.

Slice the shallots very finely and put them in a large bowl with the chicken. Bash the cardamom pods lightly in a mortar and pestle to crack their tough skins, then use the back of a teaspoon or a fingernail to get all the seeds out. Discard the empty pods and crush the seeds in the mortar and pestle. Mix the cardamom seeds, polenta and some salt and pepper, then sprinkle evenly over the chicken and shallots and mix well.

Heat the remaining tablespoon of olive oil in a large sauté pan over a high flame. Tip in all the chicken mixture and sauté until crisp and brown. Remove the chicken and crispy shallots to a clean bowl and pour over the lemon and oil mixture and some parsley, tossing like a salad to mix. Serve immediately.

Miso-glazed salmon

Miso-glazed salmon
This Japanese way with fish requires you to think ahead by a couple of days. Once you’ve slathered it with its thick sauce, the salmon needs to cure and marinate in the fridge for at least 48 hours, by which time its flesh will be delicately infused with the flavours from the den miso. Once it’s out of the fridge, it’s simplicity itself to prepare under the grill.

Marinading fish in den miso is a delicious, traditional treatment. Japanese grocers in the UK often offer fish ready-smeared and packed under plastic for you to cook when you return home. A den miso marinade is also used in Nobu’s utterly gorgeous black cod. I’ve never managed to find any black cod for sale, but salmon is just great here – try sea bass fillets too if you can get your hands on some.

To serve two, you’ll need:

2 one-person-sized pieces of salmon fillet, skin still on
200g shiromiso (white miso)
2 tablespoons sake (Chinese rice wine is good here if you have no sake)
2 tablespoons sugar
2 tablespoons mirin

Most UK supermarkets seem to be stocking miso, sake and mirin (a sweet rice wine) these days, although the alcohols will be with the foreign foods section, not in the booze section. If your supermarket doesn’t carry miso, have a look in your local health food shop. I’ve noticed that for some reason, they almost all sell a good variety of Japanese kelps, soya sauces, and miso.

Put the miso, sake, sugar and mirin in a bain marie and simmer the mixture (which is now den miso) over boiling water for 40 minutes, stirring occasionally, until the colour darkens. Remove the den miso from the heat and set aside to cool.

Put the salmon in a small bowl and pour over the cooled marinade, making sure everything is well-coated. Cover with cling film and leave in the fridge for between two and three days, turning the fish daily.

Grilled salmonWhen you are ready to cook the salmon, lay it with the skin side down on a rack over tin foil. Grill under a high flame for about four minutes, until the miso is caramelising and bubbling as in the picture. Turn the fish so the skin side is uppermost and grill for another four minutes, watching carefully to make sure the fatty skin doesn’t catch and burn.

The fish will be sweet and silky with a crisp and caramelised skin. Serve with rice and a green vegetable.