Chilli con carne

It is with a degree of trepidation bordering on downright terror that I post a chilli con carne recipe. Chilli is one of those dishes which people have very set ideas about – your family chilli will probably differ from mine, the canonical chilli recipe from your town will differ in some subtle and important way from the canonical chilli recipe from the town next door, and I fully expect howls of outrage in the comments section because there’s some detail in my chilli which you think is downright barbaric in comparison to yours. Howling makes me nervous. Let me know what makes your own chilli recipe special – and if you can do it without the howls I will be super-grateful.

This is one of those recipes which rewards you for making extra. Like all casseroles, it’s best eaten when it’s had a night in the fridge for the flavours to meld, and I like to freeze several portions for those lazy evenings when you just can’t pull together the energy to cook from scratch.

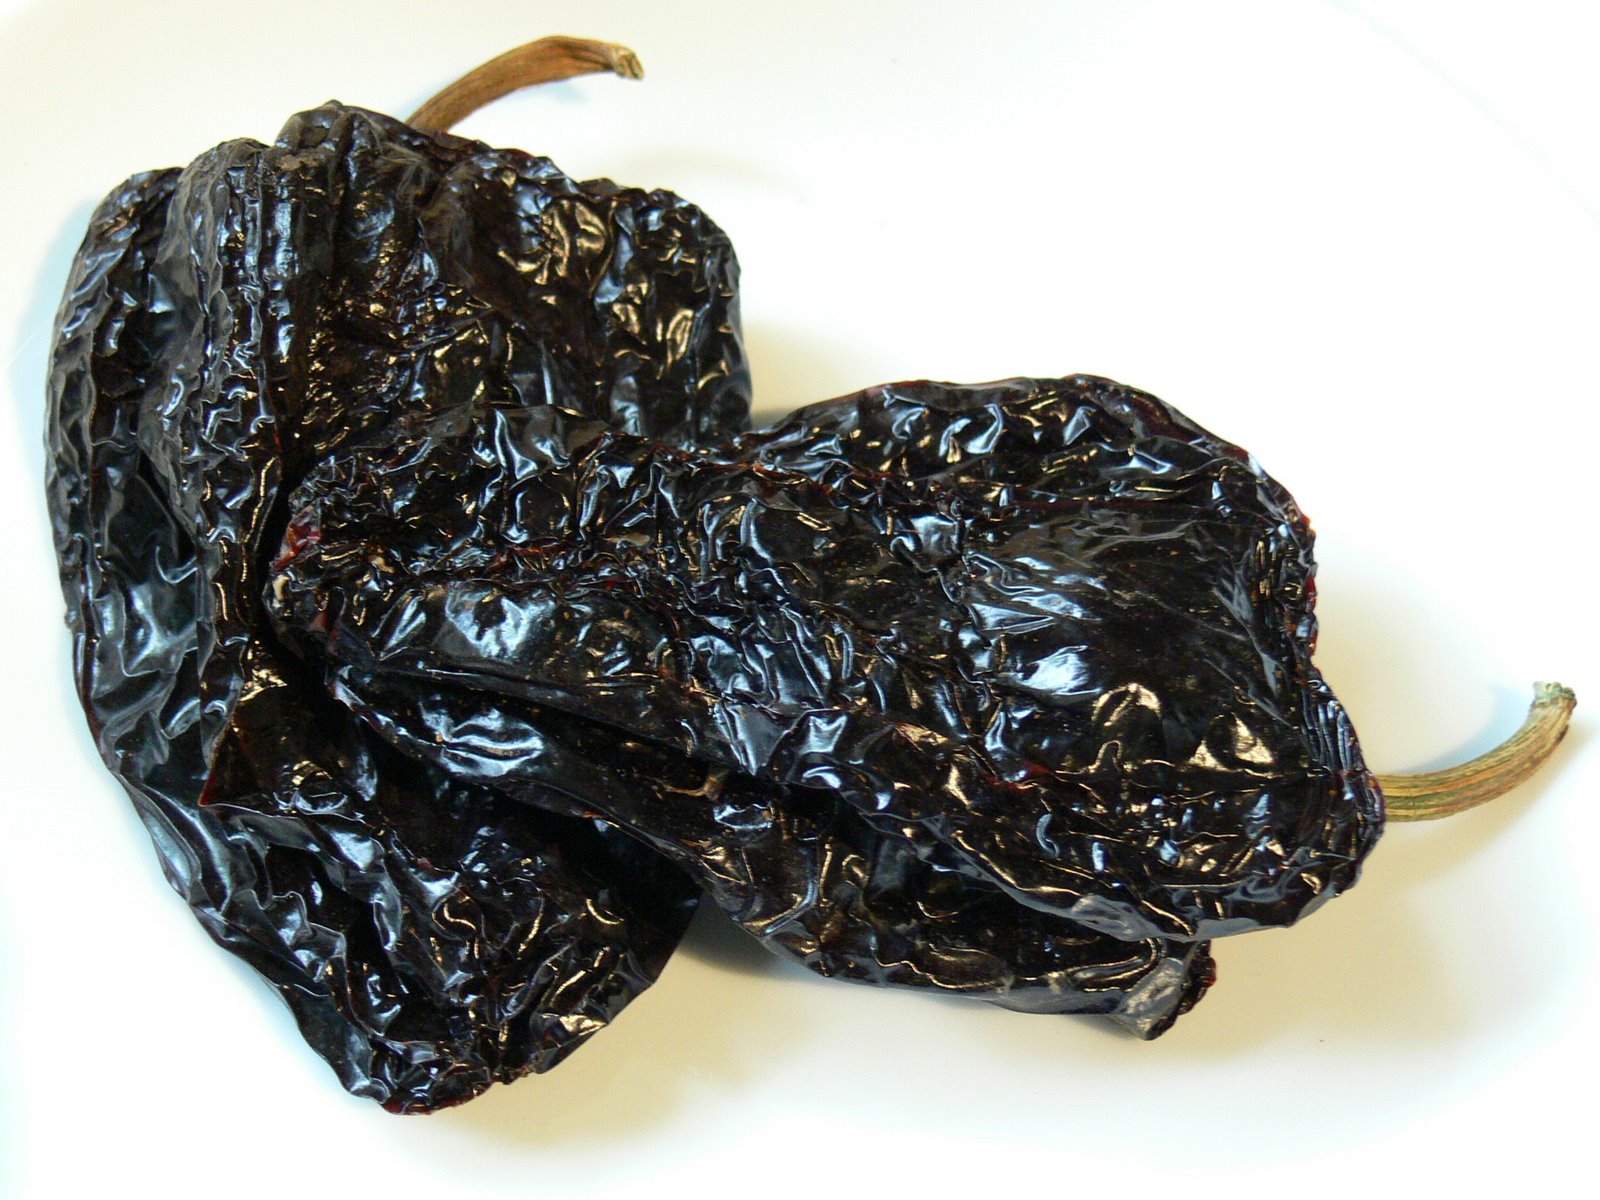
I’ve used Ancho peppers here – compare them to the fresh Poblanos (their non-dried cousins) from the crema earlier this week. If you can get the fresh peppers, it’s really worth making the crema to accompany this dish. The Anchos and another two varieties of chilli work with the bell peppers to achieve a gorgeously rounded, fruity base to the dish, packed with chilli heat.

To make between eight and ten portions, you’ll need:

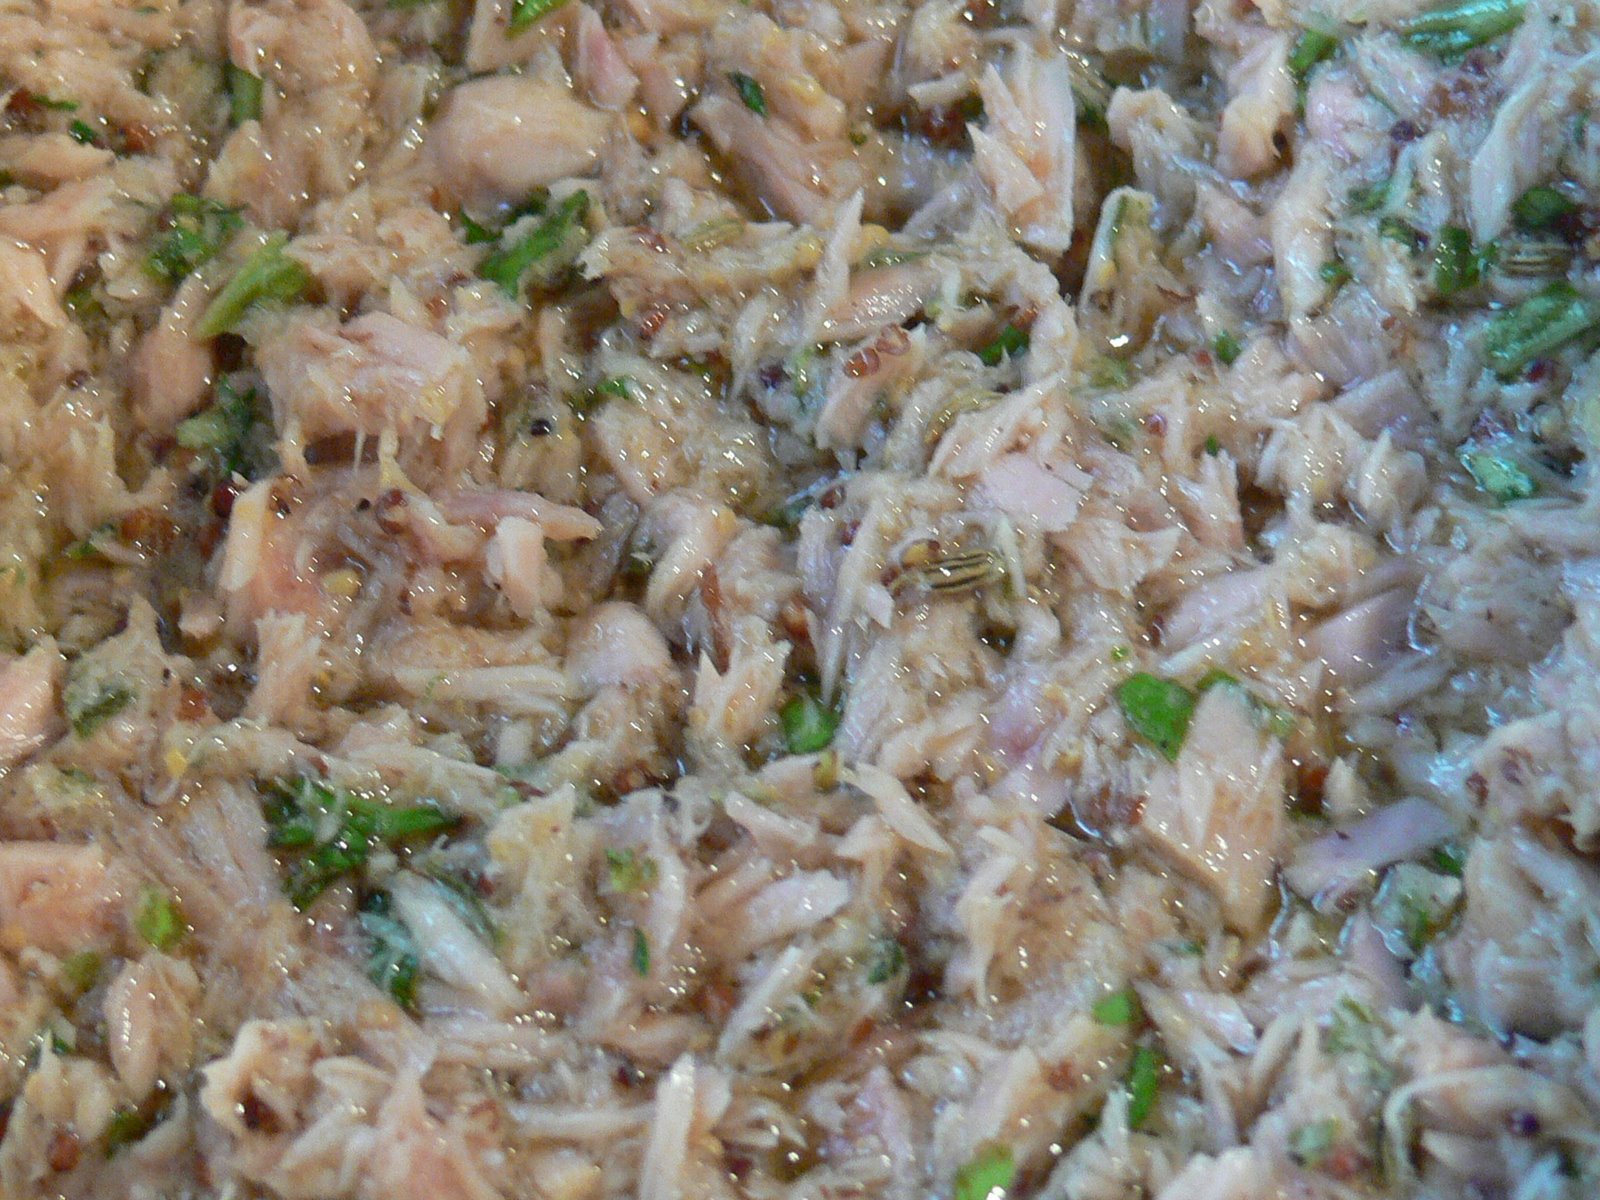
1kg lean steak mince
2 large onions
6 fat cloves garlic
6 stalks celery
3 yellow, orange or red bell peppers
3 Ancho peppers
2 teaspoons cumin
1 teaspoon fennel seeds
1 cinnamon stick
2 bay leaves
2 teaspoons cayenne pepper
2 tablespoons Chipotle peppers in adobo
1 litre passata
1 large glass red wine
2 tablespoons tomato puree
Juice of 1-2 limes
2 x 400g cans kidney beans
Olive oil
Salt and pepper

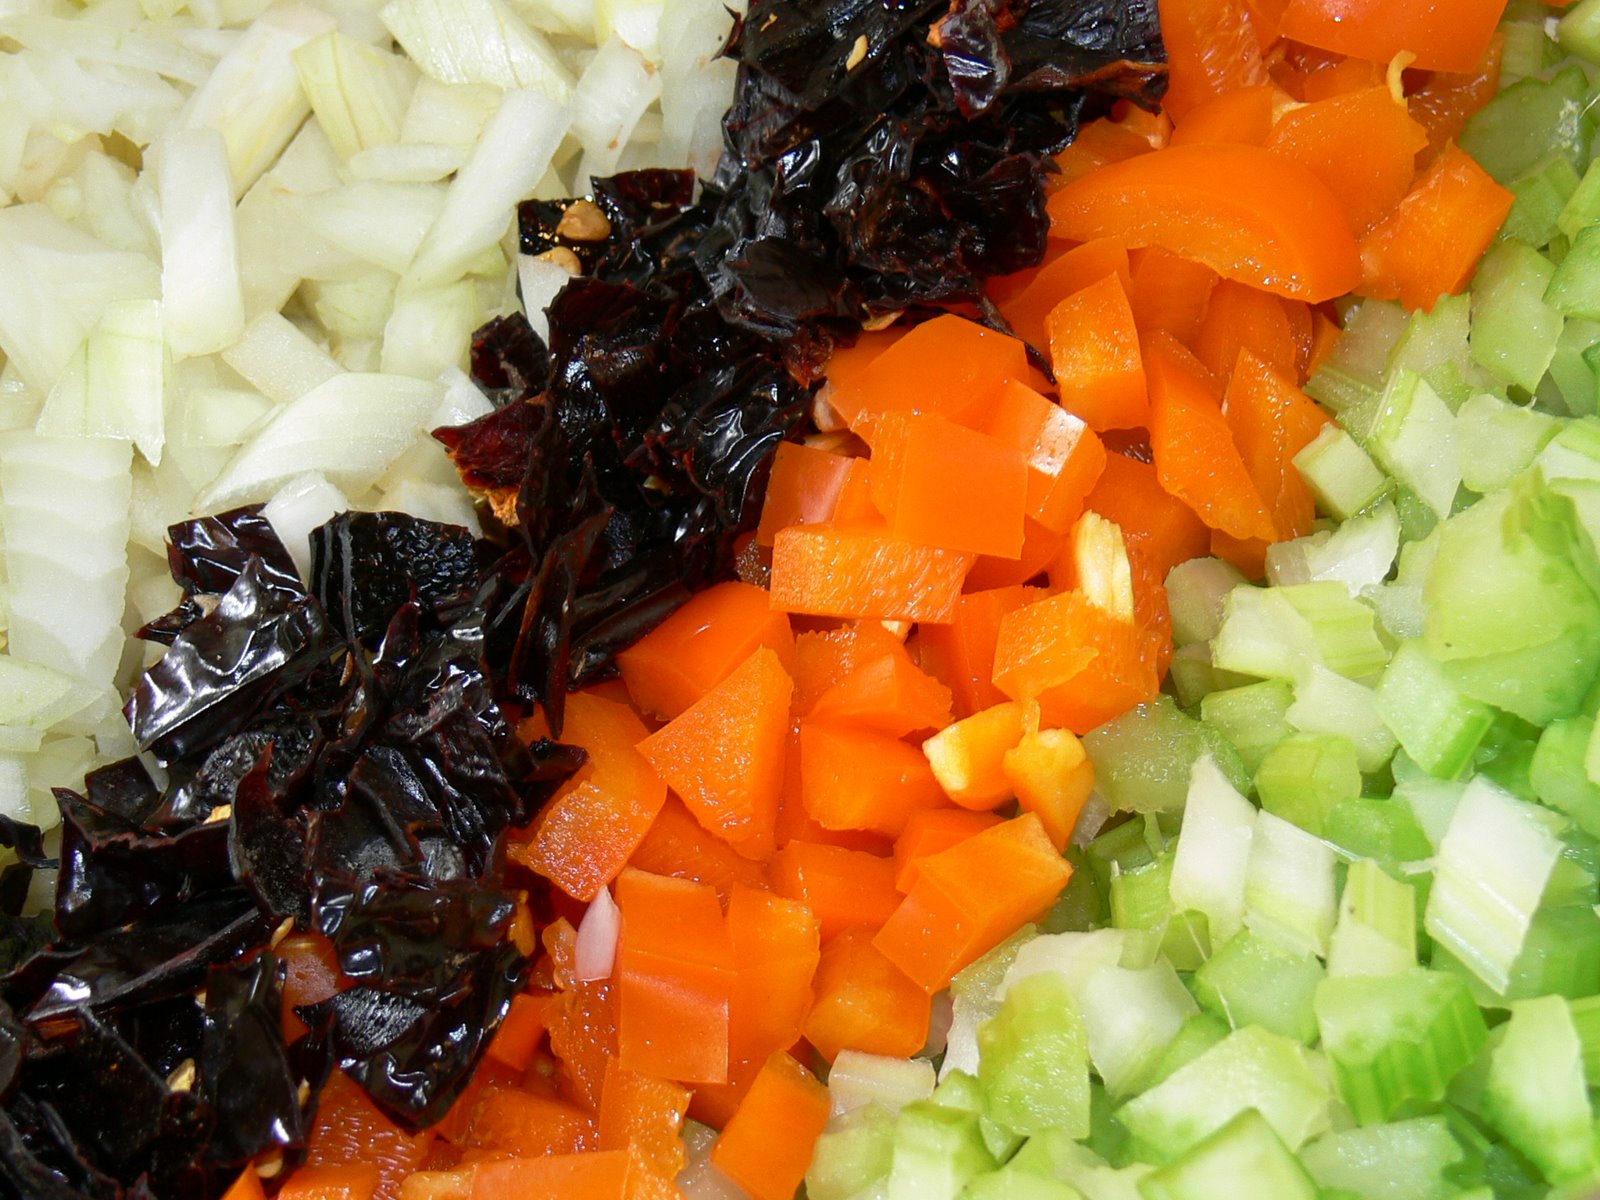
Dice the onions, celery stalks and bell peppers into even pieces, and use scissors to chop the Anchos (seeds and all) into bits about the same size. Chop the garlic into small pieces. Take a large, heavy-based casserole dish, and blanch the diced vegetables with the cumin, fennel, cinnamon stick, cayenne and bay leaves in a couple of tablespoons of olive oil, stirring all the time, until they are turning soft, but not taking on any colour.

Add the steak mince to the casserole dish and cook over a medium heat, stirring well, until the meat is browned. Pour over the passata and the wine, stir the Chipotle peppers and their sauce, the tomato puree and a large teaspoon of salt into the mixture and bring up to a simmer. Turn the heat down low and put on the lid, and leave to simmer for 1½ hours, stirring regularly.

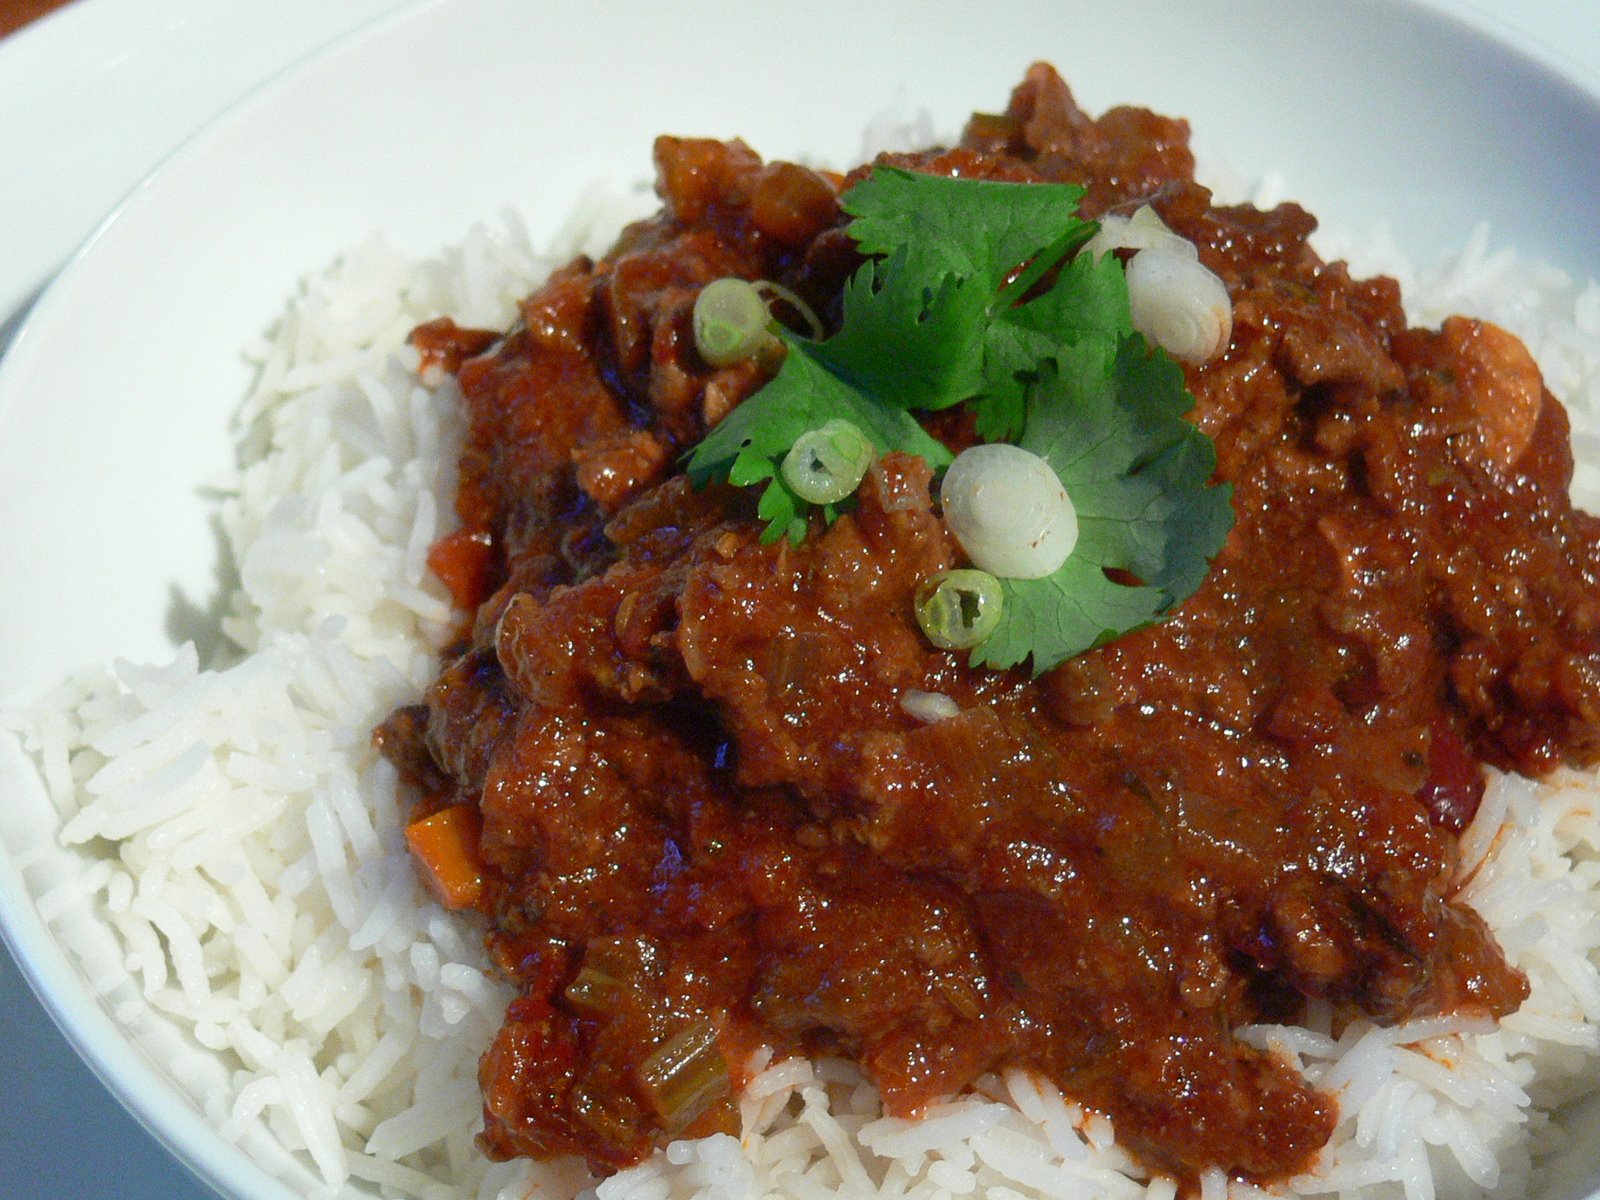
At the end of the cooking time, stir the drained beans in and continue to cook for ten minutes. Taste for seasoning – you will probably have to add a little more salt. Add the juice of one of the limes, taste again and judge whether you will need the other one. (Limes vary in sharpness and juiciness, so you may be able to use just one.) Decorate the finished chilli with chopped coriander – I like to have a bowl on the table so diners can add as much as they like.

If you haven’t made the crema, a bowl of sour cream on the table will be tasty and will help take the heat of the chillies down a little. There are plenty of easy Mexican recipes on Gastronomy Domine you can pep this up and add interest with – it’s great for an informal party – try one of the salsas, some guacamole or a gorgeous corn and squash puree. You can serve your chilli on rice, as I have here – it’s also great in tortillas, on a baked potato or even with chips for dipping.

Roast Poblano crema

I live about ten miles from Ely, where there is a cathedral, a very, very good bookshop, and an excellent twice-monthly farmers’ market. There are about 30 stalls, and it’s a great place to pick up local meats (a slab of belly pork is lurking deliciously in the freezer as we speak) and things like good free-range eggs, pork pies and ostrich products from Bisbrook farm. Because this area is right at the heart of East Anglia’s patchwork of farms, the stalls are packed to the gills with interesting fruit and vegetables. The bread in particular tends to run out early – if you do visit Ely for the market, try to get there before 11am.

Edible Ornamentals, a Bedfordshire farm growing chillies, usually has a stall full of chilli plants, pots of sauce and chillies both fresh and dried. I love their chilli sauces (some so hot it’s amazing that a glass jar can contain them without dissolving in protest), but their fresh chillies can be downright amazing, and I was delighted to score five big, fresh Poblanos for £3.

Poblanos are the fresh pepper which, when dried, become Ancho and Mulato chillies. (An Ancho is dried more than the slightly soft and fruity Mulato.) They are a mild, purple pepper with a deep, fruity background – lots of flavour and very little heat, although the redder pepper in my bag was a little hotter than the others. I was planning a chilli con carne, and had some Mulatos in the cupboard ready for deployment in that. What better to eat as a side dish than a Poblano crema – those fresh Poblanos roasted, skinned and mixed with crème fraîche, lime and coriander?

To make enough crema to accompany a chilli for two or three, you’ll need:

5 fresh Poblano peppers
5 tablespoons crème fraîche (or Mexican crema, if you can find it)
6 spring onions (scallions), chopped
1 large handful chopped coriander
Juice of 1 lime
Salt and pepper
Olive oil

Rub the whole peppers with olive oil and arrange in a baking tray. Cook at 180° C (350° F) for 20 minutes, until the skin is browned and blistering (see picture). Put the whole cooked peppers in a plastic freezer bag, seal the top and put aside for five minutes while you chop the spring onions.

The business with the freezer bag will help the peppers steam from the inside, loosening the skin so you can peel it off easily. When the peppers are cool enough to handle, peel off their skins and discard, then chop open and carefully remove all the seeds. Some people like to do this under a running tap, but I recommend keeping the cooked peppers well away from water to preserve their delicious juices. Slice the silky peeled peppers into long, thin strips and put in a bowl with any juices. (I really enjoy this bit – peeled, roast peppers feel beautiful between the fingers.) Reserve a few strips on a plate to use as a garnish.

Stir the crème fraîche, pepper strips, spring onion and coriander together with the lime juice. Taste, and add salt and pepper. Garnish with more coriander and the reserved peppers, and chill for an hour before serving.

This is deliciously cooling served alongside a chilli con carne – it also makes a fantastic filling for baked potatoes and is gorgeous slopped on a baguette.

Chocolate orange fairy cakes

I eat precisely one Terry’s Chocolate Orange every year, at Christmas. Here, for non-festive times of year, is the same thing in cake form.

There will be no post here on Monday; it’s a Bank Holiday, and I shall be spending the day on a boat.

To make 16 little cakes, you’ll need:

Cake
100g soft butter
100g caster sugar
2 eggs
100g self-raising flour
1 teaspoon baking powder
Grated zest of 1 oranges

Icing
75g dark chocolate (I used Hotel Chocolat’s amazing 100% cocoa solids bar from the Purist range)
50g butter
75ml double cream
Grated zest of 1 orange

Preheat the oven to 200° C. Beat all the cake ingredients together with an electric whisk until the mixture is pale, light and fluffy. Divide it between 16 paper cake cases and bake for 20-25 minutes until the cakes are pale gold in colour, and a toothpick inserted into the centre of one comes out clean. Set the cakes to cool on a rack while you make the icing.

Melt the butter and chocolate together in a bowl over some boiling water. Stir in the orange zest and a tablespoon of the cold cream, and begin to beat with the electric whisk on medium. Pour in the cream in a thin stream as you beat, and when all the cream is incorporated, continue to beat air into the chocolate until the mixture is pale, spreadable and light.

Spread the icing over the cooled cakes with a knife (or, if you don’t hate washing up, pipe it on). These cakes keep well in an airtight container for a few days.

Stuffed focaccia with mozzarella, artichokes and smoked ham

Oozy, garlicky, herby, smoky and greasy. What’s not to like? Focaccia is the ideal bread to make this sort of baked sandwich from. It’s oily, so it bakes to a gorgeous crisp, and it’s a relatively flat bread, so works well sliced in two horizontally. I like to make my own focaccia (the feeling of an oil-enriched dough, stretchy, silky and puffy with yeast is obscenely – there’s no other word for it – tactile against your palms), but this should work very well with a bought one.

To serve four at an al-fresco lunch (with other nibbles) you’ll need:

1 focaccia
2 balls mozzarella di bufala
150g char-grilled artichoke hearts in olive oil
½ jar sun-dried red peppers in olive oil
12 slices raw smoked ham (I like Waitrose’s prosciutto affumato)
1 fat clove garlic
1 handful flat-leaf parsley, chopped
1 handful oregano, chopped
1 handful tarragon, chopped
Zest and juice of 1 lemon
100ml extra-virgin olive oil
Salt and pepper

Slice the mozzarella and the artichoke hearts into pieces about ½ cm thick, and put in a mixing bowl. Add the sun-dried peppers, the ham, the garlic, crushed, the herbs, the zest and juice of the lemon and the olive oil with a good grating of pepper (no salt), and mix well so everything is coated with the oil and lemon juice. Cover the bowl and refrigerate for at least an hour (or up to overnight).

Preheat the oven to 180° C (350° F). Use a bread knife to cut the focaccia in half carefully along its equator, creating a top and a bottom for your sandwich. Layer the ingredients on the bottom half of the bread, starting with the mozzarella, then making a layer of the artichokes, peppers and ham, which you can tear into pieces before adding to the sandwich, if you like. Pour the marinade over the ingredients in the sandwich, sprinkle with salt to taste, and put the lid on, pressing down firmly.

Put the stuffed focaccia on a baking tray and bake for 25-30 minutes until the focaccia is golden and crusty on top, and the melting mozarella is oozing out of the sides of the sandwich. Slice and eat immediately.

Italian tuna dip

This is a lovely starter for lazy days when you’re eating outdoors. I like to dibble crudités (especially sweet batons of carrot) and good bread in this tuna dip. It’s also very good spread on toast or crostini, and, cold or warmed through, makes a good strong sauce to dollop on bland cooked fish.

Apologies for the horrendous photo – by the time I realised how rubbish this looked, the bowl had been licked clean, so there was nothing to photograph.

To serve two as a starter with crudités and bread, you’ll need:

1 small can tuna (in oil, brine or spring water), drained
2 anchovies
2 teaspoons Marsala
1 tablespoon sherry vinegar
1 heaped teaspoon grainy Dijon mustard
½ teaspoon fennel seed
1 tablespoon finely chopped oregano
½ teaspoon finely chopped rosemary
1 teaspoon finely chopped sage
1 teaspoon thyme
1 tablespoon finely chopped basil
1 tablespoon finely chopped flat-leaf parsley
1 tablespoon finely chopped mint
1 small clove of garlic, crushed
3 tablespoons extra-virgin olive oil
½ teaspoon honey

Bash the fennel seed lightly in a pestle and mortar, and chop the herbs. Chop the anchovies very finely. Put all the ingredients in a mixing bowl and mix well until the dip ingredients all come together to form a rough paste. Add a little more olive oil if you prefer a looser texture, and taste for seasoning. Serve chilled as a dip or crostini topping, or warm through in a small saucepan to use as a sauce.

Warm salad with beetroot, goat’s cheese, walnuts and lardons

“I felt miserable about having a salad for tea,” said Dr W, “until I realised it was a salad full of bacon.” There’s nothing like a bit of crispy pig to encourage men to eat things which are green.

This is a lovely salad. Freshly roasted beetroot is gorgeously sweet and has a lovely smooth texture. It is complemented beautifully here by peppery leaves, salty charred goat’s cheese, crisp nuts and lardons and a silky walnut-oil dressing. The goat’s cheese would have been grilled slices from a log, but I had the idea for this salad on a day when Tesco was my only shopping option, and they just had the soft stuff in tubs. I’m actually thrilled with the way my improvisation with the soft cheese turned out – dolloped on non-stick baking parchment and grilled, the cheese took on a lovely texture and a fantastic colour.

To serve two as a main course, you’ll need:

3 beetroots
1 handful walnut kernels
200g peppery salad leaves (I used rocket and watercress with baby spinach)
300g soft goat’s cheese
200g lardons
4 tablespoons walnut oil
2 teaspoons sherry vinegar
¼ teaspoon soft brown sugar
1 small clove of garlic, crushed
½ teaspoon Dijon mustard

Preheat the oven to 180°C (350°F). Top and tail the beets, rub them all over with olive oil and roast on a baking tray for an hour.

About twenty minutes before the end of the beets’ cooking time, toast the walnuts in a dry frying pan over a medium-low heat until they are brown and fragrant. This should take between seven and ten minutes, turning regularly – keep a close eye on the nuts so they don’t burn. When the nuts are toasted, remove them to a bowl. Put the lardons in the pan you cooked the walnuts in without any oil, and leave to cook until crispy while you prepare the other ingredients.

Make the dressing by combining the vinegar, oil, sugar, garlic and mustard in a jar with a tight lid, and shaking vigorously. Taste and add a little more vinegar if you prefer it more tart (I like this dressing to be quite mellow).

Remove the beets from the oven. Peel and dice them while still hot and put in a bowl.

Dollop dessert spoons of the cheese on non-stick baking parchment and put under a medium grill for about five minutes until turning golden brown. Toss the salad leaves and beetroot with the dressing in a large bowl, then arrange on plates. Scatter over the nuts and crisp lardons, then arrange the browned goat’s cheese over the top. Season with pepper (you shouldn’t need any salt, because the cheese and lardons will be salty). Serve immediately, while the salad ingredients are still warm.

Fisherman’s pie

They tell me it’s brain food. I remain unconvinced – I am absolutely no better at doing sums than I was before I cooked this, but I am deliciously full and thinking hard about marine biology.

This is a lovely take on fisherman’s pie, a thousand miles away from any variant you may have eaten in the school dining hall. Some of the fish is fresh, some smoked, and this gives it a deep, warm background without overdoing the smoky flavour. Sweet peas and prawns are balanced by a hit of lemon juice and nutmeg, and creamy mash makes a golden lid for the whole thing.

Although this is a fish dish, you’ll find it keeps well overnight in the fridge. This amount made two filling suppers for two greedy people with a sharply dressed green salad. I used frozen haddock fillets here, but you can use any firm, flaky white fish, frozen or fresh.

To serve four, you’ll need:

500g haddock fillets
200g smoked haddock
100g smoked salmon
100g peeled prawns, raw if possible
150g butter
50g plain flour
570ml milk
50g frozen peas
2 eggs
2 teaspoons capers in white wine vinegar
Juice of ½ lemon
A few gratings of nutmeg
1kg potatoes (choose a floury variety like King Edward)
3 tablespoons double cream
Cheddar cheese to sprinkle

Preheat the oven to 200° C (400° F).

Lay the haddock (defrosted if frozen) and smoked haddock in the baking dish you plan to make the pie in – it should have a capacity of between 1.5 and 2 litres. Pour over half the milk and dot with 25g of butter. Season with plenty of pepper and bake for 20 minutes. Pour the liquid from the baking dish into a measuring jug, top up with the remaining milk and reserve. Remove any skin or bones from the cooked fish and flake it into large pieces in the baking dish.

Hard-boil the eggs, and quarter them. Combine them in the baking dish with the flaked fish, drained capers, the frozen peas, the prawns (raw or cooked, but defrosted if frozen) and the smoked salmon. (I used Waitrose’s flakes of hot-smoked salmon – if you can’t find hot-smoked salmon use the regular variety and use scissors to cut it into bite-sized pieces.)

Peel the potatoes and set them to boil as usual for the mashed potato topping. While the potatoes are boiling, melt 75g of the butter in a saucepan. Stir in the flour and cook over a medium-low flame, stirring, for four minutes. Add the milk and fish cooking liquid a little at a time, stirring well after every addition until the sauce thickens. Continue until all the milk mixture is incorporated, and bring to a low simmer until the sauce thickens again. Season to taste with salt and pepper, and stir in the lemon juice and a grating of nutmeg. Pour the sauce over the ingredients in the baking dish.

Mash the potatoes well with the cream, 50g of the butter, another generous grating of nutmeg and plenty of salt and pepper. Spread or pipe the potatoes over the ingredients in the baking dish, and sprinkle with Cheddar cheese.

Bake for 40 minutes, until the cheesy top is a golden brown.

Competition – win £100 in Waitrose vouchers!

Calling all Cookery Masterminds!

To celebrate the launch of Allrecipes in the UK, Gastronomy Domine, Allrecipes and our friends at Waitrose are offering you the chance to win £100 worth of grocery vouchers by proving you know your basil from your bay leaves!

To prove yourself as the UK’s Cookery Mastermind you will need to do the following:

  • Find the answers to the five questions listed below.
  • Take the first letter of each answer to make a secret code.
  • If your guess is correct you could stand a chance of winning a bumper week’s grocery shopping.

1. What type of cheese is needed to make Nanmurat’s legendary salad? Hint: Click here!

2. When will Carlota Chmielewski’s Bread and Celery stuffing be sure to please everybody? Hint: Click here!

3. What flavour vinaigrette does Christy use to complement her Brown Rice Salad? Hint: Click here!

4. Fårikål is a dish found most commonly in which country? Hint: Click here!

5. Polly Welby’s heavenly chocolate mousse does not include which poultry product? Hint: Click here!

Got your code? Enter by clicking here!

Good luck and happy cooking!

Chorizo al vino

Chorizo is fantastically savoury, and makes a great tapas dish just frizzled up in its own oil in a pan, with no adornment. But if you feel like doing something a bit special with it, your chorizo will be even better cooked and marinated in red wine, creating gorgeously boozy, smoky, spicy, porky juices to dibble lots of bread in.

It’s worth preparing a couple of cured chorizos at once, even if there aren’t that many of you eating – this recipe keeps well in the fridge, the flavours becoming deeper and richer, so you can bring the dinner table to Spain again in a couple of days’ time. Once again, I don’t recommend that you use your best wine for this. A Spanish vino tinto (bog-standard red wine) will be absolutely fine.

To serve four to six as a tapas dish, depending on how many other dishes you are serving, you’ll need:

2 cured chorizos (I prefer a spicy one, but if you don’t like chillies, choose a mild chorizo)
1 bottle red wine

Prick the whole chorizos all over with a fork, and put them in a saucepan with the whole bottle of wine. The pan should be small enough to allow both sausages to be covered with the wine. Bring the wine to a gentle boil and continue to simmer it for twenty minutes with the lid on.

Remove the wine and chorizo from the heat, and set it aside with the lid on overnight at room temperature for the flavours to marry.

When you are ready to eat, remove the chorizo from the pan, reserving the wine, and chop it slantwise into chunks about 1½ cm thick. Put the pieces of chorizo in a large frying pan with half the wine, and cook over a high heat, turning the chorizo frequently, until the wine has reduced to a few tablespoons and the chorizo is crisp from the heat and dark from the wine. Pour the chorizo, the wine reduction and the savoury oil released by the cooking into a dish and serve with plenty of bread to mop up the delicious juices.

Sangria

I know plenty of books and Internet commentators will tell you strictly that you should only ever cook or mix cocktails with wines you would be happy to drink on their own. I thumb my (adorable button) nose at them. I’ve made this sangria twice in the last week with two different £3 bottles of Rioja, and I can assure you that using a more expensive bottle will simply be a waste of money – I cringe to imagine you stirring orange juice and sugar into a really good wine. On the other hand, it is worth buying a good lemonade for this drink (lemon soda like Sprite for Americans, not the fresh stuff). I like Schweppes.

You should make and drink your sangria in the same evening. If it hangs around for more than a few hours, the wine can oxidise and sour. The evening you make it, though, your sangria will be delicious: it’s a drink full of sunshine and goes very well with some salsa music and tapas.

To make 2 l of sangria, you’ll need:

1 bottle Rioja
3 large, juicy oranges
2 tablespoons caster sugar
1 lime
1 apple
1 small wineglass brandy
Lemonade
Ice

You’ll need a 2 l jug, preferably with a wide neck, to mix this in.

Dissolve the sugar in the juice of two of the oranges in the bottom of the jug. Slice the remaining orange, skin and all, into thick pieces with the lime and the cored apple, and drop them into the jug. Pour over the bottle of wine and the brandy, then add a large handful of ice and carefully fill the jug to the top with lemonade. Stir and serve immediately.