Lemon curd

Have you ever had one of those days when you’ve suddenly noticed that you’ve accidentally bought fifteen lemons? I had one of those on Friday, and decided to use the lemons life had given me to make some lemonade. (Dead easy – maple syrup and lemon juice in iced water to taste.) There were still lemons left over. I decided to test one of the heavy pans in the new Le Creuset Satin Black glaze that Dr W (the wonderful, thoughtful Dr W) bought me for my birthday; they promise to be good at distributing a very slow, even heat. Perfect for lemon curd.

If you’re lucky enough to be able to get your hands on American Meyer lemons (a superbly lemonsome lemon) or thick-skinned, aromatic Sicilian lemons, you should immediately drop everything else you’re doing and use them to make curd. It’s a wonderful part of the English nursery tea – try it as a spread on some good, crusty toast, along with a cup of Earl Grey tea. The aromatic lemon zest in the curd and the bergamot in the tea are perfect partners.

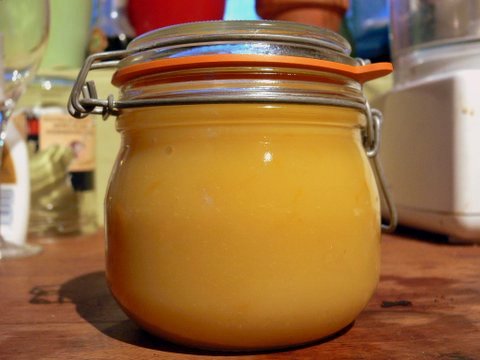
You probably have all the ingredients you need to make lemon curd in the house already (although Meyer or Sicilian lemons are best, any unwaxed lemon will make a delicious curd), and it’s very quick – it should only take you about 40 minutes, at most, from the time you start to zest your lemons to the satisfying moment when you ladle the lovely primrose goo into jars. Home-made lemon curd is a million times nicer than the shop-bought stuff, and lasts for about six weeks in the fridge. To make about 1.25 kg of lemon curd, you’ll need:

4 lemons
4 large eggs
350g caster sugar
250g butter
2 teaspoons cornflour

Start by breaking the eggs into a heavy saucepan away from the heat. Beat the eggs thoroughly with a balloon whisk. Tip the grated zest and juice of the lemons over the eggs with the sugar, the butter, cut into tiny cubes, and the cornflour. (Strictly speaking, the cornflour is a cheat’s ingredient – it doesn’t add any flavour, and all the thickening comes from the eggs, but the cornflour provides a guarantee that your curd will not curdle. I’ve never had a lemon curd go wrong with a small addition of cornflour.)

Put the saucepan over a medium/low heat, and start to go at it with a balloon whisk. Whisk constantly until the butter has all melted. After another eight minutes or so of hard whisking, the curd will start to thicken. Turn the heat down to its minimum and keep on whisking, making sure you get into every corner of the pan, for another three minutes or so, until the curd is deliciously thick (it will continue to thicken as it cools down). Ladle immediately into sterilised jars and refrigerate once cool.

Chinese chicken with cashew nuts

I’ve lost the magic USB string for my camera. No matter – I did take some pictures of this recipe, and will put them up as soon as my magic string makes an appearance. In the meantime, here is a placeholder botanical print of a cashew nut borrowed from Wikipedia.

Chicken with cashew nuts pops up on Chinese restaurant and takeaway menus the world over, all with slightly different saucing and attitudes to things like batter and breading. Where I come from, we neither batter nor bread our chicken in this preparation, but if you can’t bear missing out on the missing cholesterol, feel free to bread/batter and deep-fry your marinaded chicken before you add it to the stir-fried sauce and vegetables.

The sauce here is made up from hoi sin with smaller amounts of chilli bean and black bean sauces – all from jars, and all from your local Chinese supermarket. If you don’t have access to these ingredients locally, try the excellent Wai Yee Hong, whom I’ve found to be superbly reliable and well-stocked over the last year or so. Unsalted cashews are no longer very hard to come by – most supermarkets will stock them in their whole foods section. It’s very important that you don’t use salted cashews here; all the above sauces, and the soy sauce in this recipe, are pretty salty, and salted cashews will be overpowering.

To serve four, you’ll need:

800g chicken breast, chopped (some Chinese people prefer dark meat, but breast is commoner in restaurants)
2 glasses Chinese rice wine
4 tablespoons light soy sauce
4 teaspoons cornflour
4 teaspoons sesame oil
150g unsalted cashews
4 fat cloves garlic
10 spring onions (scallions)
2 sweet peppers (I used one yellow and one orange)
2 teaspoons chilli bean sauce
2 teaspoons black bean sauce
2 tablespoons hoi sin sauce
2 birds eye chillies
Ground nut oil for stir-frying
Water

Start by preparing all the ingredients for stir frying. Marinade the chicken pieces in 1 glass Chinese rice wine, 2 teaspoons cornflour, 2 tablespoons light soy and 2 teaspoons sesame oil for half an hour while you chop the garlic finely, dice the peppers and chop the spring onions on the diagonal into chunky pieces. In a hot frying pan without oil, toast the cashews for a few minutes, keeping them on the move with a spatula, until they are browning nicely but not burned.

Heat the ground nut oil in a wok until it begins to smoke. Stir fry the garlic for a few seconds, then tip in the chicken and its marinade, and stir fry until the chicken is half cooked through. Add the spring onions and peppers, and continue to stir fry until the chicken is cooked and the vegetables are softer. Add the hoi sin, chilli bean and black bean sauces, stir well and then add the remaining glass of rice wine. Simmer the chicken and vegetables in the sauce and add two teaspoons of cornflour made into a paste with a little cold water to thicken the sauce. Cook for another minute, stir through the cashew nuts and two teaspoons of sesame oil, and serve immediately. Totally delicious and – dare I say it – probably nicer than what’s on offer at your local take-out.

Truffled mac and cheese

Back in the dark days of the 1980s, one of the first things I learned to make in home economics class at my all-girls’ school was macaroni cheese. Ours was a class training in the basics of good 1980s wifery – white sauces like the Mornay that forms the base of this dish, bread, pastry, and, bizarrely, the correct ironing of a man’s suit. (I like to think that I’m an excellent 2000s wife, but surely the ironing of suits is the dry cleaner’s job – or that of the suit owner?) I remember bringing a large carton of macaroni cheese home, and eating it with my proud parents. I also remember the girl who left her carton of macaroni cheese at school in her locker at the back of the classroom, and forgot to retrieve it until the smell became so strong that everyone thought that one of the rats from the biology department had escaped and died somewhere.

Last year, my excellent brother bought me a white truffle, preserved in a jar, for my birthday. I felt duty-bound to stop keeping it in the cupboard and just looking at it every now and then (when there are very good things in that cupboard I have a horrible habit of not cooking with them in case I come up with a better idea for them later on). I needed to do something with it before my next birthday, so I cast around for something simple that would showcase the truffle in a creamy, cheesy, soothing sort of way. What better than macaroni cheese?

If you have fresh truffles, so much the better. If you have no truffles at all, this dish will still be absolutely delicious; it just won’t be truffled.

A quick note about the truffle oil I’ve used alongside the real truffle here before we begin. Preserved truffles inevitably have less aroma than fresh ones, so I’ve used some white truffle oil alongside my truffle. It’s genuine truffle oil – but most of the truffle oil you’ll see on the market has never been near a real truffle. The stuff you’ll usually see on sale is made with olive oil and Bis-(methylthio)methane or 2,4-dithiapentane, both industrially synthesised versions of odour chemicals occurring in real truffles. It’s not a patch on real truffles, which have hundreds of different chemicals combining with the dismal-sounding Bis-(methylthio)methane and 2,4-dithiapentane to create a much more complex odour and flavour profile than the oil has. It’d be a real shame to use any near your real truffle (although some unscrupulous chefs do use the stuff to vamp up lacklustre truffles). Happily, you can also buy olive oil which has been infused with real truffles; unhappily, it’s far more expensive than the synthetic stuff. Check your label. If it says “truffle essence”, “truffle flavour”, or “truffle aroma”, it’s synthetic. If it’s heartstoppingly expensive and says clearly on the label that real truffles have been used to make it (you can buy the real stuff at e-Foodies, a company I’m very fond of), buy it and use it here. If all you can find is the synthetic stuff, I’ll leave it up to you – use it if you like, but be aware that it doesn’t really taste like truffles; and you should feel absolutely free to leave it out of this recipe.

To serve four, you’ll need:

400g macaroni
500ml milk
1 carrot
1 shallot
5 cloves
2 bay leaves
1 bunch thyme
1 bunch parsley
10 peppercorns
1 tablespoon olive oil
25g butter
25g plain flour
200g Parmesan cheese
75g Cheddar cheese
1 teaspoon Dijon mustard
1 small head broccoli
3 egg yolks
1 truffle (white or black)
2 tablespoons truffle oil
Salt to taste

Start by infusing the milk that will make the base of your Mornay (cheese) sauce with aromatics. Pour the milk into a saucepan with a well-fitting lid, and add the peeled carrot, cut into halves, the halved shallot, studded with the cloves, the bay leaves, thyme and parsley. Add a teaspoon of salt and ten whole peppercorns. Bring the milk to a bare simmer, then turn the heat off and leave the saucepan in a warm place for 3-4 hours. Strain the milk through a sieve.

Boil the macaroni according to the packet instructions with a tablespoon of olive oil. When the macaroni is cooked, rinse it in a colander to remove excess starch and set aside. Divide the raw broccoli into tiny florets and mix with the macaroni.

Preheat the oven to 180°C (350°F).

In a clean, dry saucepan, melt the butter and combine with the flour, stirring over a low to medium heat for three minutes. Stirring all the time (I like to use a balloon whisk), add a small amount of milk and stir until it is incorporated into the sauce and starts to thicken. Keep adding milk in small amounts and stirring vigorously until all the milk is incorporated and you have a smooth, thick sauce. Stir the grated cheeses (reserving a little parmesan to top the dish with) into the sauce with the beaten egg yolks, the finely chopped truffle and the truffle oil (if using). Taste the sauce and add more salt if you think it needs it – the cheese is quite salty, so you may not need any.

Combine the sauce and the macaroni/broccoli mixture in a shallow earthenware dish. Sprinkle the surface with the remaining Parmesan cheese, and bake in the oven for 15-20 minutes, until the top is brown and the sauce is bubbling. Serve immediately, pouring over a little more (real) truffle oil if you fancy.

Rhubarb crumble with proper custard

The forced rhubarb is arriving in the shops at the moment. It’s a lovely delicate pink when raw, and can tend to lose its colour a bit when cooked, unlike the very red rhubarb from later in the season – but it tastes deliciously of spring and makes a great crumble (or crisp, as the Americans call it). The lovely buttery, crunchy topping is impossible to get wrong, and this is a good recipe to start kids on before they try to make pastry, so they can get used to the rubbing-in method.

The custard below is made in the traditional way with egg yolks, vanilla and milk, but also includes a spoonful of Bird’s instant custard. The Bird’s, full of cornflour, stabilises the other custard ingredients as well as adding some flavour, so you’ll end up with a supremely custardy custard, rich, silky and packed with vanilla. Alfred Bird, a chemist, came up with his custard powder in 1837, because his wife loved custard but was allergic to eggs: a romantic gesture that’s still going strong after nearly two centuries. Mrs Bird is no longer with us, so additional yolks are not an insensitive addition.

For this first crumble of the year, I wanted the buttery, clear taste of the crumble topping to shine against the fragrant spring rhubarb, so this is a plain topping with a rhubarb-only filling. If you want to jazz things up a bit, try adding a couple of teaspoons of ground ginger to the topping and two or three tablespoons of crystallised ginger to the filling. To serve six, you’ll need:

Crumble
225g plain flour
75g softened, salted butter
75g soft brown sugar
900g trimmed rhubarb
75g caster sugar

Preheat the oven to 180°C (350°F). Slice the rhubarb into one-inch chunks. Place in a saucepan and sprinkle over the caster sugar. Cook gently, covered (you don’t need any extra water because there is so much in the rhubarb) for 15 minutes, stirring occasionally, until the rhubarb is cooked but still chunky.

While the rhubarb is simmering, make the topping in a large bowl by rubbing the butter into the flour gently, using your fingertips, until the mixture resembles breadcrumbs. Stir the sugar through the crumble mixture.

Put the rhubarb in a shallow cooking dish (I like my le Creuset tatin dish for this) and sprinkle the topping over. Scatter a few drips of water from the tips of your fingers over the surface – this roughens up the top and makes things even crispier. Bake for 30-40 minutes until the crumble topping is golden brown.

Custard
2 tablespoons Bird’s custard powder
1 vanilla pod
1 pint milk
3 egg yolks
2 tablespoons vanilla sugar

Mix the sugar and custard powder in a bowl with a little milk taken from the pint until you have a smooth paste. Bring the rest of the milk to a bare simmer (it should be giggling rather than chuckling) and pour it over the mixture in the bowl. Return the whole lot to the saucepan over a low heat and, whisking hard, add the egg yolks and the seeds from inside the vanilla pod to the mixture. Keep cooking until the custard thickens and serve immediately. (If you need to keep the custard warm for a while before serving, lay a piece of cling film directly on its surface to avoid forming a skin.)

Korean hotpot with pork, scallops and black beans

I hadn’t come across chunjang, a Korean black bean sauce, until January’s meal at the excellent Tanuki in Portland. In Korea, it’s actually considered a Chinese sauce, but it’s rather different from the saltier, stronger black bean sauces you’ll find in the Chinese supermarket – very dark in colour, mild and sweet alongside the soy saltiness, and altogether delicious.

Once chunjang is cooked, it’s called jajang (or fried sauce). It’s usually served over noodles with stir-fried pork. I found some at Wai Yee Hong, my favourite online oriental supermarket. When it arrived, I realised I had some scallops and a big chunk of belly pork in the freezer, a sack of sticky rice, a nice block of tofu in the cupboard and a jar of kimchee in the fridge – and a recipe for a hotpot suddenly sprung into in my head, fully formed. Cooking the pork for this takes a long time, but it’s actually very little work and is more than worth the extra effort for the incredible texture you finish up with.

To serve three, you’ll need:

500g pork belly with rind
¼ bottle Chinese rice wine
Water
12 queen scallops
2 tablespoons light soy sauce
1 tablespoon Chinese rice wine
1 teaspoon grated ginger
450g firm tofu
5 dried shitake mushrooms
4 tablespoons kimchee
½ cucumber
8 spring onions (scallions)
2 green birds eye chillies
2 cups Chinese sticky rice (or Thai jasmine rice)
3 cups water
1 tablespoon cornflour
Flavourless oil

Begin the day (or two days) before you want to eat by heating two or three tablespoons of oil in a large frying pan or wok over a high flame. Brown the slab of pork belly until it crackles on the skin side and changes colour on the bottom.

Move the pork to a saucepan that fits it closely, and pour over the quarter-bottle of Chinese rice wine. Add water until liquid covers the pork by about an inch. Bring to a gentle simmer on the hob, then put in an oven at 120°C (240°F) for six hours or overnight. Remove from the cooking liquid (you can freeze this stock to use later, because you won’t be using it in this recipe) and place the pork on a large plate. Put another plate on top and put the weights from your kitchen scale on the top plate to press the pork down, and chill for at least six hours. You can put the scallops in the fridge to defrost at this point too.

When the pork has been pressed and the scallops are defrosted, mix the scallops well in a bowl with the light soy sauce, a tablespoon of Chinese rice wine and the grated ginger, and set aside in the fridge. Pour boiling water over the dried shitake mushrooms to rehydrate them. Dice the tofu, chop the spring onions, and cut the cucumber into thin julienne strips.

Cut the pork into slices. Cook four tablespoons of chunjang in four tablespoons of oil (preferably groundnut, although a flavourless vegetable oil will be fine too) for five minutes over a medium flame. Much of the oil will be absorbed into the sauce. Add the chopped spring onions to the pan, reserving one of them for a garnish later, and stir-fry until they are soft. Add the pork to the pan with the chopped chillies and stir-fry until everything is mixed. Stir the cornflour into a quarter of a mug of cold water, and stir the cold mixture into the pork and black beans (now jajang, not chunjang, because you have cooked it) over the heat until the dish thickens. Remove from the heat and put to one side.

In a claypot or heavy saucepan, bring the rice and water to a brisk boil with the lid on, then turn the heat down very low. After 12 minutes, remove the lid and quickly spread out the black pork mixture over one half of the exposed surface of the rice. Spoon the raw, marinaded scallops and their marinade into the dish along with the sliced shitake mushrooms and the diced tofu, leaving a bit of space for the kimchee when the dish is finished. Sprinkle over five tablespoons of the soaking liquid from the mushrooms. Put the lid back on, and cook over the low heat for another 15 minutes until everything is piping hot.

The ingredients at the top of the dish will have steamed, and their savoury juices will have soaked deliciously into the rice. Add a few tablespoons of kimchee (I really like Hwa Nan Foods’ version, which comes in a jar to keep in the fridge), arrange the cucumber on top of the dish as in the picture, and scatter the reserved spring onion over the pork. Dig in.

Boasting

When I’m not writing about food, I write about perfume. I’m not even going to try to be humble about this one – I won a Jasmine Award (one of the beauty industry’s most prestigious gongs) yesterday for this article, and my feet absolutely haven’t touched the ground since.

I plan to spend the rest of today sitting very still and looking at my trophy.

Star anise chicken wings

I’ve been trying very hard to find a silver lining in this economic collapse. The best I’ve been able to manage is in the fact that supermarkets are suddenly stocking more of the cheaper cuts of meat – and those cheaper, nubbly cuts, like pork belly and hock or breast of lamb, are great. They’re often fattier, tastier and altogether more fun to cook with than the clean, boneless slabs of muscle supermarkets usually fall back on.

Chicken wings are among my favourite of the nubbly bits – all that lovely, crisp skin, and the sweet little nuggets of meat, full of flavour from nestling up against the wing bone. The nice chaps at SealSaver (keep this up, fellas, and you’ll become my very best friends) have recently sent me a couple of new SealSaver vacuum canisters, which, besides increasing the storage life of foods make marinading an absolute breeze. Stick the meat and marinade mixture in a Sealsaver, pump the air out, and some magical process occurs, making the meat marinate in a fraction of the usual time. If you don’t have a SealSaver (and you should – they make life in the kitchen very easy), marinate these wings for 24 hours in the fridge. In the SealSaver, they only needed two hours – brilliant.

To make 16 wings (enough for two as a main course or four as a starter) you’ll need:

16 chicken wings, tips removed
5 tablespoons dark soy sauce
8 tablespoons light soy sauce
2 tablespoons molasses
8 tablespoons Chinese cooking wine or dry sherry
3 heaped tablespoons soft dark brown sugar
3 tablespoons sesame oil
8 star anise, 4 kept whole, 4 bashed to rubble in a mortar and pestle
Spring onion to garnish

Prick the chicken wings all over with a fork. Mix all the ingredients except the chicken wings and spring onion in a bowl, and combine the marinade with the chicken wings. If you’re using a SealSaver, marinate, refrigerated, for two hours – otherwise, marinate in the fridge for 24 hours.

Remove the wings, reserving the marinade. Bring the marinade to a low boil for two minutes. Grill the wings (use the barbecue if you possibly can – the only reason I didn’t was that it was snowing) over a slow heat for about 15-18 minutes, basting regularly with the cooked marinade and turning regularly until they are mahogany brown and crisp. Serve with more of the hot sauce and sprinkle with spring onion.

Plevna, Tampere, Finland

I’ve just spent a few glorious computer-free days in Tampere, about 200 miles north of Helsinki. The snow is deep, the sausages are plentiful, and the best of the local beer is flavoured with birch tar.

Tampere, like most Finnish cities outside Helsinki, has surprisingly few Finnish restaurants. Every other restaurant seems to be a burger place or a kebab shop. Our flight got in very late, and the only open restaurant in our hotel was Amarillo (every Finnish town has a branch of Amarillo – some have two), a Finno-Tex-Mex. Remarkable stuff, like nachos made by people from the Frozen North who appear to have seen a picture of some nachos once upon a time. They came with bits of smoked Finnish sausage, smetana and soft Finnish cheese. Surprisingly tasty, but not nachos like you’ve ever seen them.

Happily for those looking for honest Finnish stodge that hasn’t been interpreted through a Mexican filter, Plevna, a microbrewery in an old cotton mill by the city’s rapids (incidentally, this was the first building in the Nordic countries to be lit by electric light back in 1882), produces some seriously stodge-tastic drinking food and some breathtakingly good beers. We’ve suggested to them that they send a couple of barrels to this year’s Cambridge Beer Festival. You’ll find local favourites like perry, cider and sparkling mead on the drinks list, along with light-(ish) choices like wheat beers and pilsners. Things start to get seriously, seriously good with the stouts, porters and syrupy dark lagers, which seem perfectly adapted for a cold, snowy Finnish March. There’s a long list of hearty, beer-friendly food like reindeer steaks, sausages, pork knuckles and rostis with mushroom sauces.

Each of the menu items has a little number at the top, indicating which of the beers on the list will be best alongside it. Portions are enormous – the Hop Grower’s Board (the bock is recommended with this starter) here, with rolls of smoked ham and beef, a local garlic brie, creamy prawn tartare, pate and lovely sweet Finnish pickled cucumber is meant to be for one person. We split it between two. A goat’s cheese salad arrived for one of the friends we were dining with. It was a bowl of salad about the size of his head with a whole, hand-sized grilled cheese perched on top.

The main food event at Plevna is the sausages. You can try Tampere’s local speciality, mustamakkara (Tamperelainen on the menu), which is a black pudding, crisp on the outside and moist with rye grains in the middle, traditionally served with a spoonful of lingonberry jam. It’s delicious, and at €9.50 it’s one of the cheapest things on the menu. (Mustamakkara also pops up at every hotel breakfast buffet in town, and it’s a great way to start the day.) You can choose from a selection of several German-style sausages, and if you’re unable to make a sausage decision, you can just ask for the sausage pan, full of bratwurst, Thuringerwurst, herb and cheese sausage and little sausages stuffed with pearl barley. It’s served with a creamy potato gratin full of bacon, and I defy you to finish the whole dish. Spoon over some of the sweet Finnish mustard (a real treat, this mustard, and I’ve come across Finns on holiday in England who keep tubes of it in their pockets when they are invited to barbecues – look out for toothpaste-like tubes marked sinappi in supermarkets) and enjoy.

It wasn’t the recommended beer, but #11, the Rauchbier James was a wonderful accompaniment to the smoky sausages. It’s a smoked, tarry drink; dark, fruity and syrupy. Don’t worry about tomorrow’s headache – you can deal with it in the sauna while you sit back and plan another meal.