Weekend cat blogging

A quick post – I’m about to go out and start the New Year’s Eve celebrating, but thought I’d leave you some pictures of the rapidly growing kittens before heading off. Thanks again to Clare at Eatstuff for organising Weekend Cat Blogging.

It is hard to type with a kitten fast asleep on each elbow. Now they’re getting older, they’re sleeping less and gremlining more. Raffles, the boy, has turned out to be particularly cuddly, and is now getting a little larger than Mooncake. He continues to steal food. Raffles has spent the week moving too fast and squinting too much to photograph well, so here is the gorgeously photogenic Mooncake having a wash.

Slow-simmered Chinese beef and fried rice

Slow braising in soya sauce is one of the best things you can do with stewing meat, making it scented, tender and melting. Here, I’ve used some whole spices, oyster sauce, sugar, garlic and ginger to turn some cheap cubes of stewing beef into meaty gold.

To accompany it, I’ve broken out my packet of Chinese sausages (lap cheung). These are a sausage rich in pork fat, sugar and anise, preserved by wind-drying. You can buy two kinds of Chinese sausage; these, which are red in colour and made from pork and pork fat, and the darker ones, made from duck meat and liver. I’ve put the rest of the packet in the freezer, to use another day in some steamed rice. Today’s sausage is going in some stir-fried rice.

The beef is easy – all its deliciousness comes from long, slow simmering. You’ll need:

1 lb cubed stewing beef
1 bulb of garlic, halved
3 slices ginger
2 dried chilis
2 stars of anise
1 stick of cinnamon
2 tablespoons sugar
2 tablespoons oyster sauce
2 tablespoons soya sauce
1 wine glass Chinese rice wine
1 teaspoon sesame oil
Water to cover

Put all the ingredients in a heavy-bottomed pan and simmer very gently for two to three hours, until the meat is tender. Top up with water if the pan starts to look dry.

The fried rice is full of simple, assertive flavours. I used:

4 Chinese sausages, sliced thin
3 cloves of garlic, sliced
2 inches peeled ginger, julienned (cut into matchsticks)
8 spring onions, sliced into circles
1 pack shitake mushrooms, sliced
1 large handful frozen peas
1 large bowl cold, pre-cooked rice
2 eggs
1 teaspoon sesame oil
2 tablespons soya sauce

Stir fry the sausage slices, moving everything round quickly over a high heat until they give up some of their fat, then throw in the garlic, ginger and spring onions and stir fry for three minutes. Add the mushrooms and peas and continue to stir fry until the mushrooms are soft and cooked. Crumble the rice with your hands into the wok. It’s vitally important that the rice is cold from the fridge; warm rice will go gungy and come apart. Cold rice will keep its grains whole and keep its texture. Stir fry the rice until it’s all piping hot, then make a well in the middle so you can see the bottom of the wok, break the eggs into it and use your spatula to scramble them in the well. Stir the cooked egg into the rest of the rice, add the sesame oil and soya sauce, stir fry for another twenty seconds, and serve.

Ginger beer

The house is still full of Christmas food. There’s a profusion of citrus fruits and spices, along with the multitude of empty soft drink bottles (my in-laws don’t drink alcohol, but they drink fizzy drinks by the gallon). Time to make some ginger beer.

Ginger beer is another old-fashioned English recipe from the 1700s, fermented with yeast. (Teetotalers shouldn’t be worried about this; yes, there’s fermentation, but the finished product is only about as alcoholic as bread dough.) The method I’m using is a quicker one than that in the traditional recipe, where you’d be feeding a ginger beer ‘plant’ (a yeast culture) with sugar for a week. Here, the ginger beer is still fermented with yeast, but it’s instant bread yeast from a packet, and the fermenting is done in a couple of days or less, depending on how warm you are able to keep the bottle.

A word of warning. Do not use a glass bottle. Plastic is very helpful here because it can stretch and flex, and when the gases in the drink are produced, the bottle will not shatter under the stress as glass might.

For a spicy home-made ginger beer, you’ll need:

2-litre plastic soft drinks bottle
1 cup sugar
3 thumb-sized pieces of ginger
1 lime
1 orange
1/4 teaspoon instant yeast
filtered water

Peel and grate the ginger (use fat pieces if you can find any; they will be jucier) and extract the juice from the fruit. Using a funnel, put the sugar and yeast into the bottle, followed by the ginger and citrus juice. Fill the bottle up to the half-way mark with filtered water and give it a good shake with the lid on until the sugar has dissolved. Top up the bottle with water until there’s about an inch of airspace at the top of the bottle, squeeze this air out and put the lid on as tightly as you can.

Leave the bottle in a warm place (aim for around body temperature – mine went on top of a radiator cat bed, to mews of disgust from the kittens) for between 24 and 48 hours. You’ll know when it’s done because the bottle will have swollen, and dents where you squeezed the air out will have vanished. The bottle will be hard to the touch. Loosen the lid carefully to let out some of the gas, and screw everything up tightly again. Refrigerate the ginger beer (keep any you don’t drink in the fridge, which will stop further fermentation) and strain through a sieve before drinking.

Those who don’t have piles of citrus and ginger lying around the house and who can’t wait two days for their drink might want to buy some ginger beer instead. Try Fentiman’s for an authentic and very spicy drink.

Steak rub and a new gadget

I’ve nothing very complicated to cook this evening; Christmas has reduced me to a withered husk. Those wanting to see what Christmas lunch looked like will have to wait until after the New Year, when I next see my Dad, who currently has custody of the memory card with all the photos from Christmas on it. (Stay tuned. The main course was, if I do say so myself, fantastic as only £100 of ingredients can be.)

So tonight, rather than rolling whole sirloins of beef up in herbs, making complicated things with pastry or setting fire to the fumes coming off hot Cointreau-soaked Christmas puddings, I’m just doing some steak with some chips out of the freezer. I want something easy and tasty tonight, so I’ve made a cross-continental steak rub using Asian, European and American ingredients.

I’ve mixed two tablespoons of soft brown sugar, one tablespoon of a good five-spice powder (this is from Daily Bread in Cambridge, where they mix it themselves. Its ingredients include aniseed, fennel, cinnamon, cloves and pepper), an extra tablespoon of cinnamon, a teaspoon of Maldon salt and a teaspoon of ground chipotle chilis. (I get mine in America when possible, and take it home in that bulging suitcase of contraband, but fellow Brits can buy dried chipotles online in the UK at the Cool Chile Company and grind them up in a coffee grinder or Magimix. The Cool Chile Company also do excellent chipotles in adobo and a very nice chipotle ketchup.) I then added two tablespoons of liquid smoke (also from America – if you can’t get your hands on any, use a couple of tablespoons of cooking sherry, which will taste completely different, but fantastic). I rubbed the paste into the steaks, and left them to marinade for half an hour, then drained them and fried them with diced shallots in a knob of butter for four minutes each side until medium rare. Delicious.

Those shallots are where my new gadget comes in. Among a Santa’s sack of presents from Mr Weasel’s obscenely generous family was a little package containing an Alligator Onion Cutter. I’m not usually one for single-purpose gadgets, but this device is a thing of genius.

I’ve always had a problem with onions and shallots; I’m extremely susceptible to the vapours coming off them, and usually spend half an hour at least after chopping a particularly strong one looking like I’ve just been punched in the face. Tearstains and unusual swellings are not a good look for dinner. I’ve tried the business with the swimming goggles, the trick with the teaspoon between the teeth, and chopping them underwater. None of these ideas has worked very well; I steam up, lose bits of onion and weep, weep, weep the night away.

I also suffer from pretty mediocre knife skills; I may be fast, but I’m not very tidy, and my slicing and dicing is competent but uneven.

My new onion cutter eradicates both these problems, and reduced my shallots into perfect, tiny dice in three seconds flat. No fumes. Gorgeous little cubes which make me look like I know what I’m doing with a knife. And, best of all, it rinses clean or goes happily in the dishwasher. Keep one hand over the blades while slicing to keep the onion or shallot from popping all over the working surface, and you’re away. Hurrah! My next experiment will involve a potato, the Aligator and some hot, deep fat. And some of that chipotle ketchup.

Turkish Delight

People keep asking me for a Turkish Delight recipe. Must be the creeping fingers of the Snow Queen; I am the only person I know who’s not been to see the Narnia film, and while I remain relatively unmoved by sweeties, everybody else is begging for chunks of fragrant goo.

CS Lewis was on to a good thing when he had the boy Edmund betray Narnia for little cubes of this scented, sticky sweetmeat. Lokum, or Turkish Delight, is undeniably delicious, and it’s a recipe with history. According to the story, five hundred years ago, Sultan Abdul Hamid called all his sweet-makers together, and ordered them each to make a new and delicious confectionary to keep the women in his harem quiet and happy. One came back with a tray of petal-soft, flower-scented Turkish delight, and the Sultan was so pleased with it that he immediately appointed the man as his Chief Confectioner, and served the sweet daily.

History does not relate whether the women became quiet. My guess is that whatever happened, they probably became quite plump.

The craze for things Turkish which spread around Europe in the 1770s and 1780s (just think about the entertainment at the time, like Mozart’s Die Entfürung aus dem Serail, with the executions and the gauzy Turkish ladies running around the seraglio pursued by manly Janissaries with curving swords and even more curving moustaches. You don’t need to be awfully perceptive to see why things Turkish had such appeal) made sweetmeats like this all the more popular, and Turkish Delight was swapped by courting couples and given as a fashionable gift.

Unlike some quicker recipes, this old-fashioned recipe doesn’t use gelatine. Instead, the Turkish Delight is thickened with cornflour and caramelised sugar (and is suitable for vegetarians, if you’re feeling full of festive goodwill and wish to feed the poor afflicted things). Try this recipe rather than one with gelatine. It takes a bit longer, but the texture is more authentic and so much better than the texture you get with gelatine that it well justifies the extra fiddle.

For 80 pieces (40 orange-flower flavour, 40 rose flavour) you’ll need:

4 cups sugar
4 1/2 cups water
Juice of 1 lime
1 cup cornflour (cornstarch for Americans)
1 teaspoon cream of tartar (this stops the mixture from crystalising)
1 tablespoon essence of rose water
1 tablespoon essence of orange-flower water (both of these ingredients are made by the English Provender Company and are available in the UK in supermarkets)
1 cup icing sugar (confectioners’ sugar for Americans)
1/4 cup extra cornflour

Begin by boiling the sugar with the lime juice and 1 1/2 cups of water. Use a jam thermometer and remove from the heat when the syrup reaches the soft ball stage (115C).

While you are boiling the sugar syrup, combine the cream of tartar and a cup of cornflour with three cups of cold water. (Using cold water should prevent lumps.) Mix well and bring up to a simmer, stirring all the time. Continue stirring at a simmer until the mixture has made a thick, gluey paste. Stir the sugar syrup into this paste. (If you end up with lumps at this stage, push everything into a saucepan through a sieve with the back of a ladle.)

Simmer the sugar and cornflour mixture, stirring every few minutes, until it’s a golden-honey colour and about 120C (this is halfway between soft and hard ball on your jam thermometer, and will take about an hour). Divide the mixture into two, and pour it into two prepared trays lined with oiled cling film (American readers – this is what we call Saran wrap over here). Add a tablespoon of rose water and a few drops of pink food colouring to one and stir, a tablespoon of orange-flower water to the other, and stir. Cover and chill for a few hours until set.

Turn out the wobbling sections. You will be glad for that oiled cling film. Slice the set Turkish Delight into cubes, and roll in a mixture of 1 cup icing sugar and 1/4 cup cornflour so that they don’t stick together. Set before the ravening hordes. If, unaccountably, they don’t raven their way through the whole lot in one go, store in airtight boxes between layers of greaseproof paper, well-dusted with the icing sugar/cornflour mixture.

Mulled wine

A quick post today – it’s Christmas Eve, and the house is bulging at the seams with family, all of whom want something to eat. The Great She Elephant is also spending Christmas with us. Those readers of her blog who would like me to take photographs of her when asleep or looking otherwise ungainly should send bribes to the usual address.

I’m cooking a ham today (the recipe is here). Everybody else seems to be too, it being a Christmas recipe; lots of friends have been asking for the recipe, and my Mum’s doing one at their house tonight. It’s a Christmassy dish, but it’s made all the more Christmassy (Christmasic? Christmasular?) by a good, large glass of mulled wine on the side.

I have spent years perfecting this recipe. If you leave out any of the spices I will set the Ghost of Christmas Yet to Come on you, so don’t.

You’ll need:

1 bottle Merlot (I got a cheap one from Waitrose, which was discounted because it was a bin end)
1 wine-bottle of water
3 tablespoons honey
3 tablespoons maple syrup
2 oranges
1 lime
1 lemon
20 cloves
2 stars of anise
3 cardamom pods
1 cinnamon stick
1 tablespoon grated fresh ginger
1 grating of nutmeg

Stud one orange with the cloves, and slice the other one. Slice the lemon and the lime, and put all the fruit, the spices, the wine and the water in a large, thick-bottomed pan with the honey and maple syrup. Bring up to the lowest possible simmer, and simmer very, very gently for twenty minutes. Strain through a sieve to get rid of the bits, and serve.

You might want to add a couple of shots of cherry brandy, but I think you’ll find you don’t need to. It’s not that strong, but for some reason it’s dreadfully warming and potent, so don’t give any to the cat.

Merry Christmas!

Sausage rolls

My Grandma’s second husband (yes, the Grandma with the salad cream) was a butcher in a town where they liked their meat cheap and homogenous. He had a sausage machine. In one end, he’d put pieces of elderly grey stuff which looked like precisely what they were – anatomy. He’d add a dehydrated, pre-bought rusk mix that he’d wetted overnight with some tepid tap water. He’d drop in a pellet of pink food colouring and a wodge of aging fat that he’d scraped off some of the meat he’d sold to the partially-sighted lady who thought she was buying topside. Sausages came out the other end, excreted by the burping machine into glistening, protein-condom skins.

The thing I still, all these years later, completely fail to understand, is why people used to queue up to buy these gristly objects, full of bone-nubbins and unidentifiable chewy things. Why they still snatch their supermarket equivalents off the shelves with dead-eyed apathy. It took me years to trust sausages and sausage meat again, and I still read sausage packets more closely than I’ve ever read an employment contract. Be careful with your sausage meat. When you make this recipe, buy whole sausages you trust and whose packets list ingredients like meat and herbs (rather than trays of sausage meat full of nitrates and soy), slit their skins, and squeeze the meat out.

These sausage rolls are loosely based around Delia Smith’s sausage rolls, with tweaks to the filling and one very important difference; the pastry is not hers, but my great grandmother’s. Nana was a proper cook in the Edwardian tradition who believed that fat was extremely good for you. I agree with her (nothing is better for your mental health than bacon), which is why these sausage rolls contain nearly twice the butter that Delia’s very good rolls do.

This pastry is a traditional flaky pastry which doesn’t require the samurai-sword folding that many more modern recipes require. It also has more butter in it than it does flour; surprisingly, it’s very easy to handle. If you can’t eat without guilt at Christmas, when can you? Try these; they’re excellent and dreadfully English.

You’ll need:

Pastry
10 oz salted butter
6 oz plain flour
Water – amount depends on heat and humidity of kitchen
1 egg yolk

Filling
1 lb sausage meat (squeeze it out of trustworthy – probably quite expensive – sausages)
1 heaped tablespoon dried sage (preferable to fresh in this recipe)
1 egg
1 onion, chopped very finely
Lots of pepper
A grating of nutmeg
A pinch of salt

It’s important that you work your pastry as cold as you can to make it crisp and short. Begin by chilling the butter until it’s completely solid – I freeze it a la Delia for an hour before beginning. Put the mixing bowl in the fridge for the hour as well. (Nana used to put the mixing bowl in a sink with the plug out, running the cold tap around the outside of the bowl as she worked. I don’t go quite this far – my fridge is cold enough.) Use the coarse side of your grater to grate all of the butter into tiny curls – the idea here is to keep the pastry as cool as you can all the time, and to avoid handling it with blood-hot hands wherever possible. With a knife blade (Nana had a knife she used specifically for pastry), blend it into the flour, working as fast as you can. When everything is mixed well, add icy-cold water, tablespoon by tablespoon, until the pastry has collected together in a clean dough which doesn’t stick to the sides of the bowl. Use your hands to make it into a ball, working the pastry as little as possible. The finished pastry doesn’t need to look smooth throughout; aim for a texture like that in the picture.

Nana’s cooking genes were good ones where pastry was concerned. While I’m useless with bread, dumpling and other doughs, I excel at pastry; it’s always short, light and melting. I think it’s the cold hands and the disregard for my arteries.

Refrigerate the pastry for an hour, wrapped tightly in cling film.

While you refrigerate the dough, mix the filling ingredients with your hands. Leave in a bowl for the flavours to mingle while the pastry is resting.

When your pastry is ready, divide it into three and roll each third out on a floured board (if you have a glass board, you’ll find these stay nice and cold and also remain non-sticky for longer than they would on wood) into a rectangle whose long side is around 50 cm.

Roll it out as thin as you possibly can, then divide the filling into three and make a line with a third of the filling down the middle of the pastry rectangle. Trim the surrounding pastry (there will be some wastage) so that you can fold one thickness of pastry around the roll of sausage meat, dampen one edge with some water and roll it up. Use a knife to chop the long roll of pastry and sausage into ten pieces.

Use scissors (thank you Delia) to snip two little arrow shapes in the top of each piece, and glaze each one with egg yolk. Bake on a non-stick sheet for 25 minutes at 220 c. Remove with tongs and eat piping hot and crisp, thinking happy Santa thoughts.

I am in a state of terror about what we’re going to eat on Boxing day. We seem to be getting through the freezer’s stash of nibblable things very fast. The good news is that these sausage rolls freeze at the pre-glazing stage perfectly, and I’ve another thirty or so in a Tupperware box, freezing away happily. Defrost to cook and give up thanks that the great god Miele thought to invent the freezer.

Planting a medlar and a quince tree

Just in time for Christmas, the fruit trees I ordered several months ago have turned up, ready for planting. I’ve wanted my own quince and medlar trees for years, but have been living in rented houses, places with no garden and abroad for all that time. When we bought our first house this year, one of the first things I did back in the early summer was to order a pair from Keepers Nursery, where they claim to have the world’s largest selection of fruit trees.

Usually, the trees would have been delivered for me to plant earlier in the year, but this autumn was long and warm, and the trees didn’t fall dormant (and plantable) until much later than usual. The quince tree (it’s a Meeches Prolific, which is bred to fruit heavily – see the picture at the top of the post) is recognisably a tree already; it’s two years old, and has lovely goblet-shaped branches. I think we’ll get good flowers from it in the spring, and if we’re extremely lucky we may get some fruit next autumn.

The medlar (macrocarpa) is only a year old, and is a single, whippy stick with roots on one end at the moment. The twig lashed to the garden cane (to be replaced later by a proper tree-stake) in the picture is my baby tree. There’s no hope of getting any fruit from it next year, but I’m extremely excited about it; medlars are a very slow-growing, long-lived tree, and specimens over 600 years old are known in England. It promises to be beautiful. This one is on a semi-dwarfing root stock, so it won’t get enormous, but it’ll do well in the poor soil at the front of our house.

I know you all know what quinces are, because my first ever post on this blog was all about quince jelly. Medlars, though – well, they’re a forgotten fruit in England these days, having a botanical place somewhere between the pear and the hawthorn. (This picture is from a tree I found growing on a hillside in France this September.) I first came across a tree when I was at university; ouside the Law faculty in Cambridge is a standard tree about ten feet high which I used to park my bike by. It was a beautiful tree with large pinky-white blossom in the spring, and a mysterious fruit which looked like a bit like a small, brown pomegranate with an open end in the autumn. I later found out that it was a medlar with the help of an old botanical in the University Library, and collected some fruit after a frost to let it blett (the fruit of the medlar is not edible until it has sat in a dry place for a while and gone soft and brown). The taste was sweet, delicate, acid-winey and completely addictive. Given that you can’t buy medlars in the shops, and that I didn’t intend to go within five hundred yards of the Law faculty once I’d managed to graduate and escape its bloodsucking, cobwebby clutches, I decided I’d buy a tree at the first opportunity.

The medlar is an ancient tree; in 700BC the Greek botanist Theophrastus was writing about it while munching at a well-bletted specimen. It has literary pedigree too; Shakespeare mentions it in four plays (although not in particularly glowing terms – fruits which have one end which looks a bit like a dog’s bum, to be consumed when they look rotten, make for easy metaphor).

Both of these trees are self-fertile, so I only need one of each variety to make sure I get fruit like these quinces from my Mum’s garden (just as well, really; my garden’s not very big and I seem to have gone a little mad this year and given about 33% of the bedding space up to mass garlic production). Expect some glorious blossom pictures in the spring.

I’ll do my best to update as usual over the Christmas period, so keep an eye out for mulled wine, a home-made dill sauce for salmon, sausage rolls, and the enormous sirloin of beef I’m cooking on Christmas day. A very merry Christmas to all those of you who are swearing off using computers for the holiday period.

How to shuck oysters

On the phone to my friend James yesterday, I mentioned that I was planning on visiting Waitrose to pick up some Christmas supplies. He suddenly became very excited and started making insistent noises about visiting the fish counter, where, he said, oysters are currently cheap and plentiful. It’s an ‘R’ month, the middle of the oyster season, and he was right; there were dozens spread out on ice for 39p each. I managed to score twelve of my favourite transexual bivalve for less than £5.

Transexual bivalve, you ask? It’s true; Tiresias, the chap in Ovid who spent seven years being a lady as a punishment for being mean to snakes, didn’t have it this easy. Oysters of the genus Crassostrea (like those we had last night; you can tell them apart from Ostrea oysters by their asymmetrical, elongated shape) decide to be male or female from season to season on a whim. (Ostrea oysters, which are scallop-shaped and symmetrical, are even more confused, changing gender at the drop of a shelly hat, often many times in one breeding season.)

As well as having a phenomenally exciting sex life, the oyster produces pearls (sadly, the oyster you eat is vanishingly unlikely to produce anything that’s not small, brown, gritty and liable to break your teeth), can live for up to fifty years, is said to be an aphrodisiac (I’m saying nothing) and often ends up attached to a rock in the most picturesque bits of sea in the world. When I was a little girl visiting family in Malaysia, my cousin Margaret and I used to wade out into the sea where there were rocks covered with oysters at low tide, and bash the shells open with a stone, scooping the quivering flesh into greedy mouths. We were horrible children.

Eating-oysters will not be particularly venerable; the flavour becomes less good after they’re about five years old, so those you buy at the fishmongers (which are almost certainly farmed; minuscule oyster spats are encouraged to attach themselves to tiles or other collecting devices as their permanent home, and are scraped off and lovingly cared for until supper time three years later by professional oyster herdsmen) will be mere oyster striplings.

So. You’ve bought your oysters. How should you go about opening them? You’ll need an oyster knife (or another short, wide-bladed knife with a point), a towel, and a bowl to catch any juices you spill. Hold the oyster in a towel in your left hand (right hand if you are left-handed) with the curved half of the shell in the palm of your hand. The flat shell on top is the oyster’s lid. Force the point of the knife in where you can (as close to the hinge as you can manage), and twist it ninety degrees to break the muscle and pop the lid off. Use the blade of the knife to remove the meat from the underside of the lid, and scrape it into the bowl full of meat created by the curved half of the shell. You can release the meat from the bottom of the shell with the knife too, or leave it for the person eating the oyster to do it with a fork.

You need that towel. You will see from the picture that Mr Weasel started the evening considering towel-use unmanly; he changed his mind pretty quickly once he’d stabbed himself for the second time in the palm of the hand. (Those concerned for him have nothing to worry about. He says he’s very happy to be able to point at scars and say casually, ‘That? I did it shucking oysters.’)

They’re nigh on perfect tipped straight into your mouth from the shell, raw and tasting of the sea, but they do benefit from some carefully chosen accompaniments. We used a squeeze of lemon, a squeeze of lime and a microscopic dab of wasabi. (When you buy wasabi, try to get hold of it in powdered form to make up yourself. If you do get a tube, do your best to find one whose ingredients list reads ‘horseradish’ or ‘wasabi’ and nothing else.) Some people use Tabasco sauce or minced shallots in wine vinegar; I find both these a bit too strong. They can hide the subtle, seashore flavour of the oyster.

I should have bought more than a dozen. We scarfed these in five minutes flat.

Peking dumplings

It’s nearly Christmas. The family is descending upon the Uptonarium, and this calls for finger foods which I can freeze and cook quickly, with the minimum of fuss. Not for me, though, the supermarket mini-samosa or the tiny quiche in a box. I’m making Peking dumplings; lovely little pockets exploding with Chinese flavours, which are fried golden and crisp on one side, and steamed soft and tender on the other. In the north of China, these are traditionally eaten on New Year’s Day. Here in the south of England, we’re going to be eating them on Christmas Eve; infinitely nicer than the traditional glass of sherry and a carrot.

These dumplings freeze, uncooked, brilliantly, and, being tiny, defrost very quickly for cooking. If you’re freezing them, you can do the final, cooking step once your dumplings have defrosted. Try them as an alternative to sausage rolls.

For sixty Peking dumplings (I am informed that Americans call these ‘pot-stickers’), you’ll need:

Wonton wrappers
You can either buy sixty wonton wrappers in the Chinese supermarket, or make your own, as I did, using:
1lb very strong white bread flour
1 1/2 cups water

Filling
1lb minced pork
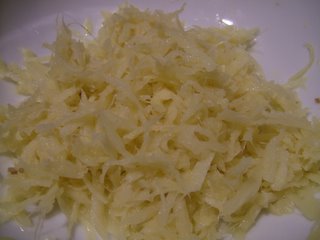
1/4 white cabbage, chopped finely
15 spring onions, chopped finely
1 small tin water chestnuts, chopped finely
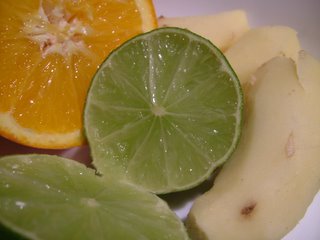
1 bulb garlic (about ten cloves), chopped finely
2 in piece of ginger, peeled and chopped finely
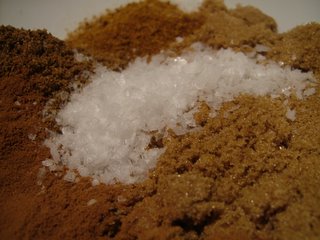
1 teaspoon caster sugar
1 teaspoon salt
1 teaspoon msg (leave out if you really must)
2 tablespoons light soy sauce
2 tablespoons Chinese rice wine (substitute cooking sherry if you can’t find any)
1 tablespoon sesame oil

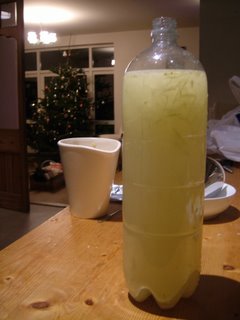
Start by mixing the bread flour and water into a soft, but not sticky, dough, adding more flour or water if your dough is sticky or dry. The resulting dough should be as soft as the plump bit at the heel of your thumb. Set aside in a covered bowl for the gluten to develop.

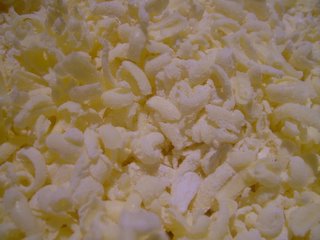
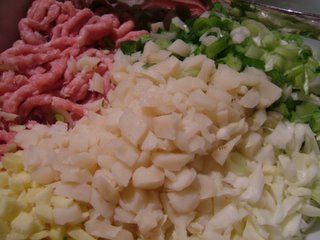
Chop all the filling ingredients to the same size. You should end up with around the same amount of vegetables as you have pork. Using your hands (I hope you took your rings off to mix the dough, or your diamonds are going to be set in a lovely crusty dumpling mixture), squish the whole lot together until it’s well mixed and holding together loosely. Don’t worry about adding eggs or anything else to bind; the wrappers will keep everything together for you.


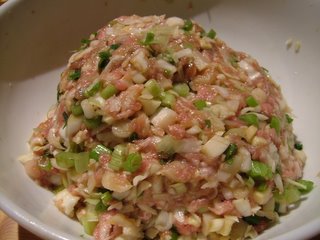
Set the filling mixture to one side for the flavours to mingle while you prepare the wonton skins.

There’s a reason you used strong bread flour; the gluten in it will give you a very smooth, tough dough, which stretches easily and doesn’t break and snap. Looking at your ball of dough, I realise it is hard to imagine that you’ll get sixty bits out of it large enough to make into wrappers. Trust me; you will. It’s stretchy stuff. Start by dividing it into two, then divide each of those bits into three. The remaining small pieces are easy to chop into ten equal-sized bits.

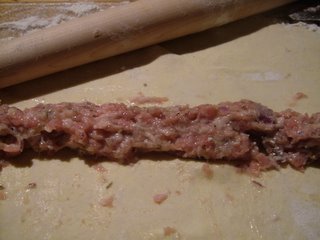
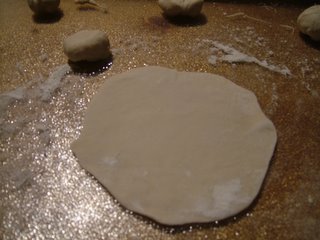
Roll each piece into a rough circle on a floury board. You don’t need to be terribly accurate with these; the tops will be frilly anyway, so don’t worry if, like me, you suddenly start acting like someone with fewer than the full complement of fingers when faced with dough and a rolling pin. When you’ve rolled your little wrapper, put it on a plate; you can stack the others on top of it and they won’t stick together.

When all your wrappers are made, put one on the board and place a teaspoon of the mixture (this is quite easy to judge if you make the spoonful about the size of the ball of dough that went to make up one wrapper) in the middle of it. Moisten a semicircle around the edge of the dough (don’t moisten all the way round or it won’t stick), and push the two halves of the circle together, crimping the edges as you go.

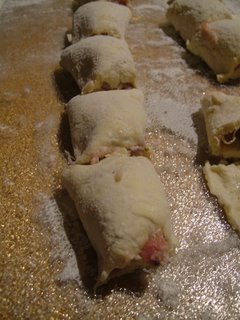
I am full of admiration for dim sum chefs, with their lightness of finger and artistry when faced with wrappers. Some of them even make them look like fish or little bunny rabbits. My own are always functional, and never pretty. Anyway; crimp away, and if you’re even half good at this, you’ll end up with something that looks prettier than this picture.

At this point, you can freeze the little dumplings. Line a container with floured greaseproof paper, put a layer of dumplings in, cover with more floured greaseproof paper, add another layer and so on until the container is full. Defrost before continuing to the next stage.

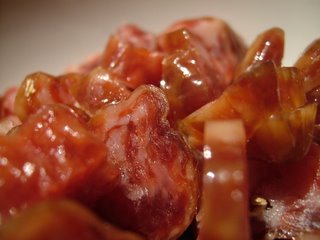
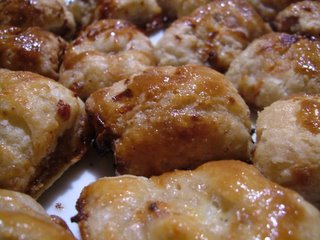
To cook, heat some vegetable oil in a thick-bottomed, non-stick (there is a reason the Americans call these things pot-stickers) frying pan, and when it is hot, slide the dumplings in carefully in one layer, their bottoms in the sizzling fat and their frilly tops pointing upwards. After about five minutes, pour water into the pan until it reaches halfway up the sides of the dumplings. Simmer over a medium heat without a cover until all the water has evaporated. The tops will be delicately steamed and the bottoms brown and crisp. Remove with a slotted skimmer.

These dumplings are traditionally served with black vinegar. (Chinese black vinegar, not the stuff you heathens put on chips.) I enjoy them with a good, sweet, bottled chili sauce mixed with a little soya sauce, alongside a nice cold beer.