A taxonomy of meta-desserts

I occasionally get emails asking for more dessert recipes to be posted on this blog. I’m working on one which I’ll put up on Monday – meanwhile, Raspberry Debacle, a blog I enjoy enormously, has produced a sketch towards a taxonomy of meta-desserts, which should keep you happy over the weekend.

A quick question for readers – are there any recipes I’ve not blogged before which you’d like to see here? Please leave any suggestions in the comments section!

Sticky Thai garlic-chilli prawns

Sticky Thai garlic-chilli prawnsOne of the things the area I live in really lacks is a good fishmonger. As a result, raw prawns with the shells still on are very hard to find, so whenever I spot them in the supermarket I grab about six bags and freeze them.

Why do I want to keep the shells on, you ask? It’s perfectly simple; cooked like this, the shells not only add rich flavour to the flesh of the prawns, but become delicious in their own right. They’re a little crunchy, a little chewy, and extremely tasty, so don’t bother peeling your prawn – eat it shell and all. I wish my prawns has also had heads (ask any Chinese person; the head is the best bit), but head-on raw prawns are increasingly hard to find these days.

I was planning on barbecuing these little guys, but the summer of torrential rain shows no signs of abating, and I’ve barely been able to use the barbecue at all this year. If the weather’s this bad where you are, put the prawns under the conventional grill. Lucky readers living where there’s sunshine and enough warmth to eat outdoors should drag out the barbecue for this one.

To cook enough prawns for a very substantial meal for two (or a sensibly sized meal for three) you’ll need:

500g raw, defrosted prawns with the shells on (raw frozen prawns will be blue-grey, not pink)
4 tablespoons light soya sauce
2 tablespoons sweet dark soya sauce (kejap manis)
4 tablespoons oyster sauce
2 tablespoons Thai fish sauce
2 tablespoons honey
1 bird’s eye chilli
1 head garlic
1 large handful coriander, chopped

Use a sharp knife to butterfly the prawns – make a slit between the prawn’s legs from the base of the tail to the place where the head was, slicing through the flesh, but not through the shell on the prawn’s back. Flatten the prawns out with your hand. Cutting the prawns like this will maximise the surface area, helping them to take up the flavour of the marinade.

Mince all the cloves from the head of garlic with a large, sharp knife. (This is very easy – just lay the cloves on a chopping board and, holding the knife at the tip and the hilt and using a rocking motion, ‘walk’ the blade up and down the board for about five minutes. You’ll find the garlic is chopped finely and evenly. It’s probably not best to eat this immediately before going on a date.) Chop the chilli finely and mix it and the garlic with all the liquid ingredients. Stir the marinade mixture well to blend everything, then tip the prawns in, stirring to make sure they’re well covered. Refrigerate for 40 minutes. This is quite a penetrating marinade, so don’t leave the prawns for more than an hour or they will taste too strong.

When you are ready to cook the prawns, reserve the marinade and place them on a barbecue or under a very hot grill for three or four minutes per side, until they turn pink and the skins start to caramelise a little. Meanwhile, bring the marinade to a strong boil for about thirty seconds. Drizzle a little of the wonderfully garlicky cooked marinade over the prawns to serve, and dress with plenty of fresh coriander…and remember to eat those delicious shells!

Hokey pokey ice cream

Hokey pokey ice creamIf you made the cinder toffee from last week and have managed to avoid eating it all so far, you’re in for a treat. This ice cream reflects two of my favourite sweeties – Maltesers and Crunchie bars. The cinder toffee (the middle of a Crunchie) is crumbled and blended into a malt-flavoured ice cream, flavoured just like the inside of a curiously creamy Malteser.

I haven’t used any chocolate in this ice cream because I wanted the malt and toffee to stand on their own, but if you would like to make this even more similar to the sweets, add five tablespoons of milk chocolate chips at the same time you add the crumbled cinder toffee to the mixture. To make about two pints of ice cream, you’ll need:

4 egg yolks
½ pint (250ml) milk
1 pint (500ml) double cream
100g caster sugar
2 sachets Horlicks Light (see below)
5 heaped tablespoons roughly crushed cinder toffee

Horlicks is an English malted milk drink. (If any US readers could let me know what the equivalent across the pond is, I’d be very grateful!) The full-fat version is usually stirred into hot milk. Horlicks Light is stirred into water, and I use it here because it contains powdered milk, which makes the ice cream all the more creamy and delicious.

Start by making a custard base for the ice cream. Beat the egg yolks, the milk, the Horlicks and the sugar together in a heavy-bottomed saucepan. Continue to stir vigorously over a very low heat until the custard starts to thicken. You’ll notice that it forms a glossy sheen on the back of a wooden spoon when ready. Be very careful not to allow the custard to boil, or it will separate.

When the custard has thickened, transfer it to a jug and add the double cream. Stir well and put the jug in the fridge until the mixture is chilled.

If you have an ice cream machine, add the mixture to the machine and follow the instructions. Halfway through the freezing time, add the crushed cinder toffee to the drum. (I’ve found the easiest way to crush it is to put it in a plastic freezer bag, knot the top, hold onto the knot and bang the bag against the work surface.) Continue until the ice cream is stiff enough to serve.

If you don’t have an ice cream machine, put the mixture in a Tupperware box and place it in the freezer. After twenty minutes, remove it from the freezer and beat the partially frozen mixture with a whisk. Remove and beat every twenty minutes, breaking up the ice crystals, until the ice cream is frozen evenly but very soft – stir the cinder toffee in at this point. Keep freezing and beating until the mixture is solid. Serve sprinkled with a little extra crushed cinder toffee. And remember to brush your teeth.

Cinder toffee

Cinder toffeeThis is an easy and delicious home-made sweet. Cinder toffee is made with vinegar and bicarbonate of soda in the mix. They react together so it froths before it sets into millions of little bubbles, and hardens into something a lot like toffee-flavoured pumice stone. Any taste of vinegar is neutralised, leaving you with a buttery toffee flavour. It’s a recipe which I don’t cook very often although I love it, because it inevitably leads to my eating the whole batch and then feeling really bad about my thighs.

Here in the UK, cinder toffee (also called honeycomb toffee) has a formative role in our childhoods as the shatteringly crisp stuff that Cadbury’s put inside Crunchie Bars. I actually prefer it without chocolate, but if you enjoy a chocolatey morsel just melt some milk chocolate over a bain marie, dip the hardened chunks in and firm up on greaseproof paper.

In the Cork and Bottle, a London wine bar specialising in a big chunk of meat called the Hemingway Burger, the New Zealand staff call cinder toffee ‘hokey pokey’, and use it in a very fabulous ice cream. I have held back from eating all the stuff I made yesterday and will use the rest in a creamy, malty ice cream over the weekend. Watch this space for the recipe.

To make one thigh-swelling batch of delicious toffee, you’ll need:

50g salted butter
30ml water
4 teaspoons malt vinegar
3 tablespoons golden syrup
450g granulated sugar
1 teaspoon bicarbonate of soda (baking soda)

Golden syrup(American readers can buy golden syrup at Amazon. Golden syrup is a by-product of the sugar refining process, with a delicious light golden toffee flavour. We use it in the UK in many of the situations where maple syrup is used in America. Don’t be tempted to substitute corn syrup or honey – they won’t taste the same, or have the same characteristics when heated.)

Grease a large baking tin with butter (mine was 11 x 7 inches). Heat the butter, water and vinegar together in a large saucepan with a jam thermometer (the saucepan should be larger than you think necessary – remember that this recipe will froth and swell) until the butter has melted. Stir in the sugar and golden syrup over the heat until they dissolve. Stop stirring, and bring to the boil. Keep boiling without stirring until the toffee reaches the hard crack stage on your thermometer (if you don’t have a jam thermometer, a teaspoon of the molten toffee dropped into a saucer of cold water at hard crack stage will form brittle into strands and crack when you try to shape it). ***Update – it is incredibly important that your toffee really does reach hard crack stage, which is 154°C, or else it may sink after rising.*** Be careful – the mixture will be unbelievably hot, and very dangerous if there are children or pets around. Remove the toffee from the heat, and gently stir in the bicarbonate of soda.

Startling frothing will occur. Keep stirring gently until the bubbles settle down a bit, then pour the mixture into your greased tin. Wait for between ten and twenty minutes until the mixture is set up but still warm, and break the toffee into pieces. Lay these pieces out on a wire rack until the sweets are cool, then transfer to an air-tight container (or your mouth).

Parmesan, tomato and onion bread

Parmesan, tomato and onion breadWhen I was a little girl, there was a bakery in our town which made a cheese and onion bread. It was never quite right – the cheese was too mild, there wasn’t enough onion, and it needed very salty butter. All the same, I used to really look forward to eating it, preferably sliced with plenty of cheese and tomatoes layered on top, then baked in the Aga by my Dad.

This week, I decided to try to make my own cheesy, oniony bread, this time with my Dad’s tomatoes baked into it. I used lots of parmesan, a nice big onion and some flavourful sun-dried tomatoes (along with a little of their oil). The results were great – no extra cheese, tomatoes or toasting required. To make one loaf, you’ll need:

210 ml tepid water
1 level teaspoon caster sugar
1 packet easy-blend yeast
350g strong white flour
1 teaspoon fine salt
100g finely grated parmesan
1 ½ teaspoons dried oregano
1 minced clove garlic
1 large onion, sliced finely
5 sun-dried tomatoes in oil, chopped small
1 ½ tablespoons of the tomato oil
½ tablespoon fleur de sel or other coarse salt to sprinkle
Extra parmesan to sprinkle

Mix all the ingredients (except the tepid water and the salt and parmesan to sprinkle on at the end) in a large, warm bowl. Pour in the tepid water and mix well with a wooden spoon until the dough comes together. Transfer to a floured board and knead hard for ten minutes, until the dough is stretchy, glossy and no longer sticky. The onion pieces will snap as you knead, but don’t worry about them.

Bread doughWhen the dough is kneaded, put it back in the bowl and cover with some oiled cling film. Leave in a warm (not hot) place for about 40 minutes, until it has doubled in size. (The dough will take a couple of hours to rise at room temperature if you don’t have a warm place to keep it.)

Take the dough from the bowl and knock it back down to its original size, kneading again for five minutes. If you want a traditional loaf shape, put it in a loaf tin. I decided to make a low, flattish bread in order to make the most of the lovely crust with its sweet caramelised onions poking through, so I shaped the dough on a non-stick baking sheet.

Sprinkle the bread with the salt and extra cheese, and leave to rise again, covered, for 40 minutes in a warm place. Meanwhile, heat the oven to 230° C (450° F).

When the dough has risen, place a large baking tray full of water at the bottom of the oven, and the tray with the bread on a rack in the middle of the oven. Bake the loaf for between 30 and 40 minutes. It will be ready when it sounds hollow when you tap the bottom. Serve with plenty of butter.

A Concise Encyclopaedia of Gastronomy

No pictures yet today – the USB cable for my camera has gone walkies. You’ll have to make do with the magic of the written word.

My very dear friend Lorna got married on Saturday. (I am still recovering from the stupid decision I made to try to keep up with her new husband’s Irish friends once the drinking began in earnest. Congratulations to Lorna and Stephen, who are currently eating things in bikini and trunks on their honeymoon in Sicily.) Lorna, clearly having got this being a bride thing back to front, gave me a present the week before the wedding.

We were sitting in a café when she handed over the book she’d bought me, and on opening it I proceeded to get so excited that an old gentleman at an adjacent table got up and said how delightful it was to see young people still able to get excited over books. I immediately stopped being delightful and instead became very self-conscious for about ten seconds before going all twittery again, for this is a seriously, seriously fabulous book. André Simon’s Concise Encyclopaedia of Gastronomy is a real treasure trove of esoteric and quirky information for the obsessional foodie. It was started in 1938 by Simon, a champagne dealer, wine writer and all-round bon-viveur, and was planned for release in three sections a year to be lined up attractively on your bookshelves. Sauces, the first section, was published in 1939. With the breakout of the Second World War, paper shortages and conscription at his English publishers slowed the publication of the next eight sections, but by 1946 the work was finished, and a couple of years later a single-volume edition (the one I was chirruping about in the cafe) was published.

André Simon’s exhaustive treatment of what he calls ‘Gaster-the-belly . . . that temperamental furnace . . . the seat of the soul’ is by turns fascinating and hilarious, and remains useful for the modern cook, with its concise recipes, its instructions on handling different ingredients and its exploration of some truly unusual foods. (I am pretty sure that readers in 1945 had never eaten an agouti, much less enjoyed its ‘best part, the grizzled fur’. I certainly haven’t.) We learn that the flesh of the squirrel is seldom eaten in England . . . and we’re given two recipes for a casserole and a pie. We discover that the fat of the Bastard Antelope ‘quickly becomes cold and clogs in the mouth’. Here is a consomme of swifts, there a roast swan. There’s a recipe for The Bishop, a Cambridge University wintertime concoction of oranges and port. There are pages upon pages of short descriptions of cheeses, some now extinct. And, wonder of wonders, a few hundred early cocktail recipes. (I like the sound of the Jack Rose – the juice of half a lime, a teaspoon of grenadine and a jigger of apple-jack, shaken over ice.) There are edible birds I’ve never heard of (the Tufted Pochard? The Godwit?) There’s a recipe for rabbit in brandy which I’m determined to cook. There’s a detailed history of the Bath Oliver biscuit. A garnish for sweetbreads involving truffles cooked whole in Madeira, hollowed and refilled with quenelles of chicken forcemeat and the chopped centres of the truffles. And there’s a thoughtful instruction to make sure that the only aardvark that I allow to pass my lips should be smoked.

It’s worth looking at some second-hand websites for a copy of this magical book. Simon laments that: ‘Gastronomy in England and in the United States of America has a very limited appeal; it certainly has none of the fascination which Nutrition has for a vast number of people. And yet Gastronomy is to Nutrition what health is to sickness. All who enjoy good health, which means, happily, the great majority of the population, could and should enjoy good food and drink, the fuller and happier life which is the gift of Gastronomy for all normal people: that is to say people who are blessed with all their senses and a sufficient measure of common sense to make good use of them.’ I hope he’d find the food landscape in Britain a bit more congenial these days.

Sage, onion and apple stuffing balls

Sage, onion and apple stuffing ballsThis was one of my Grandma’s recipes. She was not an awfully good cook (you can still make my mother pale by saying ‘trifle’ or ‘Grandma’s mushroom thing’ to her); she refused to turn the oven up to any sort of temperature which might make its insides dirty; she taught me to make an omelette out of nothing but eggs, butter, parsley and about half a bottle of Worcestershire sauce; and she used the kind of cottage cheese that comes with bits of pineapple in to make her lasagne. I miss her.

This recipe was one of her good ones, and we often make these very simple stuffing balls to accompany roast meats. To make about sixteen little balls, you’ll need:

1 packet sage and onion stuffing mix
1 large onion
5 leaves fresh sage
1 eating apple
500g good sausagemeat
3 tablespoons butter
Salt and pepper

Make up the stuffing mix according to the packet instructions, adding one tablespoon of butter with the boiling water. I much prefer good old Paxo to the wholemeal, organic, lumpy brown premium brands, but feel free to go with your favourite. Chop the onion and cored apple into dice about the size of a woman’s little fingernail. Chop the sage finely.

Stuffing ballsPut the sausagemeat (if good sausagemeat isn’t available near you, buy some good sausages and pop the meat out of the skins), stuffing mix, chopped sage, apple and onion in a mixing bowl, and use your hands to squash and mix all the ingredients together with some salt and pepper. Divide the mixture into small balls and arrange in a non-stick baking tray. Dot the stuffing balls with the remaining butter. Cook for 40 minutes at 180° C (350° F) and serve alongside your Sunday roast.

Chicken Kiev

Chicken Kiev
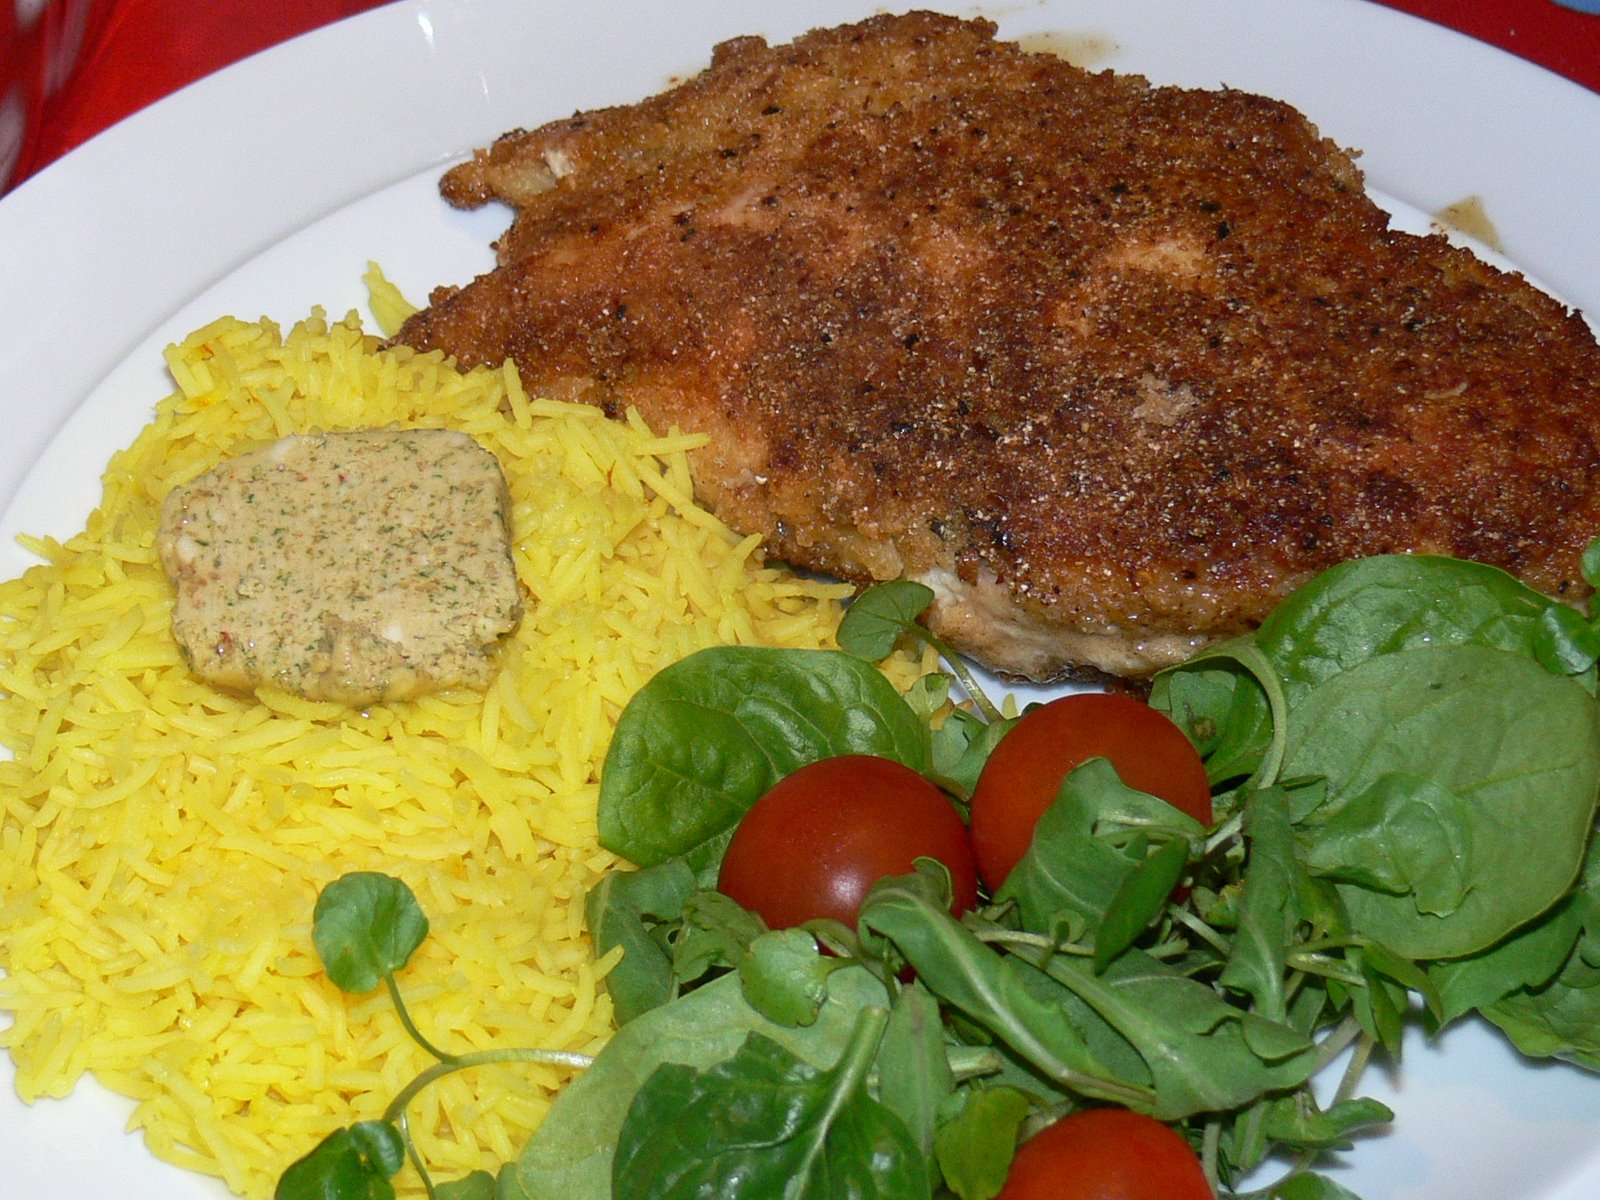
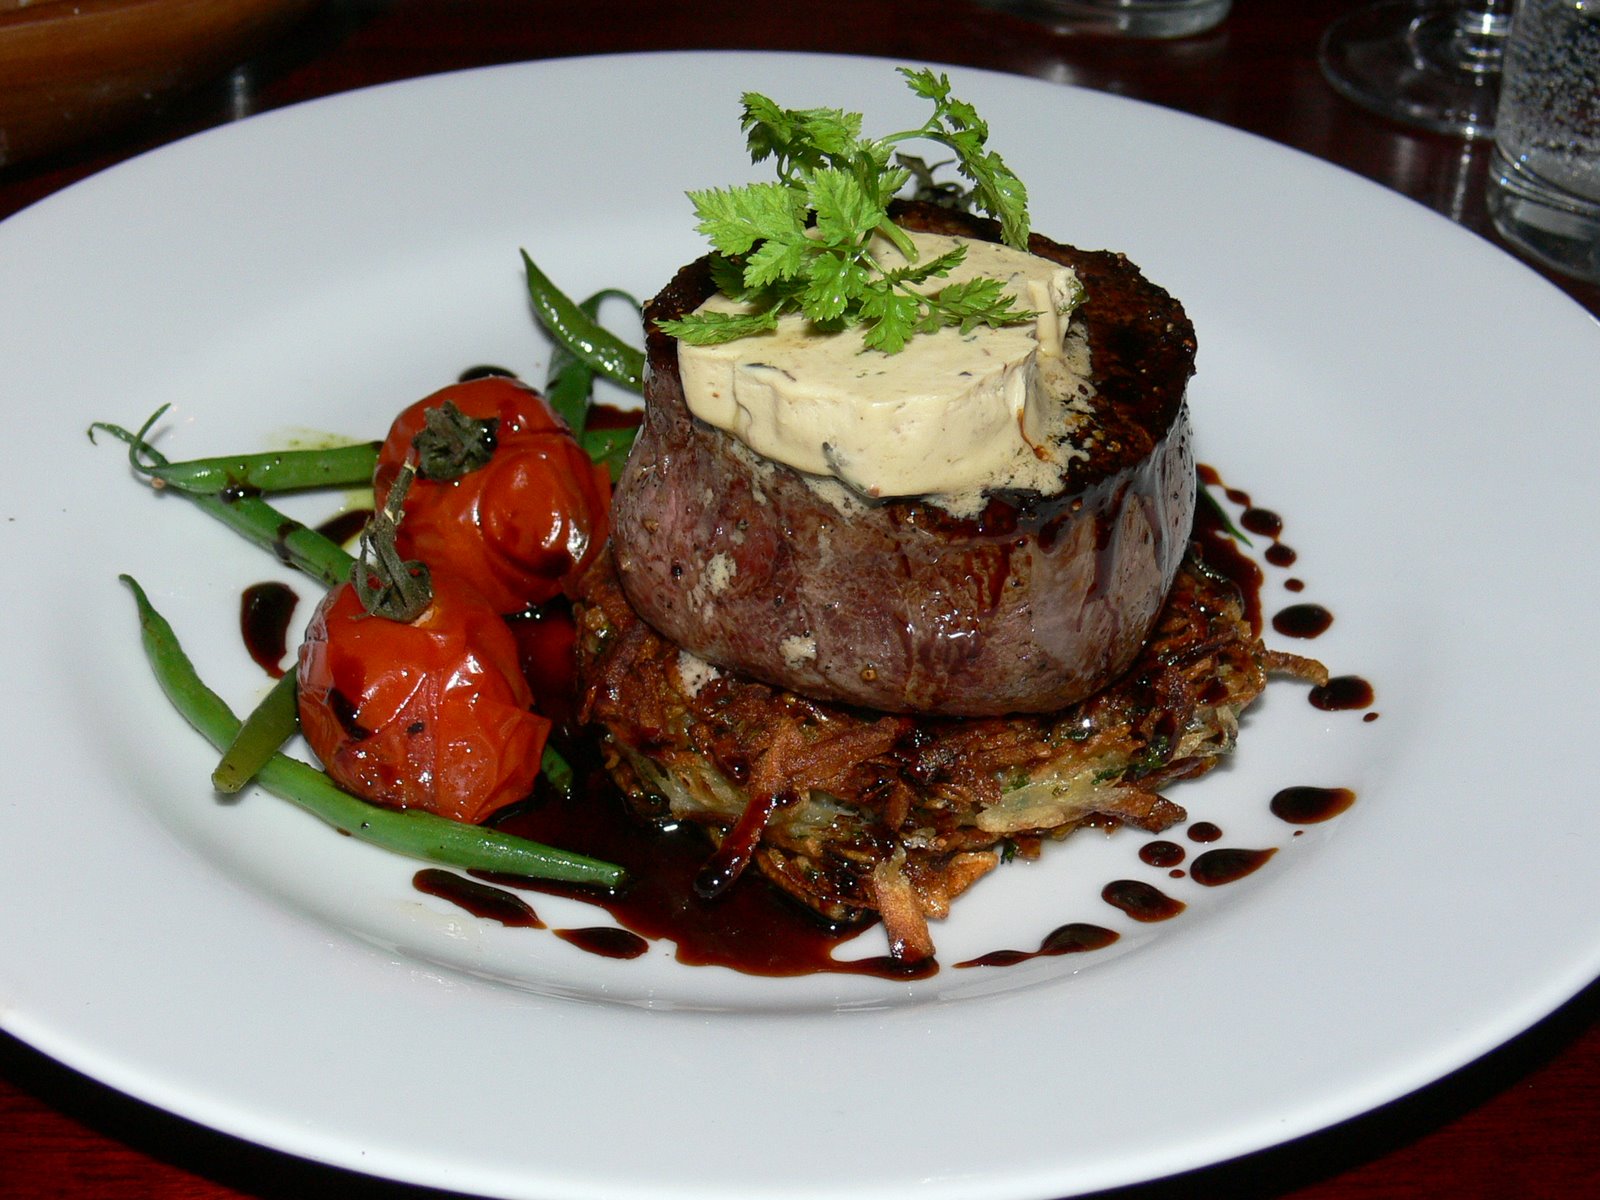
This is a rather special Chicken Kiev. It has a super-crisp coating and is bursting with a garlic butter full of extra flavours. (You will notice that I am overdosing a little on saffron rice at the moment. It’s lovely with chicken dishes – just cook your rice as usual, but add a large pinch of saffron, which you’ve soaked in an eggcup of water from the kettle for twenty minutes, with the rest of the cooking water.)

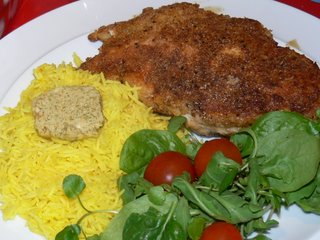
The flavoured butter carefully packed inside this chicken (and balancing cheekily on top of that lovely saffron rice) is worth making in bulk and keeping in the freezer. You can slice it direct from the frozen roll and use it to melt over steaks, to baste roast chickens, to flavour couscous, to fill a baked potato, and anywhere you need rich flavour and lovely moist butteryness. If roasting the garlic for the butter is just too much faff for you, use an extra three cloves of raw garlic instead.

Use the largest chicken breasts you can find for this recipe; this will make it much easier to keep the pool of butter inside the bird until you cut it on your plate. Waitrose is currently selling a chicken called the Poulet d’Or – a massive and delicious behemoth of a bird which grows slowly (and ethically, at Leckford Farm, an enterprise owned by Waitrose’s parent company) – it’s fed an organic, corn-rich diet, allowed to forage and roam free, and is slaughtered at around 90 days rather than the usual four weeks. It’s a big bird, but it’s tender and extremely flavourful – I’ve read comparisons to Poulet de Bresse, and for special occasions I will be very happy to spend the £12 again on two breasts. (A whole bird comes in at about twice that price, but I’d estimate that it would very happily feed six people, so the effective price is high but not unreasonable.)

To make half a pound of garlic and herb butter, and two Chicken Kievs, you’ll need:

Garlic and herb butter
1 pat of good, salted butter (2 sticks in America), plus a tablespoon of butter to roast the garlic
1 head of garlic (to roast)
3 cloves of garlic (to be kept raw)
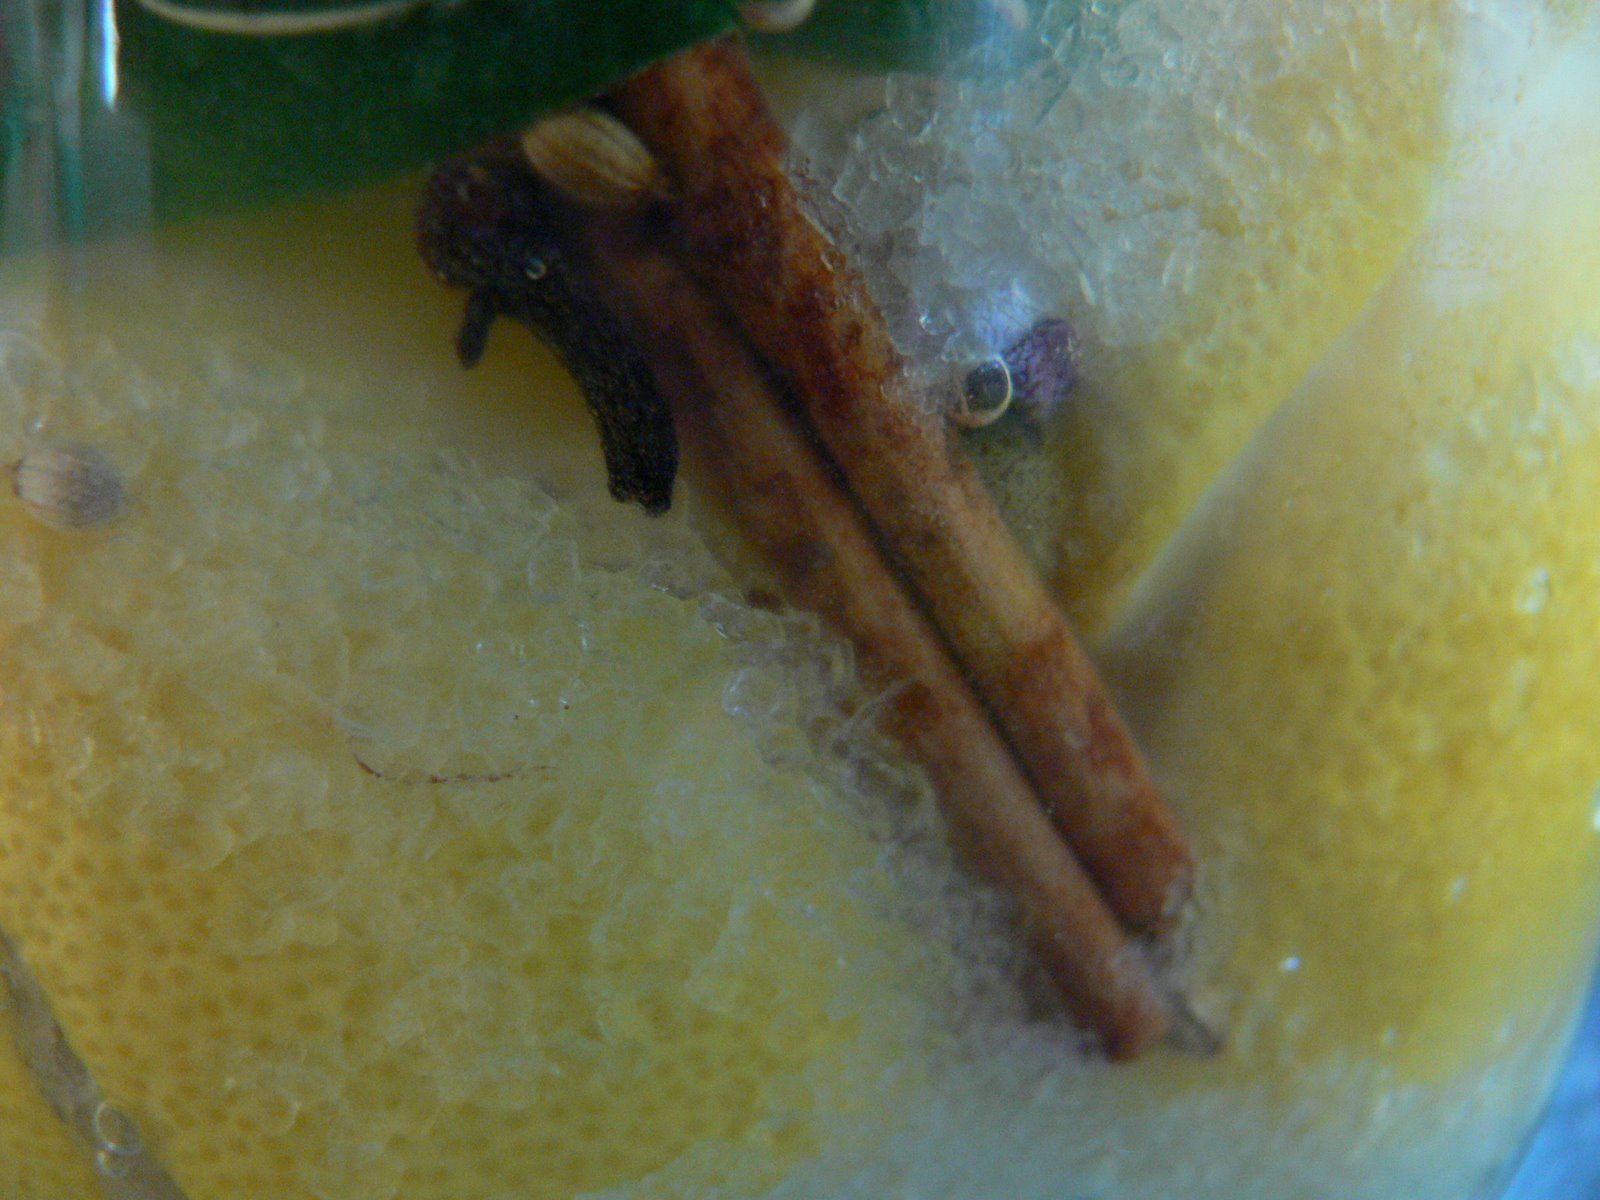
2 bay leaves
1 large sprig thyme
1 tablespoon chopped fresh tarragon
1 tablespoon chopped fresh chervil (leave this out if you can’t find any)
1 tablespoon chopped fresh parsley
1 fresh red chilli
½ teaspoon paprika
Juice and zest of 1 lemon
1 tablespoon light soya sauce
Large pinch of salt

Chicken
2 large chicken breasts, skinned and boned
Crumbs from two slices of white bread (blend in a food processor to make crumbs)
An equal volume of polenta or cornmeal
5 tablespoons grated parmesan
4 extra tablespoons polenta or cornmeal
2 eggs, beaten
Salt and pepper
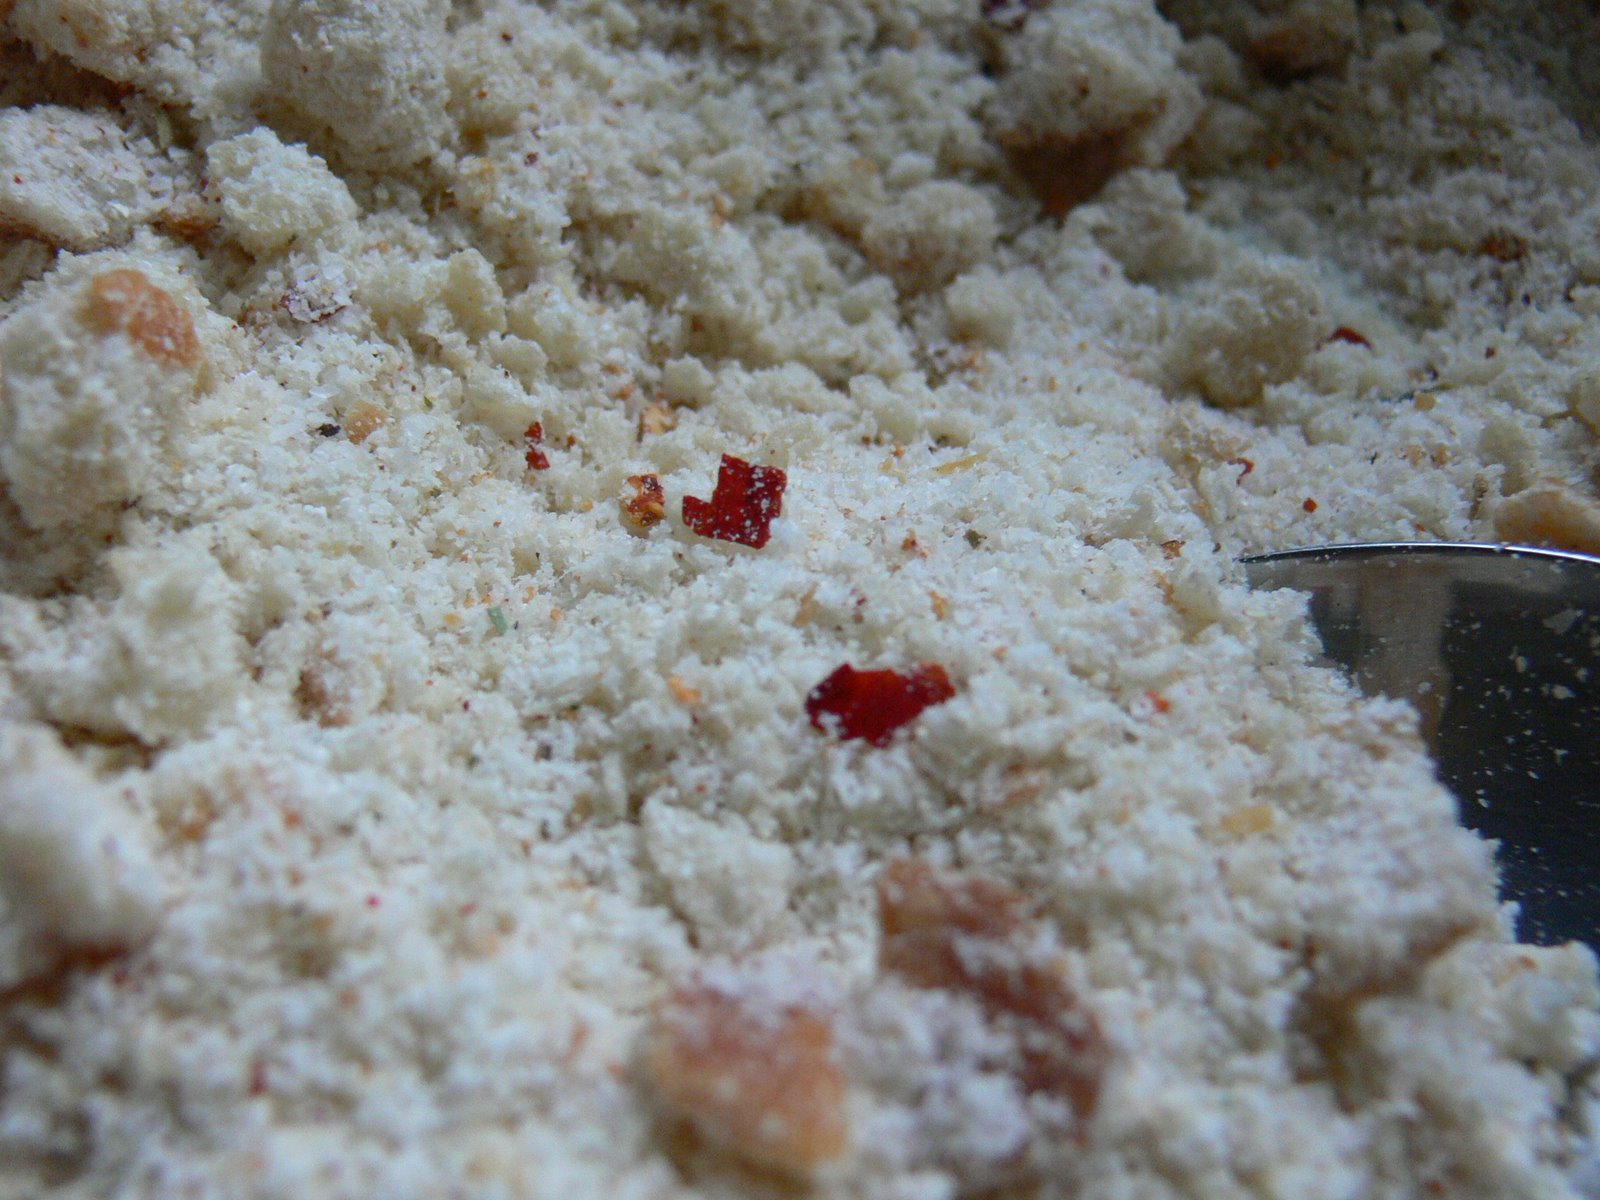
1 teaspoon chilli flakes

Start by roasting the garlic for the butter. Slice the bulb of garlic in half across its equator and put the tablespoon of butter, the bay leaves and the thyme on the cut side of the bottom half, seasoning generously. Place the top half of the garlic bulb on top, making a herby sandwich. Roast at 180° C for 40 minutes. Remove from the oven and cool.

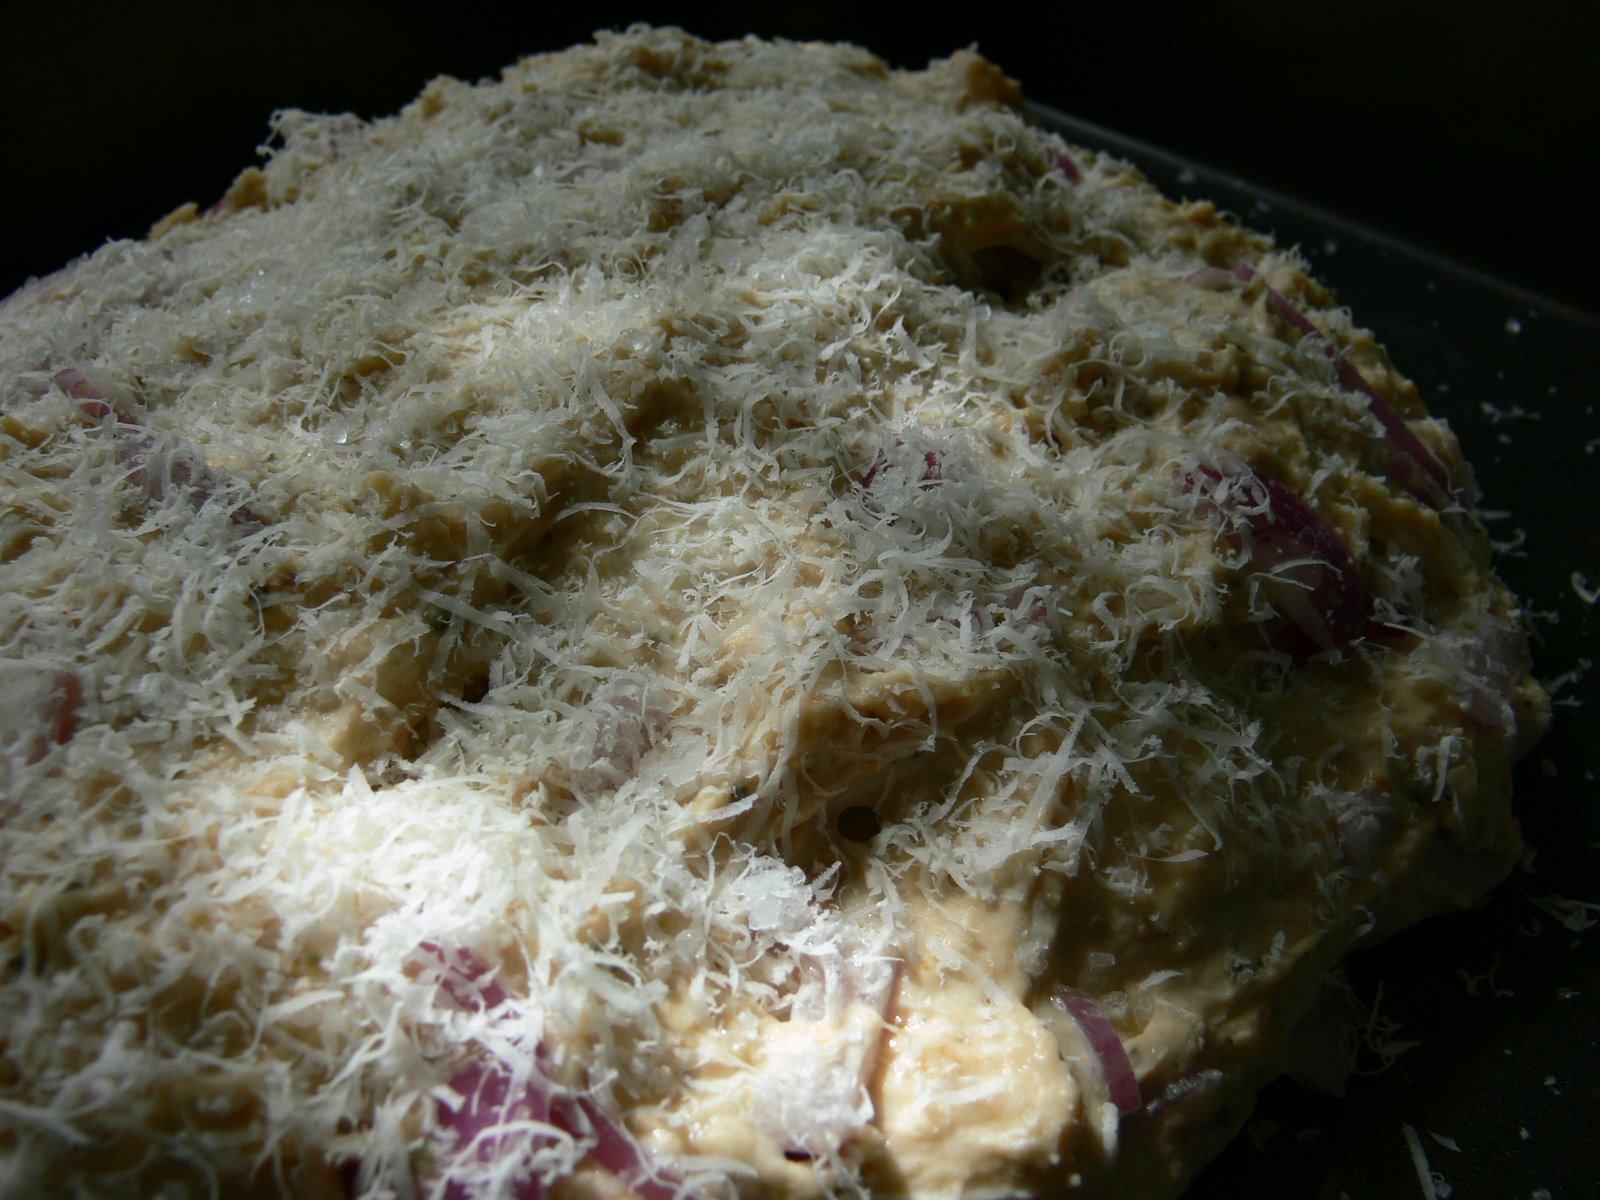
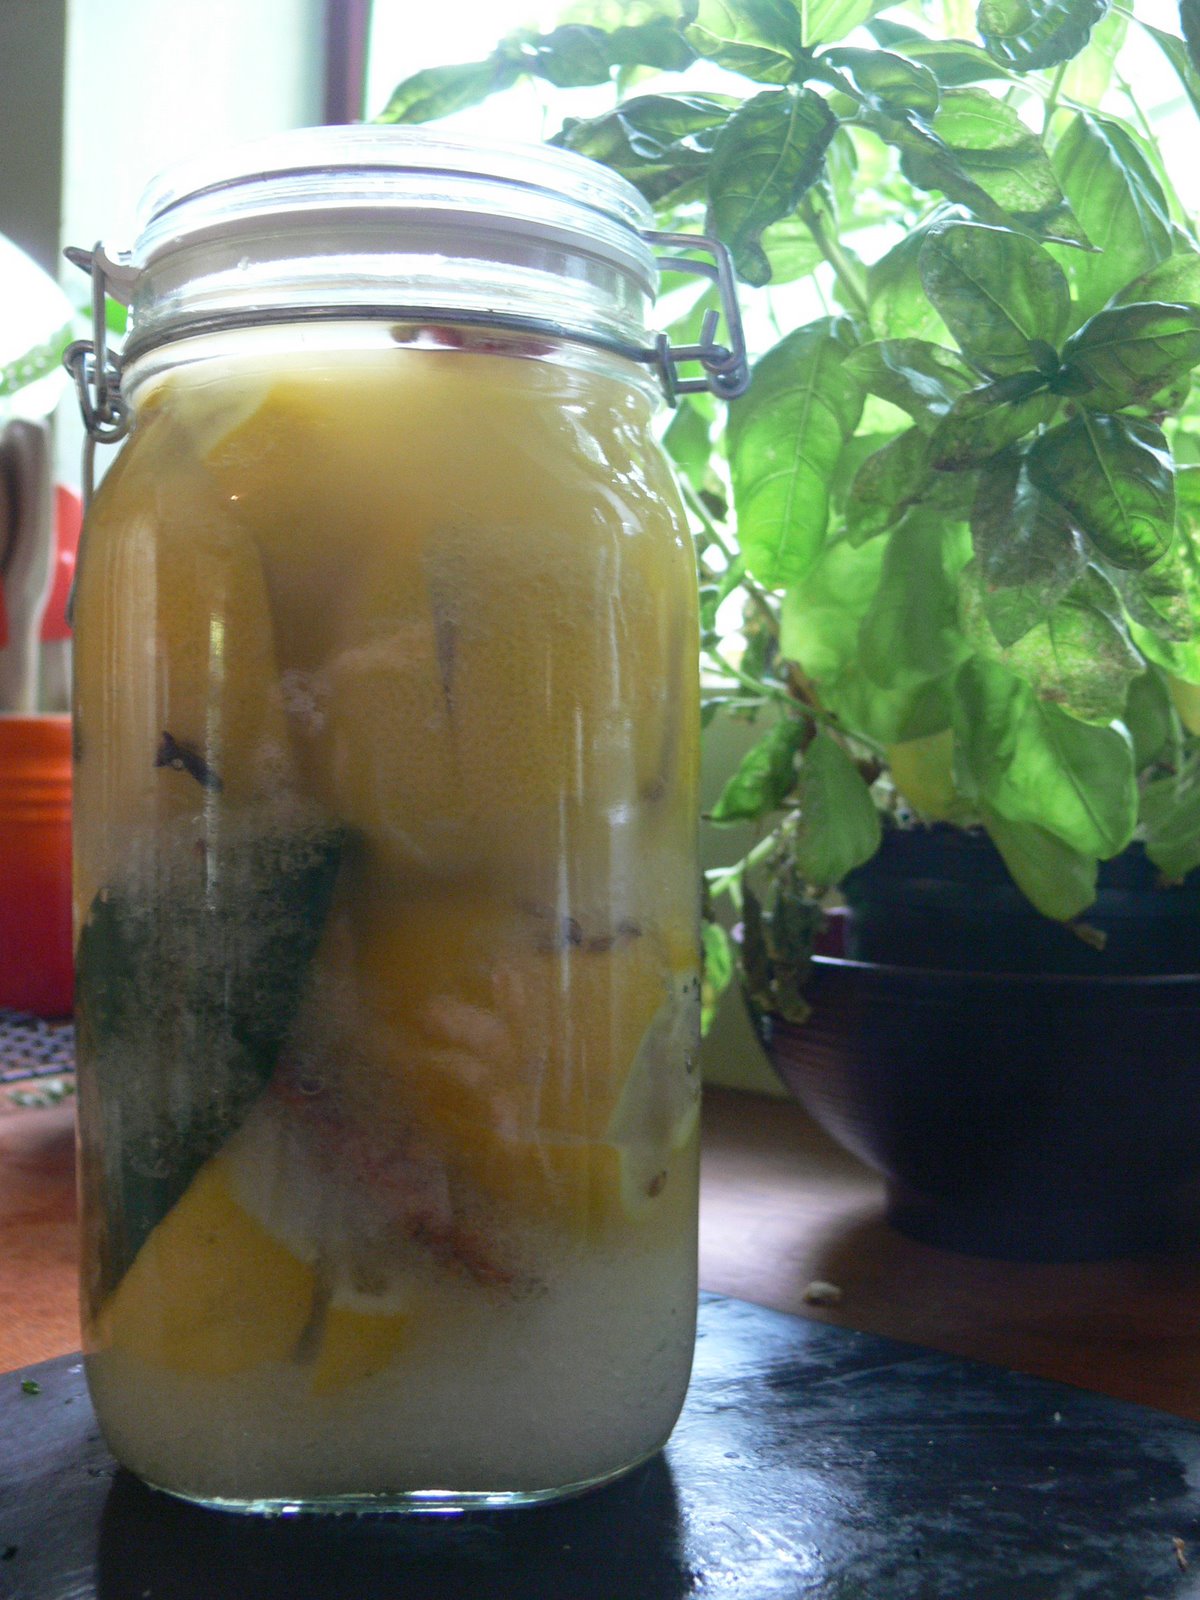
Pop the soft, roast cloves of garlic out into the food processor, and add the raw garlic; the tarragon, parsley, chervil and basil; the chilli and paprika; the lemon zest and juice; and the soya sauce. Drop in the half pound of butter and blend until everything is amalgamated and finely chopped into the butter.

Make a long sausage of the flavoured butter on a piece of tin foil. Wrap tightly and place in the freezer for at least an hour.

Breading mixtureWhen the butter has chilled, start on the chicken. Begin by combining the breadcrumbs and an equal volume of polenta in one bowl with the parmesan and chilli flakes. Put the four tablespoons of polenta in a separate bowl, and beat the eggs in a final bowl.

Take your smallest knife. Sharpen it vigorously. Use it to make a slit down the side of one chicken breast, creating a pocket inside the muscle. Be very careful not to cut all the way through. Remove the little fillet strip from underneath the breast and set it to one side.

Slice a disc of butter from the frozen butter sausage and tuck it inside the pocket. You may be able to fit more than one disc in, but be careful not to overstuff the breast, or the butter will leak out in cooking. If the butter sticks out at all, just trim it carefully so it’s firmly inside the meaty pocket.

Dip the fillet strip in the polenta, then back in the egg. Dip the chicken breast in the polenta, then the egg, and sprinkle the area where the slit is with a bit of extra polenta. Use the polenta and egg to glue the fillet strip around the slit. Roll the whole sticky assembly in the breadcrumbs mixture, patting plenty on around the slit/fillet area to make a good seal and ensuring everything is covered well. Repeat the process with the other breast.

Heat two tablespoons of butter and two of olive oil in a heavy, large frying pan. Bring the pan to a high temperature and carefully slide the chicken pieces in, slit/fillet area facing down. Turn the heat down to just below medium and leave the chicken breasts for 15 minutes, without poking or moving. After 15 minutes, flip them over (the bottoms will have turned an amazing golden crisp) and leave for another 15 minutes. Serve immediately. The melted butter will have formed a delicious pool inside the chicken breasts, and will pool out when you slice into the meat with your knife. Make sure you have plenty of rice to soak it all up.

Bruno’s Brasserie, Cambridge

Bruno's BrasserieUpdate, 19 February 2008
Sadly, Bruno’s is closing after this weekend, doubtless to be replaced by yet another branch of Starbucks or Subway. Thanks to Dan for the tip.

Update, 10 July 2007

A thousand apologies to Dan from the River Farm Smokery in Bottisham, who is, in fact, responsible for the very lovely smoked tomatoes mentioned below – I mistook them for the restaurant’s own. Dan – I am still having dreams about those pigeon breasts you guys provided for the beer festival. Keep up the good work!

Cambridge isn’t exactly buckling under the weight of good restaurants. It’s odd; Cambridge is an affluent city, and the university gives it a really cosmopolitan feel which just isn’t reflected in its restaurants. We groan under the weight of a million branches of Pizza Express and chains like Café Rouge and Chez Gerard, largely thanks to the enormous property prices in the city, which mean that independent restaurants are hard-pressed to afford a pitch. There are still a few happy standouts (the place I live next door to, 12 miles outside the city, is one of them; email me if you want more details). Midsummer House, with its two Michelin Stars, is a very fine restaurant in the centre of the city, although if you, like me, are mildly annoyed rather than amused by some of the twiddles, froth and frills associated with molecular gastronomy, a visit can be a pain in the wallet you might prefer not to bear. Over in Little Shelford, Sycamore House (only open from Wednesday to Saturday) is excellent – I’ll post a complete review later this year.

Bruno’s Brasserie (52 Mill Road, Cambridge, CB1 2AS, Tel: 01223 312702) has been a Cambridge standard for good French bistro food for some years now. The restaurant used to have a Michelin star, and I’ll admit to being a little hornswoggled by some of the aesthetic changes they’ve made since losing it; the food remains very good, but the linen tablecloths and napkins have gone (to be replaced by nothing at all and sad paper squares), and the restaurant has repositioned itself as a ‘restaurant and gallery’. Cambridge happens to have some good galleries, especially along King’s Parade (check out Primavera when you’re in town for some really interesting paintings, jewellery, pottery, glass and sculpture). Bruno’s is not a gallery. It’s a restaurant which displays local painters’ work, sometimes pretty weak, for sale to diners. Acres of canvas does not necessarily make up for the lack of a tablecloth, especially when the paintings are a bit…you know. Still – on to the food and the wine.

Salade LyonnaiseLinen and questionable paintings aside, I really like Bruno’s. It’s one of the few good restaurants I’ve found which can cater easily for large groups, and in the past I’ve been to events where friends have rented out half of the restaurant. Service was prompt and excellent even when there were thirty of us. This is good French food with some accents from other cuisines, so starters include this Salade Lyonnaise with a perfectly poached egg alongside more exotic dishes like the mussels in a lime and coriander broth.

The wine list is thoughtful and well-chosen, and there’s also a good cocktail list. The restaurant was very helpful with the wine when my friend celebrated a big birthday there, and allowed the pair of us to prop ourselves up at an empty table and taste a selection from the list. Three ‘palate cleansers’ are also on offer between courses: a champagne and vanilla sorbet, a very lovely passionfruit and lavender sorbet and a watermelon and vodka granita. These will cost you an extra £1.50, but they’re worth every penny.

SteakMain courses are built around really excellent cuts of meat. On previous visits I’ve enjoyed the belly pork (which is almost always on the menu). This beef fillet was cooked exactly medium rare (often a difficult task, for some reason, in British kitchens, many of which seem to only specialise in differing shades of grey). It sat on a crisp and delicate rosti, and was topped with a fierce and very tasty Roquefort butter – sometimes the restaurant also offers a foie gras butter. Those tomatoes you can see were a lovely surprise; they were smoked in the restaurant kitchen and served cold (although one of our dining companions said he would have found them much better if they’d been hot, like the rest of the dish).

Strawberry shortcakeI felt like revisiting my 1980s childhood and ordered the strawberry and almond shortcake. This was served with basil leaves and a basil coulis (basil is a lovely herb with strawberries). The fragile, friable shortbread was delicately spiked with almonds, and the strawberries were cheeringly sweet given this summer of no sunshine we’ve been having. This reminds me – if the rain does stop any time soon, ask for a table outdoors on the lovely terrace.

If you visit Bruno’s, parking on one of Mill Road’s side streets or at the Queen Anne car park on Parkside is always available. The restaurant is popular, so you should be sure to make a reservation.

Preserved lemons

Preserved lemonsI have been having some very good dreams recently about those sweetbreads with preserved lemon I ate a couple of weeks ago at Moro. Although sweetbreads are pretty hard to find round here, Moroccan preserved lemons are not – you can buy Belazu’s very good lemons at the supermarket, or make your own. I chose to make my own, because making preserves gives me a self-righteous glow and something nice to display in the kitchen.

This is a really easy preserve to make, largely because it involves no cooking. The lemons are preserved in salt and their own tart juices, with spices and herbs tucked in between. Once ready, the rinsed lemons’ skins can be used as a condiment, and their pulp and juice as a seasoning. To fill a sterilised 1.5 litre jar, you’ll need:

About 15 unwaxed lemons (buy a few extra in case you need the juice)
500g coarse salt
2 bay leaves
3 cardamom pods
10 coriander seeds
3 dried chillies
1 cinnamon stick
5 cloves

Preserved lemons, cinnamon stickBegin by making a 2 cm layer of salt at the bottom of the jar, and dropping a couple of the whole spices in it. Take a lemon and cut the top and the bottom off. Make as if you are going to cut the lemon in half from top to bottom, but don’t cut through the last 1 cm of flesh and skin. Turn the lemon upside down and make another cut from top to bottom, as if you were going to quarter the fruit, again not cutting all the way through. You’ll end up with a lemon with two top-to-bottom slits in it. Holding the fruit above the neck of the jar, stuff each slit with as much salt as you can fit in, then drop it into the jar, pushing it firmly into a corner.

Continue filling your lemons with salt and packing them firmly into the jar, sprinkling salt and spices between them as you go. You’ll notice that the juice from the squashed lemons will begin to cover the fruits as you work. When you have packed as many lemons into the jar as will fit, squeeze over fresh lemon juice until the top lemon is at least 1 cm deep in the preserving liquid.

Put the lid on tightly and leave the lemons in a warm place (the kitchen worksurface will do just fine) for six weeks, shaking the jar gently every day to mix the ingredients. The lemons, once ready, do not need to be refrigerated, and will keep indefinitely – if, once you start using them, the liquid no longer covers all the lemons, just add more salt and lemon juice.