Curry puffs

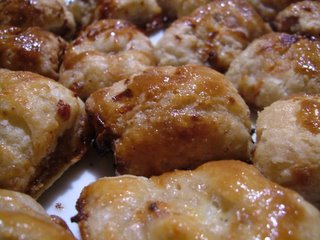
I’m having a bit of a Malaysian food binge at the moment, and the beef curry puff is about as Malaysian as you can get. These little pasties are made from a mouth-meltingly short, flaky pastry, and are filled with a rich beef, onion and potato curry.

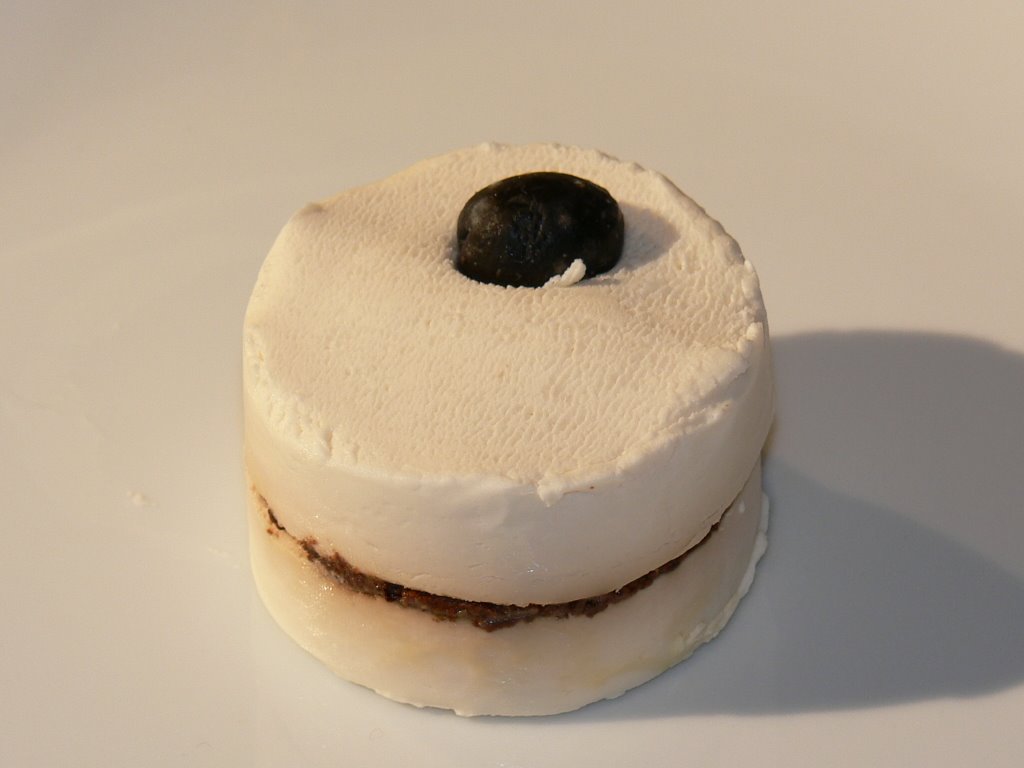
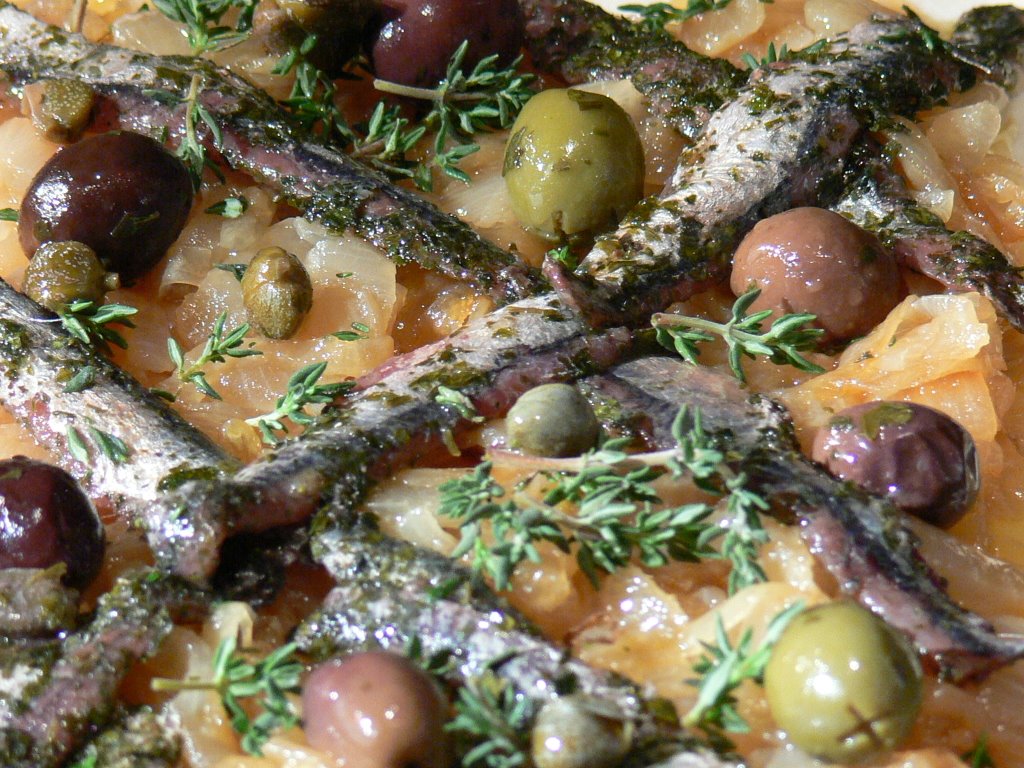
There are as many variations on the curry puff as there are cooks. Some prefer a shortcrust pastry, some like a chicken or vegetable filling – I’ve also seen sardine in Malaysia. Some are so fiercely spiced you need to cool your tongue between bites, some so subtle that they come across…well…a bit Cornish pasty. This recipe is just gorgeous – serve some curry puffs next time you have some friends round and just watch how fast they vanish. Try to use beef dripping to fry the filling if you can find it; it gives the curry puffs a delicious beefy depth. (Use vegetable oil if you can’t find any.)

To make about 30 you’ll need:

Filling
Beef dripping to fry
12 oz onions, diced
12 oz waxy potato, cut into 1cm cubes
1 teaspoon ginger, diced very fine
5 cloves garlic, diced very fine
8 shallots, sliced thinly
1 lb minced beef
4 tablespoons Madras curry powder
1 can coconut milk
Juice of 1 lemon
2 tablespoons caster sugar
3 teaspoons salt

Pastry
1 lb flour
4 oz butter
8 oz lard
1 egg, and another to glaze
2 tablespoons sugar
Juice of ½ a lemon
6 fl oz water

Start by cooking the filling. Stir fry the onions in a tablespoon of beef dripping until they are soft and translucent. Remove them to a bowl and set aside. Add another tablespoon of dripping to the pan and fry the potato cubes in the same wok with a pinch of salt until they begin to take on a little colour, then pour over 4 fl oz of water and put the lid on, reducing the heat to a simmer. Cook for between five and ten minutes, until the potatoes are cooked through. Put them in the bowl with the onions.

In the same wok, stir fry the ginger, garlic and shallots in a little more dripping. When the spices are giving off their scent, add the beef and stir-fry for five minutes until well mixed. Add the curry powder and continue to stir-fry until all the beef is coloured. Add the onion and potato, stir thoroughly, then add the coconut milk, sugar, salt and lemon juice.

Reduce the heat to a low simmer, and reduce the mixture until it’s thick and glistening. Taste, adding more lemon juice and salt if you think it needs it. Cool and refrigerate. (This is important – you’ll find the puffs much easier to fill if the curry is cold. A warm filling will be slightly runny.)
You can make the pastry and fill the puffs on the same day you prepare the filling, but the filling is one of these things that really improves by being kept in the fridge for a day – the flavours deepen and meld.

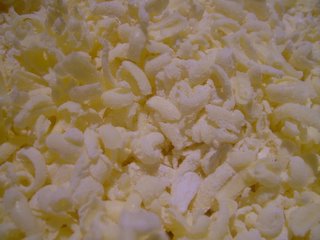
To make the pastry, mix the egg, sugar, salt, water and lemon in a measuring jug and refrigerate until it’s nice and cold. Sieve the flour into a bowl, and rub in the butter until the mixture looks like breadcrumbs. Cut the lard into little cubes (about the same size as you cut the potato) and blend it well with the flour/butter mixture. Add the contents of the measuring jug and bring everything together gently with your hands. Rest the pastry in the fridge, wrapped in clingfilm, for an hour.

Slice the pastry in two and roll out half into a thin rectangle. Fold the rectangle into three (as if you were folding an A4 sheet to fit in an envelope) and roll it out again. Repeat the folding and rolling four times. Cut out rounds about ½ cm thick with a large fluted pastry cutter and repeat the process with the other piece of pastry. (If you’ve scraps left over, just roll them out and use the cutter on them.)

Beat an egg and put it in a cup where you can reach it easily as you work.

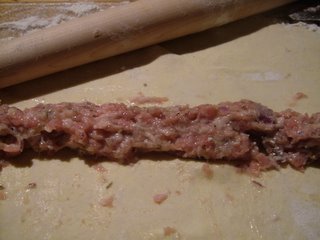
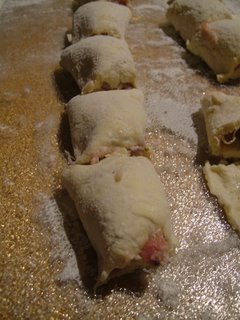
Put a tablespoon of filling in the middle of each pastry circle, and wipe some beaten egg around half the edge. Press each edge together to seal and crimp the curry puff. Arrange the puffs on a baking tray and brush each with the beaten egg to glaze.

Bake at 230° C for the first 10 minutes, then reduce the heat to 200° for 20 minutes. Cool (if you can bear to – ours usually go straight from the oven into slobbering mouths) on a cake rack.


Anchovy and olive palmiers, tapenade

palmiersThese little party biscuits are incredibly easy to make – they employ what’s fast becoming one of my favourite modern conveniences, the refrigerated roll of puff pastry. There’s a particular charm in the way that no matter how squashed-looking they are when you put them in the oven, the magic in the pastry means that they’ll rearrange themselves into perfect rounded swirls (representing palm trees, hence the name) once the pastry starts to cook, without you having to exercise any particular artistic talent.

I like to make my own tapenade for these (I like it full of zip and garlic), but you can use a good shop-bought one if you like. Try experimenting with other ingredients; these palmiers are really excellent with sun-dried tomato paste, with pesto and with pounded artichoke hearts.

To make enough for nibbles for six, you’ll need:

Tapenade
100g stoned black olives in oil (Try to find something that’s not too salty in a flavourful marinade. I like Waitrose’s Spanish Couchillo olives.)
Zest of 1 lemon
4 fat cloves of garlic
3 tablespoons salted capers, well-rinsed
8 anchovies in olive oil
1 fresh red chilli
2 tablespoons olive oil

Pastry
1 pack puff pastry

Preheat the oven to 200° C. Put all the tapenade ingredients in a food processor and blitz until smooth enough to spread.

Lay out the rectangle of puff pastry with the long end facing you, and spread the tapenade all over the surface. (If you have any tapenade left over, try it on some toast as a snack – it’s delicious.) Roll up the side nearest you halfway towards the other side, then roll up the other side towards you to meet it. Using a very sharp knife, cut the rolled pastry into slices about half a centimetre thick.

Line a couple of baking sheets with baking paper and lay out the little pastry swirls, leaving enough room for the pastry to rise and puff. Bake for 20 minutes until crisp and golden, swapping the trays over halfway through. Serve warm with cold drinks.

Puff-pastry tomato tart

Alert readers will have gathered that I am currently drowning in tomatoes, and that yesterday’s promised recipe for the other half of a packet of puff pastry was bound to include them. You’re right – today it’s tomato tart. If, as a friend I was talking to tonight does, you have a vegetarian to entertain, you’ll find this little tart really pretty, delicious and very quick and easy to prepare.

I found this goat’s cheese (Picolive) something of a blessing; my original plan had been to stir a teaspoon of tapenade into the cheese, but this came with olive paste already sandwiched in the cheese. I bought two; it’s a very nice little cheese, and I’d like some for lunch on some crusty bread.

To serve one (again, multiply the amounts to serve more people, or serve alongside yesterday’s Pissaladiere), you’ll need:

½ sheet of puff pastry from the supermarket refrigerator cabinet
1 crottin of goat’s cheese
1 teaspoon tapenade
2 cloves garlic
10 small tomatoes (or to cover)
2 sprigs rosemary
Olive oil
Salt and pepper to taste

Score a centimetre from each edge of the pastry rectangle to form a crusty border which will puff up when you cook it. Use a fork to prick holes in the inner rectangle so it doesn’t rise.

Mix the tapenade and two grated cloves of garlic with the goat’s cheese, and spread it on the inner rectangle of pastry. Slice the tomatoes and arrange them in overlapping layers on top of the cheese. Top with the rosemary, season and bake at 200° C for 20-25 minutes, until brown and puffy. The tomatoes will be sweet and juicy, the cheese toothsome and the pastry crisp. It’s almost enough to make you swear off meat.

Pissaladiere – French onion tart

We’re going to the Côte d’Azur later in September, where we’ve rented a big manor house with a gaggle of friends. I’m looking forward to the cooking – I’ve missed French market and supermarket produce since Dr Weasel and I left Paris to live in the UK again a few years ago.

I thought I’d cook some Provencale recipes before we leave, just so I feel properly prepared. There is nothing more Provencale than Pissaladiere.

Pissaladiere is a delicious, sharply savoury little tart made from crisp puff pastry, onions cooked until they are sweet and glossy, anchovies and olives. A traditional Pissaladiere would use a preserved fish paste called pissala rather than the anchovies. I did not have an empty Kilner jar and a few pounds of tiny salted fish, so this little tart employs some very delicious Provencale anchovies I found in Waitrose, marinaded in garlic and herbs.

To serve one person (double the recipe to serve two, but I shall be posting another tart for the other half of the puff pastry tomorrow which you might want to serve alongside this), you’ll need:

3 onions
½ sheet puff pastry from the supermarket chiller cabinet
1 large knob butter
1 teaspoon fresh thyme
Anchovies to taste
15 olives (preserved in oil, not salt)
10 salted capers, rinsed

Slice the onions thinly and saute them in the butter over a low heat until they release their sugar and turn golden and sweet (about half an hour). Don’t salt them; you’ll get all the salt you need from the other toppings.

Use a sharp knife to cut the rectangle of pastry in half. Set one half aside for tomorrow’s recipe. With the knife, score a line a centimetre from each edge of the pastry rectangle, so you end up with a smaller rectangle drawn inside it. The centimetre at the edges will be the puffy sides of the tart. Use a fork to make little holes in the inner rectangle. This will stop the part of the tart with the filling from rising.

Spread the soft, golden onions inside the inner rectangle. Lay the anchovies in a diamond pattern over them (you can slice them in half lengthways and use fewer for a less strong flavour; these particular anchovies were quite mild and mellow, so I left the fillets whole) and scatter over the thyme, capers and olives. I used a mixture of black, purple and green olives. Bake in a tray on a sheet of greaseproof paper at 200° C for 20-25 minutes, until the edges are golden and puffy, and the base is crisp.

This tart is delicious hot or cold. Try having one cold at a picnic, or making tiny Pissaladieres for a starter when you have a dinner party.

Sausage rolls

My Grandma’s second husband (yes, the Grandma with the salad cream) was a butcher in a town where they liked their meat cheap and homogenous. He had a sausage machine. In one end, he’d put pieces of elderly grey stuff which looked like precisely what they were – anatomy. He’d add a dehydrated, pre-bought rusk mix that he’d wetted overnight with some tepid tap water. He’d drop in a pellet of pink food colouring and a wodge of aging fat that he’d scraped off some of the meat he’d sold to the partially-sighted lady who thought she was buying topside. Sausages came out the other end, excreted by the burping machine into glistening, protein-condom skins.

The thing I still, all these years later, completely fail to understand, is why people used to queue up to buy these gristly objects, full of bone-nubbins and unidentifiable chewy things. Why they still snatch their supermarket equivalents off the shelves with dead-eyed apathy. It took me years to trust sausages and sausage meat again, and I still read sausage packets more closely than I’ve ever read an employment contract. Be careful with your sausage meat. When you make this recipe, buy whole sausages you trust and whose packets list ingredients like meat and herbs (rather than trays of sausage meat full of nitrates and soy), slit their skins, and squeeze the meat out.

These sausage rolls are loosely based around Delia Smith’s sausage rolls, with tweaks to the filling and one very important difference; the pastry is not hers, but my great grandmother’s. Nana was a proper cook in the Edwardian tradition who believed that fat was extremely good for you. I agree with her (nothing is better for your mental health than bacon), which is why these sausage rolls contain nearly twice the butter that Delia’s very good rolls do.

This pastry is a traditional flaky pastry which doesn’t require the samurai-sword folding that many more modern recipes require. It also has more butter in it than it does flour; surprisingly, it’s very easy to handle. If you can’t eat without guilt at Christmas, when can you? Try these; they’re excellent and dreadfully English.

You’ll need:

Pastry
10 oz salted butter
6 oz plain flour
Water – amount depends on heat and humidity of kitchen
1 egg yolk

Filling
1 lb sausage meat (squeeze it out of trustworthy – probably quite expensive – sausages)
1 heaped tablespoon dried sage (preferable to fresh in this recipe)
1 egg
1 onion, chopped very finely
Lots of pepper
A grating of nutmeg
A pinch of salt

It’s important that you work your pastry as cold as you can to make it crisp and short. Begin by chilling the butter until it’s completely solid – I freeze it a la Delia for an hour before beginning. Put the mixing bowl in the fridge for the hour as well. (Nana used to put the mixing bowl in a sink with the plug out, running the cold tap around the outside of the bowl as she worked. I don’t go quite this far – my fridge is cold enough.) Use the coarse side of your grater to grate all of the butter into tiny curls – the idea here is to keep the pastry as cool as you can all the time, and to avoid handling it with blood-hot hands wherever possible. With a knife blade (Nana had a knife she used specifically for pastry), blend it into the flour, working as fast as you can. When everything is mixed well, add icy-cold water, tablespoon by tablespoon, until the pastry has collected together in a clean dough which doesn’t stick to the sides of the bowl. Use your hands to make it into a ball, working the pastry as little as possible. The finished pastry doesn’t need to look smooth throughout; aim for a texture like that in the picture.

Nana’s cooking genes were good ones where pastry was concerned. While I’m useless with bread, dumpling and other doughs, I excel at pastry; it’s always short, light and melting. I think it’s the cold hands and the disregard for my arteries.

Refrigerate the pastry for an hour, wrapped tightly in cling film.

While you refrigerate the dough, mix the filling ingredients with your hands. Leave in a bowl for the flavours to mingle while the pastry is resting.

When your pastry is ready, divide it into three and roll each third out on a floured board (if you have a glass board, you’ll find these stay nice and cold and also remain non-sticky for longer than they would on wood) into a rectangle whose long side is around 50 cm.

Roll it out as thin as you possibly can, then divide the filling into three and make a line with a third of the filling down the middle of the pastry rectangle. Trim the surrounding pastry (there will be some wastage) so that you can fold one thickness of pastry around the roll of sausage meat, dampen one edge with some water and roll it up. Use a knife to chop the long roll of pastry and sausage into ten pieces.

Use scissors (thank you Delia) to snip two little arrow shapes in the top of each piece, and glaze each one with egg yolk. Bake on a non-stick sheet for 25 minutes at 220 c. Remove with tongs and eat piping hot and crisp, thinking happy Santa thoughts.

I am in a state of terror about what we’re going to eat on Boxing day. We seem to be getting through the freezer’s stash of nibblable things very fast. The good news is that these sausage rolls freeze at the pre-glazing stage perfectly, and I’ve another thirty or so in a Tupperware box, freezing away happily. Defrost to cook and give up thanks that the great god Miele thought to invent the freezer.