Roast goose with sage and onion potato stuffing

Roast goose
Roast goose

I’ve held off for couple of weeks post-Christmas on this, because I am assuming that today is approximately the day when most of you will be getting sick of your New Year’s resolution to avoid crispy skin, potatoes softened beautifully with goose drippings, and tender forkfuls of breast meat. Everybody else should herewith bookmark this page for Christmas 2011, by which time things festive will no longer cause your gorge to rise.

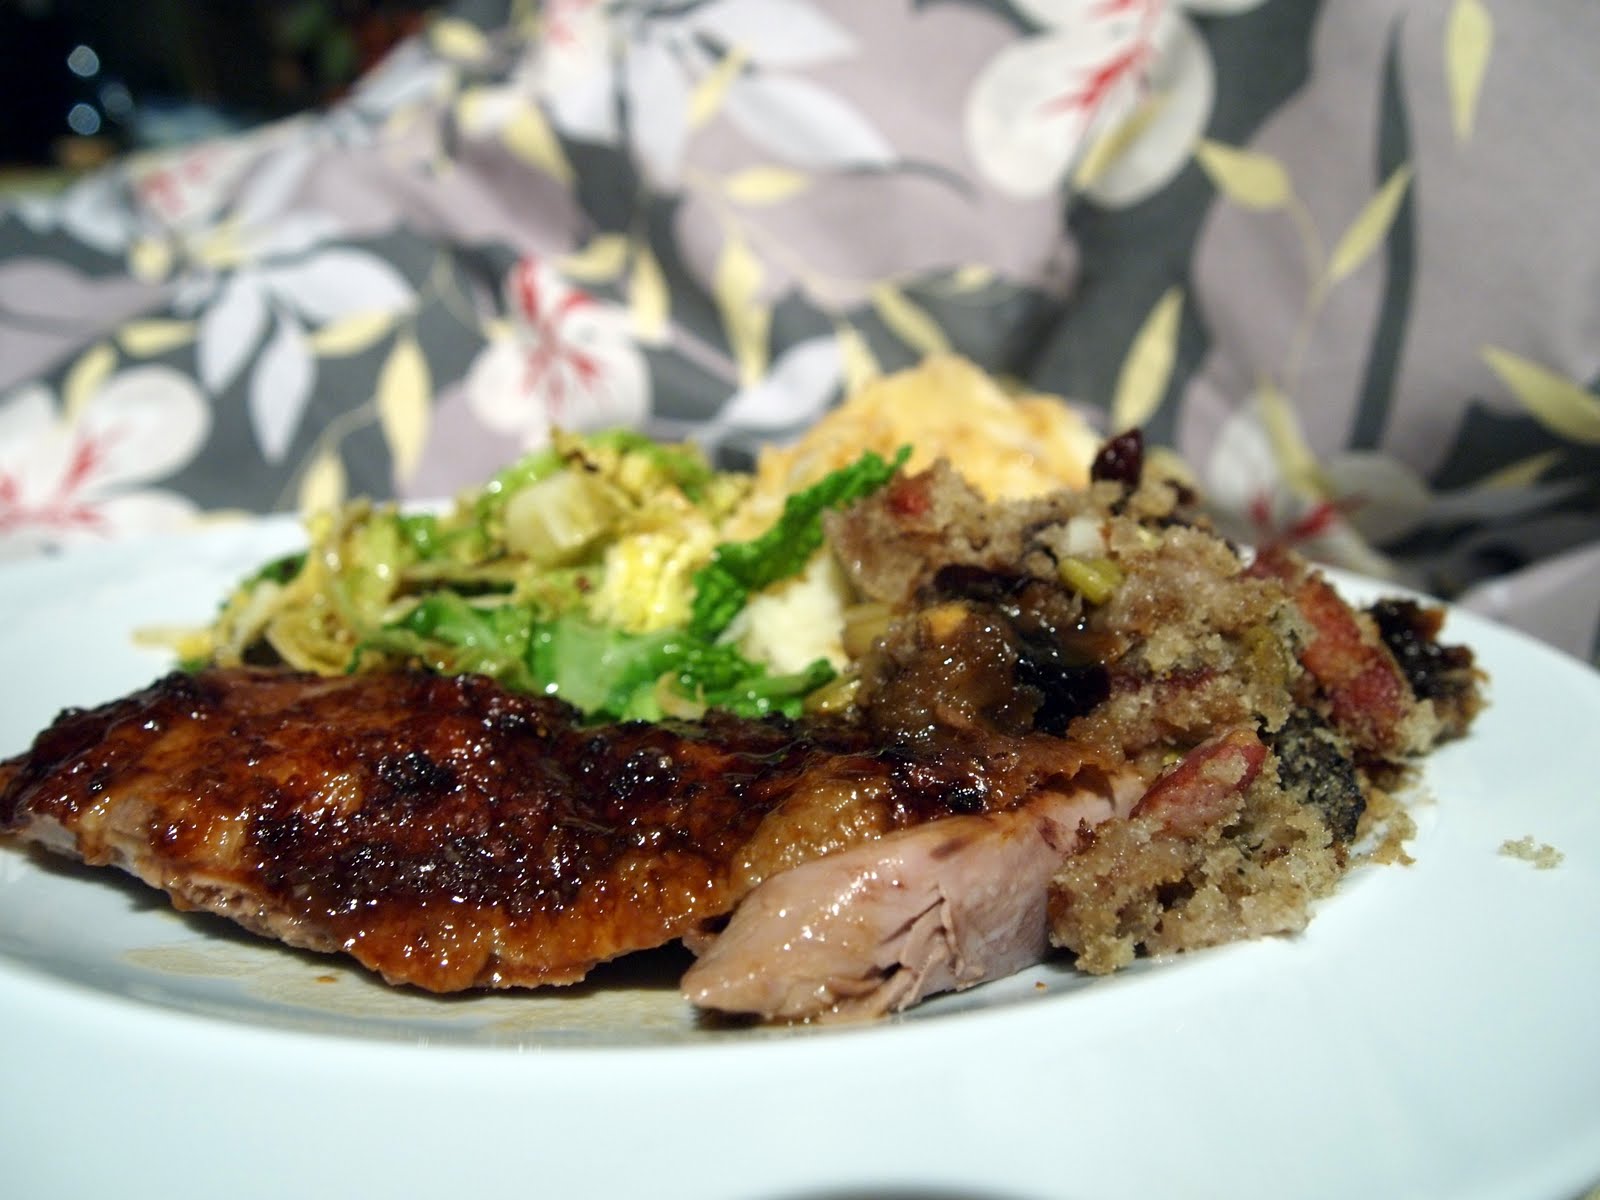
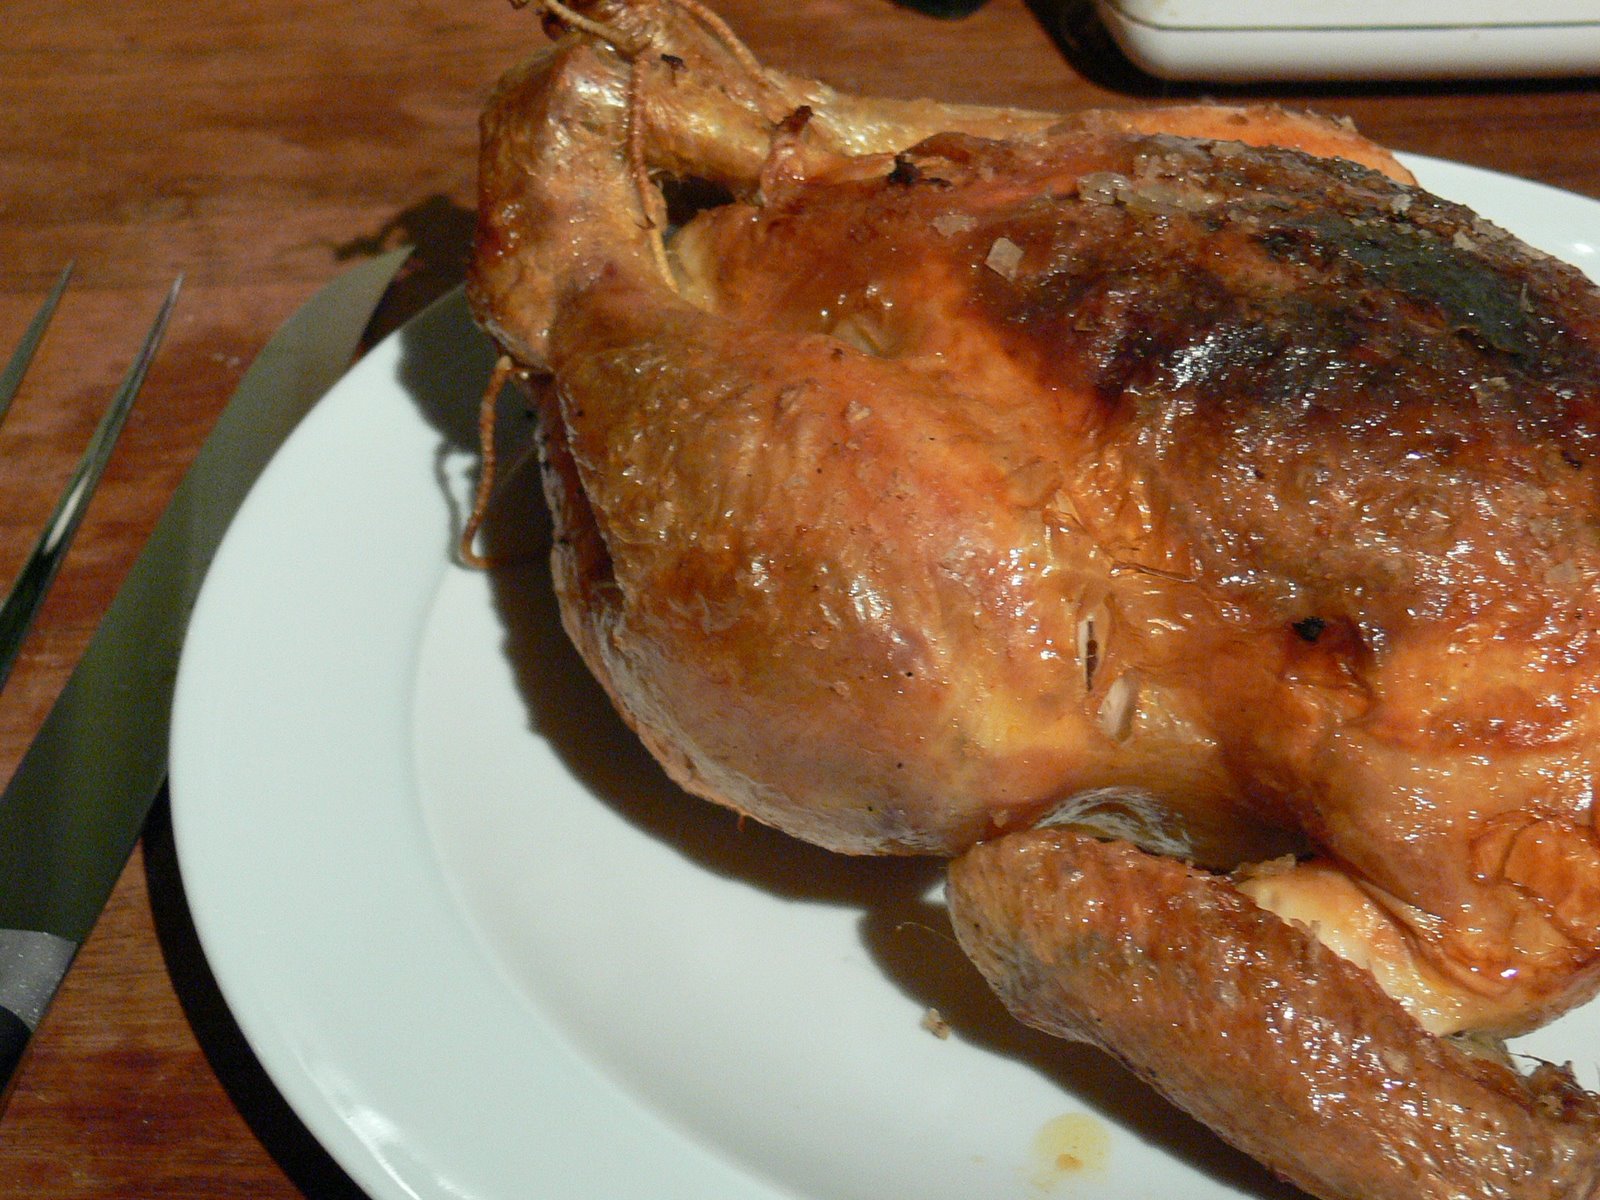
A goose this large will feed six or more, although you won’t have the great buckets of leftovers that turkeys generate. (All the better, to my mind.) And it turned out superbly; I’m not sure whether this goose or the obscenely juicy brined turkey from Christmas 2008 would win in a fight. Our goose was tender and moist, filled near unto bursting (you can see the straining of the gap where it was sewed shut in the picture) with one of the best stuffings I’ve ever made, all wrapped up in a golden, crispy skin. If you do end up cooking this for a family occasion, you’ll also find yourself the proud possessor of a massive tub of goose fat to pop in the fridge. My Mum suggested turning it into a fatball for the poor starving robins in the snow. I said pshaw, and chilled it in jam jars for future potatoes.

Geese were, of course, the upper-class Christmas comestible of choice in England until being supplanted by the filthy heathen turkey from America, which Dickens did a lot to popularise by putting one on the Cratchit’s table. Medieval swanks would spend a day’s wages on a fat goose (and they are fat, even if not raised for foie – be sure to remove the lumps of poultry fat from the body cavity before you begin cooking, and render them down in a pan over a low heat for the lovely drippings), which they would roast on a spit over a fire, the skin coloured with saffron in butter for a chi-chi golden tone. The goose tradition carried on until Dickens all but killed it with A Christmas Carol. These days, we all have ovens, and you can buy Heston’s gold leaf at Waitrose instead and poke at it gently all over the bird with a soft brush, if your family is the sort that really needs impressing, but I think the skin is perfectly golden enough if you cook it using the method below.

Potato stuffing is the perfect choice for a bird as fatty as a goose. Use a fluffy, floury potato; I chose King Edwards. The potato will soak up the bird’s delicious juices in a way that will astonish you, and takes on flavour from the sage, onion and pancetta it’s mixed with, which flavours also impregnate the flesh of the goose. A couple of sweet eating apples cut into small chunks and stirred into the mixture will collapse on cooking to give the whole stuffing a very gentle background sweetness which is glorious against the rich meat. Buy the best goose you can afford; the way your bird is raised, killed and butchered really does make a difference. We had a beautiful free-range goose, good-smelling even when raw, from Franklin’s Farm, which supplies my parents’ local farmers’ market.

To serve about six people you’ll need:

A goose weighing between 5 and 6kg
1 kg King Edward potatoes
100g pancetta
100g butter
3 onions
2 Granny Smith apples
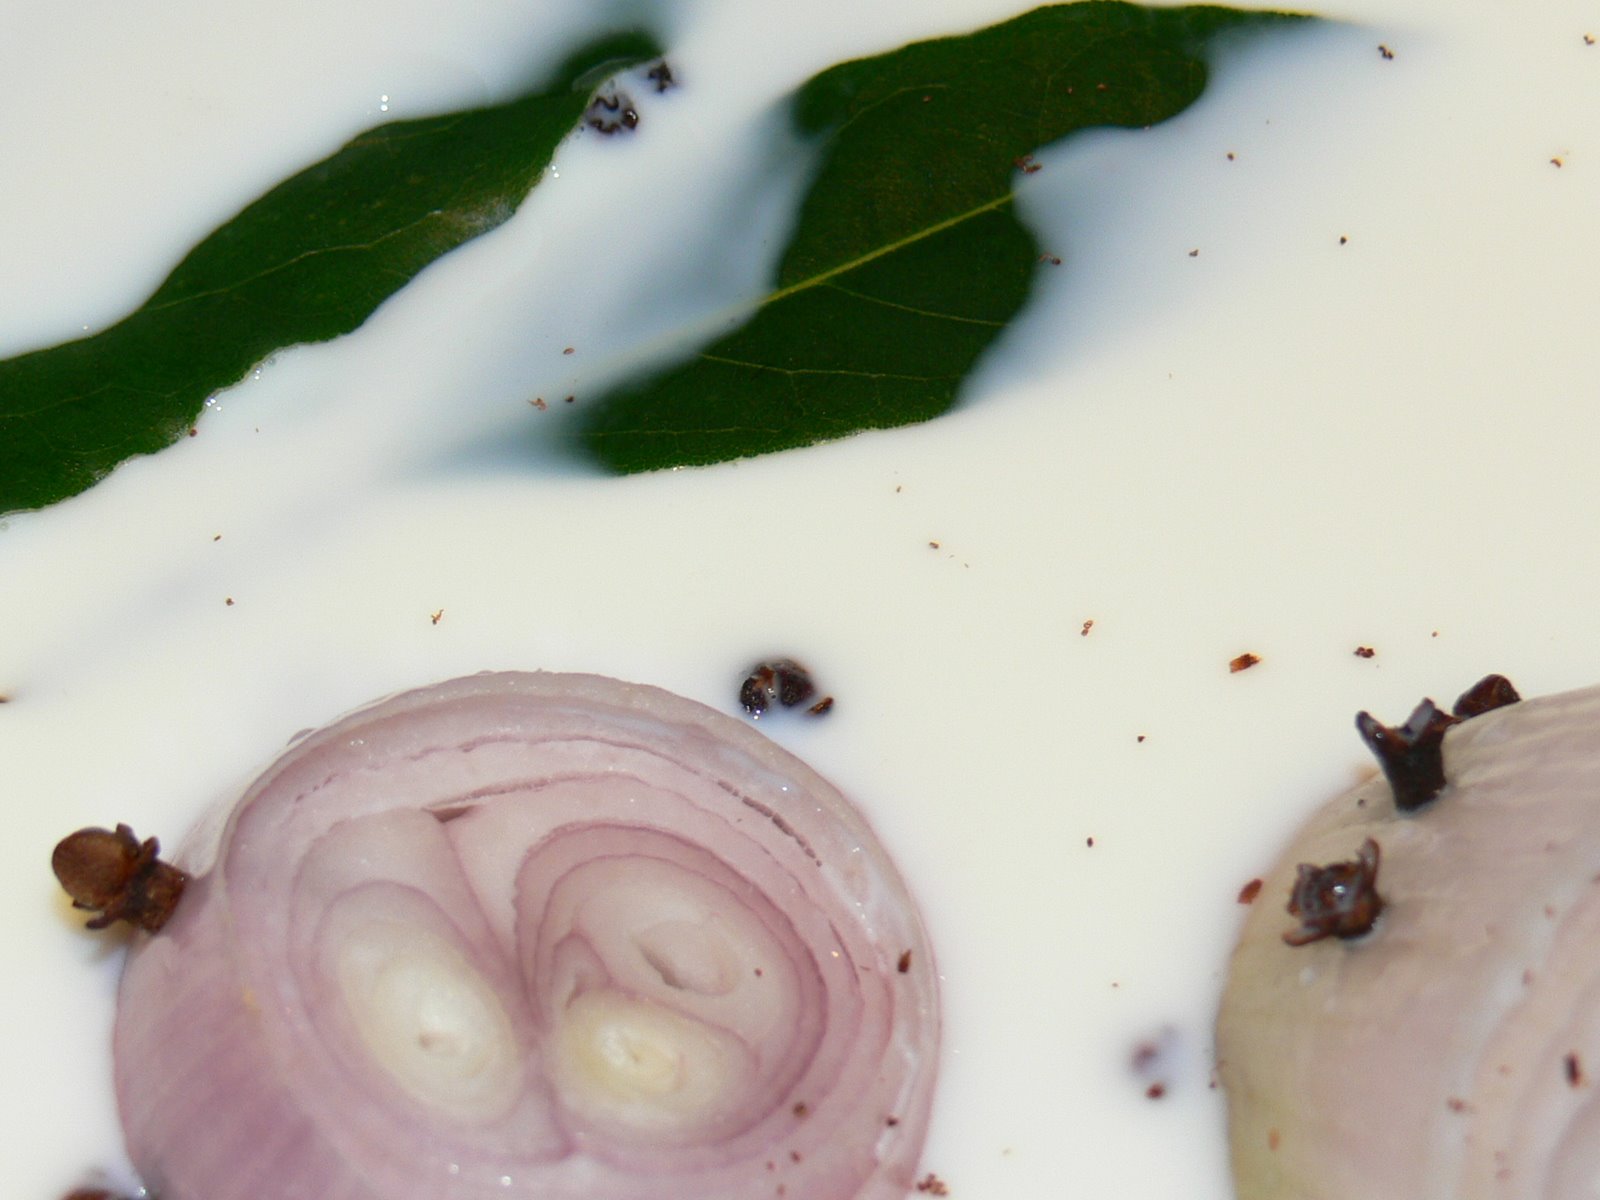
3 bay leaves
1 teaspoon thyme leaves
Leaves from 1 stalk fresh rosemary
1 large handful (about 25g) sage leaves, chopped finely
1 teaspoon salt

Sauteeing stuffing ingredients

Your goose should start off at room temperature, so make sure it’s out of the fridge for long enough to lose any chill.

Peel the potatoes, chop them into pieces about 1 inch square, and simmer them until soft (about ten minutes from the time they come to the boil if you start them off in cold water). While the potatoes are cooking, peel and core the apples, and chop them into small pieces. Peel and dice the onion.

Melt the butter in a large, heavy frying pan, and saute the onion, apple and pancetta together with the thyme and bay until the onion is soft and sweet, but not coloured (about 8 minutes – see the picture for the sort of texture you’re aiming for). Remove from the heat to a very large mixing bowl with the buttery juices.

When the potatoes are soft, drain them and add them to the mixing bowl with the rosemary, sage and salt. Stir the stuffing mixture well to make sure all the ingredients are blended.

Remove any poultry fat from inside the bird’s cavity – if you’re lucky there should be at least a couple of fist-sized white chunks in there. You can use scissors to snip it into pieces and dry-fry it over a low heat to render it down for a jar of goose fat for the fridge if you like. It goes without saying that you should remove the packet of giblets too – if you want giblet stock, simmer them without the liver (which does not make good stock) in some water. You can use that liver – my Dad and I have a bit of a tradition of chopping it up and cooking it along with some good curry paste in a little bowl sat in some water, covered with some tin foil, then spreading it on toast for Boxing Day breakfast.

Heat the oven to 225ºC.

Spoon all of the stuffing into the bird, and use stout cotton and a thick needle to sew the gap shut. If you can’t face it, you can also use skewers to secure it, but this will be much less neat. Weigh the stuffed bird and put it on a rack in a large baking tray.

Cook the goose at 225ºC for half an hour, then bring the heat down to 180ºC, taking the opportunity to pour off the fat that will have rendered out of the bird in that first hour – save it for spuds. After the initial 30 minutes at 225ºC, cook the goose at 180ºC for 30 minutes per kg stuffed weight, pouring off the fat regularly.

Check that the juices run clear by poking a skewer behind the thigh. The juices should run clear. Rest the goose for ten minutes before carving.

Roast rib of beef with red wine gravy

Roast rib of beef
Roast rib of beef, straight out of the oven

I’m blogging from my new MacBook Pro, an anniversary present from the inestimable Dr W. I’m still getting used to it; there are all kinds of PC keyboard shortcuts hard-wired into my brain that I’m having to relearn, and I don’t have any photo-editing software on here yet. In short, if anything looks a bit funny in today’s post, please be gentle with me – things should be better next week when I’ve got to grips with the various things the command button does!

Is there anybody out there who doesn’t love a big chunk of well-aged, grass-fed roast beef? This joint was a present from my in-laws, who have amazing taste in gifts. It’s from Lishman’s butcher’s in Ilkley, and had been sitting in the freezer for a few months, waiting for the weather to turn in a roasty direction.

If you’re not into turkey at Christmas, a beef rib is a fantastic substitution; it’s traditional but rather special, and there are very, very few Brits of a certain age out there who don’t have happy childhood memories of family occasions centred around a pre-BSE joint. To my mind, it’s the best of the roasting joints; the meat is rich and savoury from its proximity to the bone, and there’s a perfect amount of fat for lubrication and flavour in there. As a rule of thumb, you can count on each rib in the joint being sufficient to serve two people, so it’s easy to work out how large a chunk of meat to buy. I like to cook a rib nice and rare; if your uncle Bert likes his meat cooked until there’s not a trace of pink, just give him a slice from one end of the joint.

The gravy I served with this is a bit special; it’s intensely dense and savoury, and rich with the flavour of red wine and caramelised onion. Don’t use one of those undrinkable £3 bottles marketed as cooking wine here; while I don’t want you raiding the cellar for the Burgundy your Dad laid down in the 1980s, you should make this gravy with something you’d be happy to drink. If you can get hold of some real beef or veal stock made with a roasted bone, that’ll be fantastic here. The gravy has so much other flavour supporting it, though, that you can happily use some decent chicken stock instead. (And your freezer is full of home-made chicken stock, right?)

I served this with a huge, rustling pile of roast potatoes and parsnips, and a shredded spring cabbage sauteed in a little butter with some peeled chestnuts; these are all great for soaking up the gorgeous gravy. To roast a rib of beef rare (add five minutes per 500g if you want it medium, and ten if, for some unaccountable reason, you want it well-done), you’ll need:

Beef
A rib of beef
1 teaspoon salt
1 teaspoon mustard powder
1 teaspoon plain flour

Gravy
1 red onion
250ml red wine
1 tablespoon balsamic vinegar
300ml good beef or chicken stock
2 tablespoons plain flour
Juices from the joint
Salt and pepper to taste

Roast beef
Roast beef

Take the beef out of the fridge in plenty of time, so it’s at room temperature when you come to cook it. Preheat the oven to a blistering 240ºC (460ºF). Pat the joint dry with kitchen paper. Mix the salt, flour and mustard in a small bowl, and use your fingers to rub the mixture all over the fatty surface of the joint.

Put the beef in a roasting dish and slide it into the oven for an initial 20 minutes, then bring the temperature down to 180ºC (360ºF) and cook the joint for 15 minutes per 500g. (See timings above for a medium or well-done roast.)

While the rib is cooking, start on the gravy. Slice the onion finely, and fry it in a little beef dripping (goose fat is good if you don’t have any) until it starts to brown. Tip the balsamic vinegar into the pan and cook, stirring, until the onions start caramelising and the mixture becomes sticky.

Pour the red wine over the onions and bring to a simmer. Add the stock, bring back up to a simmer and allow the whole thing to bubble away gently with the lid on for half an hour. Remove from the heat, and strain the contents of the pan through a sieve into a jug. Discard the onions, which will have given up all their flavour, and leave the jug to one side until the beef is finished.

When the beef is ready to come out of the oven, remove it from the roasting pan to a warmed dish in a warm place to rest for 20 minutes, covered loosely with a piece of tin foil. This will give you time to finish up the vegetables and finish the gravy while the muscle fibres in the meat relax and the juices start to flow. Finish the gravy by putting the roasting pan you cooked the meat in on the hob over a medium flame. Sprinkle the flour into the pan and use a whisk to blend it well with any flavour-carrying fat from the joint. Pour a ladle of the stock from the jug into the pan and whisk away until everything is well blended, scraping at the sticky bits on the bottom. Repeat, a ladle at a time, until everything is combined, then return to a saucepan and simmer away without a lid for five minutes, stirring as you go, before tasting to adjust for salt and pepper, and transferring to a gravy boat just in time to serve up the whole roast.

Poulet Antiboise – Antibes roast chicken

Poulet Antiboise, crostiniI’m back from a week at Disneyworld, where I actually lost weight, which should tell you all you need to know about the food there. Shouldn’t complain; it’s not every week you get to accompany your husband on a work trip to somewhere with rollercoasters, but there is only so much deep-fried food a girl can take. I ended up subsisting on toffee apples; a surprisingly effective weight-loss regime. More on all that in a later post; it was, after all, the Epcot Food and Wine Festival while we were there, so I do have something besides churros and overcooked steaks to write about.

Back to the matter at hand. The only recipe I’ve ever seen for Poulet Antiboise comes from Elizabeth David’s A Book of Mediterranean Food. In that desert-island situation that never actually happens, but that we all like to fantasise about, Elizabeth David’s are the cookery books I’d rescue from the hold of my sinking ship – and I wouldn’t use them to make fires with. That fate is reserved strictly for that useless brick of a book from Prue Leith’s cookery school.

A Book of Mediterranean Food is David’s first book, and is now available (in the link above) in a hardback edition with her next two, French Country Cooking and Summer Cooking – well worth buying rather than the paperbacks, which tend to fall to bits if you use them much in the kitchen. These books were the fruits of her period living in France, Italy and Greece, and they ooze sunshine and good times. David’s style is unlike the very didactic recipe writing, full of precise times and measurements, that everybody uses these days (usually at the insistence of those reading and cooking from the recipes – a few years ago I decided to start specifying amounts of herbs in grammes rather than handfuls or sprigs, for example, after one too many worried emails asking me precisely how much basil you can fit in a fist). Her recipes are descriptive and give a clear idea of flavour and method, but without always giving particularly precise measurements, timings or even ingredient lists; all of which should leave you, the creative cook, with a world of experimentation and enthusiastic improvisation to enjoy over each dish.

This is a gorgeous recipe, where a chicken is buried in a giant heap of softened onions in a big casserole dish, then roasted until the onions collapse and make their own sauce with the chicken’s savoury juices, and served with typically Provençal flavourings. Rather than stirring olives into the sauce and serving the lot with fried bread triangles as in David’s original recipe, I’ve made a sort of deconstructed tapenade to spread on grilled crostini, which works a treat alongside the chicken’s richness. I’ve decreased the battleship-floating amount of olive oil that you’ll find in the original, added some shallots to the mix and added cooking times, temperature and a weight for your chicken below. I followed David’s original instruction to add a tablespoon or so of cream to the sauce at the end of cooking, but I’d encourage you to taste it first and decide whether or not you think it needs it; it’s just as good if you leave it out, so it’s not made it into the ingredient list below. Some French sautéed potatoes are a great accompaniment to this dish.

To roast one chicken, you’ll need:

1 roasting chicken, about 1.5kg
6 large onions
5 shallots
3 tablespoons olive oil
1 heaped teaspoon cayenne pepper
Salt and pepper
10 slices from a ciabatta
5 anchovy fillets
2 heaped tablespoons capers, drained
15 black olives, stoned (I like Greek dry roasted olives that come in a jar, like Crespo, for this recipe – additionally, they’re wonderfully cheap)
100g stupendous tomato sauce or sundried tomato paste
A handful of parsley. Ha. Take that, measurement emailers.

Poulet Antiboise
Poulet Antiboise, immediately on emerging from the oven

Preheat the oven to 180ºC (370ºF). Ferret around inside your chicken and remove any lumps of poultry fat, seasoning it inside with plenty of salt and pepper. Leave it to come to room temperature while you prepare the onions.

Slice the onions and shallots thinly, and sauté them with the cayenne pepper in the oil until soft but not coloured in a heavy-based pan large enough to take the chicken. I use a 29cm oval Le Creuset number which is perfect for pot-roasting a chicken. They’re pricey, but well worth asking for as a Christmas present; mine gets an awful lot of use.

Remove the pan from the heat and add the chicken, burying it upside-down in the onions, which should smother it completely. Put the lid on and roast for 90 minutes (you don’t need to check or baste the chicken while it’s cooking), by which time the chicken will be cooked through and tender, and the onions will have collapsed.

While the chicken is cooking, prepare your tapenade. Chop the capers and olives roughly. In a small frying pan, fry the anchovies with a teaspoon of olive oil, poking occasionally with a wooden spoon until they have “melted”. Add the capers and olives to the pan and sauté for a few minutes to meld the flavours. Remove to a bowl.

Grill the slices of ciabatta and shortly before serving, spread each slice with a teaspoon of tomato sauce and a teaspoon of the tapenade. Sprinkle with parsley and serve alongside the chicken.

Crackling pork belly with celeriac and tomato

Pork belly on celeriacWhere other children were visited by fairy godmothers bearing gifts of grace and beauty; the art of detecting peas beneath mattresses; the ability to walk in high heels for more than five yards without getting one stuck in the space between two pieces of pavement; and all that glamorous jazz, mine found that her bag was empty but for the gift of making really terrific crackling. (Seriously. It wins competitions and everything.)

I’m not complaining. It’s better than it could have been; I’ve one friend who swears her only skill is the tidy folding of a broadsheet newspaper once read.

This recipe is reliant on your getting your hands on a really good piece of pork belly, properly reared, and striped thickly with fat. It doesn’t matter whether your piece has attached bones or not, but do try not to use a supermarket slab of meat; the flavour will be much better with a butcher’s belly from a pig raised responsibly, and you’ll probably find the joint will be drier, crackling more effectively. Cooked slowly for several hours, the pork bastes itself from within, leaving you with a gorgeously dense, flavoursome and moist finish.

I’ve used the tomato sauce than I made in a few enormous batches and froze at the end of the summer here, with some additional cream and herbs. If you don’t have any sauce you’ve made and frozen yourself, substitute with a good sun-dried tomato sauce in a jar.

To serve four, you’ll need:

1.5kg pork belly
1 small handful thyme stalks (about 20g, if you’re counting)
1 small handful fresh rosemary
4 bayleaves
100g stupendous tomato sauce, or sun-dried tomato sauce in a jar
3 tablespoons double cream
1 medium celeriac (larger celeriacs can be woody)
1 large handful parsley
2 banana shallots
1 tablespoon butter
Plenty of salt and pepper

Preheat the oven to 140ºC (290ºF). Make sure the skin of the pork is scored properly in regular lines penetrating into the fat but not into the meat, and that it is absolutely bone-dry. Rub the pork all over with a couple of teaspoons of salt, making sure that plenty gets into the scored lines on the skin. Season with pepper, and sit the belly in a roasting pan on top of the thyme, bay and rosemary, reserving a bayleaf and a stalk of the thyme and rosemary to use in the sauce later.

Put the roasting pan in the middle of the oven, close the door and ignore the pork for four hours. Towards the end of the cooking time, cut your celeriac in quarters, peel them with a knife (this is far easier than trying to peel a whole celeriac), and grate them on the coarse side of your box grater. Slice the shallots finely and mix them with the grated celeriac in a bowl.

When the pork has had four hours in the oven, the top will have softened but not crackled. Still in the roasting dish, put the pork about four inches beneath a hot grill. The skin will start to bubble and crackle. Keep an eye on things; once crackled, the skin can burn easily. If you find that one side of your joint is crackling and ready before the other, put a piece of tin foil over the area that has crackled to prevent it from burning. Once the crackling is even, remove the dish from the grill and leave it to rest in a warm place while you prepare the sauce and celeriac.

Sauté the celeriac and shallots in the butter for about eight minutes until soft and sweet. Stir through the parsley and season with salt and pepper. While the celeriac is cooking, bring the tomato sauce up to a gentle simmer with the herbs you reserved earlier, then stir through the cream with any juices from the pork.

Pop a pastry cutter onto each plate, and use it as a template for a serving of celeriac. Top off with some of the herby, velvety pork meat, and a generous slab of crackling. Spoon over some of the sauce and serve.

Roast duck with prune and pancetta stuffing

If you ever find yourself doing a Christmas dinner for just two people, you’ll find you could do a lot worse than to roast a duck. It must be the weather and the dark evenings, but I’ve got a lot of time for some of the more Christmas-tending ingredients at the moment, which is how I came to stuff this bird with prunes, pancetta and allspice, alongside some Savoy cabbage lightly sautéed in bacon fat with chestnuts fried to a crisp on the outside (very easy – use vacuum sealed chestnuts or roast your own, fry them in bacon fat until gold and starting to crisp on the outside, then throw in the cabbage, stirring for a few minutes until it’s all wilted and coated with fat), a great mound of mashed potatoes spiked with nutmeg, and a cherry and port gravy. Apologies for the picture quality. I’d been at the port.

If you are feasting, one medium-sized duck split between two people makes a spectacular and plump-making meal. The bird might look big when you buy it, but it’ll lose a lot of mass when you roast it and its layers of fat render off. A duck’s breasts are also much less muscular than a chicken’s, so there will be less meat than you might expect – but you will end up with a nice big jar of duck fat that you can put in the fridge when you’ve finished, so it’s not all bad.

I’ve stuffed the bird’s cavity with a sweet and spicy breadcrumb mixture. It looks a bit dry when you pack it into the duck, but the bird will baste the stuffing with fat and juices as it roasts, and you’ll find you have a savoury and tender stuffing at the end of the cooking time. We ate the lot in one go. This is a special meal for a special occasion – but I found that it’s also perfect for an ordinary winter’s Wednesday night when you’re feeling all loved-up.

To serve two, you’ll need:

Duck and stuffing
1 medium duck with giblets
100g soft white breadcrumbs
10 soft prunes
10 spring onions
150g pancetta cubes
1½ teaspoons ground allspice
A generous amount of salt

Gravy
Duck giblets
500ml water or good chicken stock
200ml port
200ml cherry juice
1 tablespoon plain flour
1 tablespoon soft butter
A grating of nutmeg
Salt

Preheat the oven to 220°C. Remove the giblets from the inside of the duck along with any poultry fat in the cavity – you can just pull the fat away from the body using your fingers. Use it to make gratons for a cook’s treat if you fancy.

Saute the pancetta cubes (use lardons of bacon if you can’t find any pancetta) in a dry pan until they have given up their fat and are turning crispy. In a mixing bowl, stir the cooked pancetta, with any fat, into the dry breadcrumbs, and add the raw spring onions, chopped small, with the prunes, quartered, and the allspice. You won’t need any salt; there is plenty in the pancetta.

Stuff the mixture into the cavity of the duck, packing it in firmly, and seal the open end. Some sew their ducks up; I like to use a few toothpicks to keep the cavity closed, which is quicker and less messy.

Prick the duck’s skin all over with a fork, rub the whole bird with about a tablespoon of salt and put on a rack in a roasting tin. (The rack is there to stop the duck from sitting and cooking in its own fat. If your rack is a very shallow one, be prepared to drain the fat from the bird a couple of times as it cooks.) Put in the hot oven, turning the temperature down to 180°C after 20 minutes. Continue to roast for an additional 35 minutes per kilo (15 minutes per pound). Rest for 15 minutes in a warm place, uncovered, before carving.

While the duck roasts, prepare the gravy. Begin by making a giblet stock (I used a home-made chicken stock as the base for the giblet stock, which might be overkill, but it did taste fantastic) by simmering the giblets very gently in 500ml water or good chicken stock for 1 hour in an open, medium-sized saucepan, skimming off any scum that rises to the top. Strain the resulting stock – it should have reduced by about a quarter.

Add the cherry juice and port to the saucepan, and bring the heat up a bit – it should be chuckling rather than giggling. Reduce the mixture in the pan by about half. When the duck comes out of the oven to rest, mix the flour and butter together until you have a smooth paste, and whisk it into the gravy in the pan over a medium flame. Keep whisking until the gravy becomes thicker and glossy. Grate over some nutmeg and taste for salt and pepper.

The duck will have a crisp skin and a light, savoury spiced stuffing. Slosh the gravy all over your plate and get tucked in.

Garlic butter roast chicken

I’m back in Portland for the week (and I’m spending the next few weeks in the US too, so look forward to some restaurant reviews). I’ve a couple of recipes from last week to post, and in the meantime I am applying myself assiduously to Portland’s fantastic cafés, in order that I can supply those of you who visit the city with a good round-up of places to pootle around in an intellectual fashion, getting caffeinated and taking advantage of free wireless internet.

Anyway. The chicken. This is a chicken flash-cooked at a very high temperature with a garlic butter under the skin. This technique results in a moist, juicy bird which you don’t need to baste or turn, and a gorgeously crisp, garlicky skin. The pan juices are fantastic for making a gravy with, but they’re also delicious just drizzled over the carved chicken as they are.

The cooking time below will be good for a bird weighing about 1.5kg (3lb) – enough to serve three or four people. To roast one chicken, you’ll need:

1 chicken weighing about 1.5kg
5 large, juicy cloves of garlic
Zest of 1 lemon
125 g softened salted butter
2 tablespoons finely chopped parsley
1 tablespoon olive oil
Salt and pepper

Preheat the oven to 230°C (450° F). Crush the garlic (I used something called a Garlic Card – a little grating device the size of a credit card which my mother-in-law Santa gave me for Christmas), zest the lemon and chop the parsley, and blend them with the butter using the back of a fork.

Starting at the neck of the chicken, use your fingers to loosen the skin from the breast. You should be able to separate it from the flesh by pushing with your fingertips until you’ve made a pocket that covers the whole breast. Take the softened garlic butter mixture and push it into the pocket you’ve made, making sure it covers the breast evenly. Reserve two teaspoons of the butter, and push them into the space between the bird’s legs and body. Salt the outside of the bird generously and drizzle it with olive oil.

Put the chicken on a baking tray high in the hot oven, and roast for one hour. Check that the chicken is cooked by pushing a skewer into the fattest part of the bird, just behind the thigh. The juices should run clear; if they are still pinkish (which is highly unlikely), roast for another ten minutes and repeat the test.

Rest the bird for ten minutes before carving. I served this with Pommes Sarladaise, a wonderful garlicky French potato dish – watch this space for the recipe!

Cranberry sauce and bread sauce

These two sauces, one American and one thoroughly, thoroughly English, are an essential part of my Christmas dinner – it’s just not Christmas without them. Cranberries are incredibly tart when raw, and I consider them pretty inedible (despite the Finnish habit of eating them raw, with shaved ice and caramel). This recipe is very easy, and it transforms them; cooked until they pop with sugar and a lovely lemony liqueur, a lot of the bitterness vanishes. The sauce is the perfect accompaniment to your turkey or goose on Christmas day, or to some Christmas Eve ham.

If your only experience of bread sauce so far is the stuff you reconstitute from a packet, you are likely to have read the title of this post, pulled a face and sworn never to make it yourself. You’ll be missing a treat – made properly, it’s a creamy, fragrant cloud that you’ll find yourself slathering all over a good roast dinner, potatoes and all. The trick is in infusing the milk with aromatics like bay, shallots and plenty of cloves for a good long time, so that the sauce is rich with flavour. (A bad bread sauce is a bland nightmare.) I make this year-round, and it’s great with any roast poultry or game birds. It’s also extremely good cold as part of a Boxing Day leftovers sandwich.

The cranberry sauce can be made well in advance, and keeps for weeks, covered, in the fridge. All the preparation for the bread sauce (setting the milk to infuse, making the breadcrumbs) can be done the night before you eat, which means that you won’t be in such a rush to pull the different elements of your meal together on Christmas Day.

To make the cranberry sauce you’ll need:

350g raw cranberries
200g sugar (granulated or caster)
30ml Limoncello liqueur
zest of 1 lemon
60ml water

This is hopelessly easy. Just stick all the ingredients in a small saucepan, bring to a brisk simmer and cook for 10-15 minutes, until all the cranberries have popped. You’ll be able to hear the individual berries pop as they heat up, which is somehow rather pleasing. The cranberries are full of pectin, so the sauce will solidify as it cools. Keep it in the fridge until you need it, and stir through briskly before serving so it doesn’t look like a chunk of jelly.

To make the bread sauce, you’ll need:

1l full-fat milk
200g fresh breadcrumbs (just put 200g of crustless white bread in the food processor and whizz)
3 bay leaves
1 sprig thyme
2 shallots
20 cloves
10 black peppercorns
100g salted butter
100ml double cream
1 teaspoon salt

Cut the shallots in halves and press the cloves into them. Put them in a large saucepan with the milk, bay leaves, thyme, peppercorns and salt. Warm the milk to the barest simmer – the milk should be shuddering rather than bubbling. Remove from the heat, cover the pan and leave it in a warm place overnight. (I put mine on top of the boiler.)

About an hour before you plan to eat, sieve the solid ingredients out of the milk and return the liquid to the pan. Bring to a gentle simmer and stir in the breadcrumbs and cream. Remove from the heat again and lay a piece of cling film right on top of the sauce (this stops it forming a skin). The breadcrumbs will swell with the milk, stiffening the sauce. When you are ready to serve the bread sauce, bring it up to a simmer again and stir in the butter. Taste for seasoning, adding more salt if you think it needs it.

Roast turkey

Only twelve months early for your Christmas turkey, and eleven months early for your Thanksgiving turkey, here’s a roasting technique that will make even the most fibrous, leaden bird a moist, crisp-skinned joy. (Not that this one started out either fibrous or leaden – Dr W’s parents bought it from Lishman’s in Ilkley, which is one of those butchers that has almost as many awards as they do pork chops on display – and with good reason. This was a beautiful turkey.)

Turkey is a troublesome meat. It seems that whoever designed the bird constructed it to be difficult and dry – the fibres in the meat are very long and can tend towards stringy; and any bird this large (ours was 14 pounds, which is heavier than both of my cats put together) is at risk of drying out while you try to make sure it’s cooked through. There are, however, some features of the turkey which make it really worth cooking at least once a year, not least its fantastically delicious skin, which, if cooked like this, will turn mahogany-brown, caramelised and crisp. I caught several members of the family peeling skin off the carcass and eating it standing up in the kitchen, which is always a good sign. The bird’s liver is also excellent. It’s rich and creamy, and is really worth saving to enrich your gravy with (of which more later).

So what’s the trick to achieving a moist flesh and crisp skin? It’s as easy as anything – remember that post from 2008 about my experiments with brining? I scaled things up from the jointed chickens I’d been working with earlier, and brined the whole turkey in a savoury, Christmas-y, spicy mixture for two nights. You’ll need a big vessel to do this in. I bought a cheap dustbin from the hardware store, and thought I was being original and clever until Dr W’s Dad, whose own father was a butcher, said that bins were the brining vessels of choice when he was a boy in his Dad’s shop, helping to brine huge cows’ tongues. There’s nothing new under the sun. The really good news about the brining is that it makes the flesh so moist you won’t have to turn the turkey onto its breast partway through cooking. (Anybody who has ever tried to turn a searingly hot turkey partway through cooking will be punching the air with joy on reading this.)

Put your turkey in the brine two nights before you plan to cook it. This amount of brine should be sufficient to cover turkeys up to 20+lb – and if you’re cooking a turkey bigger than that, I have news for you. That’s not a turkey. It’s a pterodactyl. Ours was 14lb, and was submerged nicely. To make the brine, you’ll need:

9 litres cold water
325g salt
300g sugar
Zest and juice of 1 lemon, 1 lime and 1 orange
4 tablespoons cider vinegar
8 tablespoons maple syrup
8 tablespoons honey
1 large onion, grated
1 large knob ginger, grated
6 cloves garlic, squashed
1 handful each oregano, parsley, tarragon, chives, ripped and squashed with your hands
10 peppercorns, crushed
2 teaspoons fennel seeds, ground in mortar and pestle
1 large tin pineapple in juice, crushed with masher

For the inside of the bird, the glaze and the giblet stock you’ll need:

1 large onion
1 lime
1 tangerine
1 lemon
200g salted butter plus a tablespoon for frying the liver
4 tablespoons maple syrup
giblets from the turkey
1 shallot
1 carrot
1 bay leaf
1 tablespoon flour
1 glass red wine
salt and pepper

Combine all the brine ingredients in your carefully cleaned bin, and stir with a wooden spoon until all the salt and sugar have dissolved. The pineapple is important. It has an enzymatic action on the protein of the turkey, making the flesh softer and more moist – it also tastes fantastic. Lower the turkey in carefully (don’t drop it in – it’ll splash and you may tear the skin) and leave the bin, covered with a sheet of cling film and its lid, in a cold place until the morning you want to cook it. Outside the back door should be fine in cold December, unless you live in an area with foxes, in which case the coldest part of the garage is probably preferable.

Turkey, brined or otherwise, is at its best when cooked quickly. Don’t stuff the bird (not even the neck) – this will just make the cooking time unacceptably long. I’ll be providing a recipe for stuffing cooked separately later this week.

Remove the turkey from the brine two hours before you intend to cook it to allow it to come to room temperature. Push a quartered large onion, a halved lime, a halved tangerine and a halved lemon into the bird’s cavity. Preheat the oven to 220°C (430°F) when you are ready to start cooking, and make a stock by simmering all the giblets except the liver (which you should save in a bowl until you make the gravy) in a litre of water in a covered pan with some salt, a halved shallot, a peeled carrot and a bay leaf while you cook the turkey. Melt together 200g of salted butter and 4 tablespoons of maple syrup, and use the mixture to baste the turkey before it goes into the oven. Cook at this high temperature for 30 minutes. The turkey should already be turning golden brown. Baste again, cover with tin foil, and lower the temperature to 180°C (350°C), basting every twenty minutes or so with the butter and maple syrup mixture. For the last 15 minutes of cooking, remove the foil and baste again.

Cooking times for different weights of turkey are as follows:

  • 5lb – 1½ hours
  • 8lb – 1¾ hours
  • 10lb – 2 hours
  • 12lb – 2½ hours
  • 15lb – 2¾ hours
  • 17lb – 3 hours
  • 20lb – 3½ hours
  • 25lb – 4½ hours

Poke with a skewer behind the thigh joint to make sure the bird is done (if it is, the juices will run clear – nay, spurt, if you’ve brined it – they should not be pinkish), and rest the finished bird for 20 minutes before serving. This will give you time to make the gravy. Sauté the liver in a tablespoon of soft butter until it is just cooked, and use the back of a spoon to push it through a sieve into a bowl. Skim all but a few tablespoons of fat from the pan juices from the turkey and discard, and with the roasting pan on a low heat on the hob, whisk the flour into the remaining fat and the meat juices. When the flour is blended with the fat, tip in the wine and whisk as it bubbles up. Add a couple of ladles of the giblet stock until the gravy is the texture you want, then whisk in the sieved liver. Add any more juices which have come from the resting turkey, and season to taste.

Over this week, I’ll be posting all the trimmings you need to go with your Christmas dinner – bread and cranberry sauces, stuffing balls, chipolatas in pancetta, some really fantastic roast potatoes and (cough) sprouts. I realise it’s early in the year, but these are all fantastic with roasts year-round, they’re fresh in my mind, and you have a bookmark button if you want to save all this to read for Christmas 2009.

Roast buttered chestnuts

Roast chestnuts – another truly seasonal ingredient. When I was a kid, they were a real treat. We bought them in paper twists from the man with a roasting cart outside the British Museum, we gathered them in the woods to roast them in the oven at home, and once, excitingly, we roasted them on a coal shovel in the fireplace, one chestnut left unpricked so it exploded like a violent kitchen timer to tell us when it was ready.

Now, chestnuts just roasted in their skins and eaten immediately are delicious. But an Italian friend at university taught me to sauté the peeled chestnuts in butter and sprinkle them with coarse salt after roasting, and it’s now far and away my favourite way to prepare them. The butter kicks up the flavour a notch, the sautéing does wonderful things to the chestnuts’ texture, and a scattering of coarse salt (I used a French fleur de sel) is the perfect contrast to the sweet, fluffy flesh of the chestnuts.

If you’re stuck in the UK, you’re likely to be stuck with the English chestnut, which has a papery pith inside the shell, covering the nut. It’s a pest to remove, and is easiest to take off while the chestnuts are still very hot – this is easiest to deal with if you are one of the asbestos fingered fraternity. It’s great if you can find someone to help you peel – it gets the job done faster, so you can get to the chestnuts when the piths will still come away easily.

The Chinese chestnut, a little smaller than the English variety, has no inner pith, and we ate them by the bushel-load when I was a kid in Malaysia. They’re a lovely chestnut – if you can find some where you are, grab plenty and freeze some – all raw chestnuts freeze well. In the USA this pithless Asian variety has been hybridised with the sugary American variety, so you can buy big, fat, achingly sweet chestnuts without any papery pith. I hope British growers will cotton on to this trick soon – they’re appallingly good. When you buy your chestnuts, try to find some which are plump and glossy. They lose moisture and flavour quickly, so it’s a good idea to either freeze them until you’re ready to cook them or to cook them as soon as you get them home.

To roast and sauté enough chestnuts (of whatever variety you choose) to serve four, you’ll need:

1kg fresh chestnuts
2 large tablespoons butter
2 teaspoons salt to sprinkle

Preheat the oven to 200°C (400°F). While the oven is warming, cut a cross in the flat side of each chestnut with a sharp knife – try to pierce the skin without cutting into the flesh. This is very important – an unpierced chestnut will explode when it cooks, so make sure you don’t miss any!

Arrange the chestnuts on baking sheets and roast for 25 minutes. Start to peel as soon as you can bear to touch them (this way it will be easier to remove the pith) and set the peeled chestnuts aside.

Melt the butter in a large frying pan and throw the peeled chestnuts in when it starts to bubble. Saute, keeping the nuts on the move, until all the butter is absorbed and any crumbly bits of nut are turning gold and crisp (about 5 minutes). Turn out into bowls and scatter salt over. Serve immediately.

Spiced parmesan parsnips

One of my very favourite Delia Smith recipes is this lovely way with roast parsnips, where she tosses them in grated parmesan and flour before cooking. My Grandma used to make Delia’s parsnips every Christmas, and there was always a fight over who got the last few.

It’s funny, really; in the UK, parsnips are a very ordinary accompaniment to a roast dinner, a slightly posh vegetable to be rolled out only on Sunday lunchtimes. Elsewhere in the world, the parsnip is considered more appropriate for feeding animals than people. Part of this is down to our climate. Parsnips need exposure to frost for their flavour to be fully developed, so in warmer places the parsnip is a less impressive beast, weedy and comparatively flavourless – hence the French tendency to feed them to pigs rather than people.

This is my version of the Delia recipe my Grandma used to cook. I’ve changed the fat used – you’ll get a much better crisp using dripping, and the flavour you’ll achieve with a good butcher’s pot of beef dripping is amazingly good if you serve these next to roast beef . I’ve also upped the ratio of parmesan and added some curry powder (always unbelievably good with a parsnip) and lots of lemon zest and fresh basil, which lifts the whole dish. Result: crunchy, savoury parsnips, sweetly fluffy inside and amazingly crisp outside – and so delicious you too will be fighting over the leftovers.

To serve eight with a roast, you’ll need:

1.25kg parsnips
175g plain flour
100g parmesan, grated finely
1 tablespoon medium curry powder (I like Bolst’s)
Grated zest of 2 lemons
1 heaped teaspoon salt
3 large tablespoons beef dripping
3 tablespoons chopped fresh basil

Preheat the oven to 200°C (400°F). Put a heavy roasting dish containing the dripping in the oven as it heats up. Combine the flour, parmesan, curry powder, salt and lemon zest in a large mixing bowl. Peel the parsnips and cut them in half across their width. Cut the top half of each parsnip into four long pieces, and the bottom half into two.

Cook the prepared parsnips in boiling water for five minutes. Remove the saucepan from the heat and drain the parsnips a few at a time, rolling the steaming-hot parsnips in the flour mixture and setting aside on a plate. When all the parsnips are coated thoroughly, remove the roasting dish from the oven and arrange the parsnips in the hot fat (careful – it may spit). Put the dish of parsnips high in the oven for 20 minutes, turn the parsnips and put back in the oven for another 20 minutes.

When the parsnips are ready, they’ll be a lovely golden colour. Remove them to a serving dish and sprinkle generously with basil.