Poulet Antiboise – Antibes roast chicken

Poulet Antiboise, crostiniI’m back from a week at Disneyworld, where I actually lost weight, which should tell you all you need to know about the food there. Shouldn’t complain; it’s not every week you get to accompany your husband on a work trip to somewhere with rollercoasters, but there is only so much deep-fried food a girl can take. I ended up subsisting on toffee apples; a surprisingly effective weight-loss regime. More on all that in a later post; it was, after all, the Epcot Food and Wine Festival while we were there, so I do have something besides churros and overcooked steaks to write about.

Back to the matter at hand. The only recipe I’ve ever seen for Poulet Antiboise comes from Elizabeth David’s A Book of Mediterranean Food. In that desert-island situation that never actually happens, but that we all like to fantasise about, Elizabeth David’s are the cookery books I’d rescue from the hold of my sinking ship – and I wouldn’t use them to make fires with. That fate is reserved strictly for that useless brick of a book from Prue Leith’s cookery school.

A Book of Mediterranean Food is David’s first book, and is now available (in the link above) in a hardback edition with her next two, French Country Cooking and Summer Cooking – well worth buying rather than the paperbacks, which tend to fall to bits if you use them much in the kitchen. These books were the fruits of her period living in France, Italy and Greece, and they ooze sunshine and good times. David’s style is unlike the very didactic recipe writing, full of precise times and measurements, that everybody uses these days (usually at the insistence of those reading and cooking from the recipes – a few years ago I decided to start specifying amounts of herbs in grammes rather than handfuls or sprigs, for example, after one too many worried emails asking me precisely how much basil you can fit in a fist). Her recipes are descriptive and give a clear idea of flavour and method, but without always giving particularly precise measurements, timings or even ingredient lists; all of which should leave you, the creative cook, with a world of experimentation and enthusiastic improvisation to enjoy over each dish.

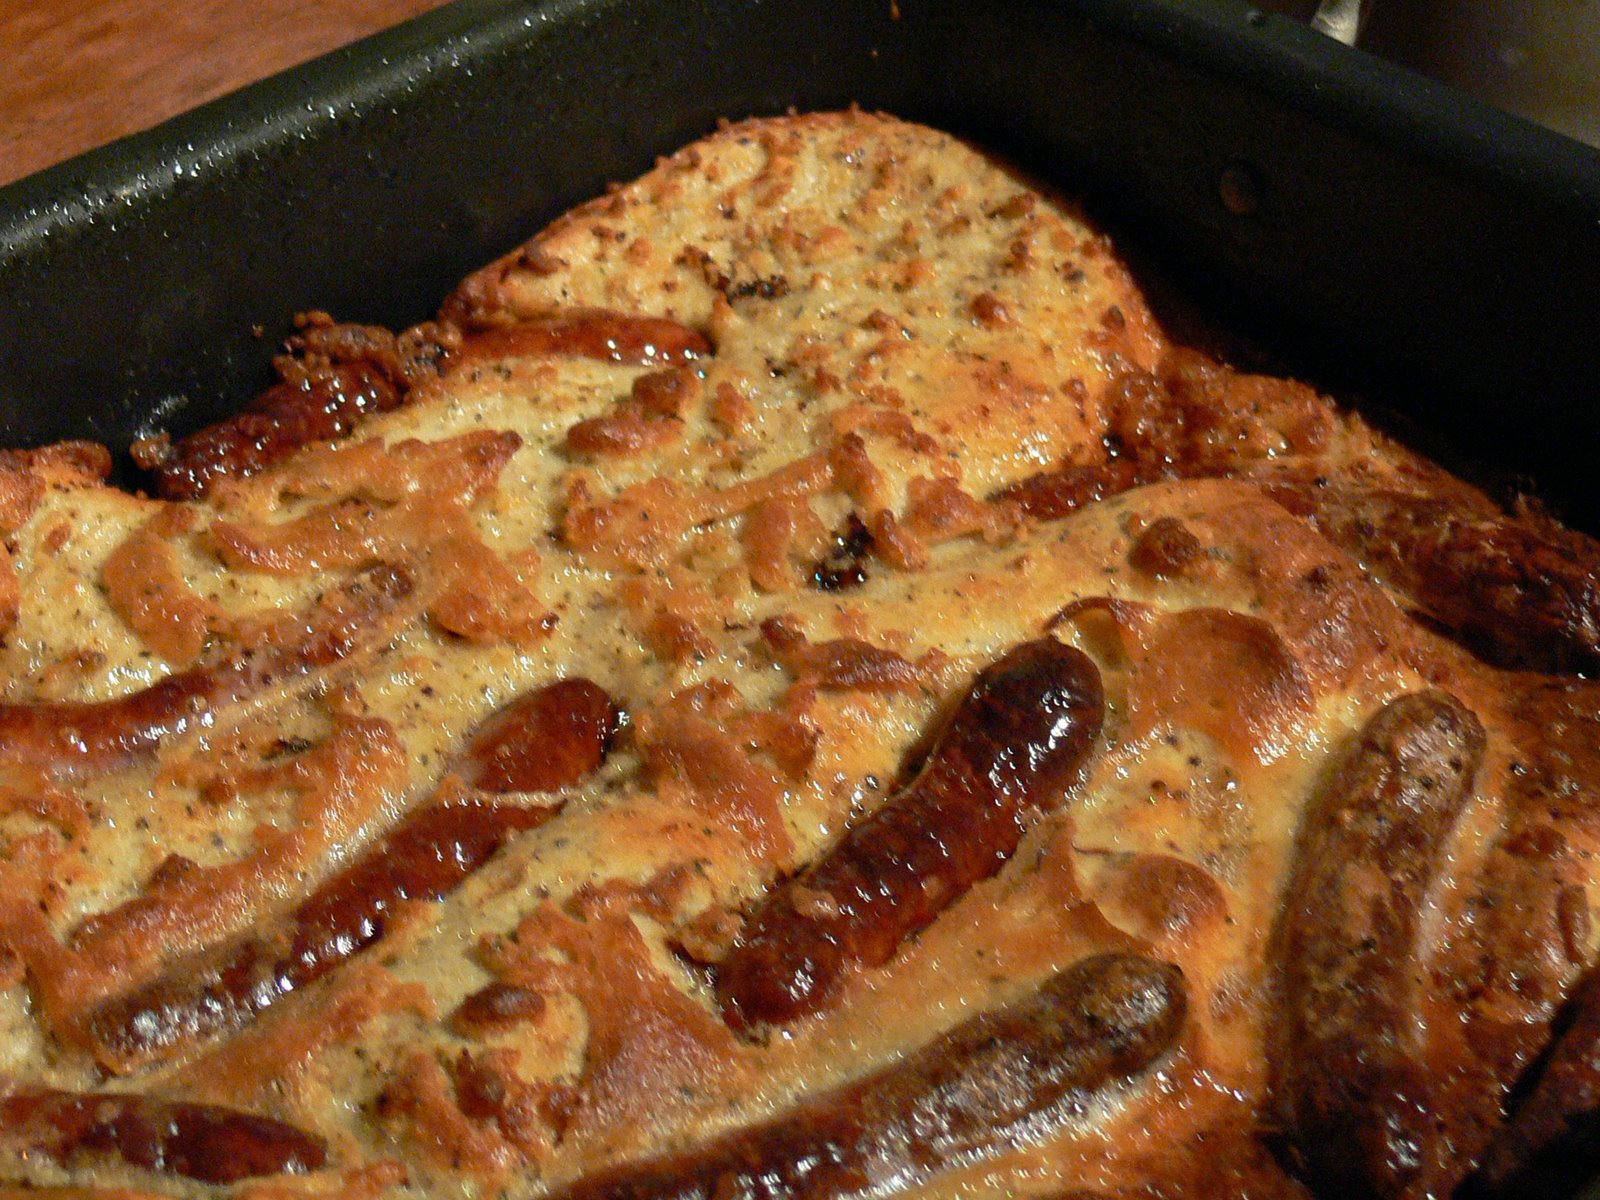
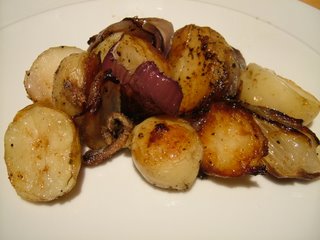
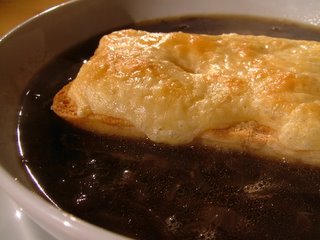
This is a gorgeous recipe, where a chicken is buried in a giant heap of softened onions in a big casserole dish, then roasted until the onions collapse and make their own sauce with the chicken’s savoury juices, and served with typically Provençal flavourings. Rather than stirring olives into the sauce and serving the lot with fried bread triangles as in David’s original recipe, I’ve made a sort of deconstructed tapenade to spread on grilled crostini, which works a treat alongside the chicken’s richness. I’ve decreased the battleship-floating amount of olive oil that you’ll find in the original, added some shallots to the mix and added cooking times, temperature and a weight for your chicken below. I followed David’s original instruction to add a tablespoon or so of cream to the sauce at the end of cooking, but I’d encourage you to taste it first and decide whether or not you think it needs it; it’s just as good if you leave it out, so it’s not made it into the ingredient list below. Some French sautéed potatoes are a great accompaniment to this dish.

To roast one chicken, you’ll need:

1 roasting chicken, about 1.5kg
6 large onions
5 shallots
3 tablespoons olive oil
1 heaped teaspoon cayenne pepper
Salt and pepper
10 slices from a ciabatta
5 anchovy fillets
2 heaped tablespoons capers, drained
15 black olives, stoned (I like Greek dry roasted olives that come in a jar, like Crespo, for this recipe – additionally, they’re wonderfully cheap)
100g stupendous tomato sauce or sundried tomato paste
A handful of parsley. Ha. Take that, measurement emailers.

Poulet Antiboise
Poulet Antiboise, immediately on emerging from the oven

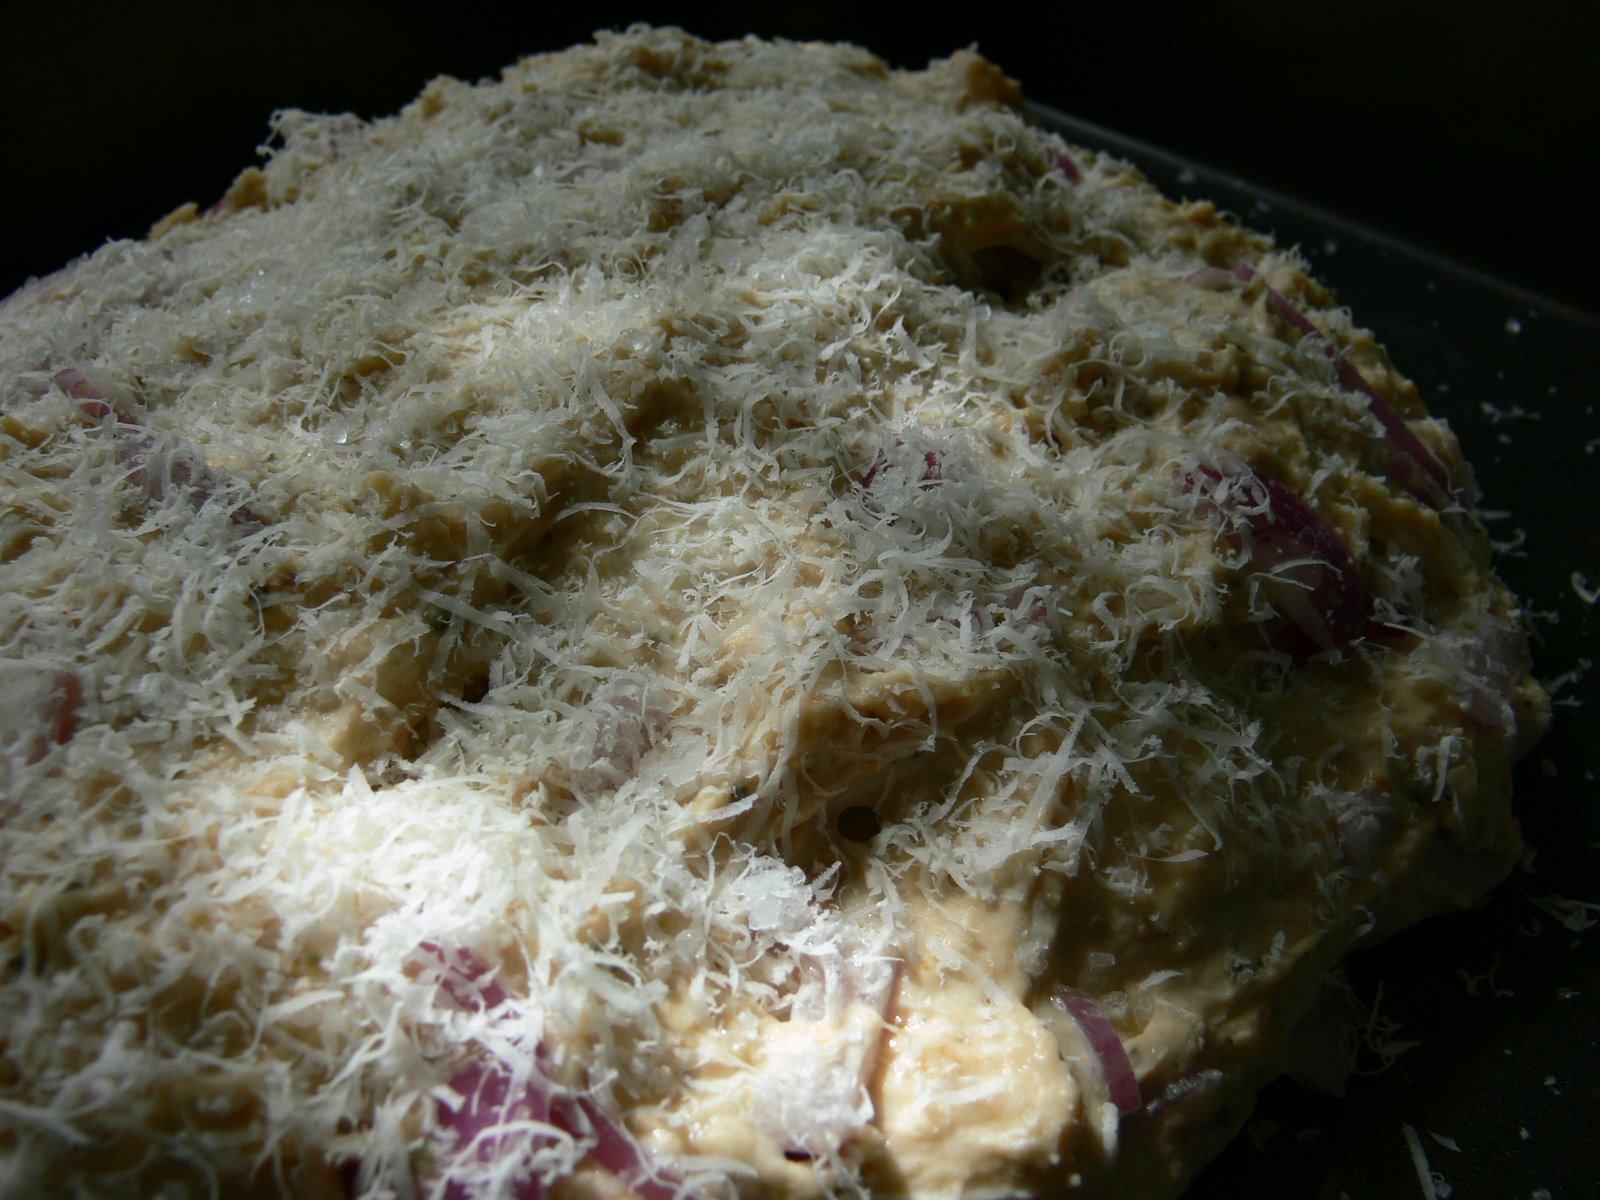
Preheat the oven to 180ºC (370ºF). Ferret around inside your chicken and remove any lumps of poultry fat, seasoning it inside with plenty of salt and pepper. Leave it to come to room temperature while you prepare the onions.

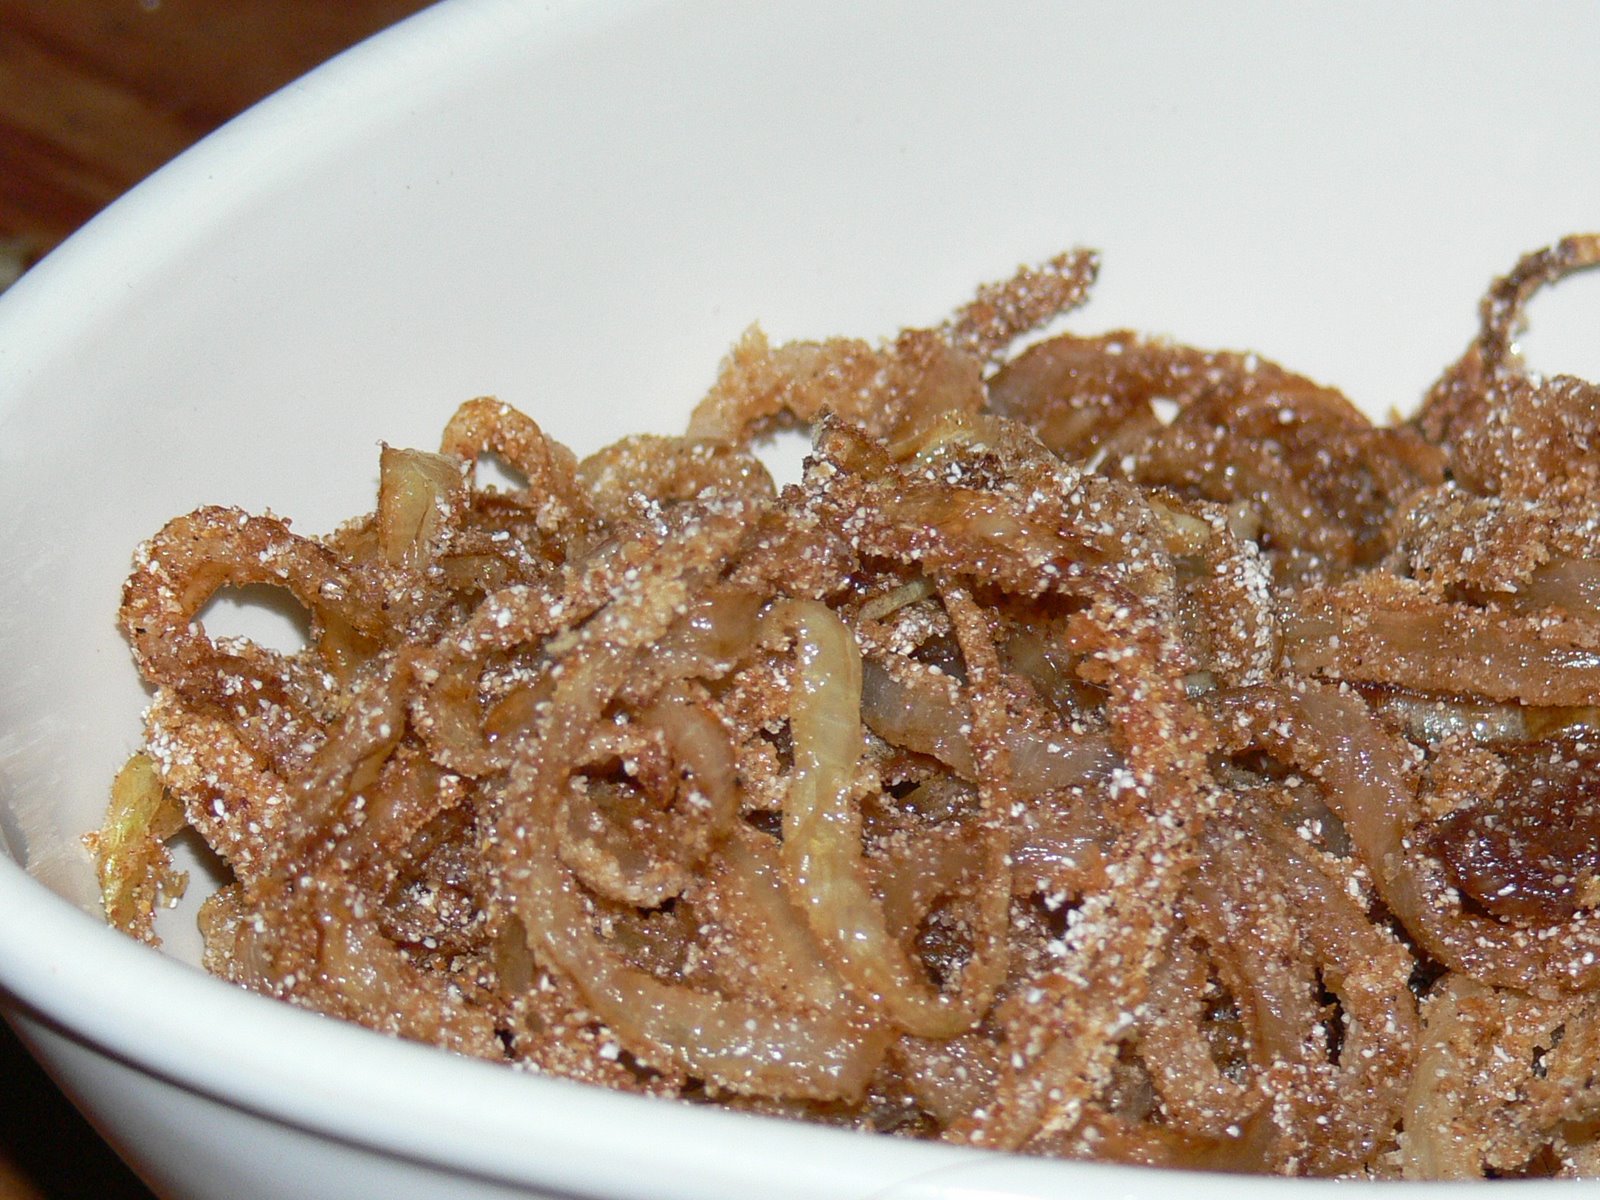
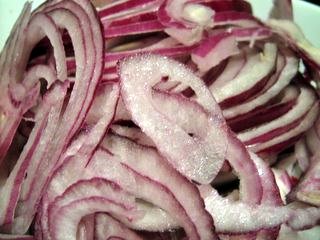
Slice the onions and shallots thinly, and sauté them with the cayenne pepper in the oil until soft but not coloured in a heavy-based pan large enough to take the chicken. I use a 29cm oval Le Creuset number which is perfect for pot-roasting a chicken. They’re pricey, but well worth asking for as a Christmas present; mine gets an awful lot of use.

Remove the pan from the heat and add the chicken, burying it upside-down in the onions, which should smother it completely. Put the lid on and roast for 90 minutes (you don’t need to check or baste the chicken while it’s cooking), by which time the chicken will be cooked through and tender, and the onions will have collapsed.

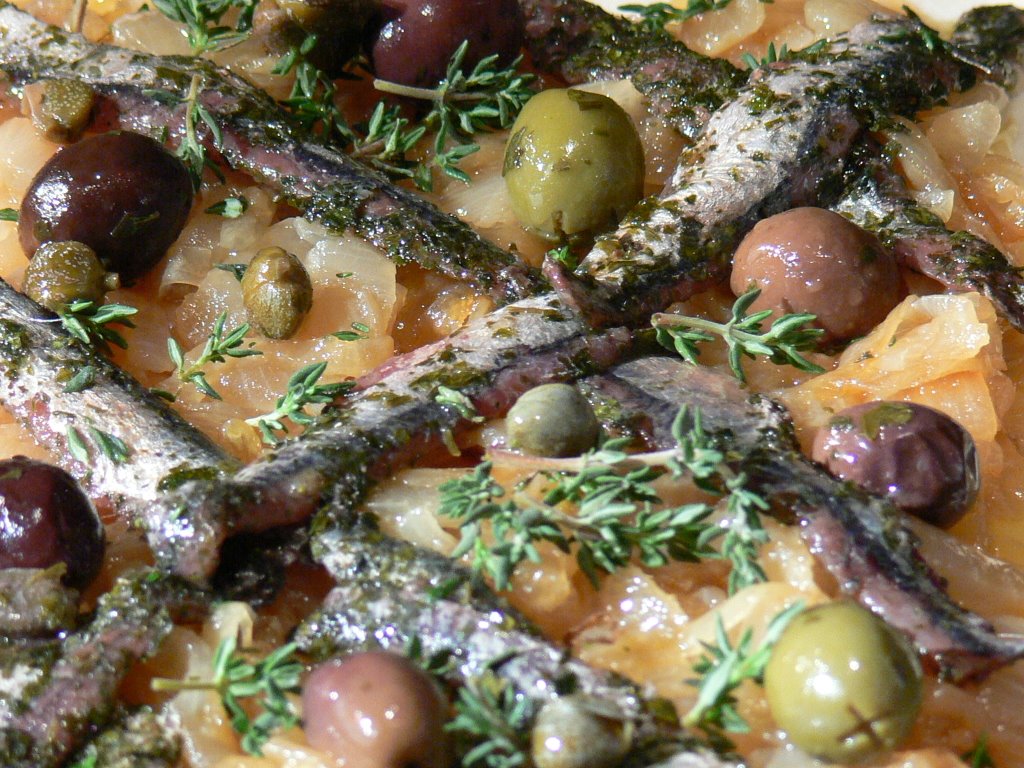
While the chicken is cooking, prepare your tapenade. Chop the capers and olives roughly. In a small frying pan, fry the anchovies with a teaspoon of olive oil, poking occasionally with a wooden spoon until they have “melted”. Add the capers and olives to the pan and sauté for a few minutes to meld the flavours. Remove to a bowl.

Grill the slices of ciabatta and shortly before serving, spread each slice with a teaspoon of tomato sauce and a teaspoon of the tapenade. Sprinkle with parsley and serve alongside the chicken.

Toad in the hole with onion gravy

Our friend Simon (the same Simon that hates tofu) is a man of set habits. Every Friday, he makes toad in the hole for supper. He has been doing this for about fifteen years now, and has developed some strongly held feelings about how the perfect toad is constructed. I quote directly from a very involved post he wrote about doing the Listener crossword a while ago – the toad recipe pops up somewhere in the middle when he gets briefly stuck on 29 across.

“All these celebrity chefs publish recipes for toad-in-the-hole, and they are, without exception, rubbish. Most involve too many eggs, and end up the texture of leather. So, here is the definitive recipe – bear in mind I’ve made this every Friday night for about 15 years, so I know what I’m talking about…

Get a metal baking tin, preferably non-stick. Rectangular is best, about 30cm by 40cm. Put a pound of Tesco’s Finest Pork & Herb sausages in it, along with a large splash of vegetable oil (or a lump of beef dripping if you’re daring.) Put it in the oven at 200 degrees C (180 degrees if fan-assisted) – no need to preheat, just bung it in from cold.

Put 4 oz of cheap plain flour into a glass jug. Add a pinch of salt, and break in an egg. Add about a quarter of a pint of full-fat milk, and whisk to a smooth paste – the best tool is a French whisk, those things that look like a big metal spring. Once you’ve got a smooth paste, add another quarter pint of full fat milk and whisk like mad to get some air into it. Leave to stand for 20 minutes, by which time the sausages should be browning and the fat should be hot.

Rapidly remove the pan from the oven, pour in all the batter, and quickly return to the heat. Leave for about 25-30 minutes, until the pudding has risen and is golden brown. Remove from the tray and serve with lashings of HP Fruity sauce. Vegetables are unnecessary. The quantity above serves one, with a couple of cold sausages left over for breakfast on Saturday.”

I am grudgingly grateful, because Simon’s Yorkshire pudding batter, which forms the ‘hole’ part of a toad in the hole (sausages, for some reason, are the ‘toad’ bit – English food etymology baffles me) is bleedin’ terrific. Simon – your basic proposal is sound, I applaud your use of beef dripping and the batter is, admittedly, fantastic – but HP Fruity? Tesco’s Finest sausages? Vegetables are unnecessary? I made my toad in the hole to Simon’s basic recipe using some sausages from the butcher’s, but stirred a tablespoon of grainy Dijon mustard and a teaspoon of chopped sage into the batter just before pouring it into the tin. I also made an onion gravy to moisten the lovely puffy batter so that I could avoid the HP Fruity, and stir-fried a thinly sliced Savoy cabbage with some lardons of bacon fried until crisp. We found that with the gravy and bacon-spiked cabbage, the amounts above were more than enough for two. (This is not to say we did not clean our plates. Toad in the hole just invites you to overeat.)

Onion gravy is fantastic stuff. It’s a delicious and incredibly savoury way to lubricate those meals that don’t produce much in the way of liquids themselves (try some with a pork chop or over naked, hole-less sausages some time). Just make sure you’ve got some decent stock hanging around. If you don’t have any home-made stock, try Knorr’s concentrated liquid stock in the brown bottles – it’s really pretty good. To make enough for two, you’ll need:

2 large onions
½ teaspoon salt
1 tablespoon beef dripping (or goose fat)
2 teaspoons plain flour
300 ml chicken stock
1 glass white wine
1 tablespoon dark soy sauce

Melt the beef dripping in a frying pan and saute the sliced onions with the salt for about half an hour, until they are turning a lovely brown. Sprinkle the flour over and stir well to make sure it’s distributed well around the pan, and pour over the stock, stirring slowly all the time. Pour the wine in and bring to a gentle simmer for five minutes, until the gravy is thickened and the alcohol has burned off. Stir in the soy sauce and serve.

I much prefer to use dark soy for gravy-browning purposes – those browning granules you can buy don’t add anything at all in the way of flavour, where dark soy will give a rich background (which doesn’t taste recognisably Chinese) to your sauce along with its great colour.

Mexican pickled red onions

These crisp, pink onions are a traditional Yucatan accompaniment for cochinita pibil, and oh, my beating heart, they’re good. Red onions are par-boiled very briefly, then semi-preserved in a citrus, sugar and salt mixture spiked with chillies and cumin. They’ll keep in the fridge for up to a month, which is good, good news, because besides being a perfectly pitched addition to a taco, these are one of the best accompaniments for strong cheeses I’ve come across. (Try some alongside a Stilton or some Gorgonzola.) They’re great to look at, too; the acid in the preserving mixture turns the red onion, which acts as a universal indicator, a really vibrant pink.

I’ve used a little home-made habanero vinegar in the preserving mixture. It’s a particularly delicious vinegar (and very easy – just steep a few whole habaneros in a bottle of white wine vinegar for a couple of weeks) – it picks up all the citrusy, fruity undertones of the habaneros and packs plenty of heat.

To make a large bowl of Barbie-toned pickled onions, you’ll need:

2 medium red onions
Juice of 1 orange
Juice of 3 limes
Juice of 2 lemons
2 tablespoons habanero vinegar (white wine vinegar in which you’ve steeped a few habanero chillies for a week or so – see above)
1 teaspoon cumin
1 tablespoon sea salt
1½ tablespoons caster sugar

Halve the onions, and cut into slices. Bring a saucepan of water to the boil and drop in the onion slices. Count to twenty and drain the onions, and set aside in a large bowl.

Stir the citrus juices, vinegar, cumin, salt and sugar together in a saucepan and bring to the boil, stirring until the sugar and salt has dissolved. As soon as the mixture starts boiling, remove it from the heat and pour it over the onions. Cover the bowl and refrigerate until cold (a couple of hours).

Focaccia with onion and rosemary

My week was brightened no end yesterday when I discovered that Jean-Christophe Novelli was linking to one of the recipes on Gastronomy Domine. I’m cooking a lot of things like the aubergine caviar he mentions at the moment – it must be the weather. To make the most of the short English summer, it’s lovely to eat a cold al fresco supper with some good, home-made bread. This explains the bread-making binge I appear to be on at this week. Fresh bread tastes great, it makes the house smell fantastic, and there is something strangely soothing about pummelling the hell out of a wodge of dough as you knead it; not to mention the lovely feeling you get from poking your fingers into a baby-soft, freshly-risen batch to knock it down. Bread dough is deliciously tactile, but I shrink from describing the full puffy, silky, stretchy glory of it in case you all decide I’m some sort of dough pervert.

Focaccia is an Italian bread enriched with plenty of olive oil. The oil in the dough makes it a dream to work with, and although it has a long rising time to help it develop its lovely open texture, all you have to do is knead, then wait for the dough to rise a couple of times. I’ve flavoured this focaccia with rosemary and chillies stirred into the dough itself, and a caramelised onion topping slathered on top. It’s lovely cut into squares and served with some Mediterranean-style cold nibbles like caponata, aubergine caviar, hummus or panzanella, and a bowl of olive oil and balsamic vinegar to dip into.

To make one focaccia you’ll need:

Bread
500g strong white bread flour
1 packet instant yeast
275ml tepid water
1 teaspoon salt
4 tablespoons olive oil (plus extra for oiling bowl and dough)
5 tablespoons chopped fresh rosemary
2 teaspoons Italian chilli flakes

Caramelised onion topping
2 large onions
3 tablespoons olive oil
A few sprigs of rosemary to decorate
12 olives
Olive oil to drizzle and salt to sprinkle over

Put 250g of the flour in a large mixing bowl with the yeast, chopped rosemary and chillies, then pour in the tepid water – this should be around blood heat – and the olive oil. Beat with a wooden spoon until the mixture is smooth, then start to stir in the remaining flour, a handful at a time, until you have a soft dough. The dough should not be completely dry – a little stickiness is fine, and should have vanished by the time you have finished kneading because of the magical development of the gluten in the wheat. You may not find you need to add all the flour – the amount you use will depend on the flour you have bought and the humidity and temperature of your kitchen. (I had about 20g left to put back in the bag when I was done.) Knead the dough vigorously for at least ten minutes, until it is very smooth and stretchy. Oil the dough ball and put it inside an oiled mixing bowl, cover with a damp cloth and leave to rise for two hours in a warm place.

The dough should have more than doubled in size. Knock it down to its original size and knead again for five minutes, then spread it out in a baking tin (mine was 25cm x 35cm), making sure the dough is even and pushed well into the edges and corners. Cover with the damp cloth again and let the focaccia rise for 45 minutes, then push the dough flat again and let it rise for a further 45 minutes while you heat the oven to 220° C (425° F) and prepare the onions by sautéing them in the oil over a low heat until they are sweet and golden (about 20 minutes), then putting them aside to cool.

Push 12 olives into the surface of the risen focaccia in a pattern with some rosemary sprigs, and spread the onions gently over the top (don’t push too hard when you spread, so the bread does not deflate). Pour over some more olive oil to fill the olive holes, sprinkle with coarse-grained salt and bake for 20-25 minutes until golden on top, then place on a rack to cool.

Onion rings

onion ringsIf the way to a man’s heart is through his stomach, these things are gastronomic Viagra. These onion rings have sweet, tender middles and a fantastically crisp coating. I use a tiny amount of parmesan cheese in the breading, which doesn’t give the onion rings a cheesy taste, but does make them deeply savoury and helps create the excellent colour. Cornmeal (rough polenta) gives them a wonderful crunch, and rice flour a pleasing crispiness.

Rice flour is a useful ingredient to keep in the kitchen. It’s usually available in Indian and Chinese grocers, and it has one very useful property – coatings made with it stay crisp even after the food has cooled. This makes it invaluable for summer picnics, when you can make breaded chicken, cool it on a rack, pop it in some Tupperware, drag it in a knapsack over miles of public footpath and take it out hours later, still crispy. These onion rings were never going to get the chance to go cold, but they do benefit from the delicate crisp you get from rice flour.

I always use a wok and a jam thermometer for deep frying; this way, you get through much less oil, and can easily control the temperature. When we finally get around to remodelling the kitchen and I have a bit more room to play with, I may end up buying a machine for deep frying; but deep frying is a cooking method I only use about five times a year, so I’m not completely convinced it’s worth the money and the counter space.

You’ll probably have some breading mixture left over. Just pop it in a bag and freeze it – you’ll find you can use it directly from the freezer on another occasion.

To make onion rings to serve four (or fewer, depending on greed), you’ll need:

2 large onions (buy the biggest ones you can find)
5 heaped tablespoons cornmeal (coarse polenta)
5 heaped tablespoons rice flour
3 tablespoons finely grated parmesan cheese
1 teaspoon Madras curry powder
1 teaspoon salt
Milk to soak
Flavourless oil to deep fry

Slice the onions into thin rings (about half a centimetre thick). Set the oil to heat. Mix the cornmeal, rice flour, parmesan, curry powder and salt in a large bowl.

Separate the rings out. Dip each ring first into the milk, then dredge them in the breading mixture. Drop the rings into the hot oil (your thermometer should have a ‘deep fry’ marking on it – otherwise, use a machine) in small batches, and fry for about two minutes, until golden brown. Remove to a tray lined with kitchen paper in a single layer, and keep the tray warm in a very, very low oven while you cook the rest of the rings.

I served these with a steak (on which I’d used Paul Prudhomme’s Magic Blackened Steak blend – a hearty recommendation here if you can get hold of some) and mashed potatoes.

Parmesan, tomato and onion bread

Parmesan, tomato and onion breadWhen I was a little girl, there was a bakery in our town which made a cheese and onion bread. It was never quite right – the cheese was too mild, there wasn’t enough onion, and it needed very salty butter. All the same, I used to really look forward to eating it, preferably sliced with plenty of cheese and tomatoes layered on top, then baked in the Aga by my Dad.

This week, I decided to try to make my own cheesy, oniony bread, this time with my Dad’s tomatoes baked into it. I used lots of parmesan, a nice big onion and some flavourful sun-dried tomatoes (along with a little of their oil). The results were great – no extra cheese, tomatoes or toasting required. To make one loaf, you’ll need:

210 ml tepid water
1 level teaspoon caster sugar
1 packet easy-blend yeast
350g strong white flour
1 teaspoon fine salt
100g finely grated parmesan
1 ½ teaspoons dried oregano
1 minced clove garlic
1 large onion, sliced finely
5 sun-dried tomatoes in oil, chopped small
1 ½ tablespoons of the tomato oil
½ tablespoon fleur de sel or other coarse salt to sprinkle
Extra parmesan to sprinkle

Mix all the ingredients (except the tepid water and the salt and parmesan to sprinkle on at the end) in a large, warm bowl. Pour in the tepid water and mix well with a wooden spoon until the dough comes together. Transfer to a floured board and knead hard for ten minutes, until the dough is stretchy, glossy and no longer sticky. The onion pieces will snap as you knead, but don’t worry about them.

Bread doughWhen the dough is kneaded, put it back in the bowl and cover with some oiled cling film. Leave in a warm (not hot) place for about 40 minutes, until it has doubled in size. (The dough will take a couple of hours to rise at room temperature if you don’t have a warm place to keep it.)

Take the dough from the bowl and knock it back down to its original size, kneading again for five minutes. If you want a traditional loaf shape, put it in a loaf tin. I decided to make a low, flattish bread in order to make the most of the lovely crust with its sweet caramelised onions poking through, so I shaped the dough on a non-stick baking sheet.

Sprinkle the bread with the salt and extra cheese, and leave to rise again, covered, for 40 minutes in a warm place. Meanwhile, heat the oven to 230° C (450° F).

When the dough has risen, place a large baking tray full of water at the bottom of the oven, and the tray with the bread on a rack in the middle of the oven. Bake the loaf for between 30 and 40 minutes. It will be ready when it sounds hollow when you tap the bottom. Serve with plenty of butter.

Pissaladiere – French onion tart

We’re going to the Côte d’Azur later in September, where we’ve rented a big manor house with a gaggle of friends. I’m looking forward to the cooking – I’ve missed French market and supermarket produce since Dr Weasel and I left Paris to live in the UK again a few years ago.

I thought I’d cook some Provencale recipes before we leave, just so I feel properly prepared. There is nothing more Provencale than Pissaladiere.

Pissaladiere is a delicious, sharply savoury little tart made from crisp puff pastry, onions cooked until they are sweet and glossy, anchovies and olives. A traditional Pissaladiere would use a preserved fish paste called pissala rather than the anchovies. I did not have an empty Kilner jar and a few pounds of tiny salted fish, so this little tart employs some very delicious Provencale anchovies I found in Waitrose, marinaded in garlic and herbs.

To serve one person (double the recipe to serve two, but I shall be posting another tart for the other half of the puff pastry tomorrow which you might want to serve alongside this), you’ll need:

3 onions
½ sheet puff pastry from the supermarket chiller cabinet
1 large knob butter
1 teaspoon fresh thyme
Anchovies to taste
15 olives (preserved in oil, not salt)
10 salted capers, rinsed

Slice the onions thinly and saute them in the butter over a low heat until they release their sugar and turn golden and sweet (about half an hour). Don’t salt them; you’ll get all the salt you need from the other toppings.

Use a sharp knife to cut the rectangle of pastry in half. Set one half aside for tomorrow’s recipe. With the knife, score a line a centimetre from each edge of the pastry rectangle, so you end up with a smaller rectangle drawn inside it. The centimetre at the edges will be the puffy sides of the tart. Use a fork to make little holes in the inner rectangle. This will stop the part of the tart with the filling from rising.

Spread the soft, golden onions inside the inner rectangle. Lay the anchovies in a diamond pattern over them (you can slice them in half lengthways and use fewer for a less strong flavour; these particular anchovies were quite mild and mellow, so I left the fillets whole) and scatter over the thyme, capers and olives. I used a mixture of black, purple and green olives. Bake in a tray on a sheet of greaseproof paper at 200° C for 20-25 minutes, until the edges are golden and puffy, and the base is crisp.

This tart is delicious hot or cold. Try having one cold at a picnic, or making tiny Pissaladieres for a starter when you have a dinner party.

Rösti with bacon and onion

You’ll read some tremendously complicated recipes for rosti, involving time-consuming methods like par-boiling and cooling before you grate, quick spells in the freezer, wrapping the grated potato in a tea towel and whirling it around your head in the garden, and so on. There’s none of that in this recipe, which is extremely easy.

There’s some dispute surrounding the boiling issue – it’s true that a par-boiled potato will make your rösti absorb sauces a little better. I’ve tried both methods and have found the difference to be minute. The raw potato method is faster and results in a deliciously crisp surface, giving to the pressure of your teeth like a thin layer of ice. The potato inside is soft and yielding – delicious.

Ashkenazi Jewish latkes are a similar kind of potato cake (without bacon, for obvious reasons). Recipes for latkes and other Hannukah foods abound in Evelyn Rose’s books – I’ve just managed to find a second-hand copy of the Entertaining Cookbook at an online bookstore for a quarter of the shudder-inducing price I’d been quoted elsewhere, so look forward to some recipes from it when it finally makes its tortured way through the Royal Mail.

I used Kestrel potatoes for these rösti. Kestrel are easy to grow in the garden, and have an excellent flavour. Be careful that whichever variety of potato you choose is a waxy-fleshed one. Don’t be alarmed by the amount of starchy liquid that comes out of your squeezed potato – you will get more than a mugful from 500g.

To serve four as an accompaniment, you’ll need:

500g Kestrel potatoes, peeled
4 rashers of bacon, chopped finely
1 small onion
3 tablespoons goose or duck fat (you can use any cooking fat with a good flavour, but goose or duck fat does create a particularly crisp surface. Bacon fat would be excellent in this, as would schmaltz.)
Salt and pepper

Grate the potatoes and onion finely. You can do this by hand, or in a food processor with a grating blade. Squeeze the grated potato and onion out, handful by handful, into a bowl and discard the juices. Mix in a large bowl with the bacon, and season.

Melt half the goose fat in a large, non-stick frying pan over a high flame, and add the grated mixture when the fat is sizzling hot. Pack the potatoes down into the pan firmly to create a dense cake, and turn the hob down to a medium heat for 20 minutes.

After 20 minutes, you’ll notice a change in the shreds of potato on the surface, which will now be transluscent and glossy. Take a large dinner plate and, using oven gloves, place it upside down on top of the frying pan. Turn the pan and plate arrangement upside down, so the rösti is neatly turned out onto the plate. Melt the rest of the fat in the pan, slide the rösti back in (the cooked side will be facing you) and leave for another 20 minutes.

This was delicious with a roast chicken, soaking up the buttery juices beautifully. Experiment with your rösti – try adding a grated apple, cheese, or fresh herbs. If there are only two of you, try making this larger amount and eat the remainder cold for lunch the next day.

Roast new potatoes with sweet onion

A comment the other day complained that English potatoes are sweet and powdery things, not worth cooking with. I beg to differ; six months of living and cooking in Paris convinced me that the English potato is a glorious beast, not bettered anywhere in the world. No American or Asian potato has yet made me think otherwise.

Tiny, young new potatoes are just appearing in the shops now; they’re dense, they’re waxy and there’s nothing sweet or powdery about them. They’ve a delicate and delicious taste. When the Jersey Royals appear in April, I’ll be steaming them in their papery skins with a little tarragon, and dipping them in home-made Hollandaise. The new potatoes in shops at the moment also steam deliciously, but it’s worth trying this recipe to bathe them with the sweet, sticky roasting juices from a couple of onions. No garlic in this one; you want the flavour of the onions to sing on its own. Anchovies give this side dish a deep and remarkably non-fishy background which complements the onion flavour; if you are an anchovy-hater (shame on you), leave them out. You’ll need:

500g new potatoes
2 large onions
Salt (I used Steenbergs’ Perfect Salt, which also contains some dried herbs)
Pepper
3 anchovies
2 tablespoons olive oil or duck/goose fat

Halve the potatoes and drop them into boiling water for eight minutes. Drain and transfer to a baking tray. Quarter the onions and separate each quarter into layers. Mix the potatoes, onions, anchovies, salt, pepper and fat well and put in an oven at 180°C for 45 minutes, or until everything is golden and fragrant.

French onion soup

A friend of mine is visiting New York for work at the moment. I received an anguished message from him about a French onion soup he experienced at the Crowne Plaza off Times Square. I quote him in full, because it made me laugh.

‘The soup itself is quite nice, but is plugged by a solid lump of melted cheese that is about the diameter of a Camembert, and an inch think. We’re talking essentially an entire Camembert’s worth of American plastic cheese. I don’t mind a delicate top to the bowl, but you could have taken this out, chilled it, and made plastic cheese sandwiches for a hungry family of six.’

Poor him. (I am keeping him anonymous so he doesn’t get any death threats from Americans fond of plastic cheese.) French onion soup isn’t really that hard to get right, but not many restaurants seem to bother trying; the very worst I’ve ever had was, shamefully, in Les Halles, the old market district in Paris. Les Halles is meant to be the birthplace of French onion soup, and Le Pied au Cochon is meant to be a restaurant which specialises in the stuff. Ha. It’s rubbish. The stock’s insipid, the rubbery onions haven’t been left to caramelise, and there’s no booze in sight. The cheesey bread lid is mostly bread, and the whole leaves you with the sort of hurt feeling you get when someone you trusted has stolen your teddy bear and sold it to buy drugs. Avoid.

The cheese you use here is important, but you do have a choice open to you. You can do it the Les Halles way and use Camembert on your giant crouton, which is delicious and, when stirred into the soup, makes it creamy and cheesey and gloopy and glorious.

I consider we’ve been overdoing the soft washed-rind French cheese thing recently (I have discovered a local source of Epoisse, and that Tartiflette the other week had enough Camembert in it to keep your arteries busy for a good six months). So I went the other way with our croutons, and topped them with sweet, stringy Gruyere (actually Swiss, but who’s checking?). Gruyere has a special affinity for the sweetly Madeira-caramelised onions in this soup; try it instead of Camembert some time and see what you think.

To serve six as a starter or four as a main course, you’ll need:

3lb onions, sliced
1 small wineglass Madeira
2½ pints good beef stock or good consommé
Open-textured white bread (ciabatta or a French loaf) – 2 slices per person
1 slice Gruyere per piece of bread
3oz butter
Salt and pepper

Put the onions in a large, heavy saucepan with the butter, and simmer, stirring every twenty minutes or so, for longer than you think you should. You’re aiming to cook these to a golden, caramel unctuousness. I didn’t use a kitchen timer; I put the DVD of Ziegfeld Girl on and sang along with Judy, running to the kitchen occasionally to stir, until Lana Turner did her tragic thing with the stairs and the chaise longue at the end. (Those who are not Judy Garland fans can just set their timers for 132 minutes, but you’re missing a treat.) The onions will have cooked down to a fraction of their original volume.

When your onions are done and you have spent a quiet five minutes being surprised at how Hedy Lamarr was able to look fantastic walking down stairs with fruit on her head and invent spread-spectrum communications without turning a hair, throw the Marsala into the hot pan with the onions and let it simmer away to nothing. Add the stock or consommé, turn the heat right down and bring slowly to a simmer again.

While the soup is coming up to temperature, prepare the croutons. Toast thick slices of bread (I used a grill pan to get good dark, charred lines on each slice), lay the cheese on them and put them under the grill until the cheese starts to brown.

Serve the soup with a crouton floating on top. The soup should soak into the crisp crouton, its heat softening the cheese. Slurp the lot quickly while it’s still deliciously hot.