Quince cheese

Quinces 
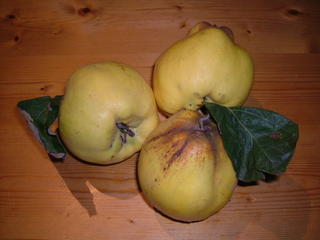
If, like me, you are now drowning in quince jelly (this is not a bad thing, per se, given that it makes a great gift and will keep in its jar for years), you may be looking for something else to do with your excess quinces. I know my parents have a whole stable filled with them, lined up neatly in cardboard crates. Like apples, the fruits will keep well in a cool, dry and dark place – check on them regularly as you would with apples though, because once one goes bad the rest will soon follow unless you remove it and throw it away immediately.

Membrillo, or quince cheese, is something you may have spotted on fashionable cheeseboards. It’s not a cheese at all, but a lovely heavy, sweet gel made from the flesh of the quince boiled down with sugar. It’s a wonderful contrast to salty cheeses like manchego – one of my favourite midnight snacks is simply a hunk sawn off the end of the piece of parmesan that’s always in the fridge, nibbled with a spoonful of quince cheese. When your quince cheese is ready, it will keep almost indefinitely in the fridge. I preserve mine in jars and spoon out chunks – some people prefer to make it in moulds, chill the moulds and turn the finished membrillo out when cold, then keep the pretty blocks wrapped in greaseproof paper and tin foil.

You’ll need:

3 lb quinces
1 lemon
Granulated sugar (see below for measurements)
Water

Peel and core the quinces and cut them into chunks. Quinces are an abominably tough fruit to work with, so make sure your knife is extremely sharp and be sure to protect your fingers from slips. Put the quince pieces in a large saucepan and cover with water, cover with the lid, then simmer very gently for around three hours until the fruit is soft when poked with a fork. It will have turned a lovely lipstick pink.

Drain the pieces and weigh them, and measure out an equal weight of sugar. Put the quince pieces in the food processor and blitz until you have a paste, then combine the paste with the sugar and the juice and zest of the lemon in a saucepan with a thick bottom (an enamelled cast-iron pan like one from Le Creuset is really useful here). Simmer the mixture over a very, very low flame, stirring until the sugar has all dissolved in the quince paste. Continue to simmer gently without a lid, stirring every now and then to make sure the bottom does not catch, for about two hours, until the paste is a deep red-brown and your spoon will stand up in it.

Spoon the quince cheese into sterilised jars and cover the top with a waxed disc before you put the lid on. The jars will keep in the cupboard pretty much indefinitely, but will need to be refrigerated once opened.

Roast garlic and a jar of infused honey

Smoked garlicI managed to get my hands on a couple of bulbs of fat, golden, oak-smoked garlic this weekend. (Cambridgeshire readers should head straight over to the River Farm Smokery in Bottisham for more smoked goodies.) It’s beautifully pungent stuff; years ago, I bought a plait of smoked garlic for my parents, who ended up having to keep it in the garage to prevent the whole house from taking on a smoky, garlicky taint. If you’ve not tried smoked garlic before, it’s pretty easy to imagine, but the reality is always a little startling. This is a fiercely flavoursome product. You can make a little go a long way, but I really like to use whole cloves of it in casseroles or around roast dishes. Much of this bulb found itself being used in a roast lamb dish with beans – just follow this recipe and add about eight whole cloves of smoked garlic in place of the chopped fresh stuff – you’ll need a couple of extra cloves to stuff into the skin of the lamb as well.

Garlic cloveWhen garlic is smoked, its cloves soften a little and turn a lovely buttery yellow. The smoking process forces some of the natural sugars in the garlic cloves to bead on the surface of the clove, under the papery skin, becoming sticky, tacky and sweet. You can use these cloves wherever you’d use raw garlic; the whole bulb is also exceptionally good roasted. Try making roast garlic and fresh tomato pasta with a smoked bulb for great depth of flavour. I really like the roast cloves popped out of their skins and spread on a good crusty bread, sprinkled with a little salt. The squashed, roast cloves are also fantastic stirred into mashed potatoes.

Infused honeySmoked garlic and honey are two flavours which, for me, seem to have been invented for each other. I kept five cloves of the garlic back to make a jar of smoked garlic honey baste. To make your own, you’ll need a jar of honey (mine is some of our local wildflower honey – anything with a delicate, flowery flavour will do, though; try clover, orange blossom or lime blossom honey) and five unblemished cloves of smoked garlic. Empty the jar of honey into a saucepan and warm it with a jam thermometer in the pan until it reaches 100° C. Put the whole garlic cloves at the bottom of a sterilised jar and pour the hot honey over them, then cover and refrigerate. The garlic will start to give its smoky fragrance up to the honey almost immediately, and the honey will have a noticeable flavour after a day or so, but for best results the jar should be left for around a month before using. Brush the infused honey over meats before roasting or grilling, use as a surprisingly delicious dressing for baked apples, or spread on some toast and nibble with a glass of whisky for a midnight snack.

Panna cotta with fresh raspberries

Panna cottaPanna cotta is Italian for cooked cream. It’s a light mixture of cream, milk and sugar (along with some honey in my version – I love the combination of milk and honey), set with gelatine and served cold. If you see panna cotta moulds for sale, buy a few – they make the job much easier. If you don’t have panna cotta moulds, ramekins work well too, but you will have to be a bit more patient when it comes to turning the set puddings out.

The vanilla is important here – I’ve used both vanilla sugar (sugar which has been stored with a vanilla pod buried in its jar) and the seeds from a vanilla pod in this recipe. Vanilla is expensive, but there’s nothing like the fragrance of the real stuff in this dessert. If, however, you can’t find any or prefer not to shell out for the real thing, a few drops of vanilla essence will work here too.

To serve six, you’ll need:

1 tablespoon powdered gelatine (from the cake-making shelves at the supermarket)
200 ml whole milk
600 ml double cream
Seeds from one vanilla pod
5 tablespoons honey
1 tablespoon vanilla sugar
Pinch salt
Raspberries or strawberries to garnish

Put the milk in your heaviest-bottomed saucepan and sprinkle the surface with the gelatine. Leave for ten minutes away from the heat for the gelatine to soften.

When the gelatine has softened, put the pan on a low heat and, stirring continually, warm until the milk is heated through and the gelatine dissolved. The milk should not boil at this stage. Add the cream, vanilla seeds (slit the pod down its length and use the handle end of a teaspoon to scrape all the seeds out – you can keep the pod and put it in another sugar jar), honey, vanilla sugar and salt to the pan and stir until the sugar has dissolved.

Divide the mixture between six panna cotta moulds. Cover and put in the fridge until set (it’s best to leave the mixture at least overnight to make sure it’s completely firmed up). To turn out the moulds, dip their undersides in water from the kettle to loosen the mixture and pop a plate over them, then turn the whole assembly upside-down. Decorate with berries and serve chilled.

Carrot cake

Carrot cakeCarrot cake is often referred to by the squeamish, afraid of disturbing their guests by mentioning root vegetables, as passion cake. I’ve never been quite sure why, since the carrot (and, in my version, a mushed up banana) is a real star here; it’s what goes to make the cake so sweet, dense and deliciously moist. This is an easy recipe of the ‘bung everything in a bowl and stir’ variety, and it’s pretty foolproof, rising evenly and maintaining that lovely moist texture throughout. This cake keeps well for about five days in an airtight tin.

Cream cheese icing is a particular favourite of mine. You’ll see some recipes where other flavourings are added to the cream cheese and sugar (orange zest is a common one, and some add crushed nuts), but I find the cool icing much better when it’s plain, allowing the warm spices in the cake to come to the fore. (This cake is especially heavy on the nutmeg, which is fantastic with that banana.) For one cake, you’ll need:

Cake
160ml melted butter
175g light brown sugar
3 eggs, beaten
½ teaspoon ground cinnamon
½ a nutmeg, grated
150g carrots, grated
1 banana, mashed
50g chopped pecan nuts
250g plain flour
1 tablespoon baking powder

Icing
160g cream cheese
80g icing sugar

Carrot cakePreheat the oven to 180°C (350°F). Grease and line a 20cm diameter springform cake tin.

Put all the cake ingredients in a mixing bowl and beat well. Put the mixture in the greased, lined cake tin, and bake for 45 minutes (at which point the cake should be golden – a skewer inserted in the middle should emerge clean). Cool the cake completely on a wire rack.

When the cake is cool, beat the cream cheese and icing sugar together with an electric whisk until it becomes fluffy. Spread over the cake, slice and munch.

Hokey pokey ice cream

Hokey pokey ice creamIf you made the cinder toffee from last week and have managed to avoid eating it all so far, you’re in for a treat. This ice cream reflects two of my favourite sweeties – Maltesers and Crunchie bars. The cinder toffee (the middle of a Crunchie) is crumbled and blended into a malt-flavoured ice cream, flavoured just like the inside of a curiously creamy Malteser.

I haven’t used any chocolate in this ice cream because I wanted the malt and toffee to stand on their own, but if you would like to make this even more similar to the sweets, add five tablespoons of milk chocolate chips at the same time you add the crumbled cinder toffee to the mixture. To make about two pints of ice cream, you’ll need:

4 egg yolks
½ pint (250ml) milk
1 pint (500ml) double cream
100g caster sugar
2 sachets Horlicks Light (see below)
5 heaped tablespoons roughly crushed cinder toffee

Horlicks is an English malted milk drink. (If any US readers could let me know what the equivalent across the pond is, I’d be very grateful!) The full-fat version is usually stirred into hot milk. Horlicks Light is stirred into water, and I use it here because it contains powdered milk, which makes the ice cream all the more creamy and delicious.

Start by making a custard base for the ice cream. Beat the egg yolks, the milk, the Horlicks and the sugar together in a heavy-bottomed saucepan. Continue to stir vigorously over a very low heat until the custard starts to thicken. You’ll notice that it forms a glossy sheen on the back of a wooden spoon when ready. Be very careful not to allow the custard to boil, or it will separate.

When the custard has thickened, transfer it to a jug and add the double cream. Stir well and put the jug in the fridge until the mixture is chilled.

If you have an ice cream machine, add the mixture to the machine and follow the instructions. Halfway through the freezing time, add the crushed cinder toffee to the drum. (I’ve found the easiest way to crush it is to put it in a plastic freezer bag, knot the top, hold onto the knot and bang the bag against the work surface.) Continue until the ice cream is stiff enough to serve.

If you don’t have an ice cream machine, put the mixture in a Tupperware box and place it in the freezer. After twenty minutes, remove it from the freezer and beat the partially frozen mixture with a whisk. Remove and beat every twenty minutes, breaking up the ice crystals, until the ice cream is frozen evenly but very soft – stir the cinder toffee in at this point. Keep freezing and beating until the mixture is solid. Serve sprinkled with a little extra crushed cinder toffee. And remember to brush your teeth.

Cinder toffee

Cinder toffeeThis is an easy and delicious home-made sweet. Cinder toffee is made with vinegar and bicarbonate of soda in the mix. They react together so it froths before it sets into millions of little bubbles, and hardens into something a lot like toffee-flavoured pumice stone. Any taste of vinegar is neutralised, leaving you with a buttery toffee flavour. It’s a recipe which I don’t cook very often although I love it, because it inevitably leads to my eating the whole batch and then feeling really bad about my thighs.

Here in the UK, cinder toffee (also called honeycomb toffee) has a formative role in our childhoods as the shatteringly crisp stuff that Cadbury’s put inside Crunchie Bars. I actually prefer it without chocolate, but if you enjoy a chocolatey morsel just melt some milk chocolate over a bain marie, dip the hardened chunks in and firm up on greaseproof paper.

In the Cork and Bottle, a London wine bar specialising in a big chunk of meat called the Hemingway Burger, the New Zealand staff call cinder toffee ‘hokey pokey’, and use it in a very fabulous ice cream. I have held back from eating all the stuff I made yesterday and will use the rest in a creamy, malty ice cream over the weekend. Watch this space for the recipe.

To make one thigh-swelling batch of delicious toffee, you’ll need:

50g salted butter
30ml water
4 teaspoons malt vinegar
3 tablespoons golden syrup
450g granulated sugar
1 teaspoon bicarbonate of soda (baking soda)

Golden syrup(American readers can buy golden syrup at Amazon. Golden syrup is a by-product of the sugar refining process, with a delicious light golden toffee flavour. We use it in the UK in many of the situations where maple syrup is used in America. Don’t be tempted to substitute corn syrup or honey – they won’t taste the same, or have the same characteristics when heated.)

Grease a large baking tin with butter (mine was 11 x 7 inches). Heat the butter, water and vinegar together in a large saucepan with a jam thermometer (the saucepan should be larger than you think necessary – remember that this recipe will froth and swell) until the butter has melted. Stir in the sugar and golden syrup over the heat until they dissolve. Stop stirring, and bring to the boil. Keep boiling without stirring until the toffee reaches the hard crack stage on your thermometer (if you don’t have a jam thermometer, a teaspoon of the molten toffee dropped into a saucer of cold water at hard crack stage will form brittle into strands and crack when you try to shape it). ***Update – it is incredibly important that your toffee really does reach hard crack stage, which is 154°C, or else it may sink after rising.*** Be careful – the mixture will be unbelievably hot, and very dangerous if there are children or pets around. Remove the toffee from the heat, and gently stir in the bicarbonate of soda.

Startling frothing will occur. Keep stirring gently until the bubbles settle down a bit, then pour the mixture into your greased tin. Wait for between ten and twenty minutes until the mixture is set up but still warm, and break the toffee into pieces. Lay these pieces out on a wire rack until the sweets are cool, then transfer to an air-tight container (or your mouth).

Elderflower fritters

I spent yesterday making this year’s batch of elderflower cordial. The wet weather earlier this year in the UK seems to have been a great thing for the elder bushes, which are positively groaning under the weight of all their flowers. The flower heads were so heavy with creamy pollen that I picked six extra heads to turn into fritters.

Foraging is brilliant. There is nothing like the warm glow you get from eating food which is, to all intents and purposes, free; it’s also a great pleasure to know that the food you’re eating is from a healthy environment (be careful to pick your elderflowers well away from any roads, and, as always, leave plenty of flowers on the bush – you’ll want them to turn into berries later in the year) and is perfectly fresh. Look for blossoms which are in full flower, and which have not yet started to brown or drop petals. For fritters, try to pick the heaviest, most pollen-filled flower heads you can find about three hours before you cook them. Pop them in the fridge in a plastic bag. Their scent will develop after picking and they’ll be very perfumed when you come to cook them (don’t leave the flowers in the fridge any longer than three hours or their scent will start to turn in the direction of cat wee).

To make six large fritters, you’ll need:

1 egg
200g flour
50g sugar
1 pint (450ml) milk
Six large elderflower heads
Flavourless oil to fry
1 tablespoon honey
Juice and zest of 1 lemon

Using a fork, beat the egg, flour, sugar and milk together with the lemon zest. Squeeze the lemon and put its juice aside. Let the batter rest for an hour.

In a large, non-stick frying pan, heat about ½ cm of oil over a high flame. Check the elderflowers for any arthropod inhabitants, but don’t wash them (you want to hold on to that pollen). Hold a head of elderflowers by the stalk and dip the flowers into the thick batter, then drop them, flower side first, into the hot oil. Fry the fritters in pairs so you don’t crowd the pan; they’ll brown better this way.

Turn the fritters after about two minutes – the flower side should be a golden, crisp brown. Fry until the stalk side is also crisp, then remove from the pan and drain on kitchen paper.

Remove to a serving plate and scatter the perfumed fritters with some fresh elderflowers, pulled from their stalks, and drizzle with the honey and lemon juice. Serve piping hot and crisp.

Peanut cookie drops with fleur de sel

The tiny sprinkle of fleur de sel on each of these little honey peanut cookies brings out the lovely peanut flavour without getting in the way of their honeyed sweetness. The finished biscuit is soft and a little puffy, and goes very well with a cup of coffee at the end of a meal.

There’s no flour in these, just the peanut butter, so these are great if you’ve got guests who can’t eat wheat. These cookies use honey instead of sugar, and are also good with a little extra honey drizzled over the top at the end if you don’t like the idea of the fleur de sel.

Fleur de sel is a hand-harvested salt made from the very top layer of evaporated salt, collected before it sinks to the bottom of the salt pan. Its name comes from the shape of the salt crystal – fleur de sel comes in beautiful, frilly little crystals a bit like a large snowflake. You can also buy Portuguese flor de sal, which is just the same, but less expensive. I’ve heard suggestions that it’s meant to taste saltier than normal table salt, but that’s not my experience with it. I do, however, think it has a very fine taste and a lovely texture, and it looks great on the finished plate. At the moment we use a small pot (from our break in Hyeres last summer) as table salt, and there’s a large bag from Portugal in my salt pig which I use for cooking.

To make about 60 peanut cookie drops you’ll need:

350g (1 ½ cups) peanut butter
250g (¾ cup) runny honey
2 egg whites
Fleur de sel to sprinkle

Preheat the oven to 180° C. Beat together the peanut butter and honey with the egg whites (I used an electric whisk, but elbow grease will do the job too) until everything is smooth. The oils from the peanut butter may make the mixture glossy as you beat – don’t worry if they do.

Place teaspoonsful of the mixture onto non-stick baking trays, a couple of inches apart. Bake for ten minutes until golden and a little puffy. Sprinkle over a very little fleur de sel (or drizzle with honey for a different take on things).

These little biscuits will keep in airtight containers for a few days.

Chocolate brownies

I’ve had a couple of emails asking for a brownies recipe to accompany the blondies I posted here a few weeks ago. Your wish, dear reader, is my command.

These brownies are very easy to make. They’re squodgy, squishy, chocolatey and have that lovely caramel-nut flavour that only toasted pecans can give. It’s very easy to adapt this recipe – if you want to try toasted hazelnuts instead of the pecans, or to add some chocolate chips, you have my blessing.

For families who fight over the slices of brownie which have come from the edge of the tin (the pieces with a crisp, chewy edge and a wonderful gradation of softness into the middle), there’s a solution to your problems: the Edge Brownie Pan. This baking tin is designed like paths in a maze, and ensures that every slice of brownie you bake has at least two edges. (The cook deserves the pieces with three.) I really must buy one of these.

Use a chocolate which has as high a percentage of cocoa solids as you can find. To make a large tray (mine measures 10 x 14 inches, just right for making enough brownies for a party), you’ll need:

1 pat salted butter (8 oz, or 110 g)
4 oz (100g) plain dark chocolate, high in cocoa solids
4 eggs
1 lb (450g) caster sugar
4 oz (100g) plain flour
2 teaspoons baking powder
1 teaspoon vanilla essence
Pinch of salt
6 oz (150g) toasted pecan nuts

You can toast the nuts yourself in a dry frying pan over a medium flame. Watch carefully to make sure the nuts do not burn – they can turn from nicely toasted to bitter and burned in moments.

Preheat the oven to 180° C (350°F).

Melt the butter and chocolate together. You can use the microwave or a bowl suspended over some boiling water (a bain marie).

While the butter and chocolate are melting, beat the eggs, salt and sugar together with the vanilla essence, and line a baking tin with greaseproof paper. Stir the chocolate mixture into the egg mixture and sieve the flour into the bowl. Stir until everything is well blended.

Turn out the brownie mix into the lined tin, and sprinkle the pecans over the raw batter. (I prefer to add the pecans to the mix when it’s in the tray rather than adding them in the bowl, as it means you’ll get a more even distribution.) Bake in the oven for about 30 minutes, until the mixture starts to come away from the sides and the top has a dry, crackling look to it. It will still be soft in the centre.

While the brownies are still hot from the oven, divide into squares. After about ten minutes they will have firmed up enough to transfer to racks to cool.

Dr Weasel’s lemon raspberry cake

Dr Weasel, my fine and upstanding husband, has an uncontrollable urge to bake about once a year. This year’s annual cake orgy has just taken place – he made several for a shared birthday party at work, where twenty ageing computer programmers played competitive Dance Dance Revolution in the office and ate cake at each other.

There were cupcakes, a couple of chocolate cakes, trays of brownies and this lemon raspberry confection. This particular cake was going to be a nice short semolina sponge, sliced across and glued together with jam and whipped cream. Unfortunately, it didn’t really rise enough in the middle to be sliced in two across the bottom successfully, but Dr Weasel, undaunted, raided the fridge and made one of the best quick cake toppings I’ve tried. He successfully disguised any sag in the middle, created something quite delicious, and ended up with something nearly as popular as my brownies. I am shocked. Has he been having lessons while I’ve not been looking?

This cake will work just as well if your semolina sponge rises better than Dr Weasel’s did (I think his egg whites were not whipped sufficiently – it still tasted brilliant, though). You’ll need:

4 oz (100 g) caster sugar
2 oz (50 g) fine semolina
½ oz (15 g) ground almonds
3 separated eggs
Juice and zest of a lemon
5 fl oz (150 ml) whipping cream
5 tablespoons lemon curd
Fresh raspberries to cover (about a punnet)

Preheat the oven to 180° C. Grease and line a round cake tin.

Whisk the egg yolks and sugar together with an electric whisk until they are pale and frothy. Add the lemon juice and keep whisking until the mixture thickens. Fold in the lemon zest, semolina and almonds.

Clean the blades of the whisk very carefully to remove any trace of egg yolk. In a different bowl, whisk the whites of the eggs until they form soft peaks. Fold the beaten whites into the semolina and yolks mixture, turn into your lined cake tin and bake for about 30 minutes until golden (and, hopefully, risen).

When cool enough to handle, turn the cake out onto a wire rack and cool completely. Meanwhile, whisk the cream until it is stiff, fold in the lemon curd and use a palate knife to spread the thick lemon cream over the top of the cake. Stud the surface with raspberries and serve in slices.