Labneh

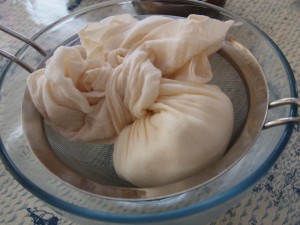
Labneh in a cheesecloth
Labneh about to be unwrapped

If you’re anything like me, you’ll be feeling somewhat bloated and liverish after Christmas and New Year, so I’ll hold the roast goose recipe back until later in the week when our gall bladders have all recovered. I was racking my brains for a nice easy recipe to start the year with – something that’s simple to prepare, and has few ingredients, but that tastes great and will impress guests or a picky family. How about labneh, a soft “cheese” from the middle east, made in your fridge from thick Greek-style yoghurt?

Greek yoghurt is thicker than the sloppy variety by virtue of having been strained until much of the whey drains out, leaving you with a richer, thicker product. Labneh takes the process further, continuing to drain until almost all of the whey has gone, and you are left with a thick, sharp-tasting ball that looks like soft cream cheese. It’s not a true cheese because rennet is not used in making it, but I like to use it where you might use something like Philadelphia – and when it’s made by the method below, with fresh garlic, you’ll find that it’s a mighty fine substitute for Boursin, richer, denser and without the dusty dried garlic taste you get in the packaged stuff from the supermarket. Labneh is a great addition to a cheeseboard, either in a chunk on its own or in a bowl, splashed with olive oil. Experiment by adding herbs to the garlic: for a Turkish flavour, try some dill and chillies; chop in some mint with the garlic for a Greek platter.

My Mum made the labneh in the pictures at Christmas as part of a cold supper. It’s fantastic wherever you’d use cream cheese or with crudites, and great crumbled over rich middle-eastern dishes, especially those containing lamb; I’ve got a cheesecloth full going in the fridge at the moment which is destined to be spread on crusty bread and served with a Greek-style lamb shoulder.

You’ll need:

400g Greek yoghurt (make sure that you choose a version without emulsifiers or thickeners; I like Total)
1 large pinch salt
2 cloves garlic, chopped as finely as possible
Labneh
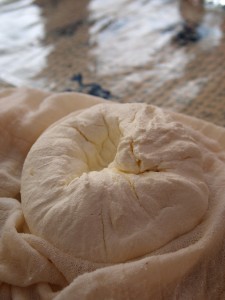
Labneh straight out of the cheesecloth

Line a sieve with a boiled cheesecloth, and put it over a bowl to catch drips. You can also use a boiled kitchen towel if you don’t have a cheesecloth – an old linen one which has been washed many times will be softer and easier to work with.

Stir the yoghurt, salt and garlic well in a bowl to make sure everything is well combined. You can leave the garlic out if you want a plain labneh; the garlic gives a lovely fiery kick to the finished cheese. Pour the yoghurt mixture into the lined sieve, bring the corners and edges up to form a bag around the labneh and twist together. You can secure the twist with string if you like, but it’s not really necessary.

Put the bowl and sieve into the fridge and leave the labneh to drain for between 24 and 48 hours, squeezing the bag every now and then. The cheese will be a pleasant, creamy texture after 24 hours, and leaving it for longer will make it even stiffer, and harder to spread.

To keep your labneh in the fridge, cover it completely with olive oil in a bowl. It will keep for two weeks, but I bet you won’t be able to stop yourself finishing it much sooner than that.

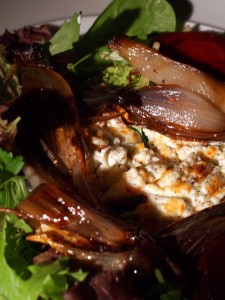
Goat cheese with balsamic shallots

Grilled goats' cheese with balsamic shallotsYou are smarter than I am, and therefore you’ll glance at this picture and think, “Silly woman. She should have bought a cheese with a rind.” You’d be absolutely right, and if you’re making this and want your cheese to hold a nice shape when grilled you’ll need something with a rind. My excuse: my cheese was in a little cardboard box and I made assumptions about the presence of a rind that wasn’t there.

I get through a lot of shallots, but I do make an effort to buy the longer kind (sometimes sold as “banana” shallots, sometimes as “echalion”), which grow here in East Anglia from September to May. They’re larger than the round variety you’ll be buying for the rest of the year, and easier to handle – the flavour is very similar. If you’re using round shallots here, be aware that they might need five minutes or so less cooking time.

Don’t use the wallet-assaultingly expensive, 20-year-old balsamic in a teensy-weensy vial that you bought on your romantic trip to Modena. That one’s for drizzling on Parmesan and perhaps dribbling on some very good bread with a little olive oil that’s been standing on some smashed garlic for an hour or so. For this recipe, you just need the supermarket stuff that comes in large bottles.

I’ve suggested two nut oils to use to dress the salad. I love a light nut oil to finish this sort of dish – buy a small bottle and keep it in the fridge, though, because nut oils go rancid quickly if kept in a cupboard. Experiment! You can buy all kinds of interesting nut oils, like macadamia, pistachio and pine nut, in delicatessens, and this salad is a good place to try them out.

To serve four as a light lunch or starter (all depending on how much crusty bread you intend to go through), you’ll need:

450g banana shallots, peeled and quartered
½ teaspoon salt
25g soft dark brown sugar
75ml balsamic vinegar
2 tablespoons extra-virgin olive oil
200g goats’ cheeses, in a log with a rind
2 tablespoons hazelnut or walnut oil
Salad leaves to serve

Preheat the oven to 220°C (430°F).

When you have peeled and quartered the shallots, use a fork to whisk the olive oil, balsamic vinegar, salt and sugar together in a large bowl. Drop the shallots in and turn them carefully to coat them in the mixture. The shallots shouldn’t fall apart completely, but don’t worry if a few of them shed chunks.

Pour the whole contents of the bowl into a metal baking tray, spreading everything out so the dressed shallots are in one even layer. Roast for 15 minutes, turn, roast for another 15 minutes until dark brown and caramelised, and set aside to cool.

When you are ready to serve the salad, cut the cheese into four discs and grill them on one side until gold and bubbling. Lay out a large handful of salad leaves on each plate, put a cheese in the centre and scatter a quarter of the shallot pieces around the cheese. Grate a generous amount of pepper over the whole salad and drizzle with your choice of nut oil before serving.

Granny Sue’s seeded cheese nibbles

Granny Sue, I should explain, is not my granny. She’s the granny of a friend, and creator of the world’s greatest cheese biscuit recipe. Last time we visited, her grandson’s lovely wife produced a dish of Granny Sue’s most excellent biscuits, and kicked half the batch she made up a notch with a sprinkle of cumin seeds. I waited until they were both rendered soft and giving with drink, and demanded the recipe: here it is, unaltered by me aside from the addition of some more whole spices.

The unholy amount of butter and cheese in these makes for an intensely crisp, rich finish – I defy you not to scarf the lot in about five minutes flat.

To make about 25 toothsome little biscuits, you’ll need:

60g plain flour
60g sharp Cheddar cheese
60g salted butter
1 egg yolk
1 heaped tablespoon whole-grain mustard
Water
20g Parmesan cheese
1 tablespoon each fennel seeds, cumin seeds and coriander seeds

Put the butter in the freezer for 20 minutes, while the oven heats to 200°C (400°F). Sieve the flour from a height, making sure you get plenty of air into it, into a large mixing bowl, and grate the Cheddar cheese into it. Grate the frozen butter into the bowl, and use a knife to mix the butter, cheese and flour together well. Add the egg yolk and the mustard to the bowl with a little water (the amount of water you’ll need to make a soft dough will vary according to the conditions on the day you make the biscuits) and mix with the knife until you have a dough which comes together nicely without sticking.

On baking sheets, form teaspoons of the mixture with your fingers into little rounds or lozenges about half a centimetre thick – it’s fussy but rather nice to create a different shape for each of the three different spices you’ll be using. Sprinkle a pinch of grated Parmesan on each one, then a pinch of one of the spices. I made a third of my batch of biscuits with cumin, a third with coriander and a third with fennel. Press the top of each biscuit gently with your finger to make sure the whole spices are firmly engaged with the cheese. Bake for 12 minutes until the biscuits are sizzling and golden. Cool on the baking sheets for ten minutes, then transfer to a wire rack to finish cooling. Serve with drinks before dinner.

Bagna cauda

A miracle! The English summer actually seems to be taking itself seriously this year – we have blissy sunshine, bone-loosening heat and, in my village at least, a lovely smell of hay in the air. These conditions do not lend themselves well to lots of roasts and meaty things, so I looked to Provence and Piedmont for today’s recipe – a bagna cauda, rich with garlic and anchovies, for dipping hunks of bread, crudités and hot, steamed artichoke petals into. (There have been some fabulous and enormous artichokes kicking around the market in Cambridge this week – if you’re local, go and grab a few now.)

This bagna cauda has a texture a lot like mayonnaise, and it’s made in a similar way, but without any eggs. (The proteins in the cooked garlic and anchovies help to emulsify the oil and butter in the way that an egg yolk does in mayonnaise.) Like mayonnaise, it keeps well in the fridge and works amazingly well in sandwiches, so if you don’t polish off the whole lot in one go, just treat it as a flavoured mayo for next week’s packed lunches.

To make enough to serve six as a robust dip with bread, carrots, cauliflower, peppers, tomatoes, artichokes, asparagus, new potatoes…or anything else you can think of, you’ll need:

1 fat bulb garlic
Milk
1 tin anchovies
300ml extra-virgin olive oil
350g unsalted butter

Start by peeling the garlic. Choose the sweetest, fattest kind you can find – the Really Garlicky Company grow Porcelain garlic, which I think is the among the most reliable and delicious in the UK. They supply Waitrose, but if you don’t have a local branch, they also sell their garlic online. Pop the peeled cloves in a little pan, cover them with milk and simmer for ten minutes, until the garlic is soft and cooked through. Discard the milk.

Put the anchovies in a bowl with a cover and nuke in the microwave for 45 seconds. They should cook down to a paste. Scrape the anchovies into a saucepan (not the milk pan, which will have milky bits stuck to the bottom) with the garlic, and use the back of a fork to squish them together.

Chop the butter into little cubes about the size of the top joint of your thumb. Put four of the cubes into the saucepan with the garlic and anchovy mixture, and turn the heat on as low as possible under the pan. As soon as the butter starts to melt, start to whisk the contents of the pan with a balloon whisk. When the butter cubes are nearly melted, add four more, still whisking, and continue until all the butter is incorporated. As you continue to whisk, drizzle the olive oil very gradually into the warm mixture as if you were making mayonnaise. Eventually, you’ll have a thick, glossy bagna cauda. Remove to a bowl, plonk it down in the middle of the table, and get dipping immediately.

Bruschetta al pomodoro – tomato bruschetta

Tomatoes and bread have an amazing affinity, from Basque slices of toasted sourdough rubbed with the cut side of a tomato, to British teatime tomatoes on toast. For me, though, a garlicky, herby Italian bruschetta is the very king of bread and tomato preparations.

There is a simple trick in making this sunny, fresh appetiser. You need to marinade the cut tomatoes with the aromatics and a hearty amount of your very best olive oil the night before you mean to eat – but that marinade should contain absolutely no salt. Salting the bruschetta just before serving means that the tomatoes’ texture will remain firm and juicy. The oil will have absorbed a fabulous wallop of tomato flavour (no salt, you see, so the juices of the tomato won’t all run out and separate), the tomatoes will be redolent with fragrant oil, herbs and garlic, and your tastebuds will want to shake your hand.

It’s very important that you select tomatoes with the maximum flavour. If you’ve grown your own, these will be by far the best. Otherwise, buy tomatoes which are ripe and have been kept on the vine after picking. That glorious smell you get in tomato greenhouses is from the green stalk and leaves, and doesn’t seem to make it into the fruit itself. If you buy vine tomatoes, they will be riper, and you can use the stalk in the marinade to inject some of that greenhouse flavour into the finished bruschetta. I’ve used some yellow tomatoes alongside regular red ones because it’s pretty, but you can use any good, ripe tomatoes you can find.

To serve four, you’ll need:

1kg vine tomatoes
2 fat, juicy cloves garlic
1 large handful basil leaves
2 tablespoons chopped fresh oregano
100ml olive oil
Freshly ground black pepper
1 ciabatta
Salt to finish

Chop the tomatoes into small bite-sized pieces, and put them and any juices in a large bowl. Crush the garlic and the herbs, and stir them into the tomatoes with the olive oil and a generous amount of freshly ground black pepper. Add the vines from the tomatoes, mix well, cover with cling film and refrigerate overnight.

When you are ready to make up the bruschetta (don’t do this too far ahead of eating, or they will go soggy) grill slices of slightly stale ciabatta and cool on racks. Fish the stalks out of the marinade and discard. Heap the tomato mixture onto the slices with a tablespoon, sprinkle with fleur de sel or another crystalline salt like Maldon, and serve immediately. There are very unlikely to be any leftovers.

Star anise chicken wings

I’ve been trying very hard to find a silver lining in this economic collapse. The best I’ve been able to manage is in the fact that supermarkets are suddenly stocking more of the cheaper cuts of meat – and those cheaper, nubbly cuts, like pork belly and hock or breast of lamb, are great. They’re often fattier, tastier and altogether more fun to cook with than the clean, boneless slabs of muscle supermarkets usually fall back on.

Chicken wings are among my favourite of the nubbly bits – all that lovely, crisp skin, and the sweet little nuggets of meat, full of flavour from nestling up against the wing bone. The nice chaps at SealSaver (keep this up, fellas, and you’ll become my very best friends) have recently sent me a couple of new SealSaver vacuum canisters, which, besides increasing the storage life of foods make marinading an absolute breeze. Stick the meat and marinade mixture in a Sealsaver, pump the air out, and some magical process occurs, making the meat marinate in a fraction of the usual time. If you don’t have a SealSaver (and you should – they make life in the kitchen very easy), marinate these wings for 24 hours in the fridge. In the SealSaver, they only needed two hours – brilliant.

To make 16 wings (enough for two as a main course or four as a starter) you’ll need:

16 chicken wings, tips removed
5 tablespoons dark soy sauce
8 tablespoons light soy sauce
2 tablespoons molasses
8 tablespoons Chinese cooking wine or dry sherry
3 heaped tablespoons soft dark brown sugar
3 tablespoons sesame oil
8 star anise, 4 kept whole, 4 bashed to rubble in a mortar and pestle
Spring onion to garnish

Prick the chicken wings all over with a fork. Mix all the ingredients except the chicken wings and spring onion in a bowl, and combine the marinade with the chicken wings. If you’re using a SealSaver, marinate, refrigerated, for two hours – otherwise, marinate in the fridge for 24 hours.

Remove the wings, reserving the marinade. Bring the marinade to a low boil for two minutes. Grill the wings (use the barbecue if you possibly can – the only reason I didn’t was that it was snowing) over a slow heat for about 15-18 minutes, basting regularly with the cooked marinade and turning regularly until they are mahogany brown and crisp. Serve with more of the hot sauce and sprinkle with spring onion.

Italian tuna dip

This is a lovely starter for lazy days when you’re eating outdoors. I like to dibble crudités (especially sweet batons of carrot) and good bread in this tuna dip. It’s also very good spread on toast or crostini, and, cold or warmed through, makes a good strong sauce to dollop on bland cooked fish.

Apologies for the horrendous photo – by the time I realised how rubbish this looked, the bowl had been licked clean, so there was nothing to photograph.

To serve two as a starter with crudités and bread, you’ll need:

1 small can tuna (in oil, brine or spring water), drained
2 anchovies
2 teaspoons Marsala
1 tablespoon sherry vinegar
1 heaped teaspoon grainy Dijon mustard
½ teaspoon fennel seed
1 tablespoon finely chopped oregano
½ teaspoon finely chopped rosemary
1 teaspoon finely chopped sage
1 teaspoon thyme
1 tablespoon finely chopped basil
1 tablespoon finely chopped flat-leaf parsley
1 tablespoon finely chopped mint
1 small clove of garlic, crushed
3 tablespoons extra-virgin olive oil
½ teaspoon honey

Bash the fennel seed lightly in a pestle and mortar, and chop the herbs. Chop the anchovies very finely. Put all the ingredients in a mixing bowl and mix well until the dip ingredients all come together to form a rough paste. Add a little more olive oil if you prefer a looser texture, and taste for seasoning. Serve chilled as a dip or crostini topping, or warm through in a small saucepan to use as a sauce.

Roast asparagus with shaved parmesan

If you thought the hollandaise sauce recipe from the other day sounded like too much hard work, this asparagus recipe will suit you down to the ground. It’s very quick and easy, and this cooking method makes the most of the tender sweetness of the stems. It also looks posh, so you can serve it up as a starter (or as an accompaniment) to guests and feel smug when they congratulate you on something which, in reality, only took you five minutes to put together.

For a starter, look at serving between six and eight stalks of asparagus per person. You can get away with less than this if you’re making it to accompany something else as a main course, but it’s worth making plenty because roast asparagus is downright delicious.

To serve two as a starter you’ll need:

16 stalks of asparagus, as fresh as possible
½ teaspoon flaked Italian chilli peppers
Zest of a lemon
3 tablespoons extra virgin olive oil
50g parmesan cheese
Salt (preferably something crystalline, like Maldon) and pepper

Preheat the oven to 180° C (350° F).

Snap the bottoms off the stems of asparagus. They’ll come apart naturally, with a lovely snapping sound, at the point where the woody part (which you don’t want to eat) begins. Arrange them in a single layer in a baking dish.

Sprinkle the flaked chilli and lemon zest over the asparagus, and drizzle with the olive oil. Roast the asparagus in the oven for 10-15 minutes until bright green.

While the asparagus is roasting, use a potato peeler to shave the parmesan into little pieces. As soon as the asparagus comes out of the oven, scatter over the parmesan, which should soften a little as it meets the hot asparagus. Serve the roast asparagus with crusty bread if you’re eating it as a starter.

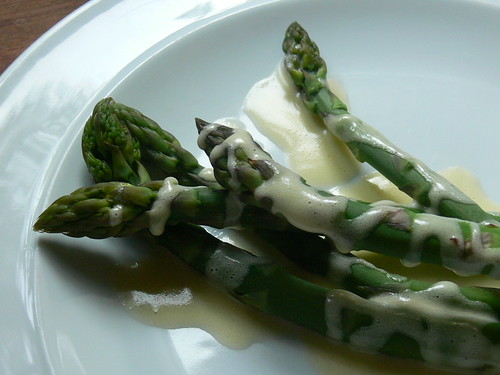
Asparagus with hollandaise sauce

Isn’t eating at this time of year brilliant? The rhubarb is still sprouting away, and now the asparagus is shooting up as well. If you live in Cambridgeshire, it’s well worth making a trip to Burwash Manor Barns in Barton, just outside Cambridge, where they grow tonnes of the stuff. It’s picked fresh daily and sold on-site at the Larder (a very nice deli), where you’ll find a lady outside trimming the stems of an enormous heap of asparagus fresh from the fields, and packing it in wrappers for sale. If you cook it as soon as you get home so the sugars don’t have a chance to turn into starch, you’ll find it amazingly sweet. Supermarket (and, sadly, market) asparagus is never available this fresh.

English asparagus is a real delicacy. Unlike asparagus grown in hotter climates, it pops up out of the ground relatively slowly, allowing the plant to build up a much greater concentration of sugars. Burwash asparagus is available as Class I and Class II (50p cheaper than the Class I this year) – I’d recommend the Class II packs, which taste exactly the same as the Class I asparagus, but contain spears which are a bit bendier than the ruler-straight Class I. (See picture for extent of bendiness.) The thickness of spear you choose is entirely a matter of personal taste, but do make sure that all the asparagus that you steam is the same thickness, or else it won’t cook evenly.

Of course, dressing your asparagus with melted butter or just dipping each spear into the yolk of a soft-boiled egg makes for a perfectly delicious starter. That said, dressing them with a hollandaise sauce – essentially just butter and yolks with an acidic spike of reduced vinegar – somehow works out to be about ten times as delicious as either butter or yolk on their own.

Hollandaise sauce is a rich emulsification of butter and good vinegar (or lemon juice in some recipes), held together by egg yolks. I always add a little boiling water to loosen the sauce and prevent it from becoming too solid – a very thick hollandaise can be overpoweringly rich.

Making hollandaise isn’t as intimidating or difficult as some make out, but it will need your full attention, so you need to make sure the answering machine gets any phone calls and ignore any cries of ‘I can’t find my shoes!’ from the family for the ten minutes or so it takes to make.

Hollandaise is cooked at a very, very low heat. In order to stop the yolks from getting too hot and turning into an omelette, you’ll be making the sauce in a bain marie or double boiler. I don’t own one of the expensive dedicated double boilers – sitting a mixing bowl on the rim of a pan part-filled with simmering water works just fine and doesn’t take up any extra precious cupboard space. To dress asparagus for four, you’ll need:

2 egg yolks
2 tablespoons boiling water
3 tablespoons good white wine vinegar (I used Maille, which, for no very good reason, keeps turning up at my local branch of TK Maxx.)
225g (half a pat) good butter
2 peppercorns
1 bay leaf
Salt to taste

The quality of your butter is all-important here. I used Bridel from Normandy. Bridel or Beurre d’Isigny is fantastic here because of its rounded and smooth flavour.

Make sure the water for steaming the asparagus is ready and boiling on the hob as you make the sauce – you’ll need a couple of spoonfuls of it for the hollandaise. Throw the asparagus into the water and put the lid on as you start to whisk the butter into the hollandaise – it only wants a little cooking, and should be bright green and ready when you finish the sauce.

Put the vinegar in a small pan with the peppercorns and bay leaf, and simmer it gently until it has reduced to about a tablespoon-full. Remove from the heat but keep warm. Melt the butter and put it in a warm jug.

Place a mixing bowl on top of a saucepan part-filled with water. The water should not touch the bowl. Bring the water to a simmer while beating the egg yolks vigorously with a hand whisk in the bowl. As the bowl warms, you will notice that the yolks start to thicken. Add a tablespoon of the boiling water to the yolks and continue beating until they begin to thicken again. Add another tablespoon and beat until the yolks are thickening once more, then add the vinegar with the bay and peppercorns removed, beating all the time until the sauce starts to thicken up again.

Pour the butter into the egg mixture in a very thin stream (as if you were making mayonnaise). Continue to whisk as you pour until all the butter is amalgamated, then remove the bowl from the heat. Taste for saltiness and acidity. If you want a little more bite to the sauce, squeeze in a few drops of lemon juice. Remove the asparagus from its water and serve with the sauce either drizzled over or as a dip.

Hollandaise sauce freezes well – when you want to use it, just bring it back to room temperature slowly.

Smoked mackerel pate

This is a lovely starter (or a light meal on its own), and looks a lot more complicated than it actually is, making it a great stand-by for dinner parties. I’ve prepared my smoked mackerel pate in little ramekins, but you can also take spoonsful of the pate and wrap them, Chinese dumpling-style, in a sheet of smoked salmon tied tight with a string of chive if you want something particularly pretty to serve. The finished pate is quite stiff, so if you line your ramekins or another mould with an abundance of cling film (saran wrap for Americans) you will also be able to tug on the edges of the film once the dish is cooled and turn out the smoked mackerel pate onto a plate. Smoked fish fans in and around Cambridge should head out to the River Farm Smokery in Bottisham for some very superior smoked mackerel.

I’ve used a generous amount of horseradish here. If you can find the whole root for sale, grab it and use a coarse grater (swimming goggles can come in handy here for minimising something similar to the effects of mustard gas) on it. Otherwise, the English Provender company does freshly grated horseradish in a little jar, which you can also use to make your own creamed horseradish by folding it into some lightly whipped cream with a pinch of sugar, lemon juice, salt and pepper to taste.

I really like this pate with melba toast. See this crab pate recipe for instructions on how to make melba toast at home.

To make enough for a starter for four, or lunch for two, you’ll need:

200g smoked mackerel
200g soft cream cheese
Juice of 1 lime
2 tablespoons snipped chives
1 tablespoon snipped chervil (leave this out if you can’t find any – it’s easy to grow at home and worth cultivating, because it’s often hard to find fresh in the UK)
2 teaspoons freshly grated horseradish
Salt and pepper to taste

You don’t need any machinery here – simply peel the papery skins off the mackerel, check for any stray bones, then flake finely with a fork. Stir the flaked fish vigorously into the cream cheese and lime juice with your fork (if you don’t have any limes use a lemon – I prefer the aromatic nature of lime here, but lemon will be just fine), and fold in the herbs, horseradish and seasoning.

Pack the pate into ramekins and chill until you are ready to eat.