Dal

I decided on a bit of childhood nostalgia for supper over the weekend. When I was a very little girl and we went to visit family in Malaysia, the biggest treat in the world was a trip with my Grandfather in his Mini Moke, starting before dawn, to inspect the rubber and palm oil plantations. It was magical – the stink of curing rubber, a thrilling terror of snakes in the dark, the burst jackfruit on the plantation floor, and the two of us bumping along jungly roots and mud in what looked for all the world like a set of tent poles in a wheeled orange dinghy.

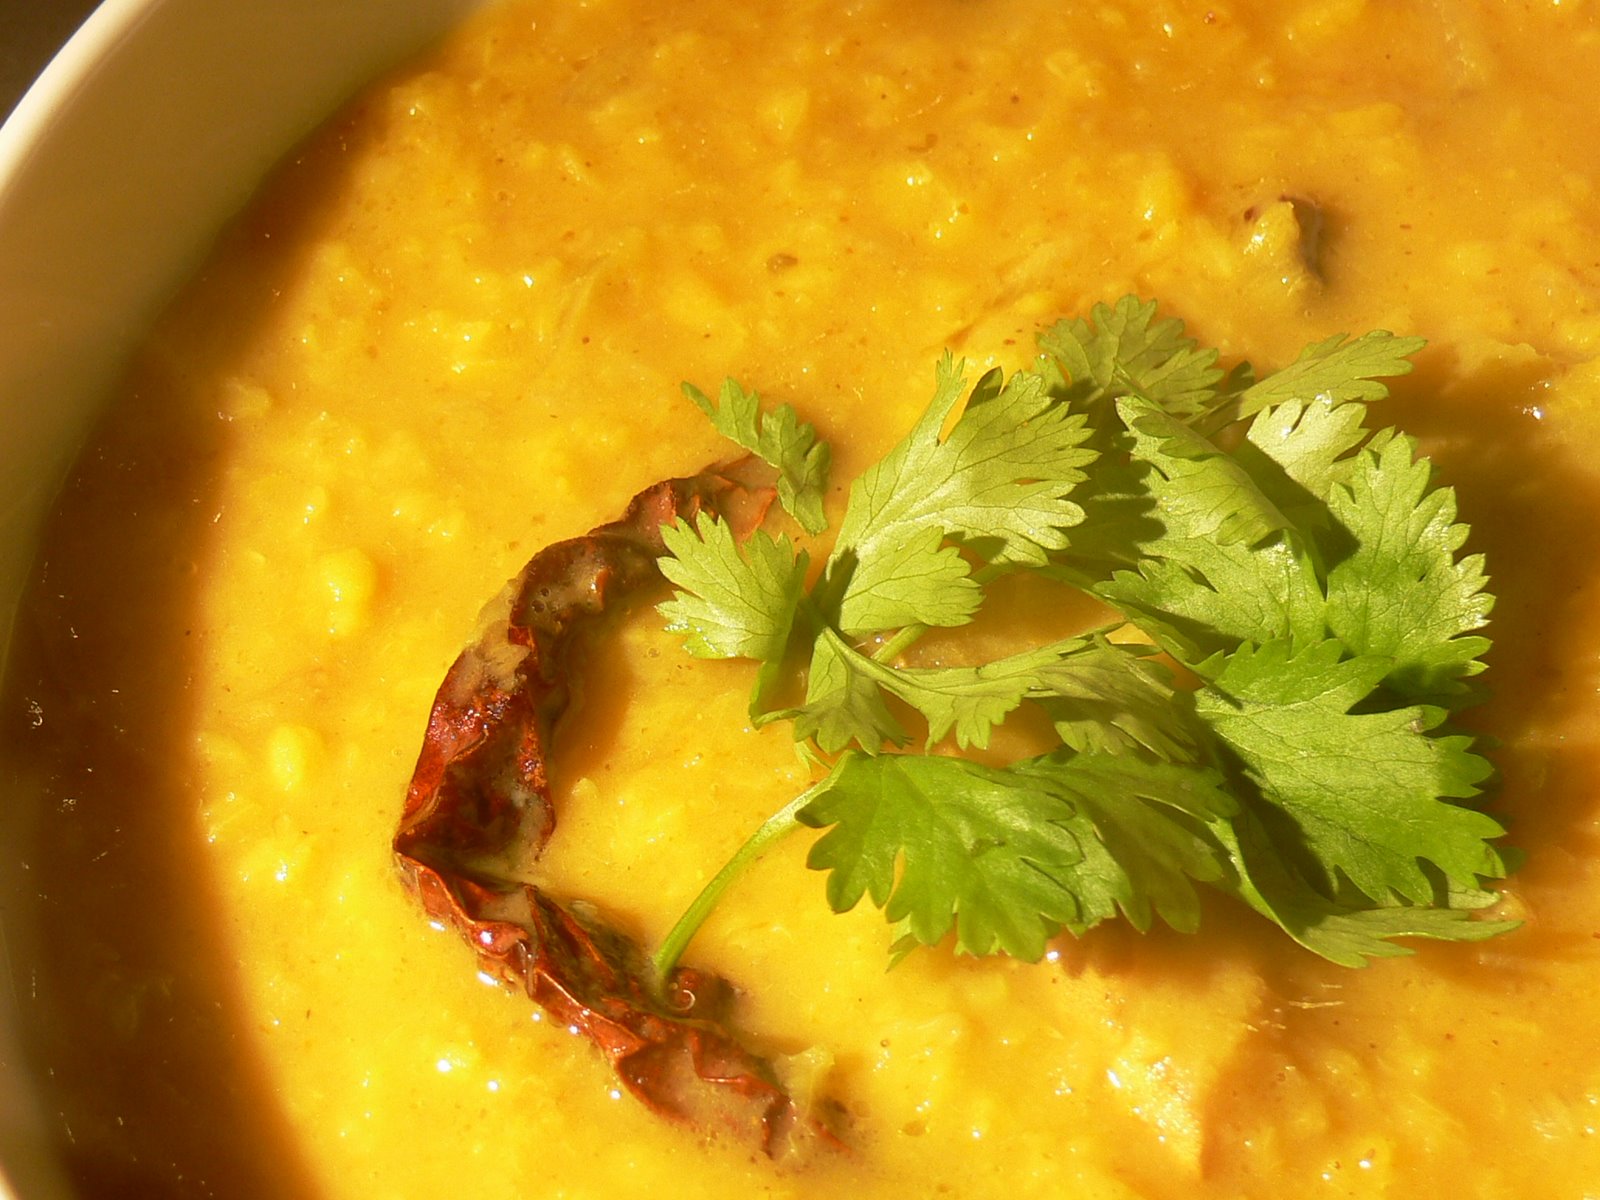
At the end of his tour of inspection, my Grandfather habitually stopped for breakfast at an Indian coffee shop, and for me, this was the perfect end to an almost unbearably exciting morning. What we ordered was always perfectly simple: two bowls of rice, two roti canai, and a positive lake of delicious dal.

Proust had his Madelines. I have lentils. When I spooned this over my rice at the weekend, I felt as if I was seven again. Eating stuff like this is a fabulous way to keep young. To serve 4-5 people as one of two curries on the table, you’ll need:

250g mung dal (mung lentils, available at Indian supermarkets)
1 large onion
4 cloves garlic
1 piece of ginger, about the length of your thumb
4 cloves
2 cardamom pods
1 star anise
3 dried chillies (I used Malaysian cili padi)
1 teaspoon curry powder (I used Bolst’s)
1 teaspoon ground turmeric
1 or 2 Thai bird’s eye chillies
Water
Salt
2 tablespoons ghee

Start by picking through the lentils for any twigs or stones. Rinse the lentils well in a sieve and soak in cold water while you prepare the base of the curry (about fifteen minutes).

Slice the onion finely and chop the garlic. Wallop the ginger with the side of a cleaver or something heavy, and chop into slices. In a saucepan, fry the onion, garlic, ginger, cloves, cardamom, anise and dried chillies in the ghee until the onion is browning. Add the turmeric and curry powder, and continue to cook for a couple of minutes. Add the drained lentils to the pan with the chopped bird’s eye chillies, and pour over water to cover the lentils by about 3cm. Stir in about a teaspoon of salt.

Simmer the dal gently for between 30 and 45 minutes, until the lentils are soft. Add more water if you prefer a thinner, more sauce-like dal. Serve as one of a selection of curries.

Aromatic braised lamb shanks

A few years ago, when lamb shanks hadn’t appeared on every pub menu in the country, they were a great cheap alternative to other cuts. These days, unfortunately, they’re a bit pricier as people have become less scared of pieces of meat with bones in them – a shame, because when braised they’re easy to handle and taste fantastic, their meat sweet from proximity to the bone and luxurious in the mouth from long simmering.

Because this is such a lusciously rich cut, lamb shanks benefit from lots of aromatics to lift the flavour. I’ve used a mixture of French and Moroccan flavours to produce what I imagine you might do with lamb shanks in Marrakesh. I have never been to Marrakesh, and this would probably be considered totally weird by any real Moroccans, but I’m very pleased with the results. Don’t be put off by the long ingredients list; this isn’t hard to make, and can all be done on the stove top.

To serve two, you’ll need:

2 lamb shanks
3 carrots
5 sticks celery
1 large white onion
1 head garlic
½ bottle red wine
800ml stock (use lamb stock if you have some in the freezer – otherwise chicken will be fine)
800g passata
2 tablespoons tomato puree
2 tablespoons balsamic vinegar
1 heaped tablespoon soft brown sugar
1 tablespoon Ras al Hanout
1 inch piece of ginger, grated
1 teaspoon coriander seeds
1 teaspoon cumin seeds
1 teaspoon fennel seeds
1 teaspoon fresh thyme leaves
½ stick cinnamon
2 dried chilllies
Juice and zest of 1 lemon
1 can chick peas
Salt and pepper
Olive oil

Dice the onions, carrots and celery, chop the garlic and grind the fennel, cumin and coriander seeds together in a mortar and pestle. Rub the lamb shanks with salt and pepper.

Heat about 5 tablespoons of olive oil over a high flame in the bottom of a heavy casserole dish with a close-fitting lid until it begins to shimmer, then brown the lamb shanks all over in it. Remove the browned meat to a large bowl, and turn the heat down to medium. Add the diced vegetables to the oil you browned the meat in and sweat them with the garlic, grated ginger, Ras al Hanout, ground spices, thyme, cinnamon and chillies.

Cook the aromatic mixture without browning until the vegetables are turning soft, keeping everything moving, then return the lamb to the casserole. Pour over the wine, stock and passata and simmer for five minutes. Add the balsamic vinegar, sugar, lemon juice and lemon zest with some salt to taste (I used just over a tablespoon for this volume of sauce.) Turn the heat down to a very gentle simmer, put the lid on and leave for three hours, turning the lamb shanks in the sauce a couple of times during cooking.

When the three hours are up, add the drained chick peas to the pan and simmer for a further fifteen minutes. The sauce will have become rich and thick (insert joke about ideal spouse here). Skim off any fat that has risen to the surface, and serve with mashed potatoes to mop up the delicious sauce.

Jerked chicken – and brining 101


I promised you a post about brining. Brining sounds a bit counter-intuitive at first; how on earth is giving a piece of meat a bath in salty water going to make it taste better?

Back in the dark ages when I was at school, cooking lessons were called domestic science. I am unconvinced that there’s a lot in common between my constructing a pie and the Large Hadron Collider at CERN, but understanding how brining works does actually require you to think back to your biology lessons. This is because what’s going on in your chicken once you’ve popped it in its salty bath involves osmosis, whereby the cell walls in the muscle let through the concentrated brine to try to balance the concentration inside and outside the cells. This results in a plumping of the muscle – the cells draw up the brine all the way into the core of the piece of meat and become very juicy, leaving you with a lovely moist piece of cooked meat. There’s also some denaturing of protein thanks to the salt; this will make your meat much more tender. All this science works at its fastest and best when your brine is as close to freezing as possible – once you’ve made yours, refrigerate it (perhaps with a couple of ice cubes bobbing around in there) until it’s very cold before using.

The brine can also push certain flavours deep inside the meat (far deeper than ordinary marinading can achieve). When choosing what flavours to add to your brine, be careful – you need to use only those aromatics which are soluble in water or vinegar, not those (like the essential oils in a lot of herbs and spices) which are only fat-soluble – these flavours won’t make it past the cell membranes. Any of those chilli sauces which have a vinegar base (Tabasco, Frank’s and so on) work brilliantly in a brine; so does lemon juice, Worcestershire sauce, soy sauce, mustard, flavoured vinegars and any alcohol. Be careful when adding wine or cider to a brine though; because the brine works on the deep tissue of the meat, not just the surface, it can be hard to cook the brined meat little enough to keep it tender while also cooking it enough to burn off any alcohol lurking deep in the middle.

I like sugar or honey in a brine, especially with chicken, because as well as adding flavour to the meat, it makes the surface skin much nicer – brown, crisp and quick to caramelise. You can add another variable by buying some vacuum containers like the ones I reviewed here, which will make brining about four times faster. Without a handy vacuum tub, brining times for chicken are:

  • Chicken breasts, no bone – 1 hr
  • Chicken joints, with bone – 1 ½ hrs
  • Whole chicken (about 4lb) – 3 hrs

I’ve made a jerk rub to slather all over chicken once it comes out of the brine. This Jamaican seasoning is unusual in its heavy use of allspice, usually a dessert spice, and it works really well here. To make unbelievably succulent, spicy chicken for two, you’ll need:

Chicken and brine
1 chicken, jointed into six pieces (ask the butcher to do this for you or go at it yourself with a very sharp cleaver)
70 g salt
1 litre water
1 ½ tablespoons Tabasco sauce
2 tablespoons honey

Jerk seasoning
2 tablespoons ground allspice
1 teaspoon fresh thyme leaves
1 tablespoon paprika
1 teaspoon cayenne pepper
1 teaspoon onion salt
1 teaspoon dried habañero pepper
1 teaspoon black pepper

Mix the water, salt, Tabasco and honey and heat gently in a saucepan, stirring, until all the salt has dissolved. Chill in a large bowl in the fridge until very cold. Add the chicken pieces to the brine and leave for an hour and a half.

Remove the chicken from the brine and pat dry with paper towels. Drizzle with a little olive oil and rub well with the jerk seasoning. Grill the chicken on the barbecue or under the grill in your oven for about 7 minutes per side (be careful here – for some reason, brined chicken takes less time to cook than virgin chicken).

I’ll put up a recipe later this week for a plantain accompaniment for this chicken.

Malaysian curried lamb shoulder

I’m cheating a bit here. The flavours are bang-on Malaysian, but you’d be unlikely to find a shoulder joint cooked in this way in Malaysia proper, where bite-sized pieces of meat are the norm in this kind of a curry. I decided to cook half a lamb shoulder on the bone in this curry sauce to maximise the flavour by keeping the meat near the bone – and because I love the fall-off-the-bone texture that a fatty shoulder achieves after a couple of hours slow cooking.

What makes a curry definably Malaysian? A few things – the spicing will be rather different from Indian curries, making use of more eastern aromatics like lemongrass, coriander, star anise and ginger. The liquid in the curry will probably be coconut milk, rather than yoghurt or any other dairy product.

I’ve made my own curry paste here, but if you don’t have the time or the inclination, you should be able to find good Malaysian curry powders and pastes on sale in any Chinese supermarket. I particularly like Yeo’s curry powder. This will make more paste than you need, but it keeps well in the fridge for a few weeks if you put it in a jar and pour over some oil to stop the air getting to the paste.

To serve two greedy people, you’ll need:

Curry paste
4 tablespoons coriander seeds
2 tablespoons cumin seeds
12 cloves
1 cinnamon stick
2 star anise flowers
1 teaspoon black peppercorns
3 stalks lemongrass
1 peeled piece galangal, about the length of your thumb (substitute with extra ginger if you can’t find any)
1 peeled piece ginger, about the length of your thumb
3 fresh birds-eye chillies (cili padi in Malay – cut down here if you want to reduce the heat)
10 dried chillies (you can find sun-dried cili kering, a less fearsome chilli than cili padi, in some Chinese supermarkets – otherwise, use what you can find)
1 teaspoon turmeric powder or 1 grated fresh turmeric root
1 bulb garlic

Lamb and sauce
½ shoulder of lamb, on the bone
2 large onions
1 can coconut milk
2 tablespoons light soy sauce
1 handful coriander leaves
Salt
Flavourless oil for frying

Preheat the oven to 180° C (350° F).

Begin by heating a couple of teaspoons of oil in a heavy pan with a lid, large enough to fit the lamb in snugly. The pan should be able to fit inside your oven. When the oil is very hot, sear the lamb on all sides, and remove it to a plate.

Chop the onions finely and fry them with two tablespoons of the curry paste in the same oil you seared the lamb in. Add a little more oil if necessary. Fry, stirring all the time, until the onions are translucent and soft (about eight minutes).

Return the meat to the pan with any juices it has released onto its plate. Pour over the coconut milk, add the salt and the soy sauce, and bring the whole confection to a gentle simmer. Put the lid on and put the pan in the oven for 2 hours, turning the meat occasionally.

Taste the sauce when the cooking time is finished – you may find you want to add a spot of sugar or a squeeze of lemon juice. Skim off any fat that’s floating on top of the sauce. Peel the skin off the lamb and discard. Sprinkle over the fresh coriander leaves and serve with rice. I like a salad of fresh pineapple and cucumber with this.

Brandysnaps

I’ve never met a person who doesn’t love brandysnaps. They’re a buttery, toffee-crisp, lacy bit of teatime royalty. Fox’s, the English biscuit people, started manufacturing these in the 1850s to sell to fairground traders, but they’re a much older recipe (the owner of Fox’s borrowed a family recipe from his neighbour in Yorkshire), which used to be cooked in the home. You can still buy them in packets – but they’re much, much nicer when they’re homemade.

There’s no brandy in the recipe – from what I can make out, brandysnaps never contained any at any point in their history. Some modern recipes will suggest that the cream you serve them with should have a couple of tablespoons of brandy whipped into it, but after some experimentation I’ve decided that this is overkill (and inauthentic overkill at that). The gentle spicing of the brandysnap can be overwhelmed by a strong-tasting filling, so I have used a simple Chantilly (which is just cream whipped with sugar and vanilla) alongside them. These fragile little gingery curls are delicious with cream and soft fruit as a dessert, but they’re also near-perfect eaten completely unadorned, alongside a cup of good coffee.

To make about 20 brandysnaps, you’ll need:

75 g caster (superfine) sugar
125 g golden syrup
125 g salted butter
90 g plain flour
1½ teaspoons ground ginger
Zest of one lemon

Start by measuring out the sugar in your measuring bowl, and spread it carefully over the bottom of the bowl. Then measure out the golden syrup into the same bowl, on top of the sugar. This will stop the golden syrup from sticking to your bowl, and will ensure that you don’t lose any because it’s adhering. Tip the sugar and syrup straight out into a small saucepan, add the butter to the pan and cook them all together over a low flame, stirring with a wooden spoon, until the butter is melted and you have a smooth paste. Don’t allow the mixture to boil. When it is smooth, remove the pan from the heat and tip in the flour, ginger and lemon zest. Stir vigorously until you have what looks like a smooth, thin batter.

Set the pan aside for about 30 minutes, until the mixture is cool, and heat the oven to 190° C (375° F). Grease a baking tin thoroughly.

You’re going to be cooking the brandysnaps four at a time -the mixture spreads out so four just about fill a baking tin, and you will have to curl them while they are still warm – handling more than four at a time is very difficult because they harden quickly, and if you cook more than one tray at a time, by the time you get to your fifth it is likely to have set solid.

Place four heaped teaspoons of the mixture, about four inches apart, on the greased baking tin and put in the oven for ten minutes, until the brandysnaps are bubbly and lacy. Remove the tin from the oven and allow the brandysnaps to cool for about a minute, until they are stiff enough to manoeuvre. Use a spatula to release each flexible brandysnap from the tin, and wrap them around the handle of a wooden spoon to create the tube shape. Cool on a wire rack. (If you want brandysnap baskets rather than curls, drape them over an upturned ramekin rather than wrapping them round a spoon.)

Repeat the process for the rest of the mixture.

I served my brandysnaps with Chantilly (150 ml whipping cream whisked into stiff peaks with 2 teaspoons of vanilla sugar, or 2 teaspoons of caster sugar and a few drops of vanilla essence) and blueberries. You can pipe the cream into the little tubes or serve it alongside them, but don’t fill them more than about half an hour before serving, or the brandysnaps will lose their crispness. Surprisingly, brandysnaps freeze very well once cooked, maintaining their crunch.

Istanbul spice bazaar

I’ve just got back from Istanbul, where I spent several days gorging myself on kebabs, dates, grilled fish, honeycomb, morello cherry juice and other good things. I am currently too jetlagged to come up with any really sparkling prose, so this will mostly be a picture post from the city’s spice market, where about 100 small stalls in a covered bazaar sell everything from henna to sumac. It’s an essential shopping destination if you’re in the city and you’re at all interested in food.

Turkish sweetsThis stall was selling loukhoum (Turkish delight – here’s my recipe) and baclava, the tooth-hurtingly sweet pastries soaked in a sugar syrup that you might have had with coffee in Turkish or Greek restaurants. I did not sample the aphrodisiac delight on the right, but judging by the huge chunks that had obviously already been sold on the day I visited, some people must think it’s effective. Behind the blocks are tins of Iranian caviar. The caviar is also sold from blocks, sliced and then jarred. Nilgun, our excellent guide, suggested putting a dab of butter in the top of the jar to keep the caviar fresh.

Spice marketRaw spices, including several grades of flaked chilli and powdered paprika. I’d already tried some of the very dark chilli in the second row, sprinkled on a rotisserie chicken; we came away from the market with a little packet to use at home. At the left-hand side of the picture you can see almonds for sale, still in their shells; the dried roots at the front next to the bundles of cinnamon are turmeric and ginger. There’s more caviar in tins above the display, next to jars of pomegranate molasses.

HoneycombRaw honeycomb, kept behind glass to keep insects away. There was a big slab of this laid out every morning at our hotel breakfast; we squashed it with a fork to drive the honey out of the waxy comb, and then ate it with yoghurt, on croissants and on toast.

SaffronThis stall was labelling several substances as saffron. None of the yellow/orange things on offer was real saffron; the powder at the front was turmeric, and the fat orange stamens on the plastic trays at the left (much fatter than the thread-like real thing) were safflower, which doesn’t taste of much and is used primarily in dyes. Caveat emptor.

Dried fruitFour grades of dates, some prunes, and two grades of apricots. Most stalls selling dried fruit sold hunza apricots in their dark, untreated form alongside the bright orange ones (which are treated with sulphur dioxide to preserve their colour). If you find the less attractive brown ones, buy them; all the flavour and aroma of the fresh fruit is concentrated in them, and they’re much better than the orange ones. We sampled several grades of date, and there was method in the pricing; the expensive ones really were the best, with thin skins and a moist, fudgy interior – it was hard to believe that what you were eating was a fruit.

I’ve got some restaurant recommendations for you, some street food tips and some more market exploration coming up – watch this space.

Carrot cake

Carrot cakeCarrot cake is often referred to by the squeamish, afraid of disturbing their guests by mentioning root vegetables, as passion cake. I’ve never been quite sure why, since the carrot (and, in my version, a mushed up banana) is a real star here; it’s what goes to make the cake so sweet, dense and deliciously moist. This is an easy recipe of the ‘bung everything in a bowl and stir’ variety, and it’s pretty foolproof, rising evenly and maintaining that lovely moist texture throughout. This cake keeps well for about five days in an airtight tin.

Cream cheese icing is a particular favourite of mine. You’ll see some recipes where other flavourings are added to the cream cheese and sugar (orange zest is a common one, and some add crushed nuts), but I find the cool icing much better when it’s plain, allowing the warm spices in the cake to come to the fore. (This cake is especially heavy on the nutmeg, which is fantastic with that banana.) For one cake, you’ll need:

Cake
160ml melted butter
175g light brown sugar
3 eggs, beaten
½ teaspoon ground cinnamon
½ a nutmeg, grated
150g carrots, grated
1 banana, mashed
50g chopped pecan nuts
250g plain flour
1 tablespoon baking powder

Icing
160g cream cheese
80g icing sugar

Carrot cakePreheat the oven to 180°C (350°F). Grease and line a 20cm diameter springform cake tin.

Put all the cake ingredients in a mixing bowl and beat well. Put the mixture in the greased, lined cake tin, and bake for 45 minutes (at which point the cake should be golden – a skewer inserted in the middle should emerge clean). Cool the cake completely on a wire rack.

When the cake is cool, beat the cream cheese and icing sugar together with an electric whisk until it becomes fluffy. Spread over the cake, slice and munch.

Preserved lemons

Preserved lemonsI have been having some very good dreams recently about those sweetbreads with preserved lemon I ate a couple of weeks ago at Moro. Although sweetbreads are pretty hard to find round here, Moroccan preserved lemons are not – you can buy Belazu’s very good lemons at the supermarket, or make your own. I chose to make my own, because making preserves gives me a self-righteous glow and something nice to display in the kitchen.

This is a really easy preserve to make, largely because it involves no cooking. The lemons are preserved in salt and their own tart juices, with spices and herbs tucked in between. Once ready, the rinsed lemons’ skins can be used as a condiment, and their pulp and juice as a seasoning. To fill a sterilised 1.5 litre jar, you’ll need:

About 15 unwaxed lemons (buy a few extra in case you need the juice)
500g coarse salt
2 bay leaves
3 cardamom pods
10 coriander seeds
3 dried chillies
1 cinnamon stick
5 cloves

Preserved lemons, cinnamon stickBegin by making a 2 cm layer of salt at the bottom of the jar, and dropping a couple of the whole spices in it. Take a lemon and cut the top and the bottom off. Make as if you are going to cut the lemon in half from top to bottom, but don’t cut through the last 1 cm of flesh and skin. Turn the lemon upside down and make another cut from top to bottom, as if you were going to quarter the fruit, again not cutting all the way through. You’ll end up with a lemon with two top-to-bottom slits in it. Holding the fruit above the neck of the jar, stuff each slit with as much salt as you can fit in, then drop it into the jar, pushing it firmly into a corner.

Continue filling your lemons with salt and packing them firmly into the jar, sprinkling salt and spices between them as you go. You’ll notice that the juice from the squashed lemons will begin to cover the fruits as you work. When you have packed as many lemons into the jar as will fit, squeeze over fresh lemon juice until the top lemon is at least 1 cm deep in the preserving liquid.

Put the lid on tightly and leave the lemons in a warm place (the kitchen worksurface will do just fine) for six weeks, shaking the jar gently every day to mix the ingredients. The lemons, once ready, do not need to be refrigerated, and will keep indefinitely – if, once you start using them, the liquid no longer covers all the lemons, just add more salt and lemon juice.

Pulled pork

This is a wonderful American way with pork. Barbecue purists (a curiously wonderful breed made up entirely of American men – I have never met a woman or a non-American who takes the barbecue quite as seriously as these guys do) should haul out their smokers for this recipe. One team at the American Royal Barbecue championship last year had a smoker made from the body of a Cessna aeroplane.

I used my oven and added a tablespoon of liquid smoke at the end.

The smoke flavour in this recipe is a great addition (UK cooks can buy liquid smoke online – I haven’t found a brand I’ve not enjoyed, but Colgin makes a particularly good version). All the same, if you don’t have access to a small adapted aircraft or liquid smoke, you shouldn’t worry. Your pork will still have a wonderful, barbecue sauce flavour.

In the US you’d use pork butt (actually shoulder) for this recipe. In other countries like the UK we butcher pigs rather differently, so just find a nice, fatty, boned piece of shoulder if you can’t get your hands on the exact cut. The fat is important; the joint cooks for a long time and its fat will baste it from within and keep the meat delectably moist.

To serve about six people you’ll need:

One boneless pork butt or boneless shoulder (about 3 lb)
4 tablespoons soft light brown sugar
2 tablespoons coarse salt
2 tablespoons paprika
2 tablespoons cinnamon powder
1 tablespoon mustard powder
10 turns of the peppermill
1 tablespoon chilli powder (I used chipotle chilli powder for the smoky taste, but you can use your favourite)
1 teaspoon coriander powder
1 teaspoon onion salt
12 fl oz (1 ½ cups) apple juice
6 fl oz (¾ cup) water

Mix all the dry ingredients in a large bowl, and rub them thoroughly all over the pork in the same bowl. If your cut of meat has been boned and rolled, you can push some of the rub into the space where the bone used to be as well, seasoning the meat inside and out. Leave the meat in the bowl and leave, covered, in the fridge overnight.

About six hours before you want to eat, preheat the oven or smoker to 150° C (300° F). Place the pork joint, skin side up, on a rack in a roasting tin. Pour the apple juice and water into the bottom of the tin. (The liquid should not be touching the meat.) Cover the roasting tin tightly with a few layers of tin foil and place in the oven for five hours. Don’t poke at the pork while it’s cooking; it should be left to steam gently in its tinfoil hat.

When the five hours are up, remove the tinfoil. If the liquid in the pan looks like it might dry up, add a wine glass of water. Turn the heat up to 200° C (400° F) and cook the joint uncovered for half an hour. Remove the meat to a large bowl, keeping the juices in the bottom of the roasting tin.

Use two forks to shred the pork. It’ll come to pieces very easily after the long cooking time, and should be moist and delicate with a slight crisp to the outsides. Place the shredded pork in a large frying pan with all its juices and the liquid from the roasting tin. Add another tablespoon of soft light brown sugar, an extra teaspoon of chilli powder if you want some extra kick, and a tablespoon of liquid smoke if you can find some (I like applewood liquid smoke for this recipe). Cook over a medium heat until the liquid in the pan begins to become syrupy.

Serve the pork with its sauce in toasted burger buns. The pork will keep in the fridge for a couple of days. Sweetcorn, coleslaw and other traditional barbecue accompaniments make a great side dish. Try not to get too much down your front.

Beer can chicken

Your eyes aren’t deceiving you – this is a chicken with a can of Guinness bunged up its how-do-you-say. With a dry rub, it’s a brilliant, if slightly obscene way to cook chicken. The beer, flavoured with some of the spicy rub, steams the chicken from inside, resulting in a juicy, delicate flesh, while the skin cooks to a crackling, caramelised crispness.

My friend Lorna pointed me at this extraordinarily cheap roasting stand from Amazon when I complained that my beer can often threatens to topple when I make this dish. It’s worth spending a couple of pounds on a stand like this (bend one of the wire loops to fit the can onto the little dish; it’ll keep the chicken nice and sturdy along with the can). If you don’t own a stand, just make sure that the chicken is resting levelly on the can. Don’t be fooled into using the chicken’s legs to balance the beast – they’ll shrink and change shape when they cook.

To roast one rude-looking chicken to perfect succulence you’ll need:

1 plump chicken without giblets
1 can of beer
2 heaped tablespoons ground cinnamon
1 heaped teaspoon mustard powder
1 teaspoon chilli powder (I like powdered chipotles for this, but you can use cayenne pepper)
1 teaspoon allspice
1 tablespoon salt
3 heaped tablespoons soft dark brown sugar

Snip through any strings holding the chicken’s legs neatly together, and spread them out. Mix all the dry ingredients together in a bowl and rub them all over the chicken, then add a tablespoon of the rub to the cavity of the chicken and smear it around a bit with the back of a spoon. Leave for the flavours to penetrate for two hours at room temperature. Meanwhile, open the beer can, pour half of the beer out and drink it. (This is a fun recipe.) Use a metal skewer or a nail and hammer to make a few more holes in the top of the half-full beer can.

Put a tablespoon of the remaining rub in the can with the beer. It will froth and bubble, so add your rub carefully. After the two hours are up, rub any remaining spice mix onto the chicken and push the bird carefully, bottom (that’s the end with the legs) first, onto the upright beer can, as in the picture. Roast the whole apparatus at 180° C (350° F) for 1 hour and 30 minutes, remove the bird carefully from the can without spilling any beer, and rest for ten minutes before serving. (If you are a lucky person with a large and easily controlled barbecue, try cooking the chicken in there over some flavourful wood – it’ll be delicious.)

Don’t be tempted to use the hot beer as a sauce. It’ll taste bitter and revolting, so just pour it down the sink. Let the chicken’s natural juices (there will be plenty, and they’ll come out of the bird as it rests) act as a gravy. This is a great dish with a salad and a pilaf or cous cous. Serve with a couple of nicely chilled cans of whatever beer you used in the cooking.

If you’d like to try a different take on beer can chicken, I’ve come up with a recipe for a slightly Chinese-ified version too – enjoy!