Bhindi bahji with whole spices

Bhindi bahji
Bhindi bahji

I’ve got collection of bad habits which do nothing to endear me to my local Indian takeaway. If we’re having takeout, I usually cook our own rice, occasionally heat up some oil for DIY poppadoms, and then fail miserably to order anything other than vegetable dishes, which happen to be the least expensive thing on the menu.  This doesn’t all come from being a hideous cheapskate; it’s just that I like my own pilau rice better than the stuff with the red and green food colouring in it, and have had a preference for vegetable curries ever since I got food poisoning in India in 2005. (A tip: if you’re in a city where the sewers drain directly into the sea, don’t eat the prawns.) And poppadoms are great fun to make at home, as you’ll know if you’ve ever tried.

Sadly for the local takeaway, I’ve started to take to making bhindi bahji, which is probably my all-time favourite curryhouse dish, at home too. There are a few reasons for creating this extra work for myself: home-made bhindi bahji is a lot less greasy than the restaurant kind, which always comes drowning in ghee for no reason that I can really make out, and I can control the cooking of the okra to make sure it doesn’t produce any of the snotty slime that puts so many people off the vegetable.

I love okra. I like its texture (I even like slippery, slimy okra, especially for its ability to thicken the base it’s cooked in), its flavour and the shuddery feeling I got aged about ten when my parents used to refer to it as “ladies’ fingers”. It’s a much maligned vegetable, and I’d encourage you to have a go at making this dish if the only okra you have experienced is olive green and exuding stuff that looks as if it came out of a snail. Cooked like this, it is crisp, fresh- tasting and entirely snot-free.

To serve two as one of two curries on the table, you’ll need:

150g fresh okra
12 fresh, sweet cherry tomatoes
1 medium red onion
2 cloves garlic
1 teaspoon black mustard seeds
1 teaspoon fennel seeds
1 teaspoon coriander seeds
1½ teaspoons turmeric powder
1 tablespoon ghee or groundnut oil

Chop the okra into pieces about an inch long (larger pieces mean less potential for slime) and dunk in a large bowl of water with a couple of spoons of salt dissolved in it. Drain in a colander. Halve the tomatoes and set aside, and chop the garlic.

Cut the onion in half, and slice it into half moons. Heat the ghee or groundnut oil to a high temperature in a frying pan or wok, and throw the onion in. Stir fry it for three minutes, then add all the spices and the garlic to the pan. Continue to stir fry until the onion is turning translucent (a couple of minutes) and the spices are giving off their fragrance.

Add the drained okra to the pan and keep stir-frying for one minute. Add the tomatoes, and continue to cook, stirring all the time, until the tomatoes start to collapse in on themselves and the okra is a bright green and piping hot. Taste for seasoning, and add some salt if necessary.

Serve immediately.

Crisp sweetcorn fritters

Sweetcorn frittersEverybody gets those days when happiness is not achievable without some fried chicken, and I wanted something horribly unhealthy to accompany it. Remembering fried chickens past, especially the ones I ate about a year ago at Lolo’s, a soul food restaurant in Phoenix, I decided that something with a sweet/savoury finish and a bit of spicing that would stand up to being drizzled with my own approximation of Lolo’s hot sauce was just what the chicken breasts I was cooking needed. The resulting fritters are crisp and puffy, and fall somewhere between an Indian pakora, a Thai fritter and a New Orleans beignet.

These are not not awfully good for you. Don’t make them too often.

To make ten once-a-year fritters and some killer honey hot sauce, you’ll need:

Fritters
1 large egg
60g plain flour
60ml milk
½ teaspoon salt
1 teaspoon baking powder
340g tin sweetcorn OR kernels from 2 fresh cobs sweetcorn
4 spring onions
1 teaspoon ground turmeric
1 teaspoon fennel seeds
1 teaspoon coriander seeds
1 small handful (about 15g) fresh chives
Oil to fry

Sauce
150ml bottle Frank’s original hot sauce (available in several UK supermarkets or online)
3 tablespoons runny honey

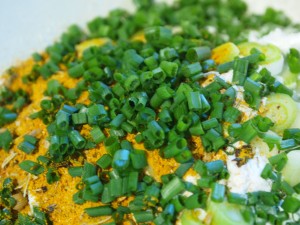
IngredientsBeat the egg into the milk. Grind the spices in a mortar and pestle with the salt, and mix with the flour, baking powder, chives and finely chopped spring onions in a large bowl. Use a whisk to beat the egg and milk into the flour mixture until you have a batter. Use a spoon to stir the corn kernels through the batter.

Drop heaped tablespoons of the batter mixture into your deep fryer, and cook a couple of minutes on each side, until crisp and golden.

To make the sauce, just combine the honey and hot sauce in a small pan and bring to a simmer, stirring well as you go. Cool before slathering generously all over your chicken and fritters. You can rebottle any extra.

Beef rendang

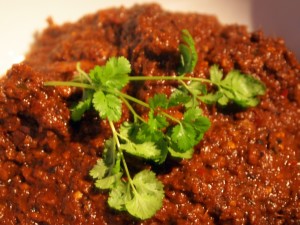
Beef rendangIt’s my firm belief that every culture in the world has at least one dish which looks like something the cat dragged in, ate, digested, and left as a gift on the hall carpet twelve hours later. Beef rendang is Malaysia’s offering to this noble pool.

I’ve not come across a dish like rendang anywhere else in the world. Beef is simmered in a thick mixture of spices, browned coconut and coconut milk until nearly dry, soaking up huge amounts of flavour during the simmering process; the cooking method turns from simmering to frying as the mixture reduces and the oils from the coconut leach out. You end up with a thick, rich, dark brown sauce, packed with herbs and sweetness from shallots and roasted coconut. It’s a dish that takes a while to prepare, so make plenty and freeze what you don’t eat immediately.

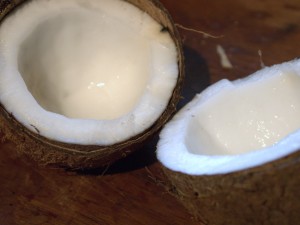
CoconutYou’ll need to tackle a raw coconut for this recipe. Opening coconuts doesn’t have to be anything like the palaver we seem to make of it in the UK – all that business with towels and hammers. As you can see from the picture, my coconut was bisected neatly. All you need to do to achieve the same thing from yours is to hold it over a bowl, and, using a meat cleaver or large knife (cleavers are available very cheaply at Chinese supermarkets, if you have one in the neighbourhood), tap hard with the blunt edge along the equator of the coconut – the pointy tuft at one end and the three “eyes” at the other are your north and south poles. Keep tapping with the blunt side, not the blade, as hard as you can, turning the coconut as you go, and once you’ve circled it about five times (by which point you will be sweating and swearing that all this work hasn’t made a blind bit of difference) the coconut will split neatly in half, the juice inside falling into your cleverly pre-positioned bowl. It’s magic. Give it a shot.

A word on that coconut juice. It’s not the same thing as coconut milk (the stuff you find in a can), which is the grated white flesh of the coconut, moistened and squeezed. Coconut juice is very pleasant on a beach somewhere when your coconut is green and straight off a tree, a nice man has sliced the top off it with a machete, and you have a few shots of rum and a straw; but once your coconut has turned brown and been shipped to the UK, it will be bitter and horrid. Drink it if you must. If you’re smart, you’ll pour it down the sink.

Coconut milk is a different matter. For this recipe, it’s more important than ever that you buy some without emulsifiers – you’ll be using the thick, creamy part of the milk separately from the more watery part. I always buy cans of Chaokoh, a Thai brand. If you’ve difficulty tracking it down locally, you can find it (and a paradise of other Chinese, Malaysian, Korean and Japanese ingredients) at Wai Yee Hong, an oriental supermarket in Bristol with an internet shopping arm – I order from them every couple of months, and they’re super-reliable.

To serve four, you’ll need:

1 coconut
600g beef topside
1 tablespoon soft dark brown sugar
1½ teaspoons tamarind block (surprisingly enough, I found some at Tesco)
10 blanched almonds OR 2 candlenuts, peeled
2 teaspoons turmeric powder
2 Kaffir lime leaves
2 stalks lemongrass
1 in piece galangal
1 in piece ginger
10 small shallots
3 fresh red chillies
8 dried red chillies (look for Malaysian cili kering in an oriental grocer)
2 cloves garlic
1½ tablespoons palm sugar (or soft dark brown sugar)
2 tablespoons dark soy sauce
1 can coconut milk
Salt and pepper
Boiling water

Open the coconut according to the instructions above. Pry the white flesh away from the shell, and use a sharp knife or a vegetable peeler to remove the brown skin from the flesh. Grate the white flesh and dry-fry, stirring regularly, until dry and dark brown but not burned.

While the coconut is frying, soak the tamarind in enough boiling water to cover, poking with a fork until the tamarind is soft. Pick out the seeds.

Cut the beef into pieces and marinade in all but 2 tablespoons of the toasted coconut, the tamarind and its liquid, two teaspoons of sugar and a teaspoon of salt. Set aside while you prepare the other ingredients.

Put the remaining toasted coconut in the bowl of the food processor with the almonds, turmeric, lime leaves, lemongrass, galangal, ginger, peeled shallots, chillies and garlic. Whizz until everything is reduced to a fine paste. Put the paste in a thick-bottomed saucepan with the runny, milky part of the coconut milk, 100ml boiling water, the palm sugar, another teaspoon of salt, a generous grating of pepper and the dark soy sauce. Stir well and bring to the boil over a moderate heat. Add the meat with any juices, and bring back to a simmer. Continue to cook, without a lid, for an hour, stirring frequently to prevent burning. Most of the liquid will have reduced away by this point.

After an hour, add the creamy part of the coconut milk to the mixture and stir well. Add a lid and continue to cook over a reduced heat for another hour, stirring occasionally. The finished rendang should have a thick, dense sauce, and look oily, the fat having come out of the coconut, almonds and coconut milk to fry off the other ingredients.

Dry prawn curry

I’m back from a couple of weeks mixing business with pleasure in Florida. More on what we ate later on – for now, here’s a recipe using a curry paste that sprang, fully formed, into my head while we were away.

I went out to Mill Road in Cambridge as soon as we got back to buy some lovely big prawns, still in their shells, at Sea Tree, a new-ish fish restaurant with the city’s only non-supermarket wet fish counter on the far side of the railway bridge; and some fresh spice ingredients at Cho Mee, my favourite of the oriental supermarkets on the town side. It made the whole kitchen smell of South East Asia. Serve the prawns with some fried rice (mine was based around three diced lap cheong, or Chinese sausages, fried until crisp, with spring onions, chopped snake beans, sesame oil and soy, then proteined up with a couple of eggs) or some plain rice and a flavourful stir-fried vegetable.

To serve two handsomely, you’ll need:

12 king or tiger prawns, shells and heads on
2 fingers fresh turmeric root (see below)
1 inch piece ginger
1 large shallot
3 large red chillies
5 fat cloves garlic
2 sticks lemongrass
30g coriander root
1 teaspoon fennel seeds
8 whole cloves
4 tablespoons vegetable oil
4 tablespoons soy sauce

You might not be familiar with fresh turmeric – it usually comes pre-dried and ground in little pots, by which point it has lost the greater part of its slightly bitter, prickly flavour and intense aroma. The picture here should help you identify it if you’re in a shop that stocks ingredients like this (an Indian or oriental supermarket should be able to help you out). Those roots are about the size of your little finger. Be aware that the yellow of the turmeric stains just as badly, if not worse, than the dried stuff does – this is curcumin, an antioxidant that is supposed to be wildly good for you. It’s also wildly yellow. So get ready for daffodil fingernails – they’ll scrub clean eventually, but it’ll take some work. I’ve also used the very aromatic roots of coriander from the same shop, which usually come attached to the leafy herb and are very inexpensive.

Use a sharp knife to peel the turmeric and ginger. Remove the skins from the shallot and garlic and chop the lemongrass into chunks. Put the lot in the bowl of a food processor with the dry spices, the chillies, the soy sauce (I used Kikkoman) and some flavourless oil. Whizz until you have a nearly smooth paste.

Remove half of the paste to a container, cover with more oil and pop in the fridge to use later on. It’s worth always making too much curry paste – it hangs around for a week or so very nicely in the fridge, you can use it in plenty of different recipes, and it’s infinitely less faff than making it as you need it. Put the prawns in a large dish and cover with the remaining half of the curry paste. Set aside to marinade for 45 minutes to an hour.

When you are ready to cook the prawns, heat some more vegetable oil (about half a centimetre’s depth) in a large frying pan to a high temperature. Add the prawns – carefully, they’ll sizzle – to the oil with what marinade sticks to them and fry without moving them around the pan until the top side, not in the oil, has turned pink. Add whatever curry paste remains in the marinade dish to the pan and turn the prawns over. The shells on the side which has been in contact with the oil should have opaque patches alongside the translucent pink. Continue to cook until the other side of the prawns has opaque skins and the curry paste is brown and sticky. Serve immediately – and if you’re bold, you’ll eat the shells and suck the good stuff out of the heads.

Crispy pork belly with bak kut teh spicing

With what, you say? Bak kut teh. It’s a Hokkien Chinese term which translates roughly as “meaty bone tea”, and it denotes a particular herbal, scenty soup spicing which is traditionally meant to warm you from within. It’s got yang, this stuff. So much so that my mother and brother won’t eat it, because it makes them turn bright red and start sweating.

In a period when my village is only accessible over a hump-backed bridge coated with half a foot of sheet ice (it’s been like this since before Christmas), red and sweating is exactly what I’m after. Hurrah for yang.

You’ll find bak kut teh served regularly in Malaysia and southern China. Bak kut teh mixtures are available in the UK in oriental supermarkets, in sealed packs containing a couple of tea-bag style sachets. These sachets are preferable to the whole spices, which you also see sometimes in neat plastic packs – the whole spices can make your recipe a bit gritty. If you’re making the traditional stew, just pop a bag in a crockpot with some rib bones, simmer for a few hours, and serve with rice or as a noodle soup with a generous slosh of soya sauce. It’s hearty stuff – the traditional mixture includes star anise, angelica, cinnamon and cloves. This mixture is, somewhat eccentrically, close to what you’ll find in a British Christmas cake.

The recipe below is not a traditional use of a bak kut teh sachet, but it’s none the worse for that. Here, you’ll be combining those spices with rice wine, several gloppy Chinese sauces, honey, spring onions and garlic, and using this stock to perfume a slab of pork belly. The belly meat is pressed under weights overnight in the fridge, then chopped and fried in a wok until it’s crispy. I know, I know: but the long simmering will render a lot of the grease out of the meat, and sometimes the weather just calls out for fatsome, sticky pork.

I served mine with some sticky hoi sin sauce to dip, alongside a little of the stock, thickened with cornflour, to moisten the rice we ate with it. Hang onto the stock – you can freeze it and treat it as a master stock. I poached a couple of hams in mine, leaving them spiced and savoury but not overtly Chinese-tasting; it’s back in the freezer now, and I have plans to poach a chicken in it next. This procedure may sound overly parsimonious to those used to stock cubes, but it’s a method that produces a stock with an incredible depth of flavour, and you can keep using it indefinitely as a poaching liquid, adding a bit more water or wine and some more aromatics every time you cook, and making sure that every time it comes out of the freezer the stock gets boiled very thoroughly. There are restaurants in Hong Kong which claim that their master stock has been on the go for more than a hundred years.

To poach one boneless pork belly (enough for four, but be warned, this is very moreish) you’ll need:

1 boneless pork belly, with rind
1 bak kut teh sachet
Water to cover the belly (about a litre)
150ml Chinese rice wine
5 tablespoons light soy sauce
3 tablespoons dark soy sauce
3 tablespoons oyster sauce
2 tablespoons hoi sin sauce
3 tablespoons honey
2 anise stars
1 bulb garlic
6 spring onions, tied in a knot
Groundnut oil to fry

Stir the liquid ingredients together in a saucepan that fits the pork reasonably closely, and slide the pork in with the star anise, garlic and spring onions. Bring to a gentle simmer, skim off any froth that rises to the surface with a slotted spoon, cover and continue to simmer gently for two hours.

Remove the pork from the cooking liquid carefully and place it on a large flat dish with high enough sides to catch any liquid that comes out of the meat as you press it. Strain the poaching liquid if you plan on using it as a master stock. Place a plate or pan lid large enough to cover the whole belly on top of the meat (the skin side) and weigh it down. I used a heavy cast-iron pan lid and all the weights from my kitchen scales. Cover the whole assembly with a teatowel and leave it in the fridge for 24 hours.

When you are ready to eat, remove the pressed meat to a chopping board and use a sharp knife to cut it into bite-sized pieces, about 2cm square. Bring about 5cm depth of groundnut oil to a high temperature in a wok, and fry the pieces of pork in batches of five or six pieces until golden (this should only take a couple of minutes per batch). Serve with shredded spring onion and some hoi sin sauce with steamed rice and a vegetable.

Game chips

There are occasions on which a roast potato will not do. (I’ll admit that these occasions are few.) For those days, these game chips are very easy to make, deliciously crispy, and packed with flavour from crispy garlic, crushed chillies, and plenty of fresh oregano.

I’ve used smoked Maldon salt here. It’s a relatively recent arrival in UK supermarkets (and I actually saw some speciality delis selling it in Lille, which made me smile), and I’ve been using it in place of ordinary salt in a few recipes. It’s very good here, but if you can’t find some just use ordinary flaky salt. If you can find some, you can make an excellent Martini by adding a pinch of the smoked salt with a teaspoon of lavender honey and a sprig of lavender to a couple of shots of iced Grey Goose.

To serve two as a generous accompaniment, you’ll need:

4 good-sized King Edward potatoes
1 large handful (about 20g) oregano
2 large pinches (use all your fingers when you pinch, not just your forefinger) smoked salt
1 teaspoon crushed Italian chillies
4 fat cloves garlic
Pepper to taste
Olive oil

Pour a generous amount of oil (enough to cover the bottom) into your largest frying pan. Slice the potatoes into eight wedges each. Bring the oil up to a high temperature and lay the potatoes in the pan for about 10-15 minutes, until they are turning gold and crisp. Flip them over and cook them on the other side for another 10-15 minutes.

While the potatoes are cooking, chop the oregano finely and crush the garlic. As always, I’d recommend you use a Microplane grater to deal with the garlic – it’s the fastest, most mess-free way I’ve found to reduce garlic to a pulp, and you won’t get the stringy bits you get with a dedicated garlic crusher.

When the potatoes are crisp and gold on both sides, stir the garlic through them vigorously with a wooden spoon or spatula, until the sticky garlic is distributed properly throughout the pan. Keep moving it around the pan with your spoon until it too is golden – the crispy garlic bits should adhere nicely to your potatoes. Scatter over the chilli, salt and some pepper straight from the grinder, then the oregano. Toss with your wooden spoon and serve immediately. Hopelessly easy, and much nicer than a chip.

I rather like these game chips drizzled with a bit of lemon juice.

Granny Sue’s seeded cheese nibbles

Granny Sue, I should explain, is not my granny. She’s the granny of a friend, and creator of the world’s greatest cheese biscuit recipe. Last time we visited, her grandson’s lovely wife produced a dish of Granny Sue’s most excellent biscuits, and kicked half the batch she made up a notch with a sprinkle of cumin seeds. I waited until they were both rendered soft and giving with drink, and demanded the recipe: here it is, unaltered by me aside from the addition of some more whole spices.

The unholy amount of butter and cheese in these makes for an intensely crisp, rich finish – I defy you not to scarf the lot in about five minutes flat.

To make about 25 toothsome little biscuits, you’ll need:

60g plain flour
60g sharp Cheddar cheese
60g salted butter
1 egg yolk
1 heaped tablespoon whole-grain mustard
Water
20g Parmesan cheese
1 tablespoon each fennel seeds, cumin seeds and coriander seeds

Put the butter in the freezer for 20 minutes, while the oven heats to 200°C (400°F). Sieve the flour from a height, making sure you get plenty of air into it, into a large mixing bowl, and grate the Cheddar cheese into it. Grate the frozen butter into the bowl, and use a knife to mix the butter, cheese and flour together well. Add the egg yolk and the mustard to the bowl with a little water (the amount of water you’ll need to make a soft dough will vary according to the conditions on the day you make the biscuits) and mix with the knife until you have a dough which comes together nicely without sticking.

On baking sheets, form teaspoons of the mixture with your fingers into little rounds or lozenges about half a centimetre thick – it’s fussy but rather nice to create a different shape for each of the three different spices you’ll be using. Sprinkle a pinch of grated Parmesan on each one, then a pinch of one of the spices. I made a third of my batch of biscuits with cumin, a third with coriander and a third with fennel. Press the top of each biscuit gently with your finger to make sure the whole spices are firmly engaged with the cheese. Bake for 12 minutes until the biscuits are sizzling and golden. Cool on the baking sheets for ten minutes, then transfer to a wire rack to finish cooling. Serve with drinks before dinner.

Basque chicken

I seem to get through an awful lot of bell peppers at this time of year, when sunshine is a dim and distant memory. This dish is a rich and glossy version of the traditional Poulet Basquaise, where the sweetness of the peppers works deliciously against tiny pieces of salt pork and the savoury chicken.

I got hold of a strip of salt pork from the Polish deli in Newmarket. (Just off Fred Archer Way, by the short-stay carpark on Wellington St.) A lot of towns, especially here in East Anglia, now have Polish stores selling some really fantastic preserved meats like smoked sausages and fat salt pork. I’ve also been using our local one to stock up on soused herrings, some great pickles and the holy grail – cartons of cherry juice. If you have a Polish shop near you, go in at the weekend and have a rummage; you’ll find some really interesting ingredients and, if you’re lucky, will discover a new addiction to that cherry juice.

Salt pork is much fattier than English bacon, and it’s not smoked. Stock up if you find some; it keeps for months in the fridge. There should be more fat in a slice than meat. Here, I’ve rendered it down into crisp little nuggets, and have used the rich rendered fat to brown the chicken and soften the vegetables in this dish. If you can’t find salt pork where you are, fatty pancetta or even fatty bacon lardons will do the job nicely. To serve four, you’ll need:

100g salt pork
4 large chicken breasts
½ teaspoon caster sugar
½ teaspoon salt
½ teaspoon pepper
2 tablespoons paprika
1 teaspoon fennel
3 bayleaves
1 teaspoon dried pimento chillies

2 red peppers
2 green peppers
1 yellow pepper
4 cloves garlic

1 banana shallot
1 medium onion
4 stalks celery
2 glasses wine
2 glasses chicken stock
500g passata
1 tablespoon tomato purée
2 tablespoons crème
fraîche
Salt and pepper
Parsley to garnish

Slice the peppers into strips, and put them aside in a bowl. Put the diced shallot and onion and diced celery in another bowl with the crushed garlic. Rub the chicken breasts with the sugar, salt and pepper.

Cut the salt pork into small dice (about half a centimetre) and put in a large, heavy-based casserole dish. Cook over a low to medium heat, stirring occasionally, until all the fat has rendered out and the dice of pork are tiny and golden. Turn the heat up to medium-high and brown the whole chicken breasts on all sides in the fat. When they are golden all over, remove them to a plate with a slotted spoon. Turn the heat back down to medium-low.

Add the paprika, bay leaves, crushed chillies and fennel seeds to the pan with the shallots, onion, celery and garlic. Sauté in the remaining fat (adding a little olive oil if you think it’s necessary) for about five minutes, until the vegetables are soft. Add the peppers to the pan and cook for another five minutes, keeping everything on the move, then return the chicken to the pan along with any juices, stirring well so the paprika mixture coats everything.

Add the wine to the dish, and let it bubble up to a simmer. Pour in the stock and passata and stir a tablespoon of concentrated tomato purée through the mixture. Put the lid on and simmer for 30-40 minutes. Stir through the crème fraîche just before serving, and garnish with parsley.

I served this with sautéed potatoes. It’s also great with buttered rice and a salad.

Cochinita pibil

This red-cooked Mexican pork is marinated in an acidic dressing, then cooked slowly for hours, with meltingly tender results. It’s a traditional recipe from Yucatan, where pork would be marinaded in the bitter local orange juice with achiote paste, then wrapped in banana leaves and buried in a fire pit for hours (pibil is Mayan for buried). Those of you without a handy banana tree and fire pit can make it in the oven in a dish sealed tightly with tinfoil – banana leaves, although very decorative, don’t really add any flavour, so you’re not really losing out here. The juice of bitter oranges can be approximated with a bit of vinegar and some lemon juice blended with sweet orange juice.

Unfortunately, while you can do clever conjuring tricks with your lemons, vinegar and tinfoil, there’s not really anything you can substitute for the achiote paste in this recipe. Achiote is what gives this dish its lovely red colour. It’s a made from crushed annatto seeds – in the UK you can sometimes find achiote powder (Barts make it and it’s stocked in the spices section in some supermarkets), but the paste is far preferable. The Cool Chile Company, Mexgrocer and Casa Mexico are good UK suppliers of Mexican ingredients, and will mail you some paste.

To serve four, you’ll need:

825g fat pork shoulder
3 tablespoons achiote paste
1 tablespoon cinnamon
1½ teaspoons each fennel, coriander and cumin seeds, ground in the pestle and mortar
½ teaspoon freshly ground nutmeg
1 crumbled bay leaf
1 teaspoon oregano
10 cloves garlic, crushed or grated
Juice of 2 oranges
Juice of 1 lemon
2 tablespoons cider vinegar
2 pointy peppers
1 large onion
1 tablespoon salt

Start by chopping the pork into chunks about 3 inches square. Don’t trim the fat away – it will moisten the meat as it cooks. Put the pork in a large bowl with the herbs, spices, juices, vinegar, salt and garlic, stir well to blend all the ingredients and marinate overnight.

When you come to cook the pork, chop the onion into large chunks and brown the chunks in a dry frying pan. Chop the peppers into long strips. Spread the pork and its marinade evenly in a shallow dish, layer the onion and peppers on top, and cover tightly with a couple of pieces of tinfoil, making sure you make a good seal all around the edge of the dish. Roast on a low rack in the oven at 150°C (300°F) for three hours.

When the cooking time is up, unwrap the dish and leave to rest for ten minutes. Serve on tortillas (corn tortillas are great if you can find them – again, they’re sometimes hard to find in the UK) with guacamole, a good dollop of sour cream or crème fraîche (crème fraîche is closer to the crema you’d eat in Mexico), some fresh coriander and Mexican pickled onions. Those onions are the gorgeous pink things in the picture at the top, and they’re a traditional accompaniment for this dish – I’ll put up a recipe for them later in the week.

Chicken devil curry

This is a recipe with a really interesting pedigree. It’s a Malaysian curry, but it’s not a Tamil Indian, Malay or Chinese recipe. This dish is unique to the Kristang, descendants of Portuguese traders who lived in the port of Malacca, and is deliciously different in flavour to the curries you usually find in Malaysia.

Chicken devil curry is a bit like a cross between the vinegar-seasoned curries of Goa and the devilled foods of Victorian Britain. It’s fiery hot, and unbelievably tasty. Serve with plenty of rice – you’ll need it to soak up the sauce, which is serious foretaste-of-the-heavenly-feast stuff, and to temper the heat of the chillies. I served this with some dal and some cooling pineapple and cucumber salad.

To serve 4, you’ll need:

6 chicken joints (your choice), with bone and skin
4 medium potatoes
1 large onion
6 cloves garlic
2 in piece of ginger, peeled
1 stalk lemongrass
10 fresh red chillies
10 dried red chillies
10 blanched almonds (or 5 candlenuts, if you can find them)
2 teaspoons powdered mustard
1 teaspoon black mustard seeds
2 tablespoons soft brown sugar
2 tablespoons rice vinegar
1 can coconut milk (use a brand like Chacao without emulsifiers)
1 teaspoon caster sugar
Salt and pepper

Rub the chicken pieces (I used six thighs) with a teaspoon of caster sugar, a teaspoon of salt and a generous amount of pepper. Set aside while you prepare the curry paste.

Put the onion, garlic, ginger, lemon grass, almonds and both kinds of chillies in the bowl of your food processor with 2 tablespoons of water, and whizz until everything is reduced to a paste.

Heat 2 tablespoons of flavourless oil in a wok, and brown the chicken all over. Remove it to a plate, and add the curry paste to the hot wok. Cook the paste over a high flame, stirring all the time, for five minutes with a spoonful of the cream from the top of the coconut milk.

Add the mustards, the sugar and vinegar to the paste and stir until the mixture starts to bubble. Lower the heat to medium and slide the browned chicken pieces into the pan to cook in the paste for ten minutes. Add the rest of the coconut milk from the can with a teaspoon of salt and the chopped potatoes. Stir well to make sure all the potato and chicken is covered with sauce, put a lid on the wok and simmer over a low flame for 20-30 minutes.