Pan con tomate – Catalan tomato bread

Pan con tomate
Pan con tomate

It’s a total mystery to me how Catalan cuisine, out of all the cuisines in the world, could have given birth to the ultra-complicated school of molecular gastronomy headed up by Ferran Adria. Catalan cooking, in its non-molecular state, is centred in simplicity and great ingredients; there’s a growing collection of super-simple tapas here on Gastronomy Domine, all of which are typical of the region.

My newly minted sister-in-law, Katie, has family in Barcelona and studied Catalan at university. She and my brother married just outside Barcelona, which afforded them the perfect opportunity for a wedding meal made up of course after course of delicious tiny nibbly tapas, alongside a whole leg of Iberico ham (complete with a knife-wielding dude to carve it), three enormous dishes of paella cooked over propane burners and enough fruit tart (standing in for wedding cake) to sink an armada.

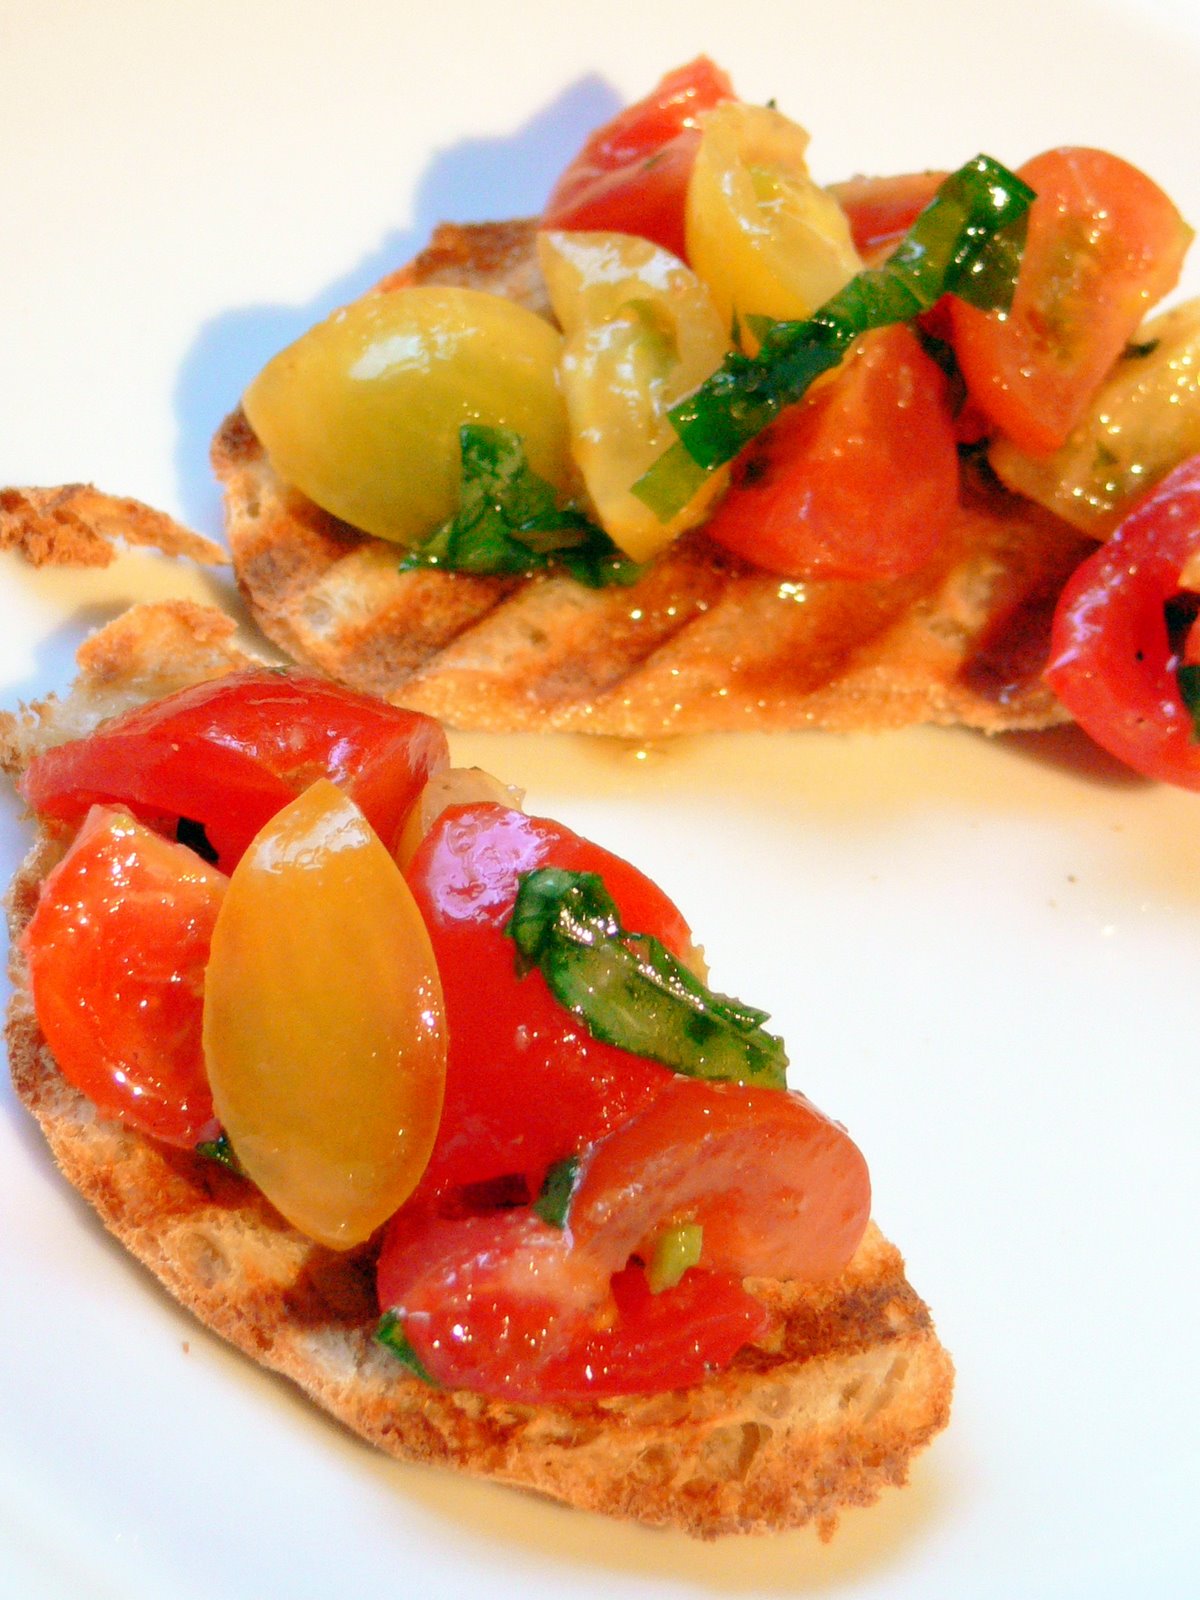
Pan con tomate, as you’ll have guessed if you’ve ever visited Barcelona, was on the wedding table (alongside chorizo al vino, padron peppers, positive gallons of sangria, and some garlicky prawns, croquetas, boquerones and other bits and bobs I’ll blog recipes for later on). It might just be the recipe with the best ease-of-making to total-deliciousness rating ratio in the world. I’m not even going to list amounts below – it’d go against the whole nature of the thing.

Quality of ingredients is always important, whatever you’re cooking; but if you’re making something this simple it becomes absolutely paramount. You should look for a really dense bread (not wholemeal) with a decent chewiness to it. And the tomatoes – hoo boy. There is no point in making this recipe at any time of year when you can’t get a decent supply of juicy, fresh, large tomatoes. You’re best off by far with tomatoes from your own greenhouse, and the things that resemble red potatoes from the supermarket should be avoided at all costs. Reckon on using half a tomato on each slice of bread. Your garlic should be plump and unblemished, and your olive oil the very best you can get your hands on.

You’ll need:

Good sourdough bread
Garlic
Very ripe, large tomatoes
Extra-virgin olive oil
Salt (I like Maldon salt here)

Grill the slices of bread until golden, and rub each slice with the garlic pieces, which will wear down to nubbins as you go. Cut a tomato in half and rub it on a garlicky slice of bread, pushing as you go to make sure the juices and seeds  are pressed into the piece of bread. Discard the pulp.

Pour a generous slug of olive oil over each slice of tomato bread, and sprinkle with a little salt.

These are fantastic just on their own, and can be made even better by laying a slice of raw Iberico ham on top before taking a bite.

Bhindi bahji with whole spices

Bhindi bahji
Bhindi bahji

I’ve got collection of bad habits which do nothing to endear me to my local Indian takeaway. If we’re having takeout, I usually cook our own rice, occasionally heat up some oil for DIY poppadoms, and then fail miserably to order anything other than vegetable dishes, which happen to be the least expensive thing on the menu.  This doesn’t all come from being a hideous cheapskate; it’s just that I like my own pilau rice better than the stuff with the red and green food colouring in it, and have had a preference for vegetable curries ever since I got food poisoning in India in 2005. (A tip: if you’re in a city where the sewers drain directly into the sea, don’t eat the prawns.) And poppadoms are great fun to make at home, as you’ll know if you’ve ever tried.

Sadly for the local takeaway, I’ve started to take to making bhindi bahji, which is probably my all-time favourite curryhouse dish, at home too. There are a few reasons for creating this extra work for myself: home-made bhindi bahji is a lot less greasy than the restaurant kind, which always comes drowning in ghee for no reason that I can really make out, and I can control the cooking of the okra to make sure it doesn’t produce any of the snotty slime that puts so many people off the vegetable.

I love okra. I like its texture (I even like slippery, slimy okra, especially for its ability to thicken the base it’s cooked in), its flavour and the shuddery feeling I got aged about ten when my parents used to refer to it as “ladies’ fingers”. It’s a much maligned vegetable, and I’d encourage you to have a go at making this dish if the only okra you have experienced is olive green and exuding stuff that looks as if it came out of a snail. Cooked like this, it is crisp, fresh- tasting and entirely snot-free.

To serve two as one of two curries on the table, you’ll need:

150g fresh okra
12 fresh, sweet cherry tomatoes
1 medium red onion
2 cloves garlic
1 teaspoon black mustard seeds
1 teaspoon fennel seeds
1 teaspoon coriander seeds
1½ teaspoons turmeric powder
1 tablespoon ghee or groundnut oil

Chop the okra into pieces about an inch long (larger pieces mean less potential for slime) and dunk in a large bowl of water with a couple of spoons of salt dissolved in it. Drain in a colander. Halve the tomatoes and set aside, and chop the garlic.

Cut the onion in half, and slice it into half moons. Heat the ghee or groundnut oil to a high temperature in a frying pan or wok, and throw the onion in. Stir fry it for three minutes, then add all the spices and the garlic to the pan. Continue to stir fry until the onion is turning translucent (a couple of minutes) and the spices are giving off their fragrance.

Add the drained okra to the pan and keep stir-frying for one minute. Add the tomatoes, and continue to cook, stirring all the time, until the tomatoes start to collapse in on themselves and the okra is a bright green and piping hot. Taste for seasoning, and add some salt if necessary.

Serve immediately.

Crackling pork belly with celeriac and tomato

Pork belly on celeriacWhere other children were visited by fairy godmothers bearing gifts of grace and beauty; the art of detecting peas beneath mattresses; the ability to walk in high heels for more than five yards without getting one stuck in the space between two pieces of pavement; and all that glamorous jazz, mine found that her bag was empty but for the gift of making really terrific crackling. (Seriously. It wins competitions and everything.)

I’m not complaining. It’s better than it could have been; I’ve one friend who swears her only skill is the tidy folding of a broadsheet newspaper once read.

This recipe is reliant on your getting your hands on a really good piece of pork belly, properly reared, and striped thickly with fat. It doesn’t matter whether your piece has attached bones or not, but do try not to use a supermarket slab of meat; the flavour will be much better with a butcher’s belly from a pig raised responsibly, and you’ll probably find the joint will be drier, crackling more effectively. Cooked slowly for several hours, the pork bastes itself from within, leaving you with a gorgeously dense, flavoursome and moist finish.

I’ve used the tomato sauce than I made in a few enormous batches and froze at the end of the summer here, with some additional cream and herbs. If you don’t have any sauce you’ve made and frozen yourself, substitute with a good sun-dried tomato sauce in a jar.

To serve four, you’ll need:

1.5kg pork belly
1 small handful thyme stalks (about 20g, if you’re counting)
1 small handful fresh rosemary
4 bayleaves
100g stupendous tomato sauce, or sun-dried tomato sauce in a jar
3 tablespoons double cream
1 medium celeriac (larger celeriacs can be woody)
1 large handful parsley
2 banana shallots
1 tablespoon butter
Plenty of salt and pepper

Preheat the oven to 140ºC (290ºF). Make sure the skin of the pork is scored properly in regular lines penetrating into the fat but not into the meat, and that it is absolutely bone-dry. Rub the pork all over with a couple of teaspoons of salt, making sure that plenty gets into the scored lines on the skin. Season with pepper, and sit the belly in a roasting pan on top of the thyme, bay and rosemary, reserving a bayleaf and a stalk of the thyme and rosemary to use in the sauce later.

Put the roasting pan in the middle of the oven, close the door and ignore the pork for four hours. Towards the end of the cooking time, cut your celeriac in quarters, peel them with a knife (this is far easier than trying to peel a whole celeriac), and grate them on the coarse side of your box grater. Slice the shallots finely and mix them with the grated celeriac in a bowl.

When the pork has had four hours in the oven, the top will have softened but not crackled. Still in the roasting dish, put the pork about four inches beneath a hot grill. The skin will start to bubble and crackle. Keep an eye on things; once crackled, the skin can burn easily. If you find that one side of your joint is crackling and ready before the other, put a piece of tin foil over the area that has crackled to prevent it from burning. Once the crackling is even, remove the dish from the grill and leave it to rest in a warm place while you prepare the sauce and celeriac.

Sauté the celeriac and shallots in the butter for about eight minutes until soft and sweet. Stir through the parsley and season with salt and pepper. While the celeriac is cooking, bring the tomato sauce up to a gentle simmer with the herbs you reserved earlier, then stir through the cream with any juices from the pork.

Pop a pastry cutter onto each plate, and use it as a template for a serving of celeriac. Top off with some of the herby, velvety pork meat, and a generous slab of crackling. Spoon over some of the sauce and serve.

Gazpacho

GazpachoI’m looking out of the window as I type this, and I’ve come to the sad conclusion that it’s definitely not summer any more. This will be this 2010’s final recipe for the contents of your greenhouse. This year hasn’t been fantastic for tomatoes, but the cucumbers have been glorious (full disclosure here – I didn’t grow any myself, but my parents have enough to club a small army to death with), and peppers are at their best now. It goes without saying that this recipe is totally dependent on the quality of your ingredients.

Most think of gazpacho as a cold tomato soup. Tomatoes do make up the dominant ingredient by weight, but a good gazpacho should take much of its flavour from the cucumber (surprisingly aromatic) and peppers. Get the finest, ripest vegetables you can find, and if at all possible, try to get your hands on one of those lovely, spurred, English cucumbers  – they’ve a lot more flavour to them than one of the smooth-skinned supermarket variety. Use your best olive oil, and enjoy the last of the sunshine. If you’re preparing this as part of a special meal, you can jazz it up something spectacular by shredding some fresh, sweet white crab meat, and putting a couple of tablespoons of it in the bottom of each bowl before you pour the soup over.

Finally, a word of warning. Your guests might have a baked-in dislike of chilled soups. Check before you serve this up. I remember the look of utter misery on my Dad’s face when we visited a friend’s house once and were presented with a choice of Vichyssoise and gazpacho to open a meal with. Dad, you’re a heathen, but for you I’d warm this through on the hob.

To serve four as a starter, you’ll need:

1kg ripe tomatoes, as fresh as possible
4 banana shallots
3 cloves garlic
2 red peppers
1 green pepper
1 large cucumber
2 slices stale white bread, soaked in water and squeezed
1 teaspoon red wine vinegar
4 tablespoons olive oil
½ teaspoon smoked paprika
Salt and pepper

Peel the tomatoes by scoring them around the equator and dunking them in boiling water to loosen the skins. Cut them open and discard the seeds. Blacken the skin of the peppers under the grill, pop the steaming peppers in a plastic box with the lid on for a few minutes to loosen the skins, peel and seed. Peel the cucumber, chop the shallots into quarters and mince or otherwise squish the garlic.

Blitz the vegetables and bread to a smooth purée in batches with the other ingredients. Taste for seasoning; you may want to add a little more vinegar or paprika as well as salt. Chill thoroughly and serve cold, with a little more olive oil drizzled over.

Stupendous tomato sauce

Tomato sauceStupendous because, really, there is no other word for this stuff. It’ll take you the best part of a day to make, although there’s not much real work involved, just a bit of stirring every half hour or so – if you’re going to be around the house all day, just carry a timer with you set to go “bing” every half hour to remind you to go and stir the sauce. You’ll use up two kilos of those tomatoes you’ve got ripening away in the greenhouse, and you’ll finish with a sauce that tastes like pure condensed summer. It freezes well – I have a few boxes of this sauce in the freezer to be hauled out in the middle of winter, when tomatoes are indistinguishable from potatoes.

The idea here is to drive as much of the moisture as possible out of sweet, summery peppers and tomatoes, encouraging their natural sugars to caramelise. The tomatoes you choose should be the very best you can find. This recipe is fantastic for gardeners with a glut of tomatoes, but you can make it with good tomatoes from the market too. Just make sure you use the sort of tomatoes that you’d be happy to snack on raw; the sort where you suddenly discover you don’t have any left because they were so good you accidentally ate them all without noticing.

This sauce is beyond fabulous on its own, dressing some pasta – if you can find Giovanni Rana fresh pasta at your local supermarket or deli, the basil and spinach fettuccine is a great match, with its intense basil aroma. For plain pasta, throw a few basil leaves and maybe some oregano over when you serve. I also love it as a sauce for chicken breasts that have been butterflied, beaten flat, breaded and fried crisp (you don’t need a recipe for those – just put the butterflied breasts between two pieces of cling film; wallop the hell out them with a rolling pin; then flour, egg and crumb them before frying for five minutes on each side); it’s great mixed with some grilled vegetables or as a sauce for grilled, oily fish too. You can use it as a dip, in sandwiches, as an enriching ingredient for other sauces, as a base for soups – versatile, delicious, wonderful stuff.

To make about 12 servings (you’ll be freezing these in individual portions, and with something that takes so long to cook it seems a waste to make any less) you’ll need:

6 bell peppers (orange, red or yellow)
2kg tomatoes
100g butter
150ml olive oil
2 large onions
1 head garlic
Salt and pepper

Tomatoes and basilBlitz the bell peppers with the onions in the food processor. You’re aiming for a rough, wet puree. Put the resulting glop in your biggest saucepan (preferably something with a heavy base that will disperse the heat evenly – I have a giant le Creuset casserole which is perfect for this sort of thing) with the butter and cook over a medium flame without a lid, stirring occasionally, for about an hour. Eventually, the peppers will start darkening in colour, most of the liquid will have been cooked off, and the whole arrangement will have a jammy texture. It may take more than an hour to get to this stage, depending on the water content of your peppers and the diameter of your pan.

Puree the tomatoes with the peeled garlic. Add them to the jammy contents of the saucepan with the olive oil and stir well to make sure everything is combined. Now go and busy yourself doing whatever it is you do when you’re not cooking, being sure to return to the pan every half hour to stir it, scraping the bottom and moving the sauce around the pan. After a few hours, as the sauce thickens, start returning to the pan every 15 or 20 minutes if you feel it is in danger of sticking when left for half an hour.

Again, timing here varies on your tomatoes and your pan, but around six hours (maybe more) after you first put the tomatoes on the hob, the contents of the pan will have reduced by more than half. The sauce will be fabulously gloppy when stirred, and will be darkening and beginning to give up its oil.  No tomato juice will rush to the surface when you press down on the sauce with a wooden spoon. Taste the sauce, which should look a bit like rusty sun-dried tomato paste, try not to jump too high for joy at the intense, umami flavour, and season.

I freeze this sauce in 250g bags – enough to serve two generously. Your yield should be about six bags, give or take. Unfrozen, the sauce will keep in the fridge for about a week.

Piedmont peppers

Piedmont peppersThis recipe is based loosely around an Elizabeth David one my Mum used to serve up regularly as a cold antipasto when my brother and I were tinies. We couldn’t get enough of it, and I know he has his own version of the recipe too.

These peppers must be served at room temperature, when they are, unaccountably, much sweeter and juicier than they are when warm. The original version calls for bell peppers, but I’ve found that pointed Romano or Piquillo peppers tend to contain more in the way of fruit sugars and taste far better. (It goes without saying that the peppers you choose should be ripe – red, orange and yellow ones are all find, but avoid the green peppers when you go shopping.) If you have guests whose stomachs are made sensitive by peppers, advise them to peel the indigestible skins off before they eat, which should prevent any upsets.

This is a recipe it’s worth trying out on anchovy-haters, several of whom I’ve brought round using these peppers – not necessarily to a whole-hearted embracing of the anchovy, but at least to a whole-hearted embracing of it in this particular dish. The final result isn’t a fishy one, rather a deeply savoury, umami dish, full of sweet and buttery juices (you’ll use a lot of butter here – it’s worth it) to dip some good crusty bread into. If you love the sweet, fruity bite of a roast pepper (god knows, I do), you’ll find this is one of the best ways to showcase that flavour.

To prepare six peppers as an antipasto (how many you’ll eat depends on how much else you prepare, but you’ll find these disappear quickly) you’ll need:

6 Romano or Piquillo peppers
12 anchovies
3 plump tomatoes
6 plump cloves garlic
100g butter
olive oil to drizzle
Salt and pepper

Preheat the oven to 180°C (350°F). Cut the peppers in half lengthwise, discard any seeds, and chop each half into half again across the short edge. Lay the peppers out in a large baking tray (use two if you have to), the skin side down.

Chop the tomatoes into quarters and put a piece in each little pepper boat. Cut each clove of garlic into four fat slices and put one in each pepper, along with half an anchovy fillet. Cut the butter into small pieces and scatter them all over the dish. Sprinkle everything with a generous amount of salt and pepper, drizzle a few tablespoons of olive oil over the whole dish and put everything, uncovered, in the oven for between 45 minutes and an hour until the edges of the peppers are browning. (The cooking time is imprecise here because a riper pepper will cook faster than a less ripe one – I find this recipe performs differently at different times of year and with different peppers, so you’ll have to use your judgement here.)

Remove the dish from the oven and leave it on the side, covered with a teatowel, until the peppers are at room temperature. Serve with plenty of the juices from the bottom of the dish drizzled over, and lots of crusty bread to soak them all up.

Bruschetta al pomodoro – tomato bruschetta

Tomatoes and bread have an amazing affinity, from Basque slices of toasted sourdough rubbed with the cut side of a tomato, to British teatime tomatoes on toast. For me, though, a garlicky, herby Italian bruschetta is the very king of bread and tomato preparations.

There is a simple trick in making this sunny, fresh appetiser. You need to marinade the cut tomatoes with the aromatics and a hearty amount of your very best olive oil the night before you mean to eat – but that marinade should contain absolutely no salt. Salting the bruschetta just before serving means that the tomatoes’ texture will remain firm and juicy. The oil will have absorbed a fabulous wallop of tomato flavour (no salt, you see, so the juices of the tomato won’t all run out and separate), the tomatoes will be redolent with fragrant oil, herbs and garlic, and your tastebuds will want to shake your hand.

It’s very important that you select tomatoes with the maximum flavour. If you’ve grown your own, these will be by far the best. Otherwise, buy tomatoes which are ripe and have been kept on the vine after picking. That glorious smell you get in tomato greenhouses is from the green stalk and leaves, and doesn’t seem to make it into the fruit itself. If you buy vine tomatoes, they will be riper, and you can use the stalk in the marinade to inject some of that greenhouse flavour into the finished bruschetta. I’ve used some yellow tomatoes alongside regular red ones because it’s pretty, but you can use any good, ripe tomatoes you can find.

To serve four, you’ll need:

1kg vine tomatoes
2 fat, juicy cloves garlic
1 large handful basil leaves
2 tablespoons chopped fresh oregano
100ml olive oil
Freshly ground black pepper
1 ciabatta
Salt to finish

Chop the tomatoes into small bite-sized pieces, and put them and any juices in a large bowl. Crush the garlic and the herbs, and stir them into the tomatoes with the olive oil and a generous amount of freshly ground black pepper. Add the vines from the tomatoes, mix well, cover with cling film and refrigerate overnight.

When you are ready to make up the bruschetta (don’t do this too far ahead of eating, or they will go soggy) grill slices of slightly stale ciabatta and cool on racks. Fish the stalks out of the marinade and discard. Heap the tomato mixture onto the slices with a tablespoon, sprinkle with fleur de sel or another crystalline salt like Maldon, and serve immediately. There are very unlikely to be any leftovers.

Spaghetti bolognese

Four hundred-plus posts on this blog, and there are still some really basic, popular things I’ve not written about. Would you believe that I haven’t cooked a spag bol since 2005? I spent yesterday evening remedying the problem – here’s a recipe for a rich, savoury, gorgeously gloppy version, full of wine and herbs.

As any self-respecting Italian will tell you, if you ordered what we call spaghetti bolognese in Italy, you would get a funny look. In Italy, this sauce is called ragù or ragù alla bolognese, and it’s not usually served with spaghetti – you’re more likely to find your ragù as a layer in a lasagne or served with tagliatelle.

Back in 1992, the folks in Bologna decided that they had had enough of the world’s bastardisation of their hometown sauce, and the Bolognese chapter of the Accademia Italiana della Cucina issued a proclamation. From that point on, bolognese sauce would be defined strictly, and could only be called ragù alla bolognese if it was made with a limited set of ingredients: beef, pancetta, onions, carrots, celery, passata, beef stock, red wine and milk.

Inevitably, I’ve strayed away from the strict letter of the Accademia’s law here in (cough) a few details, but I don’t think you’ll be too saddened by this, because what results is damn tasty. Please use the anchovies even if you don’t usually like them – they add a subtle depth to the sauce, but they don’t make it taste fishy.

To make enough spaghetti bolognese to serve four, you’ll need:

500g ground or minced steak (ground steak is more authentic here, but if you can’t find it, mince is fine)
4 banana shallots
5 anchovies
2 bay leaves
2 carrots
2 sticks celery
500g passata (pressed tomatoes)
1 tablespoon dried oregano
4 cloves garlic
5 sundried tomatoes in oil
¼ bottle red wine
1 ladle beef stock
1 tablespoon balsamic vinegar
1 tablespoon Worcestershire sauce
1 large handful fresh oregano
1 large handful fresh basil
Salt and pepper
Olive oil
Parmesan to garnish

Chop the shallots finely and sweat in a large, heavy-bottomed pan with a lid over a low heat in a couple of tablespoons of olive oil for about 20 minutes, until translucent but not colouring. Add the anchovies and bay leaves to the pan and continue to cook, stirring, until the anchovies disintegrate into the shallots. Turn the heat up to medium-high and add the beef to the pan, cooking, stirring occasionally, until the meat is browning all over. Add the finely diced carrot and celery with a tablespoon of dried oregano and the chopped garlic and chopped sundried tomatoes. Sweating off these vegetables will add some moisture to the pan – keep cooking and stirring until the pan is nearly dry again.

Pour the wine into the beef mixtures, bring up to a simmer and add the passata and beef stock with the Worcestershire sauce and balsamic vinegar. Season with salt and pepper. Simmer gently with the lid off until the sauce has reduced to a thick texture (20-30 minutes), and continue to simmer with the lid on for as long as possible, checking occasionally and adding a little water if things seem to be drying out. Mine was on the hob for four hours – if you have time to leave yours even longer, feel free – the longer the better.

Immediately before serving, stir through the chopped fresh herbs. Cook 100g spaghetti per person according to the packet instructions, and serve with the sauce and parmesan cheese.

Aromatic braised lamb shanks

A few years ago, when lamb shanks hadn’t appeared on every pub menu in the country, they were a great cheap alternative to other cuts. These days, unfortunately, they’re a bit pricier as people have become less scared of pieces of meat with bones in them – a shame, because when braised they’re easy to handle and taste fantastic, their meat sweet from proximity to the bone and luxurious in the mouth from long simmering.

Because this is such a lusciously rich cut, lamb shanks benefit from lots of aromatics to lift the flavour. I’ve used a mixture of French and Moroccan flavours to produce what I imagine you might do with lamb shanks in Marrakesh. I have never been to Marrakesh, and this would probably be considered totally weird by any real Moroccans, but I’m very pleased with the results. Don’t be put off by the long ingredients list; this isn’t hard to make, and can all be done on the stove top.

To serve two, you’ll need:

2 lamb shanks
3 carrots
5 sticks celery
1 large white onion
1 head garlic
½ bottle red wine
800ml stock (use lamb stock if you have some in the freezer – otherwise chicken will be fine)
800g passata
2 tablespoons tomato puree
2 tablespoons balsamic vinegar
1 heaped tablespoon soft brown sugar
1 tablespoon Ras al Hanout
1 inch piece of ginger, grated
1 teaspoon coriander seeds
1 teaspoon cumin seeds
1 teaspoon fennel seeds
1 teaspoon fresh thyme leaves
½ stick cinnamon
2 dried chilllies
Juice and zest of 1 lemon
1 can chick peas
Salt and pepper
Olive oil

Dice the onions, carrots and celery, chop the garlic and grind the fennel, cumin and coriander seeds together in a mortar and pestle. Rub the lamb shanks with salt and pepper.

Heat about 5 tablespoons of olive oil over a high flame in the bottom of a heavy casserole dish with a close-fitting lid until it begins to shimmer, then brown the lamb shanks all over in it. Remove the browned meat to a large bowl, and turn the heat down to medium. Add the diced vegetables to the oil you browned the meat in and sweat them with the garlic, grated ginger, Ras al Hanout, ground spices, thyme, cinnamon and chillies.

Cook the aromatic mixture without browning until the vegetables are turning soft, keeping everything moving, then return the lamb to the casserole. Pour over the wine, stock and passata and simmer for five minutes. Add the balsamic vinegar, sugar, lemon juice and lemon zest with some salt to taste (I used just over a tablespoon for this volume of sauce.) Turn the heat down to a very gentle simmer, put the lid on and leave for three hours, turning the lamb shanks in the sauce a couple of times during cooking.

When the three hours are up, add the drained chick peas to the pan and simmer for a further fifteen minutes. The sauce will have become rich and thick (insert joke about ideal spouse here). Skim off any fat that has risen to the surface, and serve with mashed potatoes to mop up the delicious sauce.

Lemon-pepper crispy chicken with tomato sauce

Lemons. Tomatoes. Lots and lots of basil. Who said it was February?

I really love a good breading mixture. This one’s just great – it’s seasoned with lemon zest and freshly ground pepper, so it’s really fresh and zingy. I’m sure there are non-fried things just as crispy and delicious as this, but I’ve yet to find out what they are.

To serve four, you’ll need:

Chicken
4 chicken breasts, without skins
8 tablespoons olive oil (choose a really fruity one)
Juice of ½ a lemon
1 clove of garlic, crushed
½ teaspoon salt
Freshly ground black pepper
2 eggs, beaten
250g breadcrumbs
Grated zest of a lemon
1 teaspoon chilli flakes

Sauce

1.5 kg fresh ripe tomatoes
3 large onions
4 cloves of garlic
1 handful fresh basil
1 handful fresh oregano
1 mild red chilli
1 ½ tablespoons balsamic vinegar
2 teaspoons sugar
1 large knob butter, plus extra to taste
1 tablespoon olive oil
Salt and pepper

Cut the chicken into bite-sized pieces and marinade it overnight in the olive oil, lemon juice, salt garlic and ten turns of the peppermill.

Here comes the tedious bit – peel and seed the tomatoes. (This is very easy but takes a while – use a knife to make a little cross in the skin at the bottom of the tomato, then pour over boiling water and leave for ten seconds. Fish the tomato out with a slotted spoon. You’ll find the skin will come away easily. Slice open to remove the seeds.) Chop the tomato flesh and set aside in a bowl. If you are pressed for time, use tinned tomatoes. They won’t be quite as good, but they’ll still be pretty darn tasty.

Dice the onions and chop the garlic finely, and fry in a large knob of butter until translucent and fragrant. Add the tomatoes and finely chopped chilli to the saucepan and stir to combine everything. Bring to a very low simmer, and reduce (this will take more than an hour) to half its original volume or a little less. Bring the vinegar and sugar to the boil in a small pan and stir it into the sauce. Add the oregano and season with salt and pepper. Taste to check whether you need more salt or sugar. Add another knob of butter for a more mellow flavour if you like.

Combine the breadcrumbs, lemon zest, chilli flakes and a tablespoon of freshly ground pepper in a large bowl. When the sauce is nearly reduced, bread the chicken by removing the pieces from the marinade, dipping in the beaten egg, and rolling in the breadcrumb mixture until each piece is nicely coated with the crumbs and aromatics. Heat a large knob of butter and three tablespoons of olive oil together in a non-stick frying pan, and slide the breaded chicken pieces in when the oil is very hot. Cook for about 5 minutes each side, until the chicken is golden and crisp.

Serve the chicken and its tomato sauce with buttered tagliatelle or some basmati rice mixed with a knob of butter and a small handful of parmesan.