Barbecue in Austin, Texas

Beef brisket
Beef brisket from Lambert's. Not the prettiest picture, but it's a good example of the smoke ring (the pink layer beneath the charred crust - call that crust a "bark" if you wish to impress Texans) that you should look for in good smoked meats.

Is there any food whose “proper” preparation gets people more worked up than America barbecue? Regional styles differ all over the continent, but most dedicated barbecuers you meet have a strong opinion that their favoured way of doing things is the only right one – witness Yelp reviews on pretty much any barbecue restaurant in the country, where arguments on vinegar sauces versus sugary ones, Memphis versus Texas, wet versus dry brining and mesquite versus oak rage beyond all relevance to whether the food’s actually any good or not.

Austin’s a great place; it’s very unlike the rest of the state, in that it’s leafy, humid and green rather than dusty and dry, and packed with hipsters rather than cowboys. It feels a bit like a West Coast college town plopped in the middle of Texas. With added barbecue. Passions run high – my friend G, for example, complained at the top of his voice on finding I’d booked us lunch somewhere other than the Salt Lick, a small barbecue chain which, he says, “does a proper sauce”. All traditional Texas barbecue sauces are sweet, tomato-based, thick and spicy, but there’s a world of variation within that definition.

Mexican Coke
Mexican Coca-Cola. This is Coke made for the Mexican market, and you'll find it in a lot of Texan barbecue restaurants and ethnic groceries. It's made with cane sugar rather than high-fructose corn syrup, and has a distinctly different (and I think nicer) flavour than regular Coke. It's also a great accompaniment to barbecued meats.

No amount of asking would get G to tell me what he meant by “proper”; every barbecue joint in town has a different saucing and rub, which is also on sale at the counter so you can anoint the food you grill at home with it. I’ve a good, and pretty faithful, Texan barbecue sauce recipe you can use here if you want to have a go yourself; use it as a marinade, or pour a dollop on the side of the plate for dipping.

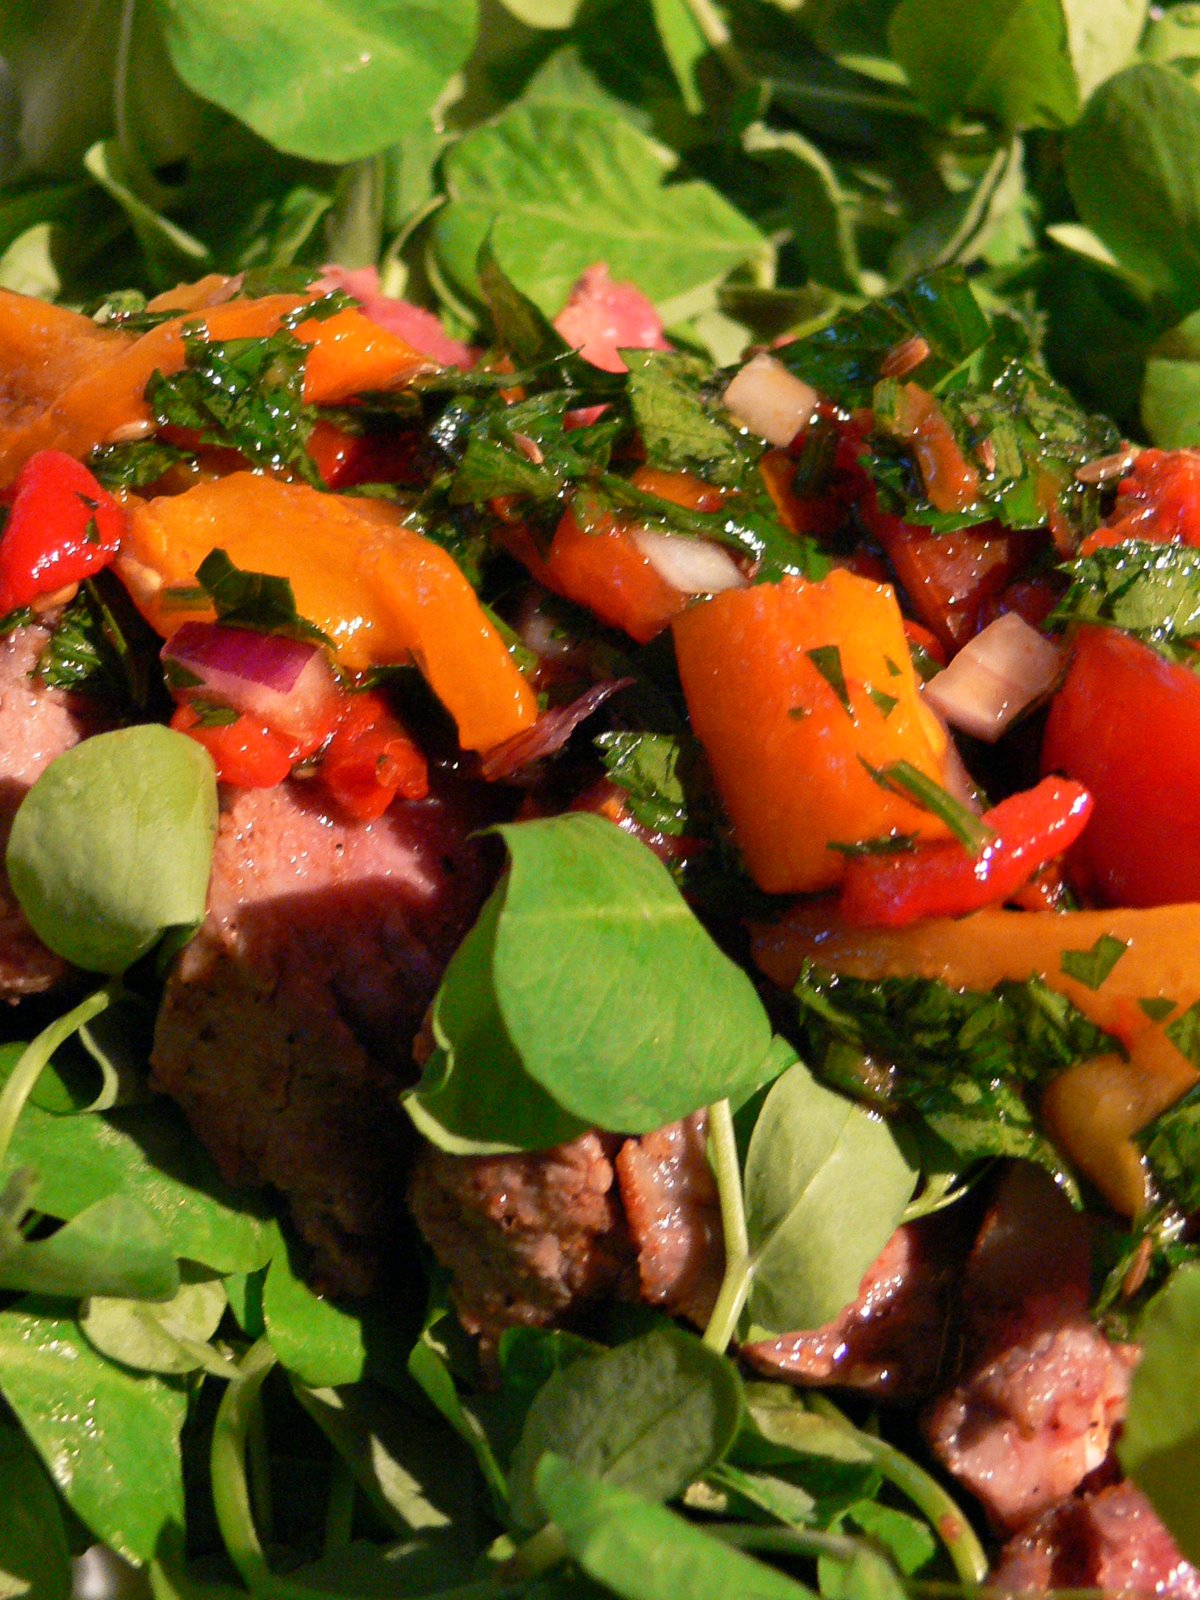
I found that there are two ends of the barbecue spectrum in these parts: traditional, pile-em-high casual eating where you use your fingers and get sauce on your elbows; and “fancy barbecue”, with cutlery and (whisper it) salad. Everywhere we tried offered a regular sauce alongside an extra-spicy one; some also made their own sweet mustard. And there are standard accompaniments on offer everywhere: potato salad is a must, often sweetened and gussied up with a bit of the in-house sugary rub. You’ll also find baked beans everywhere, sugary, spicy and seasoned with bits of smoked brisket end.

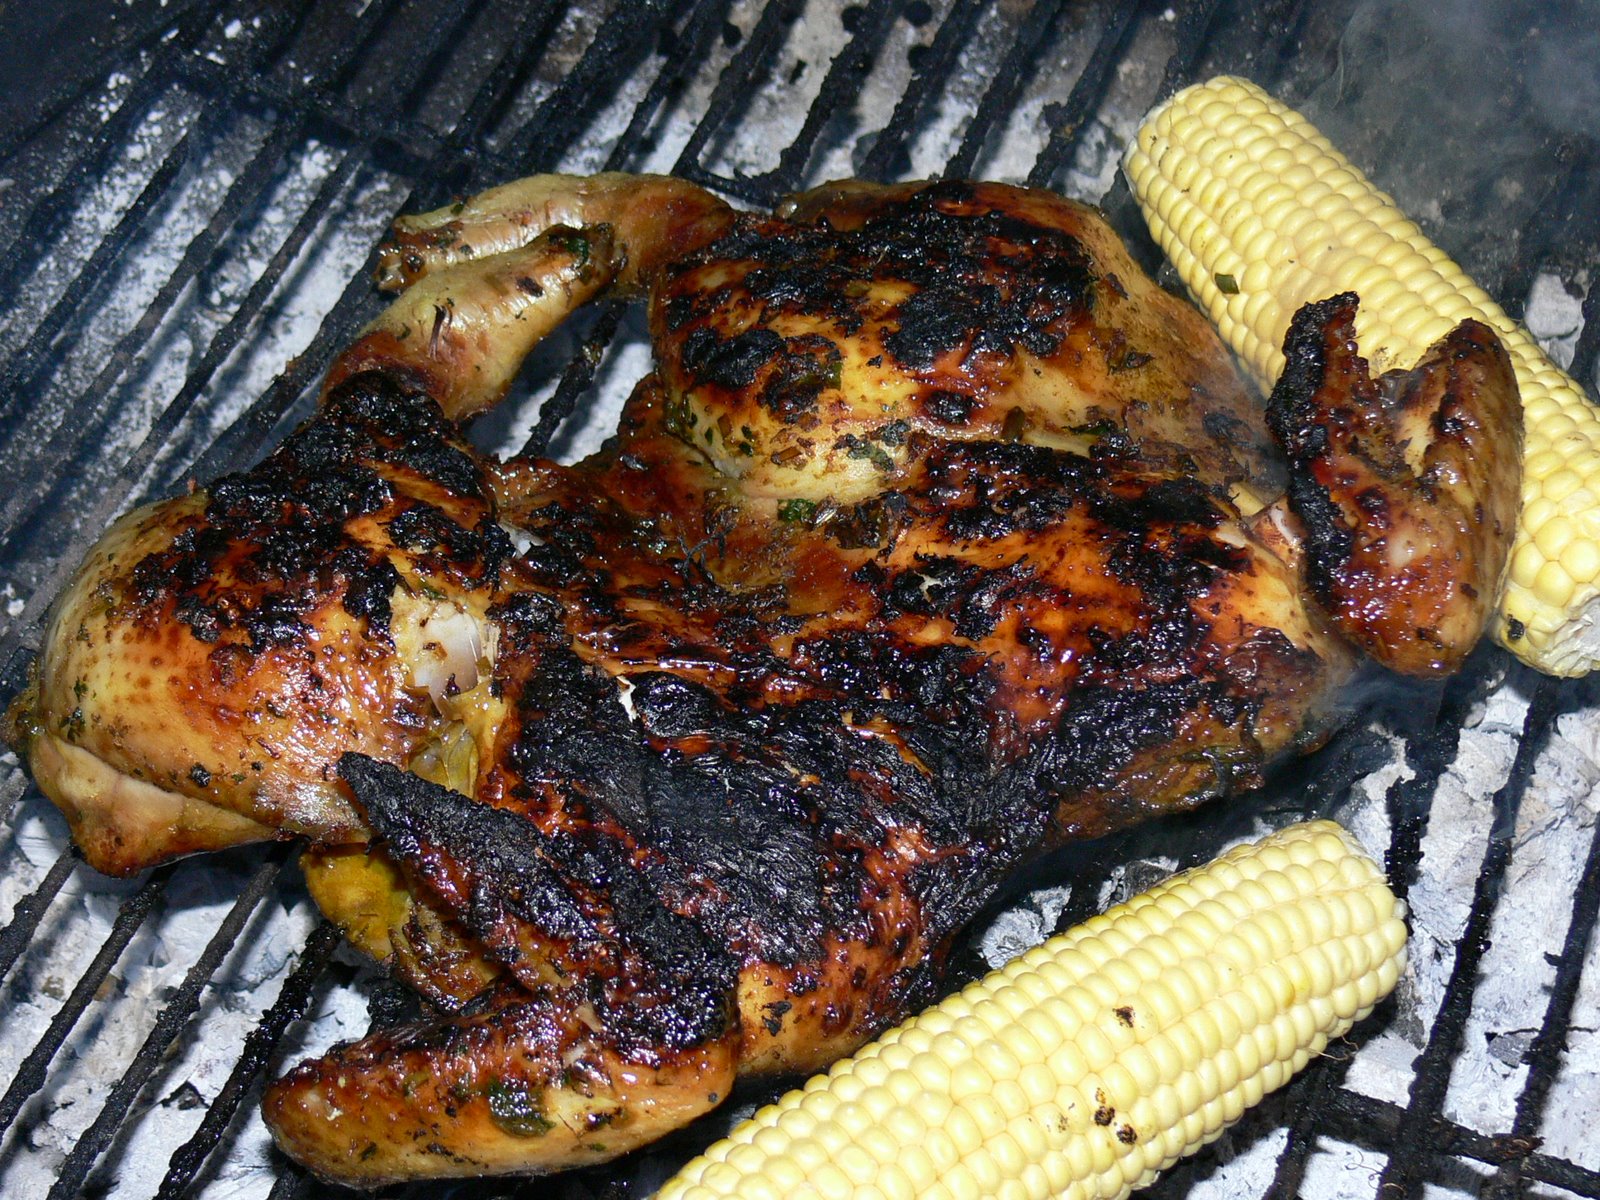
Beef’s the standard in Texas, but most restaurants also offer some smoky porky bits and pieces alongside the traditional beef. Beef – brisket, ribs, or a good old-fashioned steak – is usually your best bet here. This is, after all, where longhorn cattle come from.

Beef ribs
Beef ribs plate from The Ironworks. Note bottle of local root beer in background. Fizzy drinks are a way of life hereabouts.

For casual barbecue, all paper plates, chequered tablecloths and sticky fingers, my favourite in town was The Ironworks, on Red River St. This is one of those restaurants with celebrity endorsements plastered all over the walls. If it’s good enough for Chewbacca and The Fonz, it’s good enough for me. I was lucky enough to go for the first time in a group of 12, so we were able to order a sample of everything on the menu – which is to say, a honking great mountain of meat. Fat beef ribs, crisp, smoky and sweet from the rub, are the restaurant’s speciality, and were, to my tastes, the very best thing on the menu. These are a bit of a challenge to eat politely, but persevere. There’s a great home-smoked hot sausage on offer, pork ribs (much less good than the beef ribs), halved chickens, pork loin, wonderfully smoky ham – you can order these meats by the pound, or, if there are fewer of you, you can each get a platter of one of the meats with some traditional accompaniments heaped alongside on your paper plate. Potato salad mixed sweet, like so much food in Texas; pickled cucumbers; pickled chillies; slices of raw onion; baked beans; and a big slice of Wonder Bread are more than you’ll probably be able to manage in one go, but they’re great to browse on. There are big, ice-filled coolers out front, where you can pick up a local beer, a bottle of root beer (awesome, as they say out here, with the beef ribs) or a Budweiser if you have no tastebuds.

After something a bit more spiffy and shiny? You need to head to Lambert’s Downtown Barbecue, in the new Second Street shopping district. There’s a little stage upstairs where you can listen to live music, a fabulous Sunday brunch that’s part buffet, part waiter service, and a simply superb lunch and evening menu. And cutlery. And cloth napkins.

Lambert's interior
Settling in for a monumental Sunday brunch at Lambert's.

My first visit to Lambert’s was an evening one, when I was served a ribeye steak cooked with a mustard and brown sugar crust, much like you’d find on a crème brûlée. One made of solid meat. I know I’ve been complaining all week about the sugariness of Texan food, but it was hard not to notice that this was the first time in my life I’ve finished a whole ribeye. This steak was cooked over oak chips, served with a roasted head of garlic, and was so good that I’d have married it if I could. Dr W (to whom I am married, making any potential steak-marriage impossibly bigamous) ordered a slab of brisket, rubbed in brown sugar and coffee, and smoked until blissfully tender.

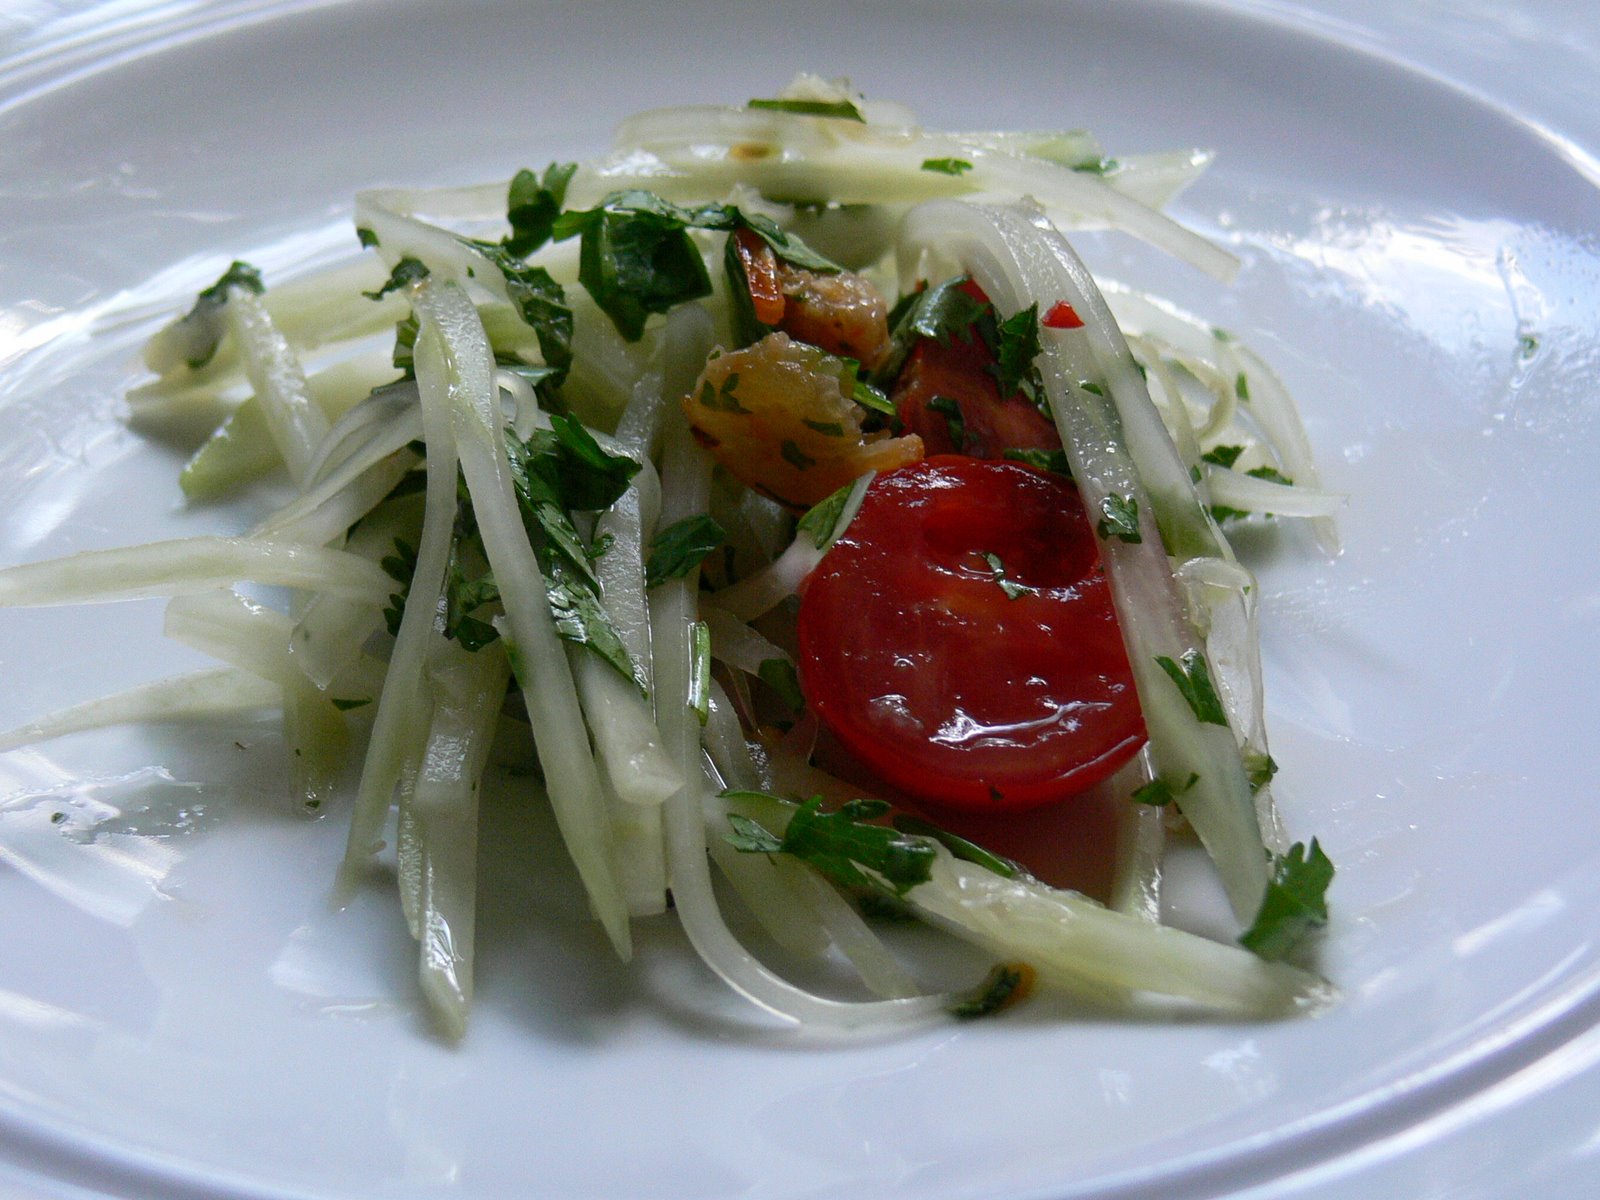
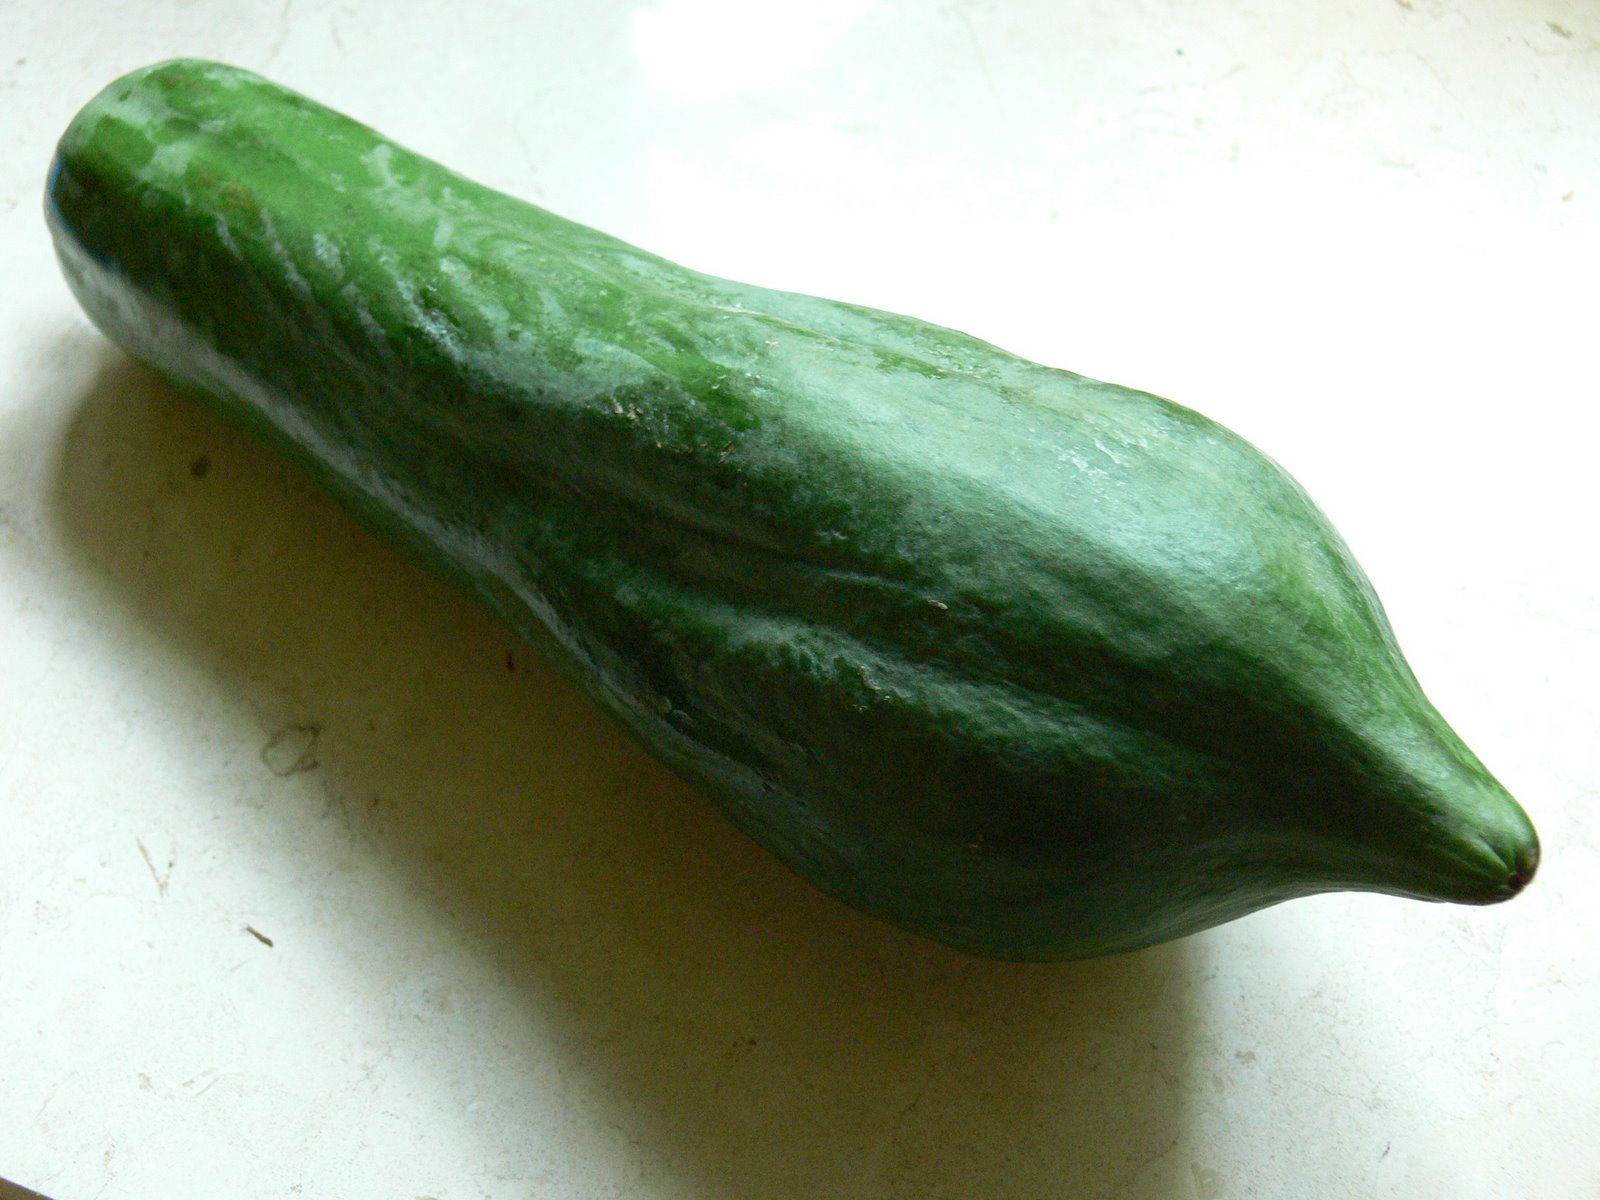
Staff here are impossibly hip. There are enough tattoos on the restaurant floor to upholster a really creepy three-piece suite. Everybody’s as nice as pie (specifically, a lovely little crescent-shaped, deep-fried apricot pie, served with some excellent ice cream); and in common with many places with ultra-hip servers, there are some ultra-good cocktails on offer. Try the tart cucumber gimlet, which is a great foil to the sweetness of some of the food.

Devilled eggs, asparagus
Devilled eggs and asparagus from the brunch buffet at Lambert's - an unusually non-meaty plateful.

We were back again for brunch, which gave me a chance to branch out into the rest of the menu a bit. There are actual salads on offer – asparagus vinaigrette, great coleslaw packed with coriander, the ubiquitous potato salad and a fruit salad for any health nuts who have stumbled through the wrong door. Great gravadlax, cured to a nutty tenderness then gently smoked, so the outside is barely cooked, is served with a Texan favourite, crisp fried capers. There are devilled eggs topped off with farmed caviar (I am a sucker for a devilled egg);  grits, home fries, macaroni cheese and all the American carbs you could wish for; and a butcher’s block manned by a fella with a big knife who will lovingly slice some of the restaurant’s smoked meats for you. There’s also a long list of small plates you can order fresh from the kitchen, and a groaning table piled with patisseries. The coconut profiteroles, chocolate pie and a blueberry muffin so densely filled with fruit that it was more blueberry than muffin would have beaten a less dedicated group of diners, but Dr W, G and I manfully made our way through it.

After a week’s serious eating, Lambert’s comes out as my top Austin pick by far. Happily for me, more trips to the city seem to be in the offing; next time, I’m planning on ordering their cold-smoked, stuffed quail, and a slab of their thick strawberry Texas toast. It’s beyond me how anyone in this city can stay slim.

Devilled eggs with bacon and chilli

Devilled eggsA couple of weeks ago, I was footling around in the sun at Ciudad, one of my favourite restaurants in LA, with a Margarita and some devilled eggs. (This goes some way to explain the recent hiatus at Gastronomy Domine; I went away for a week and forgot my laptop, then caught something filthy from one of the insanitary people on the plane on the way home and spent all of last week in bed. To be honest, enforced absence from the internet has been great – I highly recommend it.)

I have some friends who claim they don’t like eggs, and whose idea of picnic hell is a plate of devilled eggs. This recipe, inspired by the two helpings of Ciudad’s spectacular and spectacularly expensive jalapeño and bacon devilled eggs that I ended up face down in, is not for them. If you are a fan of devilled eggs, you’ll be pleased to learn that these keep well, refrigerated, for a couple of days. They’re a great outdoor food – just pack them in the bottom of a plastic box before you go, and make sure you keep it the right way up.

To prepare 12 eggs, you’ll need:

12 eggs
2 tablespoons Dijon mustard
2 tablespoons mayonnaise
2 tablespoons creme fraiche
½ pickled habanero chilli – or other chillies to taste
6 spring onions, white and pale green parts only
1 small handful each dill, parsley and chives
½ stalk celery
½ sweet dill pickled cucumber
8 rashers smoked streaky bacon (a sweet, dry cure is best here – try to get a reasonably thick cut too)

Start by boiling the eggs. Perfect hard-boiled eggs are as easy as anything – just cover all the eggs with cold water in a saucepan, and bring it to the boil with the lid on. As soon as the eggs boil, remove them from the heat, keeping the lid on, and leave to one side for 12 minutes. Put the saucepan in the sink and run cold water over the eggs for a few minutes until they are cold, then peel.

While the eggs are boiling, grill the bacon until it starts to crisp at the edges. Put all the ingredients except the dill pickle and bacon in the food processor, and whizz until you have a creamy paste.

Dice the pickle finely by hand. You’re chopping it rather than processing it so that it adds a bit of crunch to the eggs. If you’re in the UK, Mrs Elswood pickles, which are available in most supermarkets in the pickles section and sometimes in the kosher section, are excellent. (Like Betty Crocker and Sara Lee, the Mrs Elswood pictured on the label is a fiction – the name is a portmanteau of Elstree and Borehamwood, where the company is based. They’re still damn good pickles.) Dice the bacon finely with a sharp knife, reserving one rasher. Slice that rasher finely to use as a garnish and reserve. Add the diced pickle and bacon to the whizzed ingredients in a large bowl and taste for seasoning. You may find you don’t need to add any salt.

Halve the peeled eggs and pop their yolks out into the bowl with the other ingredients. Use a fork to squish the yolks into the creamy mixture, and stir vigorously to combine everything. Put the mixture in a piping bag with a medium nozzle and pipe dollops into the empty egg halves. Use a squeeze-down-up motion for the best results – you don’t need to twist the bag or nozzle as you work. If you don’t have a piping bag, just spoon the mixture into the eggs or pop it in a freezer bag with the corner snipped off and use that instead – it won’t look as pretty, but it’ll taste just as good.

Sprinkle some herbs and the reserved bacon over the top, and serve cold.

Steak with sweet pepper salsa

I love the silky, slippery texture of a roasted, peeled sweet pepper. Removing the seeds and skins is a job I relish – a cleaned pepper is velvety-smooth between the fingers, and once it gets to your mouth, that texture combined with the pepper’s natural sweetness makes for an experience far more sensuous than supper should be.

This is a good way to get out of a steak rut (you know the rut I mean – it’s the one with the chips and Hollandaise). I’ve served my steak, rested for a few minutes to allow the meat to soften up and release its juices, over a plateful of undressed pea tops, which you should be able to find in some supermarkets at this time of year. The meat juices and the salsa will dribble into the salad, like a particularly stupendous dressing. I served this with some buttered rice cooked in chicken stock – good, crusty bread will also be good (and this mixture of pea tops, salsa and steak will make a world-beating sandwich).

To serve two, you’ll need:

2 steaks of your choice – I used sirloins
5 sweet peppers – I used 2 pointy piquillo peppers and 3 bell peppers. Try to vary the colours, but don’t use any green ones; they won’t be sweet enough.
12 cherry tomatoes
½ red onion
1 large handful (25g) parsley
1 heaped teaspoon cumin seeds
1½ tablespoons balsamic vinegar
5 tablespoons extra-virgin olive oil
1 pack pea tops, or another sweet, tender leaf
Salt and pepper

Take the steaks out of the fridge before you start and pop them to one side while you deal with the salsa, so they’re at room temperature when you come to cook them.

Rub the whole peppers with a couple of drops of olive oil and arrange in a baking tray. Cook at 180° C (350° F) for 20 minutes, until the skin is browned and blistering, and use tongs to put them in airtight freezer bags. Seal the bags and set aside while you prepare the other ingredients – this will give the steam rising from the flesh of the peppers time to loosen the skin, which will make peeling them much easier when they are cool.

Dice the onion and quarter the tomatoes. Put them in a mixing bowl and stir in the finely-chopped parsley. Toast the cumin seeds in a dry frying pan for a couple of minutes until they are giving up their aroma (be careful not to over-toast and burn them), and stir them into the bowl.

Use your fingers to peel the skins from the roast peppers, and remove their seeds. Discard the seeds and skins, chop the flesh of the peppers into chunks about the size of the pieces of tomato, and add them to the salsa. Pour the oil and vinegar over the other ingredients, stir well and set aside for the flavours to meld while you prepare the steaks.

To cook the steaks, rub them on both sides with salt and pepper, and grill or saute (I chucked mine on the barbecue) for a few minutes on each side until medium rare. Remove to a plate and rest for five minutes to allow the tissues of the meat to relax. Slice on the diagonal and lay the warm steak on a bed of pea tops. Taste the salsa for seasoning, add salt and pepper to taste, then spoon a generous helping on top of the steak. Serve with sunshine and a cold drink.

Som tum – Thai green papaya salad

Thanks for being so patient while I bunked off from blogging and from my other work for an indolent week. It’s been lovely – I’ve been to the seaside, got sunburned, drunk lots of lovely summery booze, eaten some great meals, and done lots of work on new recipes: it means I’m able to come back to you fully recharged. There’s lots to look forward to over a very busy couple of months to come, when I’ll be blogging from Cardiff, a cruise ship just outside Southampton, New Orleans, then Vegas and Phoenix – you can probably see why I felt I needed a short break before getting back down to things!

So then: som tum. You might have ordered this dish (and if you haven’t, you should; I’d rate it as one of the world’s best salads) in a good Thai restaurant. Green papaya makes the base of this salad, its dense, crisp texture made the most of with some careful shredding with a sharp knife. It’s bathed in a dressing which, for me, promotes it right to the head of the international salad flavour conspiracy. (See also: coban salatasi, panzanella and Swedish cucumber salad.) Som tum dressing touches every part of your tongue. It’s sweet with palm sugar, salty and umami with fish sauce and dried shrimp, sour with fresh lime juice, and spiked with chilli to give the whole mouth heat. Some aromatic herbs give it a lovely nose as well – for my tastes, this is about as good a picnic dish as you could make.

Green papaya is surprisingly neutral in flavour. If you can’t find any, Natacha de Pont du Bie, who encountered it in Laos, found to her pleasure that you can substitute a raw turnip in similar Laotian salads and that doing so will even fool Laotians, so I don’t see why you shouldn’t make the same substitution here. My papaya came from the Chinese supermarket on the railway bridge on Mill Road in Cambridge, and other oriental supermarkets with good fruit and veg sections will probably be able to help you too.

To serve up to six as a side dish, you’ll need:

1 green papaya
2 fat cloves of garlic
1 Scotch bonnet chilli (or three or four Thai bird’s eye chillies)
1 small handful (about 20g) dried shrimp (available from the Chinese supermarket in the chiller section)
8 cherry tomatoes
Juice of 2 limes
2 tablespoons fish sauce
2 tablespoons palm sugar (use soft dark brown sugar if you can’t find any)
1 large handful coriander, chopped finely
1 small handful mint, chopped finely

Start by shredding the papaya. Peel it with a potato peeler (surprisingly easy), and cut into the thinnest possible strips. Some find that holding the papaya in one hand and making lengthways cuts like lots of guitar strings halfway into the fruit, then slicing down along those cuts so the shreds fall away from the fruit, is a good method. I prefer to cut the whole fruit into thin pages, and then cut piles of those into strips, because I have trouble with the hollow centre of the fruit when using the first method. Put the shredded papaya into a large bowl.

Crush the garlic thoroughly in a pestle and mortar, and add the shrimp, pounding it with the garlic for about 20 seconds. The shrimp won’t reduce to shrimpy rubble, but they should be well-squished and full of flavour from the garlic. Mix the garlic and shrimp well with the papaya in the large bowl, and add the halved tomatoes, tossing everything in the bowl thoroughly as if to bruise the tomatoes and papaya a little.

Make the dressing in a jam jar so you can adjust seasoning as you go. Add the lime juice, fish sauce, palm sugar and very finely chopped chilli to the jar and shake it with the lid on until the palm sugar has dissolved. Taste the sauce – you may feel it needs to be sweeter, saltier or more sour depending on your taste, so adjust it with some extra juice, sauce or sugar. Pour it over the salad in the bowl, add the finely chopped herbs and toss vigorously again.

This salad will hang around happily for hours, so it’s great to take to a picnic. I particularly love it with fatty meats or barbecued foods, or, of course, to accompany a Thai main dish.

Will you look at that – a hailstorm. Looks like I chose just the right moment to get back to work.

Gai Yang – Lao Barbecue Chicken

I hope you read through the spatchcocking instructions yesterday (my spellchecker doesn’t recognise ‘spatchcocking’, and suggests I use ‘knocking shop’ instead – honestly). If you didn’t, have a quick look, then come back here. This recipe will have you marinating a whole bird in some extravagantly delicious paste full of lemongrass, chilli and coriander, then grilling it over hot charcoal. It’s my version of a recipe that’s originally from Laos. When I lived in Paris, most weekends found me face-down in a plate of sticky rice, Ping Gai (the Laotian term for what the Thais and subsequently the Brits call Gai Yang) and Laotian wind-dried beef at Lao Lanxang (105, Avenue Ivry, 75013 Paris). This is a handsome treatment of a chicken, aromatic, sweet and smoky from the grill.

The recipe is also found in the Issan province of Thailand, and has now been subsumed into the melting pot of Thai food, so it’s in Thai restaurants that you’re most likely to find it in the UK – but if you’re intrigued by food from Laos (and you should be – it is fascinating and delicious), read Natacha du Pont de Bie’s Ant Egg Soup, a foodie backpacking travelogue with a handful of recipes at the end of each chapter that takes you all over the little country, sampling marvels like silkworm grubs, river algae and bottled chicken. The book seems to be out of print now, but there are plenty of copies available second-hand at Amazon.

To marinate a whole spatchcocked chicken (enough to serve four with rice), you’ll need:

1 stick lemongrass
5 green chillies
4 fat, juicy cloves garlic
1 large handful fresh coriander, with stems
1 in ginger, grated
1 tablespoon turmeric
4 tablespoons soy sauce
2 tablespoons fish sauce
1 ½ tablespoons soft brown sugar

Chop the lemongrass, chillies, garlic and coriander coarsely, and put them in a pestle and mortar. Bash and squash until you have a rough, emerald-coloured paste, as in this picture. (Don’t worry about squishing everything until it’s completely smooth – you are aiming to break the cell walls to make an aromatic paste, and this sort of texture will be fine.)

Transfer the green paste to a large bowl, big enough to fit your chicken in, and add the other ingredients. Stir well to combine all the ingredients, and slip the chicken into the bowl, turning and spooning so it’s well covered with the sauce. Refrigerate, covered, for 24 hours, turning occasionally in the marinade.

When you are ready to barbecue the chicken, bring your charcoal up to temperature and set the grill high above it. Ideally, the chicken should cook relatively slowly, to prevent the delicious skin from charring too much. The spatchcocked chicken will lie flat, which helps it cook evenly. Stand over your chicken as it grills, turning it every couple of minutes (again, this will help to avoid the skin from turning too black), and basting each time you flip the chicken over with the remaining marinade from the bowl. After 20 minutes, poke a skewer into the fattest part of the chicken at the thigh. If the juices run clear, you’re done – transfer the chicken to a plate to serve. If the juices are still pink, give the chicken another five minutes and repeat the test until you’re satisfied it’s cooked.

Serve with rice and some grilled corn cobs, drizzled with lime juice.

How to spatchcock a chicken

We’ve been promised something called a ‘barbecue summer’ by the Met Office this year, so I thought I’d go with the flow and bombard you with some barbecue recipes – I’m a big fan of charcoal. There’s a recipe for a whole barbecued Thai chicken coming up tomorrow (here it is), but before you cook it, you’ll need to learn how to spatchcock the bird (removing its breastbone and backbone) so that it’ll lie flat on the grill to cook evenly. It’s much easier than you’d think, and all you’ll need is a pair of stout kitchen scissors (or, better, poultry shears) and a sharp knife – here’s how you do it.


Start by putting the bird back-side up, feeling for the spine of the chicken and cutting with the shears or scissors immediately to the right of it, all the way along the bird. Snip through the ribs as you go – they’re not very tough.


Repeat to the left of the spine and lift out the whole backbone. Don’t chuck it out – pop it in a saucepan with the other bits you’re going to be removing from the bird, and make stock.


Pull the legs apart and look into the cavity of the chicken. You’ll see the arrow-shaped breast bone (the bit my knife is pointing at in this picture). Slip your knife all the way around it, loosening it from the surrounding flesh.

Pull the breastbone out of the bird (the whole thing – it widens and goes all the way to the end of the chicken). You might need your scissors again to release it from the breastmeat.


And you’re done. Your finished chicken will be lovely and rubbery and foldy, ideal for marinating and grilling. Pop back tomorrow for marinade and cooking instructions.

Star anise chicken wings

I’ve been trying very hard to find a silver lining in this economic collapse. The best I’ve been able to manage is in the fact that supermarkets are suddenly stocking more of the cheaper cuts of meat – and those cheaper, nubbly cuts, like pork belly and hock or breast of lamb, are great. They’re often fattier, tastier and altogether more fun to cook with than the clean, boneless slabs of muscle supermarkets usually fall back on.

Chicken wings are among my favourite of the nubbly bits – all that lovely, crisp skin, and the sweet little nuggets of meat, full of flavour from nestling up against the wing bone. The nice chaps at SealSaver (keep this up, fellas, and you’ll become my very best friends) have recently sent me a couple of new SealSaver vacuum canisters, which, besides increasing the storage life of foods make marinading an absolute breeze. Stick the meat and marinade mixture in a Sealsaver, pump the air out, and some magical process occurs, making the meat marinate in a fraction of the usual time. If you don’t have a SealSaver (and you should – they make life in the kitchen very easy), marinate these wings for 24 hours in the fridge. In the SealSaver, they only needed two hours – brilliant.

To make 16 wings (enough for two as a main course or four as a starter) you’ll need:

16 chicken wings, tips removed
5 tablespoons dark soy sauce
8 tablespoons light soy sauce
2 tablespoons molasses
8 tablespoons Chinese cooking wine or dry sherry
3 heaped tablespoons soft dark brown sugar
3 tablespoons sesame oil
8 star anise, 4 kept whole, 4 bashed to rubble in a mortar and pestle
Spring onion to garnish

Prick the chicken wings all over with a fork. Mix all the ingredients except the chicken wings and spring onion in a bowl, and combine the marinade with the chicken wings. If you’re using a SealSaver, marinate, refrigerated, for two hours – otherwise, marinate in the fridge for 24 hours.

Remove the wings, reserving the marinade. Bring the marinade to a low boil for two minutes. Grill the wings (use the barbecue if you possibly can – the only reason I didn’t was that it was snowing) over a slow heat for about 15-18 minutes, basting regularly with the cooked marinade and turning regularly until they are mahogany brown and crisp. Serve with more of the hot sauce and sprinkle with spring onion.

Hoi sin beer can chicken

This is an extremely tasty hybrid – American barbecue crossed with Chinese roast chicken. Regular readers may already have read my original beer can chicken post, and it’s worth glancing at it again for more on this cooking method, which is one of my favourites for roasting chicken. A can of beer is – how can I say this delicately? – rammed up the chicken’s bottom, and steams the bird from the inside while the outside roasts to a lovely crisp.

Usually, I make chicken cooked in this way with an American-style dry rub. This time, I’ve made a Chinese paste to marinade and cook the bird in, and I’m very pleased with the results. I served this with some steamed rice and sweetly stir-fried carrot and courgettes – about which you can read more later in the week.

To roast one chicken to toothsome perfection you’ll need:

1 chicken weighing around 1.5 kilogrammes
4 tablespoons hoi sin sauce
3 teaspoons five-spice powder
2 teaspoons sesame oil
1 piece of ginger about the size of your thumb
3 cloves garlic
1 can lager

Make a paste from the hoi sin, two teaspoons of the five-spice powder, 1 teaspoon of the sesame oil, and the ginger and garlic, grated. Rub it all over the chicken, both inside and out. Leave to marinade for at least three hours (I left mine overnight).

Preheat the oven to 180° C (350° F), pour half of the can of beer into a glass and drink it, and use a hammer and nail to knock a few holes in the top of the can alongside the ringpull. Sprinkle the remaining teaspoon of five-spice powder into the can (be careful – it will fizz extravagantly, so do this over the sink). Put the can in the centre of a roasting tin. Cut the string holding the chicken’s legs together, pull them apart so it looks like it’s standing up, and push the upright chicken firmly onto the can. I use a very cheap stand, whose wires I’ve bent so you can fit them round the can, when I roast chicken this way – it helps keep the whole apparatus from falling over while it cooks.

There is little dignity in death for chickens.

Roast the chicken for 1 hour and 30 minutes (if you have a large enough barbecue with readily controlled temperature, cook it in there instead of the oven), and remove carefully from the can. Pour away the beer in the can – it doesn’t taste great. Rest the chicken in a warmed dish for ten minutes – it will produce plenty of delicious juices to go with any that have dripped into the roasting tin during cooking. Whisk the juices together with a teaspoon of sesame oil, and pour over the carved chicken. Garnish with some chopped spring onion and serve.

Herby grilled sardines – gore warning!

Those Padron peppers have got me thinking about Spain, sunny weather and booze, so last night I made a selection of tapas and a big jug of sangria to eat in the garden.

It rained, so we ate indoors.

Some fat sardines, marinaded in olive oil, lemon, garlic and herbs, formed the core of the meal. (More recipes, including one for sangria, to come next week.) If you’re fortunate enough to be able to find some really fresh sardines, which are sweet and tender, this simple preparation really makes the most of them.

Sardines come with a built-in set of biological zips, and can easily be cleaned, gutted and filleted with your bare hands, without any need for a knife until you come to the end and chop the tails off. It’s all a lot less unpleasant than you might think; really fresh sardines don’t smell at all fishy, just sea-like and delicious, even when raw, and I think there’s a real satisfaction that comes from doing this kind of thing yourself.

You’ll need to start by removing the scales from the whole fish. This is very easy – just run a cold tap and gently rub the fish with your fingers under the running water. The scales will come away as you rub. They are quite large and might block the plughole in your sink – scoop them out every now and then and put them in a bowl or a bin bag at the side of the sink. You’ll need this bowl or bag to put the heads and guts in as you prepare the fish.

To gut and clean the sardine, hold the head in your dominant hand and the body in your other hand. Snap the head off downwards, towards the fish’s belly, and pull it away from the body. Most of the fish’s innards will come away easily with the head, as in the picture. You’ll find that some of the sardines are rather fuller than the others; these are the greedy or pregnant ones.


Stick a thumb into the cavity that has appeared where the guts were, and slide your thumb along the underside of the fish to open up the cavity. You’ll find the fish unzips easily up to the point about a quarter of the way from the tail where its digestive tract ends. Run the opened fish under the tap, pulling any remaining bits of gut out of the cavity, and rinse the cavity out until it is clean and no longer bloody.

Your emptied fish should look like this.


You can stop at this point, and go straight to the marinading stage if you don’t mind pulling the fish’s spine out on your plate with your knife and fork. I prefer to fillet and butterfly the fish before cooking – this means that it has the maximum surface area available to soak up the lovely marinade. Removing the backbone is, again, very easy (and probably the most zip-like bit of taking apart this strangely zip-like fish). To open the fish up, put your thumb in that cavity and push your thumb along the underside of the fish to the tail. The fish can then be laid flat on a board. Starting at the head end, pull the spine out of the fish, zip-style, and chop off the tail with a knife.


You’ll be left with some tiny, hair-thin bones in the flesh, but you can leave these alone; they are so fine that you can eat them, and they won’t prick your mouth. I like to trim the edges of the filleted pieces of fish for neatness, but you can leave them ragged if you like.

To make enough marinade for eight sardines (enough to serve two as a main course), you’ll need:

1 wineglass olive oil
Juice and zest of 1 lemon
2 tablespoons each finely chopped parsley, oregano and basil
1 teaspoon crushed dried chilli
2 cloves garlic, crushed
8 turns of the peppermill

Mix all the marinade ingredients in a large bowl and submerge the sardine fillets in the mixture, adding a little more olive oil if necessary to cover. Marinade for at least three hours.

Sprinkle the sardines with salt and cook for about three minutes per side over charcoal or under a conventional grill turned to high, starting with the fleshy side and doing the skin side last. Use a wide spatula to turn the fillets carefully – they will be quite fragile. Baste the fish with any remaining marinade as it cooks. The skin should turn crisp and golden, and start to blister slightly.

We ate this with Padron peppers, chorizo al vino (recipe to come next week), a hunk of good bread and a jug of sangria. Not quite as good as going on holiday, but close.

Boston baked beans

Home-made Boston baked beans are deliciously, wonderfully, shockingly different from the canned variety. When you try these, you’ll wonder just exactly what happened in the long-ago board meeting when Heinz made their plan to pass off their sweetly uninteresting beans as the real thing. There’s so much more going on here than a thin tomato slime surrounding stiff little beans. In beans made properly you’ll find delicately soft beans in a thick, rich sauce packed with clove-studded onions, herbs like bay and cinnamon, and deeply savoury chunks of ham.

Baked beans want your time and your love. You’ll be baking them at a low temperature for six hours, stirring attentively every now and then. Your house will fill up with some really, really good smells. Eat these beans as main course with some good bread, or to accompany a porky barbecue or some pulled pork. This happens to be one of those recipes which improves after a night’s refrigeration, which will help the flavours meld to an even deeper degree.

I’ve used part of a ham I cooked according to this recipe. That ham yielded three meals: the ham itself with fried potatoes, a Pasta alla Medici, and these beans. One of the ingredients in the beans is the liquor the ham cooked in. If you haven’t made a ham yourself, or have made a ham to a recipe which doesn’t yield a sweet cooking liquid, just replace the 500 ml of sweetened stock with 500 ml cola (not diet). It sounds barking, but it tastes divine.

To make six servings, you’ll need:

500 g dried haricot beans
1.5 l water
500 g cooked, smoked ham (recipe here)
500 ml stock from a ham cooked in cola (see above for substitution)
1 large onion
10 cloves
3 bay leaves
1 tablespoon molasses (treacle)
2 tablespoons maple syrup
1 tablespoon Dijon mustard
1 dried chipotle pepper (use any hot chilli pepper if you can’t find chipotles)
1 head garlic
1 cinnamon stick
2 teaspoons salt

Put the dried beans in a large bowl and pour the cold water over them. Soak overnight. The next morning, simmer the beans in this water in a covered pan without salt (which will make them tough) until they are soft – about an hour.

Heat the oven to 180° C (350° F). Drain the beans, reserving their soaking liquid, and put them in a heavy casserole dish with a tight-fitting lid. Quarter the onion and press the cloves into it, and chop the garlic. Push the ham, onion, garlic, chilli pepper, bay and cinnamon into the beans, stir in the garlic, then combine 500 ml of the soaking liquid from the beans with 500 ml of the ham’s cooking liquid in a jug and stir in the molasses, the maple syrup, the salt and the mustard. Pour this over the bean mixture, put the lid on and put in the oven for six hours.

Stir the beans every hour or so. You’ll notice that very gradually, the beans will take on colour and the sauce will thicken. If you think the dish is looking too dry, add some water to the casserole dish – if you reach the last hour of cooking and the mixture is looking wetter than you would like, remove the lid.

The beans will keep in the fridge for over a week, but they’re so good that you’re very unlikely to be able to keep them in the house for that long without eating them.