Char siu pastry

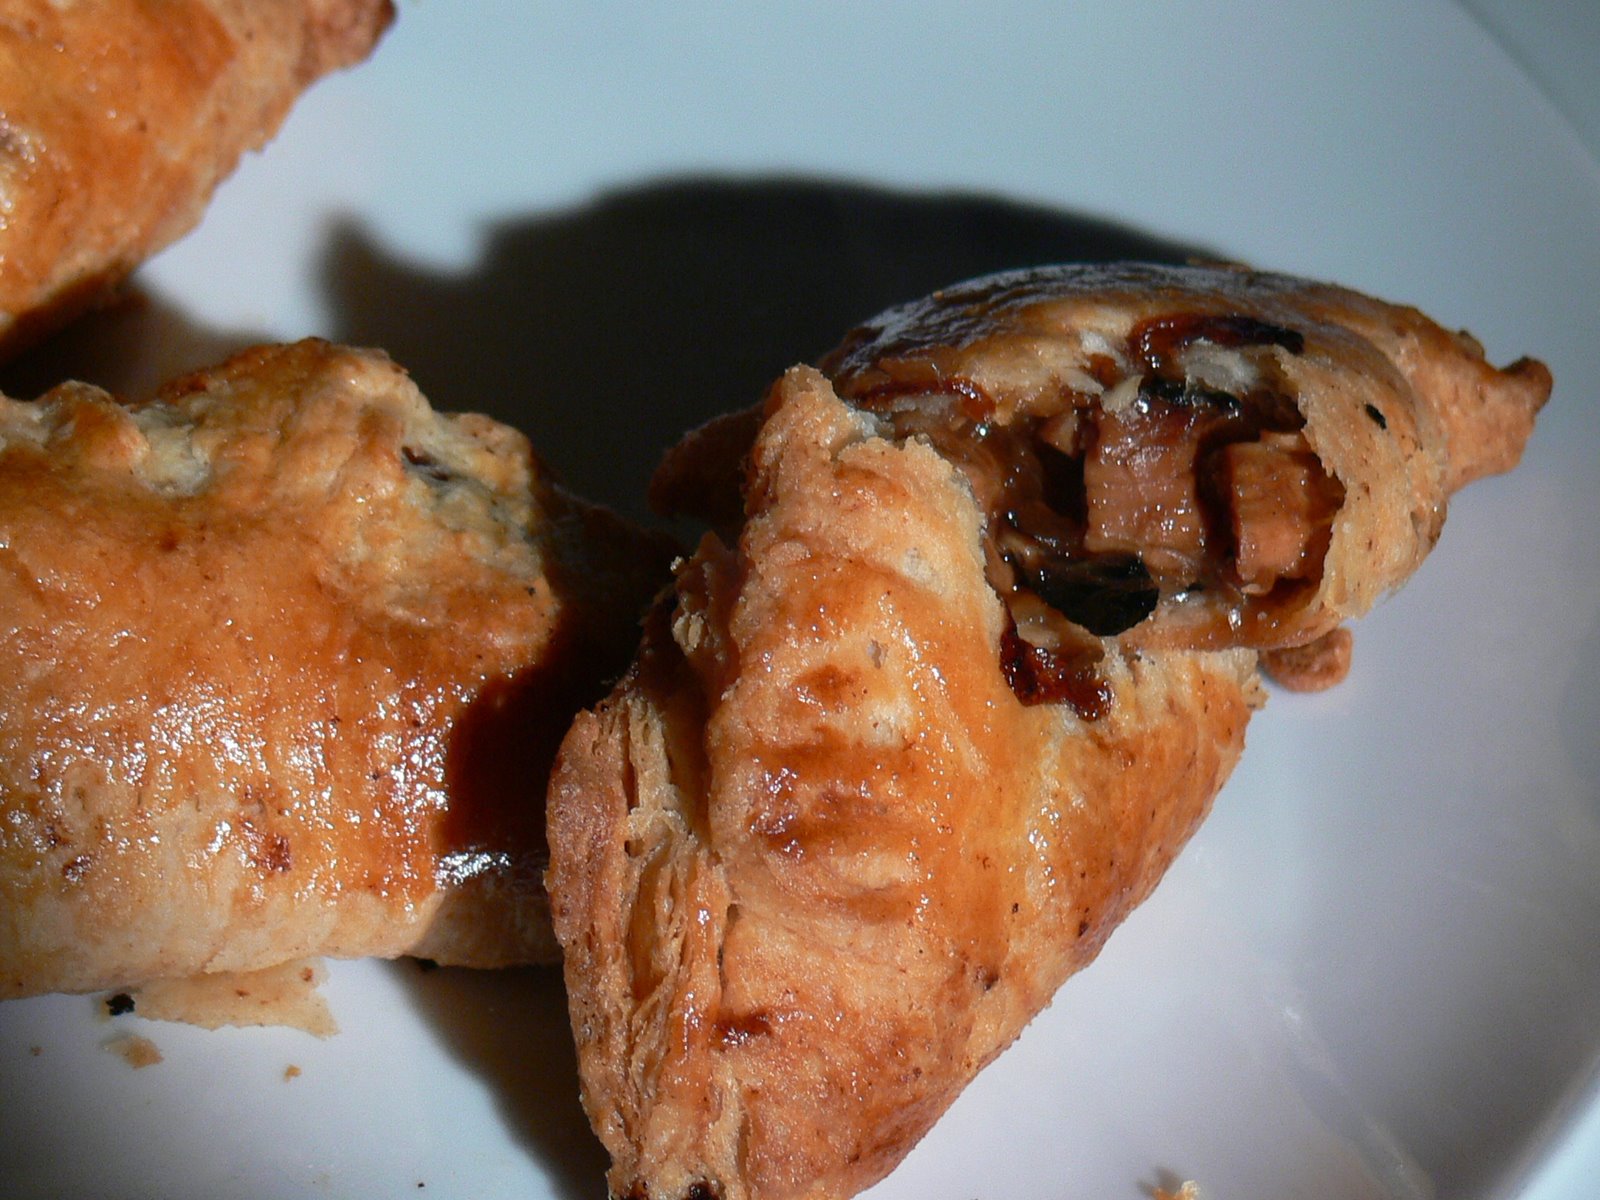
Here’s another dim sum recipe; in Cantonese this savoury pastry, a bit like a little pie, is called Char Siu Sau. It’s a parcel of crisp, flaky puff-pastry wrapped around succulent barbecued pork in a sweetly spicy sauce.

Char siu, the barbecued pork in question, has featured on this blog before, and is very easy to make – see the recipe here. The pastry I use to make these is a Malaysian-Chinese flaky pastry, made incredibly short and delicate with a lot of fat and some lemon juice. This is an altogether fatty recipe which is best made for a party (and believe me, if you serve them at a party they’ll vanish in no time at all).

To make about thirty little pastries (they freeze very well before the final baking stage, so you can assemble them and then freeze a few for a treat later on) you’ll need:

Filling
2 fillets of char siu
2 tablespoons lard
8 fat cloves garlic, chopped finely
2 medium onions, cut into small dice
4 tablespoons soft light brown sugar
2 teaspoons sesame oil
2 tablespoons kecap manis (sweet dark soya sauce – use 2 tablespoons of dark soya sauce and a teaspoon of soft light brown sugar if you can’t find any)
2 tablespoons light soya sauce
4 fl oz water
2 tablespoons plain flour
1 tablespoon vegetable oil

Pastry
1 lb flour
4 oz butter
8 oz lard
1 egg, and another to glaze
2 tablespoons sugar
Juice of ½ a lemon
6 fl oz water

Begin by cooking the filling. Chop the two fillets of pork into small dice. Dice the onions finely and chop the garlic. Mix the vegetable oil and flour in a cup. Saute the garlic in the lard until it begins to give up its scent (about 2 minutes) and then add the onions, moving them around the pan until they turn translucent (another 2 minutes or so). Add the sugar, sauces, water and sesame oil to the pan, and bring up to a gentle simmer. Add the diced pork and stir until everything is well coated with the sauce. Add the oil and flour mixture, and stir until everything is thickened (about a minute).

Remove everything to a large bowl and chill in the fridge. (Your little pastry packets will be easier to fill with a thick, cold mixture.)

For really successful pastry, there are a few rules: keep the ingredients as cold as possible, rest the pastry for at least half an hour, and handle it as little as you can manage. To make the pastry, mix a beaten egg with the water, sugar and lemon juice, and chill until nicely cold. Rub the butter, straight from the fridge, into the flour until the mixture resembles breadcrumbs, then use a knife to chop the chilled lard into small dice, about the size of the top joint of a woman’s little finger. Stir the lard into the butter and flour mixture. Add the liquid ingredients to the bowl and use a knife or spatula (cooler than your hands) to bring everything together into a dough. Wrap with cling flim and rest in the fridge for at least half an hour.

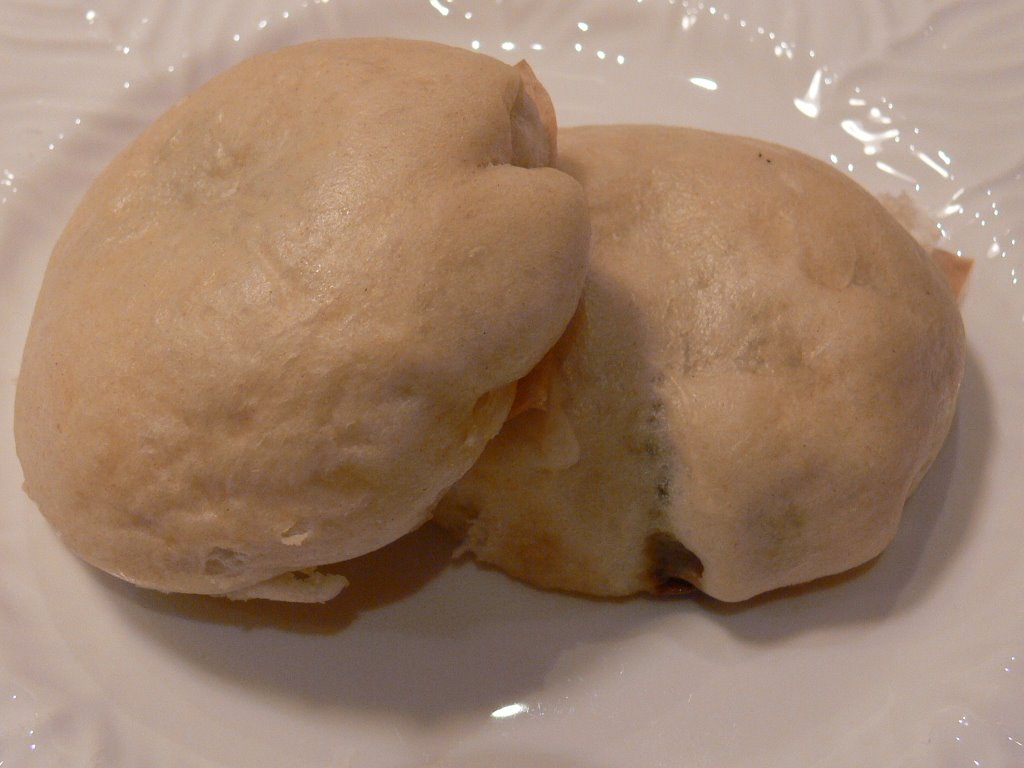
When you are ready to assemble the pastries, roll half the ball of dough out into a rectangle about half a centimetre thick, fold it into three (as if you were folding a piece of A4 paper to put in an envelope), turn it through 90 degrees so the long edge is facing you, and roll it out again. Fold, roll and turn another four times. You’ll end up with a slab of pastry which has been folded and rolled into many, many thin, flaky layers (you can see the layers in the raw pastry, already visible partway through rolling, here on the left).

Preheat the oven to 230° C.

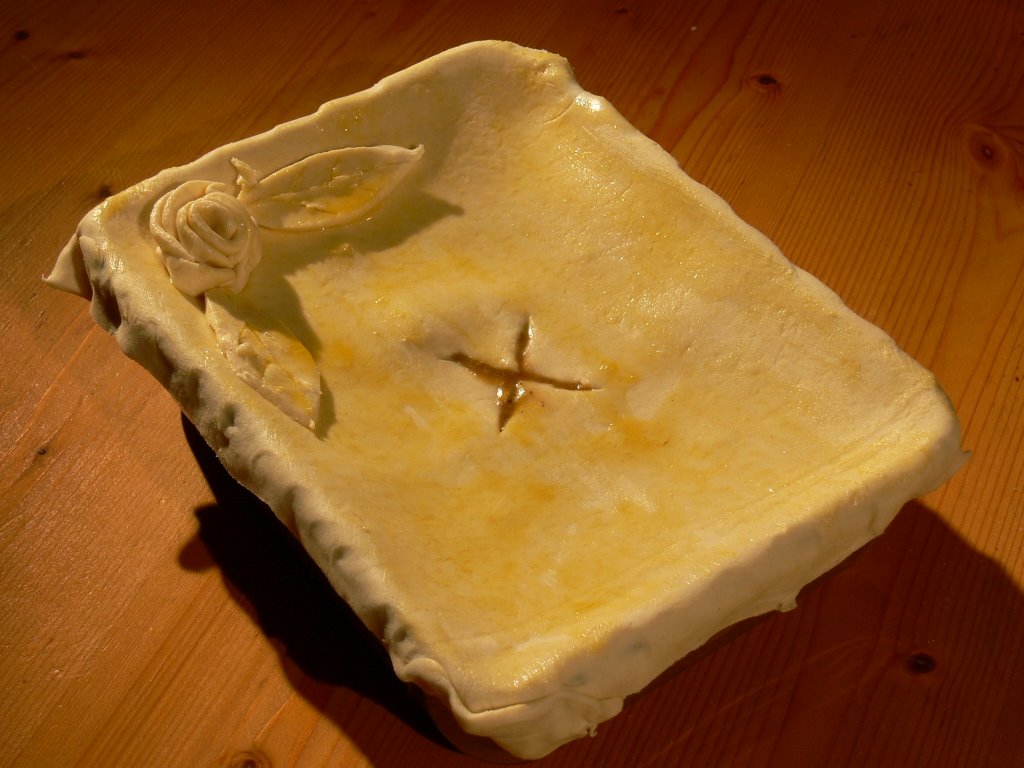
Use pastry cutters to make circles, or a knife to make squares, and place a dollop of the cold char siu mixture in the centre of each. Use a beaten egg to seal the edges, crimp with a fork and make a little hole with your fork in the top side of each pastry (important, this – it will allow steam to escape and prevent your pastries from gaping open when they cook). Brush each one with some of that beaten egg, and put on a non-stick baking sheet in the oven for 10 minutes. When the 10 minutes are up, reduce the heat to 200° C and bake for a further 20 minutes. Cool the pastries a little before you eat – the insides will be unbelievably hot, as well as unbelievably delicious.

Kofta kebab

We fancied lamb for Easter, but didn’t feel like a roast. The answer came with the weather forecast; it was a gloriously sunny weekend, so I hauled the barbecue out for its first kebab recipe of the year.

This juicy, spicy kebab, also called a kofte kebab, is great served with a selection of mezze-type spreads, salad and pitta bread. I made hummus and tzatziki (just a tub of yoghurt with a generous handful of chopped mint and very finely chopped raw garlic), and a big bowl of aubergine caviar. Cooked over charcoal, the kebabs are deliciously smoky, but if the weather isn’t up to it you can cook them under the grill.

To make about eight kebabs you’ll need:

500g good-quality lamb mince
2 medium onions
4 cloves garlic
1 tablespoon coriander seeds
1 tablespoon cumin seeds
1 teaspoon cayenne pepper
½ teaspoon ground cinnamon
1 large handful fresh parsley
1 small handful fresh mint
1 large egg
Salt and pepper

Grind the cumin and coriander roughly in a mortar and pestle with a teaspoon of salt. Put the spices, herbs, onions, garlic and the egg in a food processor and blitz until everything is chopped. Add the meat and blitz again until everything is well-mixed. (Don’t completely purée the meat – aim for a reasonably rough texture.)

Form handfuls of the meat mixture around bamboo skewers. (The skewers make the kebabs really easy to turn and move around on the grill, as well as holding things together.) Grill on a hot barbecue or under the kitchen grill for about ten minutes, turning regularly. Serve immediately.

Pulled pork

This is a wonderful American way with pork. Barbecue purists (a curiously wonderful breed made up entirely of American men – I have never met a woman or a non-American who takes the barbecue quite as seriously as these guys do) should haul out their smokers for this recipe. One team at the American Royal Barbecue championship last year had a smoker made from the body of a Cessna aeroplane.

I used my oven and added a tablespoon of liquid smoke at the end.

The smoke flavour in this recipe is a great addition (UK cooks can buy liquid smoke online – I haven’t found a brand I’ve not enjoyed, but Colgin makes a particularly good version). All the same, if you don’t have access to a small adapted aircraft or liquid smoke, you shouldn’t worry. Your pork will still have a wonderful, barbecue sauce flavour.

In the US you’d use pork butt (actually shoulder) for this recipe. In other countries like the UK we butcher pigs rather differently, so just find a nice, fatty, boned piece of shoulder if you can’t get your hands on the exact cut. The fat is important; the joint cooks for a long time and its fat will baste it from within and keep the meat delectably moist.

To serve about six people you’ll need:

One boneless pork butt or boneless shoulder (about 3 lb)
4 tablespoons soft light brown sugar
2 tablespoons coarse salt
2 tablespoons paprika
2 tablespoons cinnamon powder
1 tablespoon mustard powder
10 turns of the peppermill
1 tablespoon chilli powder (I used chipotle chilli powder for the smoky taste, but you can use your favourite)
1 teaspoon coriander powder
1 teaspoon onion salt
12 fl oz (1 ½ cups) apple juice
6 fl oz (¾ cup) water

Mix all the dry ingredients in a large bowl, and rub them thoroughly all over the pork in the same bowl. If your cut of meat has been boned and rolled, you can push some of the rub into the space where the bone used to be as well, seasoning the meat inside and out. Leave the meat in the bowl and leave, covered, in the fridge overnight.

About six hours before you want to eat, preheat the oven or smoker to 150° C (300° F). Place the pork joint, skin side up, on a rack in a roasting tin. Pour the apple juice and water into the bottom of the tin. (The liquid should not be touching the meat.) Cover the roasting tin tightly with a few layers of tin foil and place in the oven for five hours. Don’t poke at the pork while it’s cooking; it should be left to steam gently in its tinfoil hat.

When the five hours are up, remove the tinfoil. If the liquid in the pan looks like it might dry up, add a wine glass of water. Turn the heat up to 200° C (400° F) and cook the joint uncovered for half an hour. Remove the meat to a large bowl, keeping the juices in the bottom of the roasting tin.

Use two forks to shred the pork. It’ll come to pieces very easily after the long cooking time, and should be moist and delicate with a slight crisp to the outsides. Place the shredded pork in a large frying pan with all its juices and the liquid from the roasting tin. Add another tablespoon of soft light brown sugar, an extra teaspoon of chilli powder if you want some extra kick, and a tablespoon of liquid smoke if you can find some (I like applewood liquid smoke for this recipe). Cook over a medium heat until the liquid in the pan begins to become syrupy.

Serve the pork with its sauce in toasted burger buns. The pork will keep in the fridge for a couple of days. Sweetcorn, coleslaw and other traditional barbecue accompaniments make a great side dish. Try not to get too much down your front.

Beer can chicken

Your eyes aren’t deceiving you – this is a chicken with a can of Guinness bunged up its how-do-you-say. With a dry rub, it’s a brilliant, if slightly obscene way to cook chicken. The beer, flavoured with some of the spicy rub, steams the chicken from inside, resulting in a juicy, delicate flesh, while the skin cooks to a crackling, caramelised crispness.

My friend Lorna pointed me at this extraordinarily cheap roasting stand from Amazon when I complained that my beer can often threatens to topple when I make this dish. It’s worth spending a couple of pounds on a stand like this (bend one of the wire loops to fit the can onto the little dish; it’ll keep the chicken nice and sturdy along with the can). If you don’t own a stand, just make sure that the chicken is resting levelly on the can. Don’t be fooled into using the chicken’s legs to balance the beast – they’ll shrink and change shape when they cook.

To roast one rude-looking chicken to perfect succulence you’ll need:

1 plump chicken without giblets
1 can of beer
2 heaped tablespoons ground cinnamon
1 heaped teaspoon mustard powder
1 teaspoon chilli powder (I like powdered chipotles for this, but you can use cayenne pepper)
1 teaspoon allspice
1 tablespoon salt
3 heaped tablespoons soft dark brown sugar

Snip through any strings holding the chicken’s legs neatly together, and spread them out. Mix all the dry ingredients together in a bowl and rub them all over the chicken, then add a tablespoon of the rub to the cavity of the chicken and smear it around a bit with the back of a spoon. Leave for the flavours to penetrate for two hours at room temperature. Meanwhile, open the beer can, pour half of the beer out and drink it. (This is a fun recipe.) Use a metal skewer or a nail and hammer to make a few more holes in the top of the half-full beer can.

Put a tablespoon of the remaining rub in the can with the beer. It will froth and bubble, so add your rub carefully. After the two hours are up, rub any remaining spice mix onto the chicken and push the bird carefully, bottom (that’s the end with the legs) first, onto the upright beer can, as in the picture. Roast the whole apparatus at 180° C (350° F) for 1 hour and 30 minutes, remove the bird carefully from the can without spilling any beer, and rest for ten minutes before serving. (If you are a lucky person with a large and easily controlled barbecue, try cooking the chicken in there over some flavourful wood – it’ll be delicious.)

Don’t be tempted to use the hot beer as a sauce. It’ll taste bitter and revolting, so just pour it down the sink. Let the chicken’s natural juices (there will be plenty, and they’ll come out of the bird as it rests) act as a gravy. This is a great dish with a salad and a pilaf or cous cous. Serve with a couple of nicely chilled cans of whatever beer you used in the cooking.

If you’d like to try a different take on beer can chicken, I’ve come up with a recipe for a slightly Chinese-ified version too – enjoy!

Gratons de canard – duck scratchings

The UK’s most splendid pub snack is, for my money, a lovely salty bag of pork scratchings. These aren’t at all like American pork rinds, where the skin from some pork is separated from the fatty meat and baked; the English version uses that fatty layer which, along with the crackling skin, is rendered into a fatty, crunchy, salty mouthful that’s perfect with a beer.

When we lived in France, Dr Weasel and I discovered that there’s something even better than pork scratchings: duck scratchings. Ducks which are raised for foie gras don’t end their usefulness with the sacrifice of their liver. Their plump breasts are sold as magret de canard; their fatty thighs and wings are preserved in confit; and the bits of fat from inside the bird and the trimmings of skin are rendered down for cooking fat. The crispy bits, or gratons, left over from the rendering are sold in some French charcuteries as a snack to accompany drinks. They are light, crisp, puffy and delectably ducksome.

My Dad was cooking a couple of ducks the other day, so we saved the extra skin and the poultry fat from inside the birds to render. The best way to do this is in a frying pan on the hob; baking the gratons will make them cook down unevenly, and may result in some burning.

Cut the pieces of skin and poultry fat from one or more ducks into pieces about an inch square in size. They will shrink dramatically when cooked. Spread out in a single layer in a frying pan and place over a low heat for about an hour, periodically pouring off the liquid fat that renders out. (Save it in a bowl and refrigerate it when you’re done; you can use it for making perfectly crisp sautéed or roast potatoes.)

Continue to cook the gratons, turning and draining occasionally, until they are crisp and an even gold colour. Use kitchen paper to absorb any extra fat – your gratons should be dry to the touch and puffily crisp. Season with salt and pepper and serve warm with drinks as a pre-dinner snack.

I’m leaving for America for a few weeks tomorrow morning. I’ll try to keep the blog updated, but I’m hoping the wireless provision at the Horizon Casino Resort in Lake Tahoe has improved significantly since last year. I’ve somehow managed to score a booking at Picasso in Las Vegas too, which is tremendously exciting – watch this space for a review.

Slow-roast citrus lamb shoulder with pilaf and accompaniments

I hate this time of year. The weather’s glum, it gets dark absurdly early, and waking up to a foggy view over very damp fenland full of dead things does not make me leap out of bed springheeled with happiness. It’s time for some summery spicing before I am driven to emigrate.

I’ve written about how brilliant slow-roast lamb shoulder is before – the meat becomes falling-apart-tender, all the fat renders out, and the skin becomes crisp and delicious. In this recipe, you’ll push tiny pieces of lemon zest and garlic into pockets in the fatty flesh before cooking, infusing the whole joint with sunny flavour. I accompanied the lamb with hummus (I blogged the very simple recipe last year), an idiot-proof tzatziki (no recipe needed here – I just stirred a handful of chopped mint into a tub of Greek yoghurt with a little crushed garlic and some pepper), roast pointy peppers and a spicy pilaf. This makes a fantastic supper dish if you have guests, as the hummus, tzatziki and peppers can be prepared well in advance. The lamb needs very little attention for the four hours it’s in the oven, and the pilaf is all cooked quickly, in one pan. To serve six, you’ll need:

Lamb
1 lamb shoulder
Zest of 1 lemon, pared into strips
1 large bunch rosemary
5 cloves garlic, cut in half lengthwise
Salt

Using a very sharp small knife, make little pockets in the lamb shoulder just large enough for half a clove of garlic. Push a piece of garlic and a strip of lemon zest into pockets all over the joint. Lay the shoulder in a roasting tin on a bed of rosemary, skin side up. Sprinkle the skin with salt and place in an oven at 220° C for 20 minutes, then turn the heat down to 170° C and roast for four hours.

Pilaf
1¾ lb basmati rice
4 pints chicken stock
6 large shallots
2 tablespoons butter
5 cloves garlic
1 teaspoon cumin seeds
2 teaspoons coriander seeds
1 teaspoon fennel seeds
1 teaspoon Ras-al-Hanout
2 teaspoons harissa
1 large pinch saffron, steeped in an eggcup of boiling water for 20 minutes
2 tablespoons sherry vinegar
1 tablespoon brown sugar
1 handful sultanas
Salt and pepper
1 handful chopped fresh coriander

Slice the shallots finely and sauté them in the butter in a large pan with a lid until starting to brown. Add the chopped garlic and all the spices except the saffron and harissa, and continue to fry for four minutes. Add the sugar and vinegar to the pan and simmer for two minutes until the mixture looks syrupy. Add the rice, stirring well to make sure it is well coated, with the sultanas, salt and saffron. Pour over the stock and bring to a fast boil, then immediately turn the heat down, put the lid on and simmer gently for 12 minutes. Stir the coriander and pepper through the finished rice.

Peppers
Slice sweet red peppers in half lengthways (use pointed peppers if you can find them – they’re sweeter than bell peppers) and place an anchovy fillet and sliced clove of garlic in each half. Drizzle with olive oil, place a knob of butter in each pepper half, and put in the oven alongside the lamb for the last hour of cooking. These peppers taste their very best at room temperature, so take them out at the same time you take the lamb out, and leave them to cool as the lamb rests while you prepare the pilaf. The lamb will keep its heat as it rests, but if you place the peppers on a cold plate they’ll be the perfect temperature when it’s time to eat.

Chicken claypot rice

I bit the bullet last weekend and bought a claypot from the Chinese supermarket. These traditional cooking pots are finickity beasts to cook with; a claypot isn’t shatter resistant, so you have to be very, very careful when cooking with it to allow it to heat up very slowly (complete with cold ingredients) and cool down equally slowly, or risk shards of pot and sauce all over the kitchen. Cooking in a claypot gives the dish a very particular texture and a smoky flavour. The rice on the very bottom of the pot will catch and singe into a gorgeous crisp layer, and the meat at the top will steam delicately, giving its juices to the flavourful rice.

I’ve used Chinese sausages here – you will be able to find them at any Chinese supermarket. If you can’t get your hands on any, use lardons of smoked bacon instead. They won’t taste the same, but they’ll give the dish the smoky, porky depth you’re looking for.

If you don’t have access to a claypot, you can cook this dish in a heavy-bottomed (not non-stick) saucepan with a lid. A well-used claypot, however, will give a lovely smoky taste to whatever’s cooked in it.

To serve three hungry people or four less-hungry people, you’ll need:

3 Chinese sausages
4 chicken thighs
2 tbsp oyster sauce
1 tbsp dark soy
1 tbsp light soy
2 fat garlic cloves, crushed
5 chopped spring onions
1 tsp cornflour
½ glass rice wine
1 inch julienned ginger
1 tablespoon brown sugar
4 baby pak choi
5 dried shitake mushrooms, soaked in boiling water for 20 minutes
2 cups rice
3 cups stock

Mix the chicken and sausages in a bowl with all the ingredients except the rice, pak choi, mushrooms and stock. Leave to marinade for at least half an hour.

Put the rice and chicken stock in the cold claypot and place it over a medium heat with the lid on. Bring to the boil and immediately reduce the heat to a low simmer, then leave the rice to steam for 15 minutes. The rice should be nearly cooked, with little holes in the flat surface.

Spread the chicken mixture, the pak choi and the chopped mushrooms all over the top of the rice, and put the lid back on. Continue to steam over a low heat for another 15 minutes, until the chicken is white and cooked through. Serve piping hot.

Char siu bao – Chinese steamed pork buns

Char sui baoChar siu (see my recipe from last week) on its own is wonderful stuff. Chopped, cooked into a sticky, savoury, meaty mixture and sealed inside a light steamed bun, it becomes something really, really special. It’s a dim sum staple; a filling, moreish little bun of scrumptiousness.

When we’re in Malaysia, my very favourite breakfast is one of these buns. It makes a splendidly fattening change from muesli. Once you have a strip of char siu in the house, the buns are very simple to assemble. They’re also a doddle to reheat – just steam for ten minutes – and they freeze like a dream.

If you made the braised pork with accompanying buns, you’ll recognise the dough recipe here. The method is slightly different, in that you’ll be stuffing your buns before steaming. To make about twenty buns you’ll need:

Filling
1 fillet of char siu (about 10 oz)
2 tablespoons lard
4 fat cloves garlic, chopped finely
1 medium onion, cut into small dice
5 teaspoons caster sugar
2 teaspoons sesame oil
1 teaspoon dark soya sauce
2 teaspoons light soya sauce
4 fl oz water
1 tablespoon plain flour
2 tablespoons vegetable oil

Buns
1 pack instant yeast
1 teaspoon sugar
2 tablespoons lukewarm water
½ tablespoon salt
3 tablespoons vegetable oil
8 tablespoons sugar
8 fl oz lukewarm water
20 oz white flour

Filling method
Cut the char siu strip into tiny cubes with a knife and fork, and blend the vegetable oil and flour in a cup. Fry the garlic in the lard until it starts to turn colour, add the onions and cook until they are translucent. Pour in the sugar, sesame oil, soya sauces and water and bring up to a simmer. Add the chopped meat, stir until well-coated, then add the oil and flour. Continue to simmer for 30 seconds, then transfer to a bowl and chill.

Buns method
Mix the yeast, 1 teaspoon of sugar, two tablespoons of lukewarm water, half a tablespoon of salt and three tablespoons of vegetable oil in a teacup, and let it stand for five minutes.

Place the flour in a bowl and pour the yeast mixture into a depression in the centre of the flour. Add 8 tablespoons of castor sugar and 8 fl oz lukewarm water to the mixture and stir the flour with your hand until everything is brought together.

At this point the dough will be very sticky. Don’t worry – just knead for ten minutes or so, and it will turn smooth and glossy. Don’t add extra flour to get rid of the stickiness. The action of kneading will make the protein strands in the dough develop, and the stickiness will vanish on its own. You’ll know that your dough is ready when it has become smooth, and does not stick to the bowl. Cover the bowl with cling film and leave in a warm place until the dough has doubled in size.

Knock the dough down again, and take an egg-sized piece in the palm of your left hand. Stretch it and squash it on your palm until you have a disc about the size of your hand. Still holding the disc of dough, put a teaspoon and a half of the chilled filling in the centre of the disc, then gather the edges to the centre and pinch closed. Put the pinched side of the bun on a square of greaseproof paper. Leave the filled buns in a warm place until doubled in size.

Steam the buns over boiling water for ten minutes to cook. Once cooked, the buns can be eaten hot (or cold in a packed lunch) – just steam again to reheat. The cooked buns will freeze well; they’ll also keep in the fridge for a few days.

Char siu – Chinese barbecued pork

char siuChar siu is a brilliantly versatile thing. Even if you’re not familiar with it by name, you’ve almost certainly tasted it before; it’s the reddish pork that appears in little pieces in every Special Fried Rice in every Chinese restaurant and takeaway in the country, in those wonderful fluffy buns you get as dim sum (my recipe for those buns is here), on its own over rice as a roast meat, and sliced thickly in a million different noodle dishes. It’s a sweetly glazed, aromatically spiced, perfectly delicious piece of meat, and one of my very favourite things to do with pork.

This recipe makes a single fillet of char siu. I’d recommend you at least double it – you’re going to need a whole fillet of the stuff for Monday’s recipe, and you’ll probably want to eat at least some as soon as it comes out of the oven. Char siu freezes well too, so you don’t need to worry about cooking too much.

A note on the glaze and colour. The strips of char siu you’ll see in Chinese shops are usually glazed with maltose, a sugary by-product of the brewing industry. It does achieve a really gorgeous, crackly sheen, but it’s not got a lot of flavour or sweetness, and I find it’s not as tasty as glazing with a honey/soy mixture, thinned with a little vegetable oil to help the sugar catch and caramelise. Shop-bought char siu is normally very red, because a little food colouring is used in the marinade. Feel free to add half a teaspoon to yours if you like – I find I’m happy with the less shocking colour the meat gets from the hoi sin sauce in its marinade.

To make one strip of char siu (enough for three as a roast meat on rice) you’ll need:

1 pork fillet

Marinade
5 tablespoons light soya sauce
3 tablespoons dark soya sauce
5 tablespoons runny honey
3 tablespoons sugar
1 teaspoon five spice powder
½ glass Chinese rice wine (sherry will do if you can’t find any)
3 tablespoons Hoisin sauce (I like Lee Kum Kee)
1 thumb-sized piece of ginger, crushed
4 fat cloves of garlic, crushed

Glaze
2 tablespoons runny honey
1 tablespoon dark soya sauce
1 tablespoon vegetable oil

Mix all the marinade ingredients together and warm through in a saucepan until the sugar has all dissolved. Pour the warm marinade over the pork, and leave for at least eight hours in the fridge.

To cook the char siu, heat the oven to 210° C and place the meat, basted with some of its marinade, on a rack over a roasting tin with a couple of centimetres of water in it. Roast for 20 minutes, then baste again on both sides, turn the meat over and reduce the heat to 180° C. Roast for another ten minutes, then baste and turn again, and roast for a final ten minutes.

Transfer the meat to a plate, empty the tin of water and line it with foil. Place the meat and rack back on the tin, then brush it liberally with the glaze and put it under the grill for about five minutes, until the glaze is glossy and starting to catch at the edges. Turn the meat, glaze again and put back under the grill until the other side is also glossy and starting to caramelise.

Steak and wild mushroom pie

pieAstute readers will notice that recently I’ve been obsessing somewhat about puff pastry. This should be your last puff pastry recipe for a bit – use a roll from the supermarket chiller cabinet or make your own using the recipe for curry puffs.

Dried wild mushrooms are great. A small handful, especially when simmered for a long time with the meat as in this dish, will infuse the whole pie with a wonderful rich, earthy fragrance. I’ve also used some fresh mushrooms here to bulk out the pie and to add some texture. Try different kinds of mushroom when you make this – my dried mushrooms were cepes, summer boletes and girolles, while I chose lovely firm little Crimini mushrooms (a bit like button mushrooms, but a darker chestnut colour) to add at the end.

pie crustA note on the pastry decoration – a pastry rose on top of a pie is, in Lincolnshire, where my Great Grandma lived, a visual cue to remind you in the larder that it’s a meat pie, and not a fruit pie. Just make a small pastry spiral for the centre and glue on some petals around the outside with some beaten egg.

To serve two (heartily) you’ll need:

1 lb stewing steak, diced
8 shallots, quartered
3 cloves garlic
1 tablespoon flour
1 small handful dried mushrooms
1 punnet fresh mushrooms
Juice of ½ a lemon
1 wine glass vermouth
½ pint good stock
Salt and pepper
Olive oil and butter to fry
Puff pastry
1 egg, beaten

Set the dried mushrooms to soak in ½ a pint of freshly boiled water.

Brown the steak in batches in the olive oil, and remove to a plate. Set aside. Sauté the shallots in the same oil with two cloves of sliced garlic until they are soft, with brown edges. Return the meat to the pan with a tablespoon of flour and stir well. Add the mushrooms and their soaking liquid. Pour over the vermouth and the stock, and simmer with no lid on a low heat for an hour or so, until the sauce is thick and reduced.

Sauté the chopped fresh mushrooms in butter with another clove of garlic in a separate pan. When they give up their juices, add the lemon juice, and continue to cook until nearly all the liquid is gone. Stir into the reduced meat and mushroom pan, and season the whole mixture to taste.

Transfer the mixture to a pie dish and top with pastry. Cut a hole in the centre to allow the steam to escape, and decorate with a rose, glazing with the beaten egg. Bake the pie at 200° C for 25 minutes, until brown and glossy.