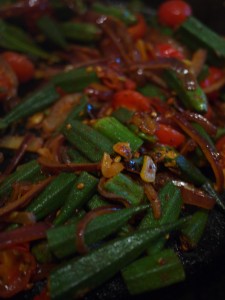
Bhindi bahji with whole spices

Bhindi bahji
Bhindi bahji

I’ve got collection of bad habits which do nothing to endear me to my local Indian takeaway. If we’re having takeout, I usually cook our own rice, occasionally heat up some oil for DIY poppadoms, and then fail miserably to order anything other than vegetable dishes, which happen to be the least expensive thing on the menu.  This doesn’t all come from being a hideous cheapskate; it’s just that I like my own pilau rice better than the stuff with the red and green food colouring in it, and have had a preference for vegetable curries ever since I got food poisoning in India in 2005. (A tip: if you’re in a city where the sewers drain directly into the sea, don’t eat the prawns.) And poppadoms are great fun to make at home, as you’ll know if you’ve ever tried.

Sadly for the local takeaway, I’ve started to take to making bhindi bahji, which is probably my all-time favourite curryhouse dish, at home too. There are a few reasons for creating this extra work for myself: home-made bhindi bahji is a lot less greasy than the restaurant kind, which always comes drowning in ghee for no reason that I can really make out, and I can control the cooking of the okra to make sure it doesn’t produce any of the snotty slime that puts so many people off the vegetable.

I love okra. I like its texture (I even like slippery, slimy okra, especially for its ability to thicken the base it’s cooked in), its flavour and the shuddery feeling I got aged about ten when my parents used to refer to it as “ladies’ fingers”. It’s a much maligned vegetable, and I’d encourage you to have a go at making this dish if the only okra you have experienced is olive green and exuding stuff that looks as if it came out of a snail. Cooked like this, it is crisp, fresh- tasting and entirely snot-free.

To serve two as one of two curries on the table, you’ll need:

150g fresh okra
12 fresh, sweet cherry tomatoes
1 medium red onion
2 cloves garlic
1 teaspoon black mustard seeds
1 teaspoon fennel seeds
1 teaspoon coriander seeds
1½ teaspoons turmeric powder
1 tablespoon ghee or groundnut oil

Chop the okra into pieces about an inch long (larger pieces mean less potential for slime) and dunk in a large bowl of water with a couple of spoons of salt dissolved in it. Drain in a colander. Halve the tomatoes and set aside, and chop the garlic.

Cut the onion in half, and slice it into half moons. Heat the ghee or groundnut oil to a high temperature in a frying pan or wok, and throw the onion in. Stir fry it for three minutes, then add all the spices and the garlic to the pan. Continue to stir fry until the onion is turning translucent (a couple of minutes) and the spices are giving off their fragrance.

Add the drained okra to the pan and keep stir-frying for one minute. Add the tomatoes, and continue to cook, stirring all the time, until the tomatoes start to collapse in on themselves and the okra is a bright green and piping hot. Taste for seasoning, and add some salt if necessary.

Serve immediately.

Gazpacho

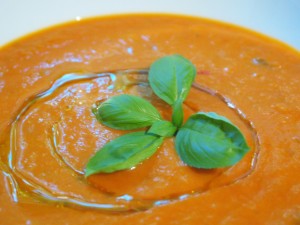
GazpachoI’m looking out of the window as I type this, and I’ve come to the sad conclusion that it’s definitely not summer any more. This will be this 2010’s final recipe for the contents of your greenhouse. This year hasn’t been fantastic for tomatoes, but the cucumbers have been glorious (full disclosure here – I didn’t grow any myself, but my parents have enough to club a small army to death with), and peppers are at their best now. It goes without saying that this recipe is totally dependent on the quality of your ingredients.

Most think of gazpacho as a cold tomato soup. Tomatoes do make up the dominant ingredient by weight, but a good gazpacho should take much of its flavour from the cucumber (surprisingly aromatic) and peppers. Get the finest, ripest vegetables you can find, and if at all possible, try to get your hands on one of those lovely, spurred, English cucumbers  – they’ve a lot more flavour to them than one of the smooth-skinned supermarket variety. Use your best olive oil, and enjoy the last of the sunshine. If you’re preparing this as part of a special meal, you can jazz it up something spectacular by shredding some fresh, sweet white crab meat, and putting a couple of tablespoons of it in the bottom of each bowl before you pour the soup over.

Finally, a word of warning. Your guests might have a baked-in dislike of chilled soups. Check before you serve this up. I remember the look of utter misery on my Dad’s face when we visited a friend’s house once and were presented with a choice of Vichyssoise and gazpacho to open a meal with. Dad, you’re a heathen, but for you I’d warm this through on the hob.

To serve four as a starter, you’ll need:

1kg ripe tomatoes, as fresh as possible
4 banana shallots
3 cloves garlic
2 red peppers
1 green pepper
1 large cucumber
2 slices stale white bread, soaked in water and squeezed
1 teaspoon red wine vinegar
4 tablespoons olive oil
½ teaspoon smoked paprika
Salt and pepper

Peel the tomatoes by scoring them around the equator and dunking them in boiling water to loosen the skins. Cut them open and discard the seeds. Blacken the skin of the peppers under the grill, pop the steaming peppers in a plastic box with the lid on for a few minutes to loosen the skins, peel and seed. Peel the cucumber, chop the shallots into quarters and mince or otherwise squish the garlic.

Blitz the vegetables and bread to a smooth purée in batches with the other ingredients. Taste for seasoning; you may want to add a little more vinegar or paprika as well as salt. Chill thoroughly and serve cold, with a little more olive oil drizzled over.

Iceberg lettuce and beansprout stir-fry

Iceberg lettuce and beansprout stir fryI’ve never really caught on to this British idea of the lettuce as mere salad vegetable. The Chinese aren’t alone in cooking them; you’ll find lettuce simmered gently in French soups and especially in dishes with peas. Cooked, the lettuce becomes silky and sweet; a totally different beast from the salad leaf you’re used to.

In China, you’re much more likely to find a lettuce cooked than raw. This preparation works very well with the spicy, rich, Vietnamese caramel pork from the other day; in Chinese terms, its clean, fresh flavour would be described as being Yin, against the Yang of the pork. This philosophy of food strives to balance the body – if you are prone to cold fingers and toes, and have a slow heart rate, you’re considered to have an excess of Yin. If you’re sleepless, sweaty or jittery,  Chinese grandmothers would tell you you’ve too much Yang. Yang foods tend towards richness: think chestnuts, squashes, onions and garlic, meat, ginger, coffee, alcoholic drinks and fruits like peaches, mangoes and cherries. Apples, bananas, asparagus, watermelon (as distinct from cantaloupe, which is Yang), shellfish, lettuce, beansprouts, citrus fruits and cucumbers are among the foods considered Yin.

I live in a post-enlightenment age, and do not think my cold fingers are due to an excess of lettuce, rather an excess of typing. But it’s still an interesting philosophy which works surprisingly well to help you balance the flavours in a meal. In Malaysian Chinese households, you’ll often be offered a Yin mangosteen to accompany the excessive Yang of a durian, for example; the two work together exceptionally well. Try this dish, which only takes minutes to cook (and is only Yanged-up slightly by the chicken stock, rice wine and a little garlic) to accompany fierce and rich flavours like Monday’s pork. To serve two generously, you’ll need:

1 iceberg lettuce, halved and chopped into strips
500g beansprouts
3 fat cloves garlic, sliced
1 ladle good home-made chicken stock
2 tablespoons light soy sauce
2 tablespoons Chinese rice wine
Groundnut or grape seed oil to stir fry

Bring a small amount of oil to a high temperature in a wok. Throw in the sliced garlic and stir-fry for ten seconds, then add the beansprouts to the pan and continue to cook, stirring all the time. After three minutes, add the liquid ingredients, bring to a simmer and add the lettuce. Cook, stirring, until all the lettuce is wilted, and serve immediately.

Stupendous tomato sauce

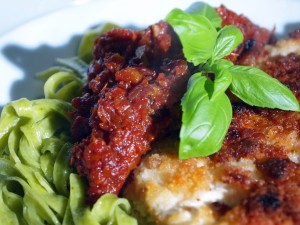
Tomato sauceStupendous because, really, there is no other word for this stuff. It’ll take you the best part of a day to make, although there’s not much real work involved, just a bit of stirring every half hour or so – if you’re going to be around the house all day, just carry a timer with you set to go “bing” every half hour to remind you to go and stir the sauce. You’ll use up two kilos of those tomatoes you’ve got ripening away in the greenhouse, and you’ll finish with a sauce that tastes like pure condensed summer. It freezes well – I have a few boxes of this sauce in the freezer to be hauled out in the middle of winter, when tomatoes are indistinguishable from potatoes.

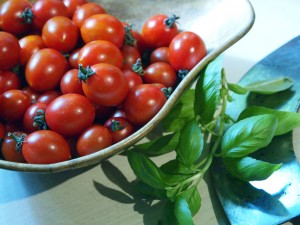
The idea here is to drive as much of the moisture as possible out of sweet, summery peppers and tomatoes, encouraging their natural sugars to caramelise. The tomatoes you choose should be the very best you can find. This recipe is fantastic for gardeners with a glut of tomatoes, but you can make it with good tomatoes from the market too. Just make sure you use the sort of tomatoes that you’d be happy to snack on raw; the sort where you suddenly discover you don’t have any left because they were so good you accidentally ate them all without noticing.

This sauce is beyond fabulous on its own, dressing some pasta – if you can find Giovanni Rana fresh pasta at your local supermarket or deli, the basil and spinach fettuccine is a great match, with its intense basil aroma. For plain pasta, throw a few basil leaves and maybe some oregano over when you serve. I also love it as a sauce for chicken breasts that have been butterflied, beaten flat, breaded and fried crisp (you don’t need a recipe for those – just put the butterflied breasts between two pieces of cling film; wallop the hell out them with a rolling pin; then flour, egg and crumb them before frying for five minutes on each side); it’s great mixed with some grilled vegetables or as a sauce for grilled, oily fish too. You can use it as a dip, in sandwiches, as an enriching ingredient for other sauces, as a base for soups – versatile, delicious, wonderful stuff.

To make about 12 servings (you’ll be freezing these in individual portions, and with something that takes so long to cook it seems a waste to make any less) you’ll need:

6 bell peppers (orange, red or yellow)
2kg tomatoes
100g butter
150ml olive oil
2 large onions
1 head garlic
Salt and pepper

Tomatoes and basilBlitz the bell peppers with the onions in the food processor. You’re aiming for a rough, wet puree. Put the resulting glop in your biggest saucepan (preferably something with a heavy base that will disperse the heat evenly – I have a giant le Creuset casserole which is perfect for this sort of thing) with the butter and cook over a medium flame without a lid, stirring occasionally, for about an hour. Eventually, the peppers will start darkening in colour, most of the liquid will have been cooked off, and the whole arrangement will have a jammy texture. It may take more than an hour to get to this stage, depending on the water content of your peppers and the diameter of your pan.

Puree the tomatoes with the peeled garlic. Add them to the jammy contents of the saucepan with the olive oil and stir well to make sure everything is combined. Now go and busy yourself doing whatever it is you do when you’re not cooking, being sure to return to the pan every half hour to stir it, scraping the bottom and moving the sauce around the pan. After a few hours, as the sauce thickens, start returning to the pan every 15 or 20 minutes if you feel it is in danger of sticking when left for half an hour.

Again, timing here varies on your tomatoes and your pan, but around six hours (maybe more) after you first put the tomatoes on the hob, the contents of the pan will have reduced by more than half. The sauce will be fabulously gloppy when stirred, and will be darkening and beginning to give up its oil.  No tomato juice will rush to the surface when you press down on the sauce with a wooden spoon. Taste the sauce, which should look a bit like rusty sun-dried tomato paste, try not to jump too high for joy at the intense, umami flavour, and season.

I freeze this sauce in 250g bags – enough to serve two generously. Your yield should be about six bags, give or take. Unfrozen, the sauce will keep in the fridge for about a week.

Pea and edamame falafel

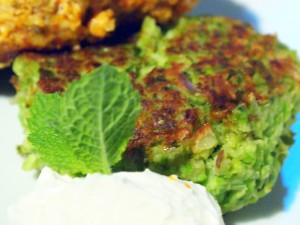
Pea and edamame falafelFalafel? Well, kind of, although I don’t think anyone from the Middle East, or anywhere else where they’re a staple, would necessarily agree with me. I threw this together after eating something advertised as a pea falafel wrap at Harvey Nichols cafe in Leeds last week. I felt the Harvey Nicks version could do with some work – it was underseasoned, underspiced and crying out for a squeeze of lemon and some mint, but had the makings of something really rather good, as I discovered after some experimentation with a bag of peas and some soybeans back home.

Frozen peas and edamame cooked like this make a very quick store-cupboard supper, and the results taste as if you’ve spent much, much longer on them than the few minutes these take to throw together. This is a great dish to whip out when you’ve been landed with an unexpected vegetarian guest (like my poor parents-in-law, who were told that the foreign students they were hosting a few weeks ago were Germany’s only veggies barely a day before they arrived), and a good burger substitute for vegetarian barbecue-goers. Lacto-ovo vegetarians who do it for moral reasons befuddle me. What do they think happens to the calves who were going to drink the milk, and the chickens who weren’t female enough to lay eggs? I can guarantee you that they’re not all prancing in the sun and nibbling on tender shoots, shepherded by the consciences of unimaginative veggies. Cue comments storm.

Anyway. These falafel make for a great side-dish, or a main event on their own. Stick them in a wrap, once they’ve cooled, for an easy and uncharacteristicly healthy lunch, if you have any left over.

To make 12 burger-proportioned falafel, you’ll need:

200g sweet frozen peas (the frozen ones are almost always sweeter than fresh, unless you’re picking straight from your own garden and shelling immediately)
100g frozen edamame (soy beans) without pods
1 medium onion
1 teaspoon cumin seeds
1 teaspoon coriander seeds
1 small handful (about 20g) fresh mint leaves
50g fresh breadcrumbs
Zest of 1 lemon
Juice of ½ lemon
1 egg
Salt and pepper
Olive oil to fry

Defrost the peas and beans, throw all the ingredients into the bowl of the food processor and pulse until you have a rough paste. Use your hands to bring the paste together into patties about the size of a burger.

In a non-stick pan, heat the olive oil until it shimmers and starts to give up its fragrance. Slide in the patties and cook for a couple of minutes per side, until golden on the outside. Serve with a big dollop of Greek yoghurt and some lemon to squeeze over.

Scotch broth

It’s been a very busy month or so, and those of you who follow me on Twitter will have noticed that I was in Scotland for most of last week. I had good fun chomping on tablet, drinking gin and jam (if you are in Edinburgh and fancy a really, really clever and delicious cocktail, head straight for Bramble Bar – I can’t recommend their various egg-based flips enough), eating black pudding (much saltier than the southern variant, largely because of the inclusion of bacon rinds), and failing to spot any of those square sausages or any Arbroath Smokies. Bother.

I didn’t manage to find any Scotch broth either, so the obvious remedy on getting home was to make a large saucepan of it. The ultimate deliciousness of your broth will depend on the stock you use, which should definitely be homemade – lamb or beef is traditional, but any good, rich stock will work here (I cheated and used some stock I found in the freezer that I’d made a few months ago from a pork hock and some bits of shoulder – chicken stock is also excellent here, but it needs to be rich and dense). This is one of those dishes that it’s worth making a stock for from scratch, so if you don’t have anything likely in your freezer, try poaching a lamb shank or a bit of beef shin for a few hours and use the stock from that. You can also shred the resulting cooked meat into the soup – if you’re making your stock from scratch, just fish the bone out when you add the barley and lentils, shred the meat and add it to the broth with the chopped vegetables. If you’re using freezer stock which is sufficiently rich, you can happily leave the meat out.

Pearl barley is what marks a Scotch broth out among other, lesser broths. I’ve also thrown in a large handful of red lentils, which are a wonderful thickening and enriching agent for this kind of lovely lumpy soup. As with many stewed and simmered dishes, you’ll find this tastes even better if you leave it in the fridge overnight once you’ve made it up, and reheat it to serve the next day. To serve four (with some left over) you’ll need:

2 litres stock of your choice (see above)
150ml vermouth
75g pearl barley
75g split red lentils
2 medium potatoes, peeled
2 carrots
1 leek
1 large onion
1 red pepper (totally inauthentic, but very tasty)
1 small turnip
1 heaped teaspoon herbes de Provence
1 lemon (again, not strictly authentic, but damn good)
Salt and pepper to taste

Bring the stock to a simmer with the vermouth and toss in the barley and lentils. Simmer, uncovered, for 30 minutes, skimming any scum from the top of the pan with a slotted spoon.

While the pulses are simmering, chop the vegetables into small, even dice. When the 30 minutes are up, add them to the pan with the herbes de Provence and simmer for another 20 minutes. Add any shredded meat you’ve reserved along with the vegetables, if you’ve boiled a bone especially for this recipe.

Taste for seasoning and add the juice of the lemon. (This lifts the flavour of this rich soup, which I rather like.) If the soup is thicker than you like, just dilute it down with some water or some more stock until it reaches the consistency you fancy. Stir well before serving with big wedges of bread.

Som tum – Thai green papaya salad

Thanks for being so patient while I bunked off from blogging and from my other work for an indolent week. It’s been lovely – I’ve been to the seaside, got sunburned, drunk lots of lovely summery booze, eaten some great meals, and done lots of work on new recipes: it means I’m able to come back to you fully recharged. There’s lots to look forward to over a very busy couple of months to come, when I’ll be blogging from Cardiff, a cruise ship just outside Southampton, New Orleans, then Vegas and Phoenix – you can probably see why I felt I needed a short break before getting back down to things!

So then: som tum. You might have ordered this dish (and if you haven’t, you should; I’d rate it as one of the world’s best salads) in a good Thai restaurant. Green papaya makes the base of this salad, its dense, crisp texture made the most of with some careful shredding with a sharp knife. It’s bathed in a dressing which, for me, promotes it right to the head of the international salad flavour conspiracy. (See also: coban salatasi, panzanella and Swedish cucumber salad.) Som tum dressing touches every part of your tongue. It’s sweet with palm sugar, salty and umami with fish sauce and dried shrimp, sour with fresh lime juice, and spiked with chilli to give the whole mouth heat. Some aromatic herbs give it a lovely nose as well – for my tastes, this is about as good a picnic dish as you could make.

Green papaya is surprisingly neutral in flavour. If you can’t find any, Natacha de Pont du Bie, who encountered it in Laos, found to her pleasure that you can substitute a raw turnip in similar Laotian salads and that doing so will even fool Laotians, so I don’t see why you shouldn’t make the same substitution here. My papaya came from the Chinese supermarket on the railway bridge on Mill Road in Cambridge, and other oriental supermarkets with good fruit and veg sections will probably be able to help you too.

To serve up to six as a side dish, you’ll need:

1 green papaya
2 fat cloves of garlic
1 Scotch bonnet chilli (or three or four Thai bird’s eye chillies)
1 small handful (about 20g) dried shrimp (available from the Chinese supermarket in the chiller section)
8 cherry tomatoes
Juice of 2 limes
2 tablespoons fish sauce
2 tablespoons palm sugar (use soft dark brown sugar if you can’t find any)
1 large handful coriander, chopped finely
1 small handful mint, chopped finely

Start by shredding the papaya. Peel it with a potato peeler (surprisingly easy), and cut into the thinnest possible strips. Some find that holding the papaya in one hand and making lengthways cuts like lots of guitar strings halfway into the fruit, then slicing down along those cuts so the shreds fall away from the fruit, is a good method. I prefer to cut the whole fruit into thin pages, and then cut piles of those into strips, because I have trouble with the hollow centre of the fruit when using the first method. Put the shredded papaya into a large bowl.

Crush the garlic thoroughly in a pestle and mortar, and add the shrimp, pounding it with the garlic for about 20 seconds. The shrimp won’t reduce to shrimpy rubble, but they should be well-squished and full of flavour from the garlic. Mix the garlic and shrimp well with the papaya in the large bowl, and add the halved tomatoes, tossing everything in the bowl thoroughly as if to bruise the tomatoes and papaya a little.

Make the dressing in a jam jar so you can adjust seasoning as you go. Add the lime juice, fish sauce, palm sugar and very finely chopped chilli to the jar and shake it with the lid on until the palm sugar has dissolved. Taste the sauce – you may feel it needs to be sweeter, saltier or more sour depending on your taste, so adjust it with some extra juice, sauce or sugar. Pour it over the salad in the bowl, add the finely chopped herbs and toss vigorously again.

This salad will hang around happily for hours, so it’s great to take to a picnic. I particularly love it with fatty meats or barbecued foods, or, of course, to accompany a Thai main dish.

Will you look at that – a hailstorm. Looks like I chose just the right moment to get back to work.

Aubergines with den miso

Years ago, before I’d even met Dr W, I had a boyfriend whose sister-in-law was Japanese. She and I didn’t agree on much, but we did agree that these aubergines (which she made every time I visited her house) are pretty sublime.

Takako used to make this using those lovely wee Japanese aubergines – the sort that leave you gasping with their visual similarity to eggs and explain the whole eggplant nomenclature thing (not obvious when you are 18 and the only eggplants you have ever met are purple and shaped like a torpedo). Happily for those of us without a supplier of dear little Japanese aubergines, this works very well with the purple sort too. Aubergines are a wonderfully meaty sort of vegetable. Although this works really well as an accompaniment, this lovely meatiness means that you can happily serve this dish as the main event, with rice and perhaps a salad dressed with some rice vinegar. It’s also a good win if you have an unexpected visiting veggie, and, being one of those things you serve at room temperature, I think it’s really, really good as part of a picnic. These do soak up quite a lot of oil, as is common with aubergines, but hell – it’s not like you’re making this dish every day. To serve two, you’ll need:

2 medium aubergines
200g shiromiso (white miso)
2 tablespoons sake (Chinese rice wine is good here if you have no sake)
2 tablespoons sugar
2 tablespoons mirin
6 tablespoons ground nut oil

As usual, if you’re having trouble finding white miso, head for a large independent health food shop. They tend to have a bewilderingly good selection of miso, seaweeds, pickled ginger and the like. I have no idea why, given that most of the other nutty, protein-knitted, fermenty things masquerading as food that the health food shop I use sells are things I have no interest in ingesting at all. Boo hippies.

Start by slicing the aubergines into three lengthways. Slash the cut surfaces diagonally, without cutting all the way through the flesh, and without cutting the skin. Fry in the hot oil over a medium heat, turning halfway through, until the skin and flesh is golden brown, and the aubergine is soft.

While the aubergine slices are frying, make the den miso by combining the mirin, sugar, sake and miso in a small frying pan and bringing to a very gentle simmer, stirring all the time. Cook the sauce for two minutes and keep warm until the aubergines are cooked.

Move the cooked aubergines to a plate and smear the hot den miso all over their upper surface, making sure the paste gets into the slashes. Leave the slices to come down to room temperature before serving – for some reason, this dish is all the more delicious when it’s cold.

Maple-mustard glazed vegetables

British readers will notice that the baby vegetables they are able to buy at the moment are, for babies, somewhat husky. This is because EU legislation, which was only repealed last week and which will remain in force until July 2009, sets strict rules for the dimensions of vegetables – carrots may not be sold, even as baby carrots, if they weigh under 8g.

Legislation on the weight, symmetry, roundness, straightness, evenness and colour of vegetables in the EU has, in my experience, been roundly ignored by market sellers in France, Italy and Spain, while it’s prosecuted with zeal by UK council officials. (Meanwhile, amazingly, it was the French, Italians and Spanish who were in particular opposition to any change in legislation – I am at a total loss to understand how it comes to be the rigid old British and the Germans who are calling the situation as it is untenable.) It’s good to know that these protectionist rules, which used to result in the waste of around 20% of all farm produce, are being dumped as a result of the EU-wide rise in food costs, and I look forward to the appearance of spurred and bendy cucumbers in my local supermarket. Meanwhile, I wish they’d extend the repeal of these rules to all vegetables – even once next year’s changes come into force, it will still be illegal to sell imperfect apples and pears (note that a lot of old English varieties are rusty and spotty, and as such impossible to sell legally) unless you slap a label on them saying “product intended for processing”. Citrus fruit, kiwi fruit, lettuces, peaches and nectarines, pears, strawberries, sweet peppers, table grapes and tomatoes will also remain covered by the old legislation. I long for a funny-shaped tomato, or one of those lovely ripply peppers. The law in this area is a mess, protecting the interests of farmers while raising prices, putting financial pressure on householders and excluding us from choice and flavour. Sometimes I feel my best option might be to turn the back garden into an allotment.

Anyway. I seem to have gone off on a tangent. These glazed carrots and radishes are delicious, extremely easy to make, and not as bad for you as you might imagine. They’re a regular fixture on our table at Christmas, but they’re fantastic at any time of year. I have faked true baby Chantenay carrots here with the judicious trimming of pubescent-but-legal, 8-gram Chantenays. Until next year, you’ll have to do the same. Or emigrate.To serve two, you’ll need:

12 baby carrots
12 radishes
2 tablespoons maple syrup
1 heaped tablespoon grainy Dijon mustard
½ teaspoon salt
50g butter
50ml water

Top and tail the radishes. Top and tail the carrots and trim them to be a similar size to the radishes. Melt the butter with the water, maple syrup, salt and mustard in a small saucepan, and bring the mixture to a gentle simmer. Cook the carrots in the mixture over a low heat, stirring, for about eight minutes, then add the radishes and cook for a further two minutes. Serve immediately, with some of the glaze drizzled over the top.

Spiced parmesan parsnips

One of my very favourite Delia Smith recipes is this lovely way with roast parsnips, where she tosses them in grated parmesan and flour before cooking. My Grandma used to make Delia’s parsnips every Christmas, and there was always a fight over who got the last few.

It’s funny, really; in the UK, parsnips are a very ordinary accompaniment to a roast dinner, a slightly posh vegetable to be rolled out only on Sunday lunchtimes. Elsewhere in the world, the parsnip is considered more appropriate for feeding animals than people. Part of this is down to our climate. Parsnips need exposure to frost for their flavour to be fully developed, so in warmer places the parsnip is a less impressive beast, weedy and comparatively flavourless – hence the French tendency to feed them to pigs rather than people.

This is my version of the Delia recipe my Grandma used to cook. I’ve changed the fat used – you’ll get a much better crisp using dripping, and the flavour you’ll achieve with a good butcher’s pot of beef dripping is amazingly good if you serve these next to roast beef . I’ve also upped the ratio of parmesan and added some curry powder (always unbelievably good with a parsnip) and lots of lemon zest and fresh basil, which lifts the whole dish. Result: crunchy, savoury parsnips, sweetly fluffy inside and amazingly crisp outside – and so delicious you too will be fighting over the leftovers.

To serve eight with a roast, you’ll need:

1.25kg parsnips
175g plain flour
100g parmesan, grated finely
1 tablespoon medium curry powder (I like Bolst’s)
Grated zest of 2 lemons
1 heaped teaspoon salt
3 large tablespoons beef dripping
3 tablespoons chopped fresh basil

Preheat the oven to 200°C (400°F). Put a heavy roasting dish containing the dripping in the oven as it heats up. Combine the flour, parmesan, curry powder, salt and lemon zest in a large mixing bowl. Peel the parsnips and cut them in half across their width. Cut the top half of each parsnip into four long pieces, and the bottom half into two.

Cook the prepared parsnips in boiling water for five minutes. Remove the saucepan from the heat and drain the parsnips a few at a time, rolling the steaming-hot parsnips in the flour mixture and setting aside on a plate. When all the parsnips are coated thoroughly, remove the roasting dish from the oven and arrange the parsnips in the hot fat (careful – it may spit). Put the dish of parsnips high in the oven for 20 minutes, turn the parsnips and put back in the oven for another 20 minutes.

When the parsnips are ready, they’ll be a lovely golden colour. Remove them to a serving dish and sprinkle generously with basil.