
 I am pathetically proud of having successfully cooked a strip of Chinese roast belly pork (siew yoke or siew yuk, depending on how you transliterate it) at home. This pork, with its bubbly, crisp skin and moist flesh is a speciality of many Cantonese restaurants. An even, glassy crispness is hard to achieve if you’re making it at home, but I think I’ve cracked it; with this method, you should be able to prepare it at home too.
You’ll need a strip of belly pork weighing about two pounds. Here in the UK you may have trouble finding a belly in one piece (for some reason, belly pork is often sold in thick but narrow straps of meat); look for a rolled belly which you can unroll and lay flat, make friends with a pliant butcher or shop at a Chinese butcher (you’ll find one in most Chinatowns). Look for a piece of meat with a good layer of fat immediately beneath the skin. The belly will have alternating layers of meat and fat. Try to find one with as many alternating strips as possible.
To serve three or four (depending on greed) with rice, you’ll need:
2lb piece fat belly pork
1 teaspoon sugar
1 teaspoon salt
1 teaspoon five-spice powder
½ teaspoon cinnamon
1 tablespoon Mei Gui Lu jiu (a rose-scented Chinese liqueur – it’s readily available at Chinese grocers, but if you can’t find any, just leave it out)
3 cloves garlic, crushed
2oo ml water
2 tablespoons Chinese white vinegar
Bring the water and vinegar to the boil in a wok, and holding the meat side of your pork with your fingers, dip the rind in the boiling mixture carefully so it blanches. Remove the meat to a shallow tray and dry it well. Rub the sugar, salt, five-spice powder, cinnamon, Mei Gui Lu jiu and garlic well into the bottom and sides of the meat, leaving the rind completely dry. Place the joint rind side up in your dish.
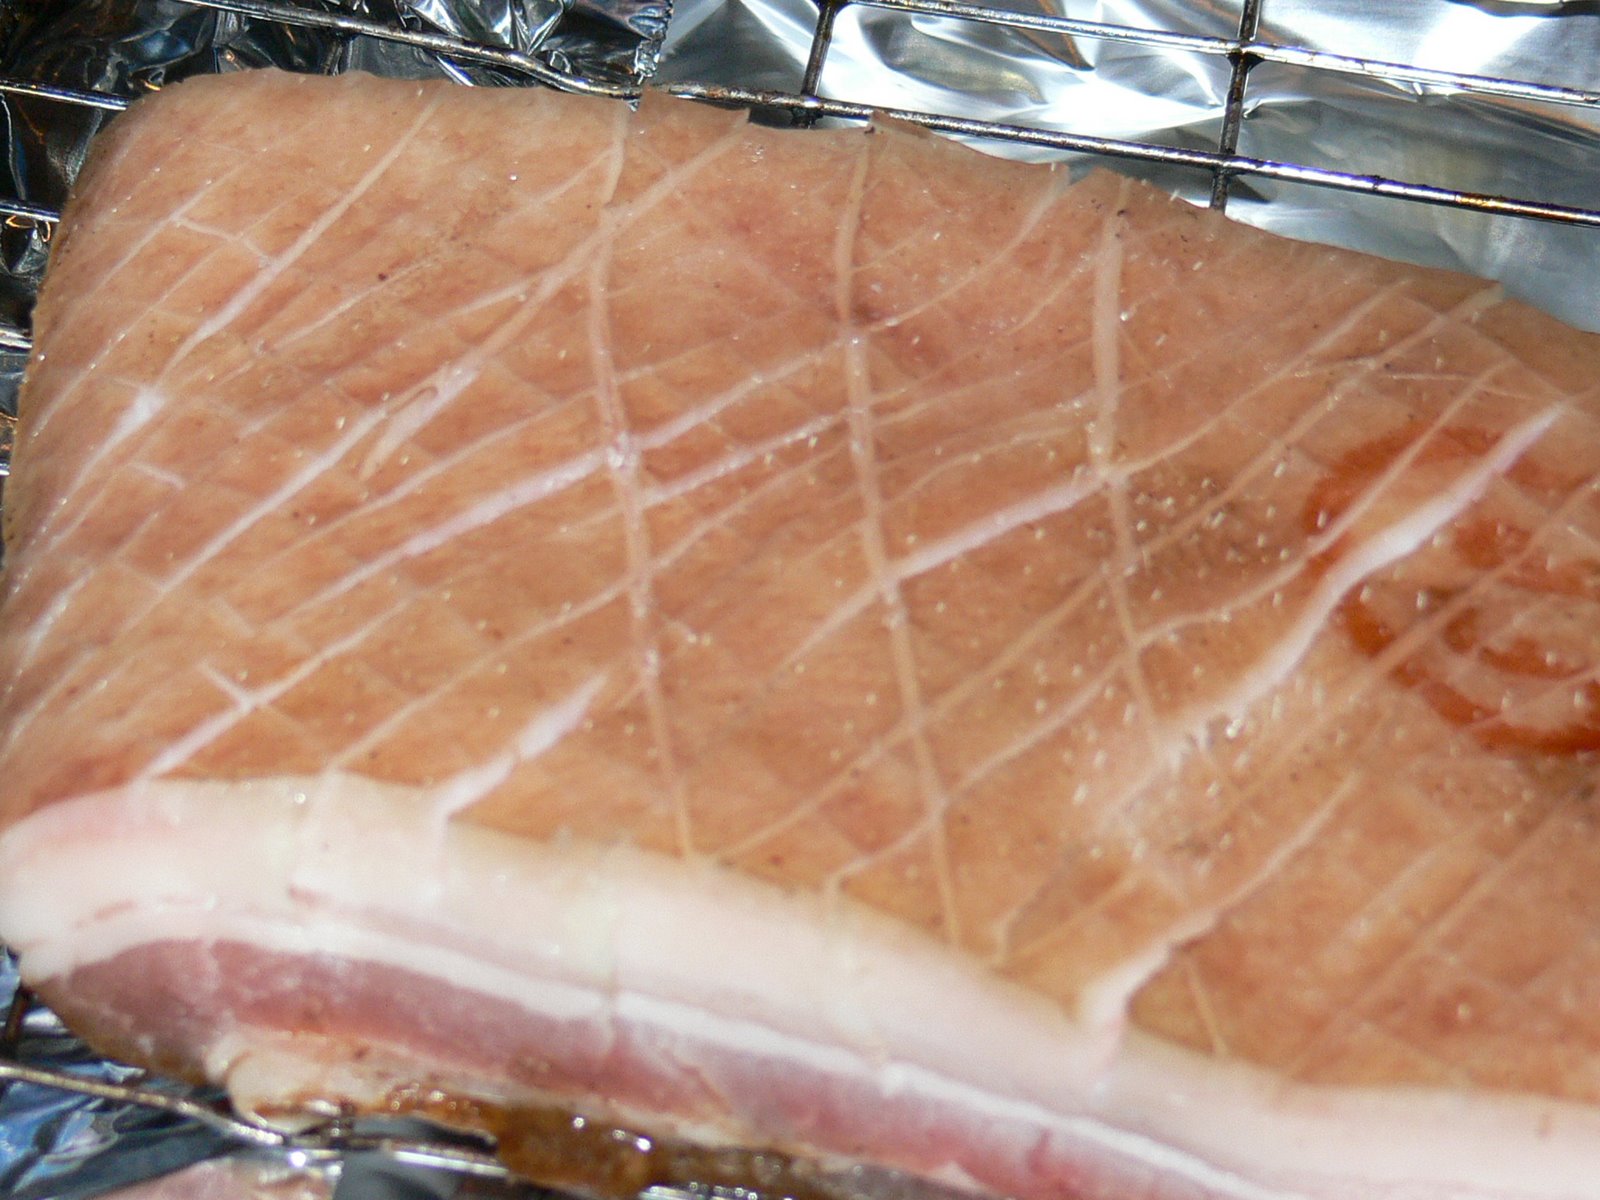 Use a very sharp craft knife to score the surface of the rind. If your rind came pre-scored, you still need to work on it a bit – for an ideal crackling, you should be scoring lines about half a centimetre apart as in this photo, then scoring another set of lines at ninety degrees to the original ones, creating tiny diamonds in the rind. Rub a teaspoon of salt into the rind. Place the dish of pork, uncovered (this is extremely important – leaving the meat uncovered will help the rind dry out even further while the flavours penetrate the meat) for 24 hours in the fridge.
Heat the oven to 200° C (450° F). Rub the pork rind with about half a teaspoon of oil and place the joint on a rack over some tin foil. Roast for twenty minutes. Turn the grill section of your oven on high and put the pork about 20cm below the element. Grill the meat with the door cracked open for twenty minutes, checking frequently to make sure that the skin doesn’t burn (once the crackling has gone bubbly you need to watch very closely for burning). The whole skin should rise and brown to a crisp. This can take up to half an hour, so don’t worry if the whole thing hasn’t crackled after twenty minutes – just leave it under the grill and keep an eye on it.
Remove the meat from the heat and leave it on its rack to rest for fifteen minutes. Cut the pork into pieces as in the picture at the top of the page. Serve with steamed rice, with some soya sauce and chillies for dipping. A small bowl of caster sugar is also traditional, and these salty, crisp pork morsels are curiously delicious when dipped gingerly into it.
I made this at the weekend, and I can’t believe how nice it is! My son says he likes it better than my normal sunday roast. The crackling is great but it doesn’t stay crispy the next day. 🙁
Hi
Do you have a Morrisons near you? I’ve found that they are a reliable source for reasonably large pieces of belly pork, as opposed to slices.
:0)
This looks absolutely delicious! Stumbled upon your blog while searching for Chinese roast pork!
Thank you! My favourite dish in Chinatown and now I have produced it spot on at home thanks to your excellent recipe! I am afraid I gorged myself rather too much on it…
Thanks, Aster – glad to have been able to help! (It’s one of my absolute favourites too.)
In Australia, most self respecting butchers have belly pork in the piece.
Wow, can’t believe its been almost a YEAR since I last made this…I guess I’ve been busy! Here we go again then, except through necessity I will will be leaving the pork to dry/marinate for 36 hours…Bring on Sunday!
Just about to give this another go. Pork Belly is such a simple cost effective dish!!
Shared Your Thoughts On Crispness On The Day After.
Nevertheless, Crispness Turns Into Softly Delicious Sponge For A Lack Of A Better Term.
Mom Just Cook The Leftover With Peas, Onion, and Garlic Served With Rice Noodles And Gai-Lan.
Your Mum is a lady after my own heart. Extravagant use of the shift key there, by the way!
I’d like to share my dear friend, Van’s recipe with you. The amount of pork may seem sparse by Western standards but many Viet-namese prefer lots of vegetable and rice, with meat as a garnish.
Tuyet Van’s Pork
Ingredients
Served with rice and stir fried vegetables
For 4 people
Note: This sounds like a LOT of sugar and you can reduce the amount but in fact most is left in the pan after cooking.
4 strips of Pork belly
2 heaped tablespoon of brown sugar
10 tbs of fish sauce
1 or 2 tbs of dark soy sauce
Fresh coconut (up to u how much) chopped into bite size pieces
1.Cut the pork belly into bite size pieces
2.Heat the brown sugar on a very low heat, keep stirring until melted into goo but very careful not to burn.
3.Add fish sauce to sugar and heat together until sugar disappears
4. Add pork pieces. Mix pork pieces into the fish sauce and sugar mixture, **then leave to cook on a medium heat, stirring every 5 mins or so.
5.When pork has been cooking for about 10 mins add diced, chopped, fresh coconut, turn heat down a little and put a lid on pot, continue to cook for 10/15 mins.
** here, I add the liquid from the coconut but the original Viet-namese recipe doesn’t.
I’m curious to know how the crackling in this recipe compares to your roast pork with crackling recipe? I’ve been attempting to make crackling pork belly using sous-vide pork. And forget about raw pork treated with water and glucose; my sous vide pork has even more water-logged skin! I’ve tried applying bicarbonate of soda then air-drying overnight in the fridge, scalding with boiling water and then air drying and most recently, basting with vodka and then air drying. No real success so far! I look forward to trying your blowdryer and salt method soon. But I am curious how your 2 recipes compare in terms of skin crunch. Both photos look fantastic to me. Thank you in advance for your help!