Stir-fried pork belly

Pork belly stir fry
Pork belly stir fry

Chinese crispy belly pork, or siew yoke, is fabulous stuff, but it only stays crispy for a day or so. The day-two-wangy-crackling is, of course, also a problem with belly pork you’ve cooked in a western style, and this stir fry works really well with any leftover roast belly. You don’t need to strip the crackling off, but sadly, it will not be resurrected by any cooking method; it still tastes good, but if you’ve plenty of leftovers you might choose to remove it as I did here. Save any fat that renders out of the pork as you roast it to push the flavour of the pork in the stir fry up a notch.

Don’t keep your pot of tom yum paste (my favourite brand is Mae Ploy, which comes in a 400g tub you can keep for months in the fridge) just for tom yum soup. It makes a fantastic quick marinade for seafood, and works really well as a sauce ingredient. In this dish, it provides the spice and piquancy to make a great base for a sweet/sour style sauce, rather nicer than the mouth-puckering sort you’ll get at the local takeout because the sourness in the paste comes from lime and tamarind rather than white vinegar.

Rich pork and sweet peas work really well together. I’ve cooked this pork with sugary mange touts and sweet sugarsnap peas. If you can only get one kind of pea, substitute the other with frozen petits pois.

To serve 2-3 people, you’ll need:

500g leftover roast pork belly
200g mange tout peas
200g sugar snap peas
3 cloves garlic
10 spring onions, chopped
1 or 2 red chillies, to taste
1 tablespoon soft brown sugar
2 tablespoons tom yum paste
100ml Chinese rice wine
1 tablespoon light soy sauce
Juice of a lime
1 tablespoon rendered fat from the pork or flavourless oil to fry

Chop the pork into bite-sized pieces, and set aside. Chop the garlic finely and slice the spring onions and chillies.

Bring the pork fat or oil up to a high temperature in your wok, and throw in the garlic, chillies and spring onion with the sugar. Stir fry for about ten seconds, then add the pork to the pan with the tom yum paste, rice wine and soy sauce. Continue to stir fry for two minutes, then add the peas, pop a lid on the wok and leave to steam in the sauce for a couple of minutes while you put some rice out, until the peas are bright green and barely cooked.

Remove the stir fry to a warm serving dish, and add lime juice to taste. Serve immediately.

Crackling pork belly with celeriac and tomato

Pork belly on celeriacWhere other children were visited by fairy godmothers bearing gifts of grace and beauty; the art of detecting peas beneath mattresses; the ability to walk in high heels for more than five yards without getting one stuck in the space between two pieces of pavement; and all that glamorous jazz, mine found that her bag was empty but for the gift of making really terrific crackling. (Seriously. It wins competitions and everything.)

I’m not complaining. It’s better than it could have been; I’ve one friend who swears her only skill is the tidy folding of a broadsheet newspaper once read.

This recipe is reliant on your getting your hands on a really good piece of pork belly, properly reared, and striped thickly with fat. It doesn’t matter whether your piece has attached bones or not, but do try not to use a supermarket slab of meat; the flavour will be much better with a butcher’s belly from a pig raised responsibly, and you’ll probably find the joint will be drier, crackling more effectively. Cooked slowly for several hours, the pork bastes itself from within, leaving you with a gorgeously dense, flavoursome and moist finish.

I’ve used the tomato sauce than I made in a few enormous batches and froze at the end of the summer here, with some additional cream and herbs. If you don’t have any sauce you’ve made and frozen yourself, substitute with a good sun-dried tomato sauce in a jar.

To serve four, you’ll need:

1.5kg pork belly
1 small handful thyme stalks (about 20g, if you’re counting)
1 small handful fresh rosemary
4 bayleaves
100g stupendous tomato sauce, or sun-dried tomato sauce in a jar
3 tablespoons double cream
1 medium celeriac (larger celeriacs can be woody)
1 large handful parsley
2 banana shallots
1 tablespoon butter
Plenty of salt and pepper

Preheat the oven to 140ºC (290ºF). Make sure the skin of the pork is scored properly in regular lines penetrating into the fat but not into the meat, and that it is absolutely bone-dry. Rub the pork all over with a couple of teaspoons of salt, making sure that plenty gets into the scored lines on the skin. Season with pepper, and sit the belly in a roasting pan on top of the thyme, bay and rosemary, reserving a bayleaf and a stalk of the thyme and rosemary to use in the sauce later.

Put the roasting pan in the middle of the oven, close the door and ignore the pork for four hours. Towards the end of the cooking time, cut your celeriac in quarters, peel them with a knife (this is far easier than trying to peel a whole celeriac), and grate them on the coarse side of your box grater. Slice the shallots finely and mix them with the grated celeriac in a bowl.

When the pork has had four hours in the oven, the top will have softened but not crackled. Still in the roasting dish, put the pork about four inches beneath a hot grill. The skin will start to bubble and crackle. Keep an eye on things; once crackled, the skin can burn easily. If you find that one side of your joint is crackling and ready before the other, put a piece of tin foil over the area that has crackled to prevent it from burning. Once the crackling is even, remove the dish from the grill and leave it to rest in a warm place while you prepare the sauce and celeriac.

Sauté the celeriac and shallots in the butter for about eight minutes until soft and sweet. Stir through the parsley and season with salt and pepper. While the celeriac is cooking, bring the tomato sauce up to a gentle simmer with the herbs you reserved earlier, then stir through the cream with any juices from the pork.

Pop a pastry cutter onto each plate, and use it as a template for a serving of celeriac. Top off with some of the herby, velvety pork meat, and a generous slab of crackling. Spoon over some of the sauce and serve.

Crispy pork belly with bak kut teh spicing

With what, you say? Bak kut teh. It’s a Hokkien Chinese term which translates roughly as “meaty bone tea”, and it denotes a particular herbal, scenty soup spicing which is traditionally meant to warm you from within. It’s got yang, this stuff. So much so that my mother and brother won’t eat it, because it makes them turn bright red and start sweating.

In a period when my village is only accessible over a hump-backed bridge coated with half a foot of sheet ice (it’s been like this since before Christmas), red and sweating is exactly what I’m after. Hurrah for yang.

You’ll find bak kut teh served regularly in Malaysia and southern China. Bak kut teh mixtures are available in the UK in oriental supermarkets, in sealed packs containing a couple of tea-bag style sachets. These sachets are preferable to the whole spices, which you also see sometimes in neat plastic packs – the whole spices can make your recipe a bit gritty. If you’re making the traditional stew, just pop a bag in a crockpot with some rib bones, simmer for a few hours, and serve with rice or as a noodle soup with a generous slosh of soya sauce. It’s hearty stuff – the traditional mixture includes star anise, angelica, cinnamon and cloves. This mixture is, somewhat eccentrically, close to what you’ll find in a British Christmas cake.

The recipe below is not a traditional use of a bak kut teh sachet, but it’s none the worse for that. Here, you’ll be combining those spices with rice wine, several gloppy Chinese sauces, honey, spring onions and garlic, and using this stock to perfume a slab of pork belly. The belly meat is pressed under weights overnight in the fridge, then chopped and fried in a wok until it’s crispy. I know, I know: but the long simmering will render a lot of the grease out of the meat, and sometimes the weather just calls out for fatsome, sticky pork.

I served mine with some sticky hoi sin sauce to dip, alongside a little of the stock, thickened with cornflour, to moisten the rice we ate with it. Hang onto the stock – you can freeze it and treat it as a master stock. I poached a couple of hams in mine, leaving them spiced and savoury but not overtly Chinese-tasting; it’s back in the freezer now, and I have plans to poach a chicken in it next. This procedure may sound overly parsimonious to those used to stock cubes, but it’s a method that produces a stock with an incredible depth of flavour, and you can keep using it indefinitely as a poaching liquid, adding a bit more water or wine and some more aromatics every time you cook, and making sure that every time it comes out of the freezer the stock gets boiled very thoroughly. There are restaurants in Hong Kong which claim that their master stock has been on the go for more than a hundred years.

To poach one boneless pork belly (enough for four, but be warned, this is very moreish) you’ll need:

1 boneless pork belly, with rind
1 bak kut teh sachet
Water to cover the belly (about a litre)
150ml Chinese rice wine
5 tablespoons light soy sauce
3 tablespoons dark soy sauce
3 tablespoons oyster sauce
2 tablespoons hoi sin sauce
3 tablespoons honey
2 anise stars
1 bulb garlic
6 spring onions, tied in a knot
Groundnut oil to fry

Stir the liquid ingredients together in a saucepan that fits the pork reasonably closely, and slide the pork in with the star anise, garlic and spring onions. Bring to a gentle simmer, skim off any froth that rises to the surface with a slotted spoon, cover and continue to simmer gently for two hours.

Remove the pork from the cooking liquid carefully and place it on a large flat dish with high enough sides to catch any liquid that comes out of the meat as you press it. Strain the poaching liquid if you plan on using it as a master stock. Place a plate or pan lid large enough to cover the whole belly on top of the meat (the skin side) and weigh it down. I used a heavy cast-iron pan lid and all the weights from my kitchen scales. Cover the whole assembly with a teatowel and leave it in the fridge for 24 hours.

When you are ready to eat, remove the pressed meat to a chopping board and use a sharp knife to cut it into bite-sized pieces, about 2cm square. Bring about 5cm depth of groundnut oil to a high temperature in a wok, and fry the pieces of pork in batches of five or six pieces until golden (this should only take a couple of minutes per batch). Serve with shredded spring onion and some hoi sin sauce with steamed rice and a vegetable.

Pork rillettes

Dr W pitched up with two kilos of pork belly a few weeks ago, having spotted it on offer at the butcher’s. If you’re familiar with this blog, you’ll know that there are plenty of options here for cooking this particular cut – it’s one of my favourites. Mind you, who wants to roast or casserole in this weather? Time to experiment with some charcuterie.

Rillettes (pronounced ree-etts) are a kind of coarse pate, made from gently cured meat poached in stock and its own fat (and, in this case, some fat from a duck) for hours until it becomes soft, falling into shreds. The fat is there to carry the flavour to the tastebuds, to provide some really world-beating texture, and as a preservative; once you’ve sealed your rillettes into sterilised jars, covered with a layer of the creamy fat, nothing will be able to get in there, so you’ll be able to store them in the fridge for months. I’d recommend, in fact, that you don’t eat your rillettes as soon as you’ve made them if you can possibly help it; a week or so in a jar will allow the flavours to develop fully.

Traditionalists will tell you to cure your meat with nothing but salt and pepper before cooking, and to avoid adding extra flavourings to the meat as you poach it. Traditionalists are, in my experience, a bloody miserable lot. My brother (currently right off pork, as he recovers slowly from swine flu) makes spectacular rillettes at Christmas, which he packs with lots of crushed juniper berries. I like mine garlicky and boozy, with plenty of aroma from a generous scattering of herbes de Provence, and some bay, lavender and thyme from the garden. To make your own (reduce the amounts if you want, but this keeps very well and makes an excellent gift – given that it’s mildly fiddly, you’ll be rewarded for making a large batch), you’ll need:

2kg pork belly
1kg pork shoulder
2 bulbs garlic
2 heaped tablespoons herbes de Provence
2 tablespoons salt
6 fresh bay leaves
1 small handful (20g) thyme
1 small handful (20g) lavender leaves
750g rendered pork fat (I used duck fat from the confit I made earlier this year – you can also substitute goose fat here)
2 glasses white wine
Pork stock or water

Cut the pork (leaving the skin on the belly) into long strips about 1 inch square, and put it in a large mixing bowl. In a mortar and pestle, grind the salt, bay, thyme, lavender and herbes de Provence together. Rub the resulting mixture all over the strips of meat, cover and refrigerate for 48 hours. Curing the meat like this before cooking (you’ll notice that the confit the duck fat came from was cured in a similar way) gives it what the French call a goût de confit – a very specific and delicious flavour you only really find in confited meats.

When the meat has cured, chop the strips, retaining the belly skin, into smaller pieces, about the size of your thumb. Put the meat and any salt and herbs from the bowl in a large casserole dish with the unpeeled garlic bulbs, chopped in half across their equators, and pour over the wine. Carefully pour over stock (I happened to have some pork stock in the freezer, but if you don’t, don’t worry about it – water will be fine) until it barely covers the meat, then spoon the rendered fat into the casserole dish. Heat the oven to 150°C and bring the casserole dish to a very gentle simmer on top of the stove. Pop it into the oven with the lid on and ignore it for five hours.

Remove the casserole from the oven and remove the meat and garlic from the liquid ingredients with a slotted spoon, putting them in a large mixing bowl. Leave the liquid in the casserole to stand and separate while you work on the meat.

When the meat is cool enough to handle, use your fingers to remove the skin from the belly pieces and discard it – it’s done its work now and will have given up its gelatin to the cooking liquid, which you’ll be using in a bit. Shred the meat (now lovely and soft, with all the fat rendered out) into another bowl, and squeeze the garlic from its skin into the bowl of shredded meat, discarding the skin. When all the meat is shredded evenly, use a ladle to skim all the fat from the liquid in the casserole, and put it in a jug. You’ll be left with a glossy stock in the pan. Stir two or three ladles-worth of the stock into the shredded meat to moisten it, and pop the rest of the stock in the freezer for another day. Now ladle the liquid fat into the shredded meat bowl and mix everything in the bowl thoroughly and evenly, reserving a couple of ladles of fat to cover the rillettes in their jars. (Exactly how much you’ll need depends on the size of jar you’re using.) Taste the contents of the bowl for seasoning – this recipe benefits from some robust salting.

Pack the rillettes into sterilised jars, leaving half an inch of room at the top of each one for the fat you’ll seal them with. (I also popped some in a terrine dish for serving to friends later in the week.) Pour fat into each jar/dish to cover, seal, and refrigerate until you come to eat them. I like to let the rillettes come to room temperature before spreading them on chunks of baguette, with some caper berries and cornichons on the side to cut through the velvety fat.

Cassoulet

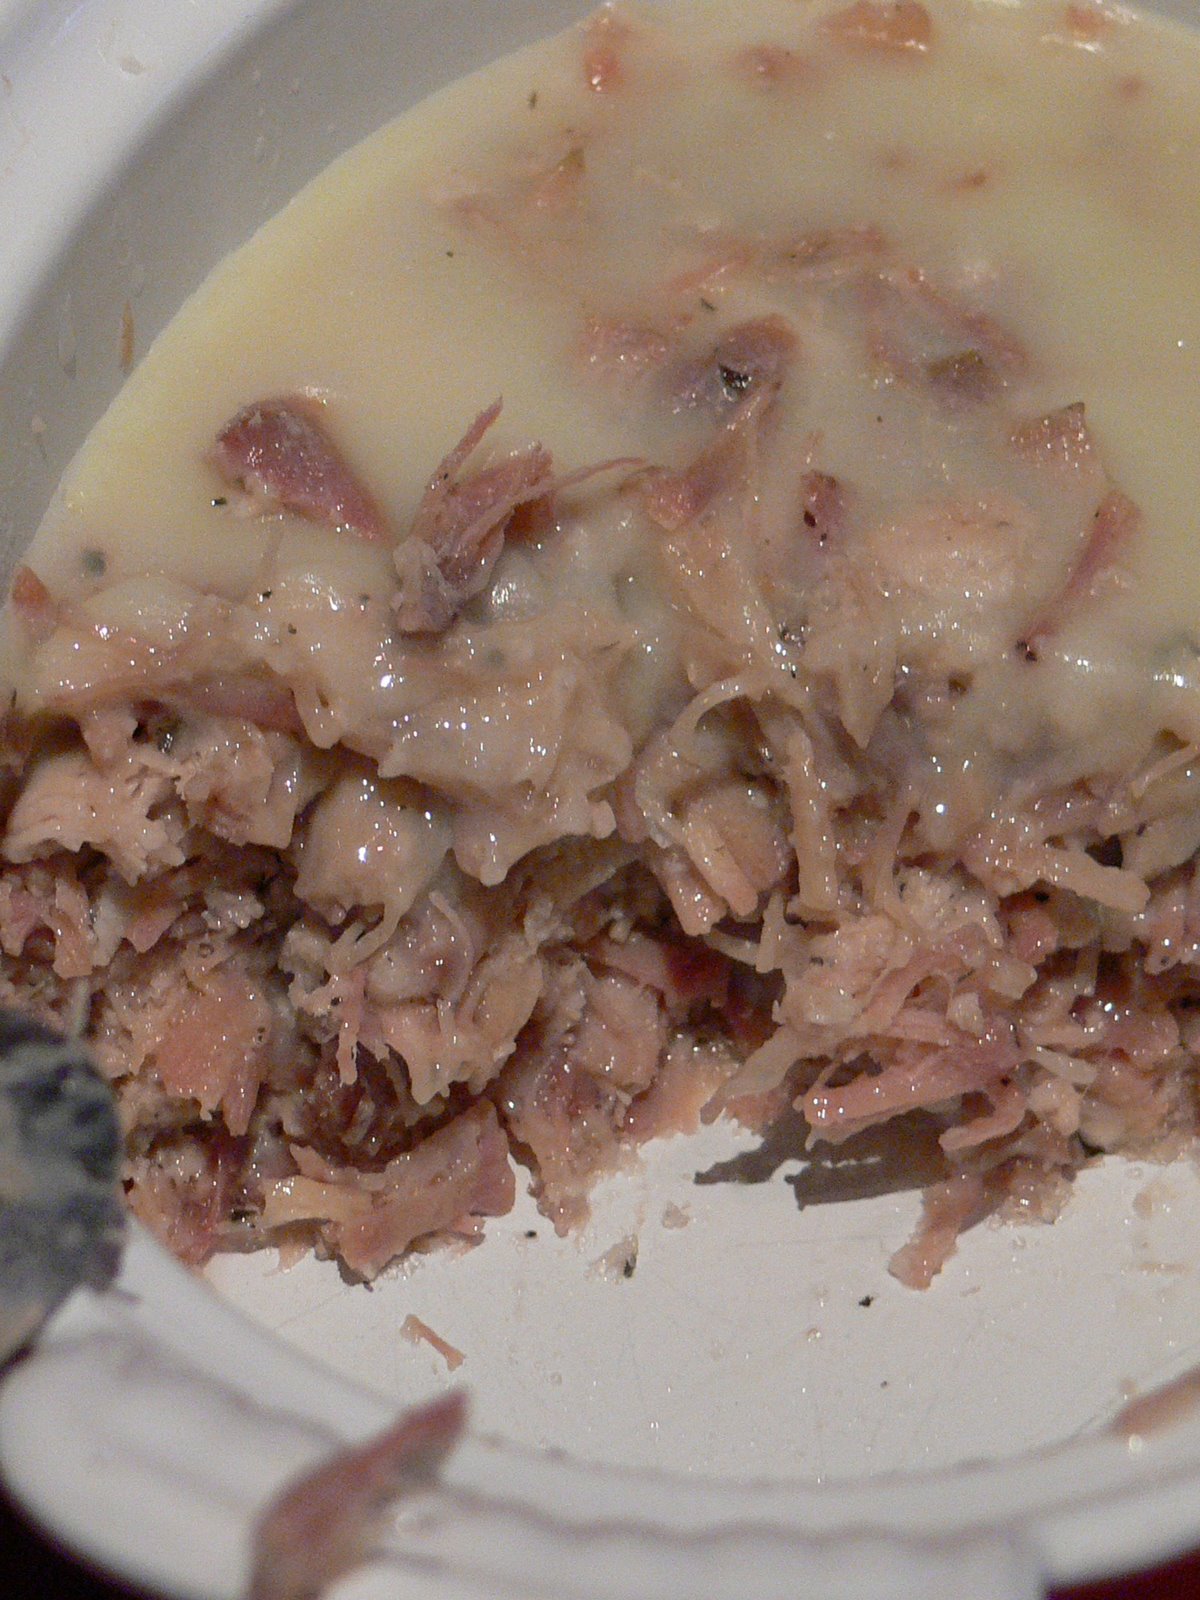
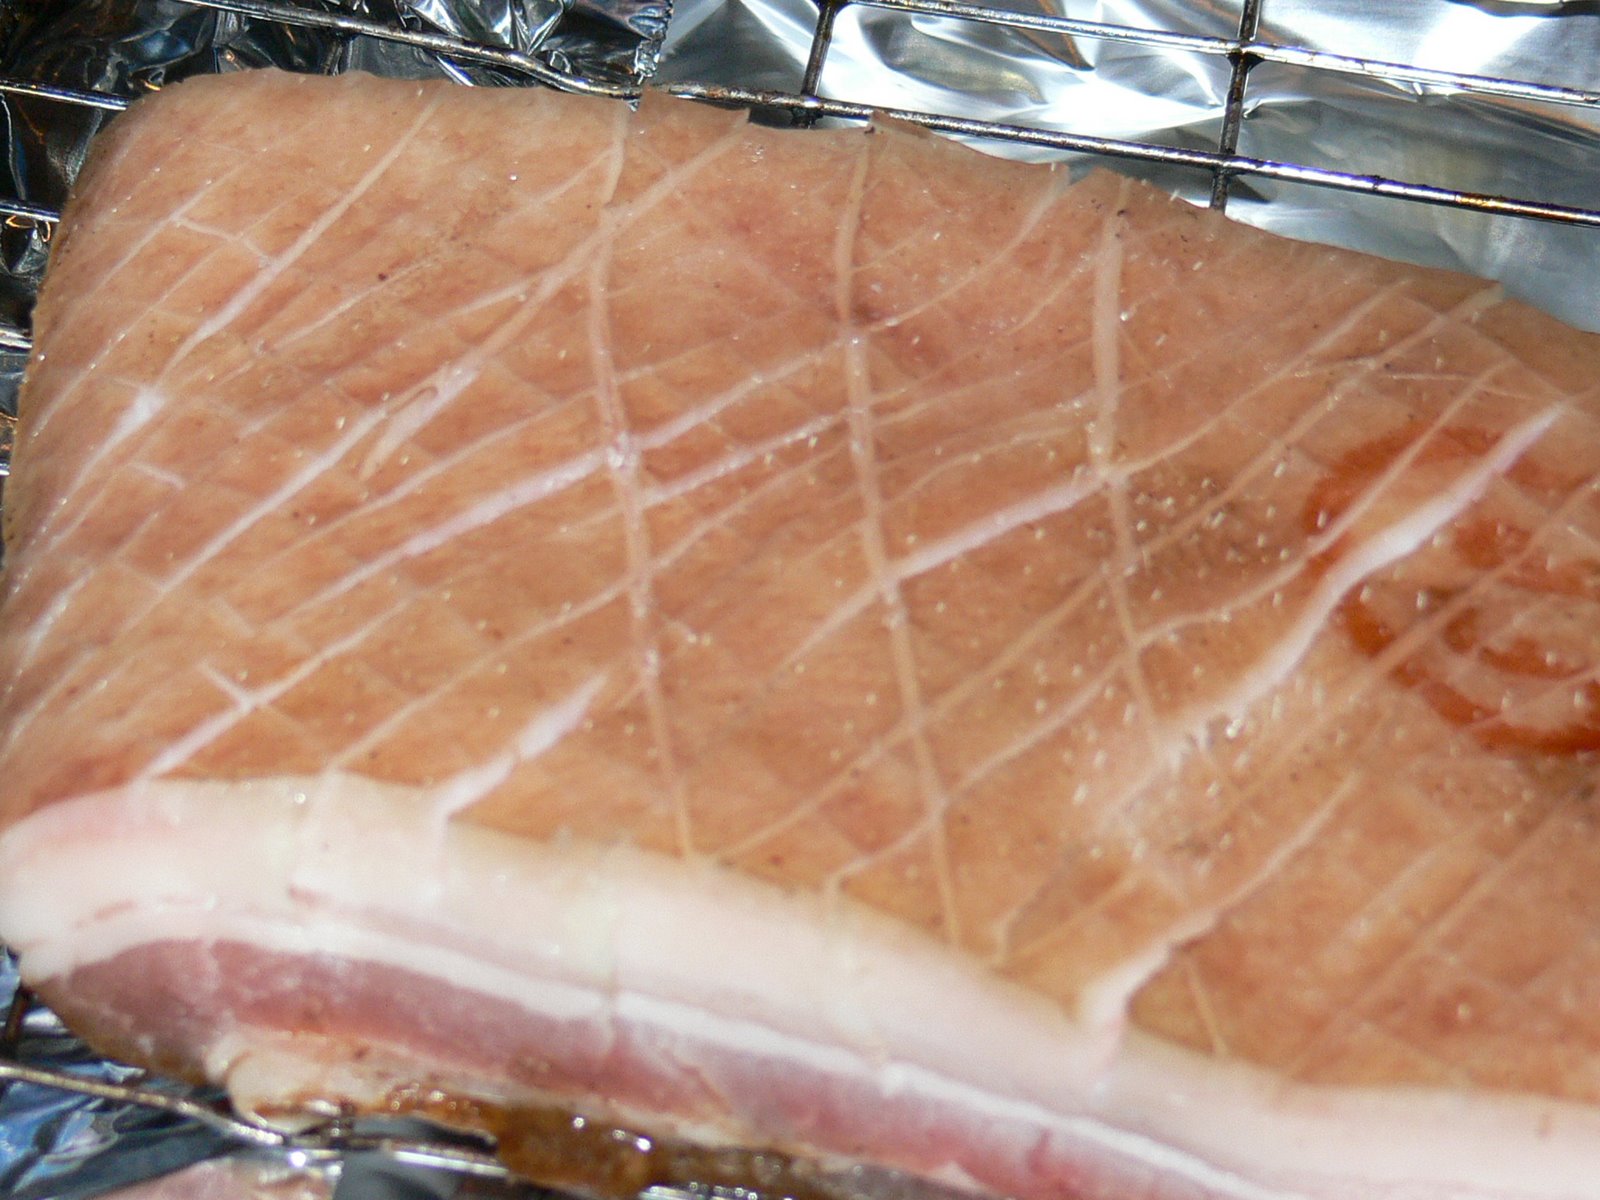
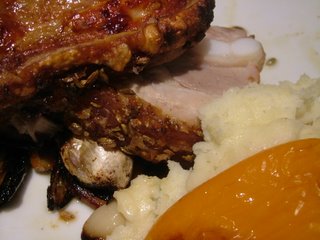
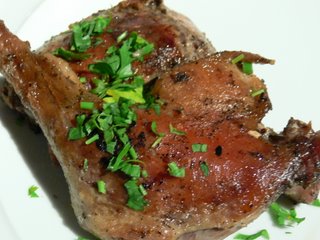
No photos of this one, since cassoulet à la Liz, once dished up, turns out to look totally unlovely; and I really don’t want to scare you off, because it tastes divine. I hope you made the duck confit (I have cunningly recycled the picture here from that recipe) from a few weeks back, which, along with its fat, forms an important part of this dish. If you didn’t, though, you can usually find tins of excellent Castelnaudry confit in good delis in the UK (I’ve also seen it in Waitrose).

Cassoulet is one of those social-climbing dishes, which began life as a French peasant dish full of preserved meats and dried beans, and now gets sold for vast amounts of money in swish restaurants. You can buy tins of cassoulet, but a cassoulet you have made at home is even better, especially in mouth-feel. It’s a wonderfully warming dish, and it’s fantastic to serve to friends; somehow it’s an especially cheering and convivial thing to eat. You can serve it up as is, or with crusty bread and a salad. I’ve used Japanese panko breadcrumbs here, which are not at all French. I’m developing a slight addiction to them – wonderfully crisp, with a slightly malty flavour and a perfect balance between absorbency and crustiness, they’re terrific for topping baked dishes or making breaded coatings for baked or fried meats. If you can’t find any, normal white breadcrumbs, whizzed in your food processor, will be absolutely fine. If you’re in France, try to pick up some of the wonderful long, white haricot beans (haricots blancs lingots) which are traditionally used in cassoulet and have an amazingly creamy texture. They’re hard to find in the UK, so I have fallen back on standard haricots, which are a shorter bean. They are still excellent in this dish.

Thanks not least to Iris Murdoch (whose A Fairly Honourable Defeat, which contains a very stressful cassoulet incident, managed singlehandedly to put me off making cassoulet myself for about fifteen years), cassoulet has a bit of a reputation as a complicated, work-intensive dish. It’s really not all that bad; most of the work is done by your oven, with you stirring occasionally to help the slow-cooked beans become tender and creamy, and while there are short bursts of frying, skimming and stirring, you can easily fit all the other things you have to do in a day at around the long cooking time. Packed with moist pork belly, fat duck legs and garlicky sausage, this isn’t for days when you’re worrying about your blood pressure – as always, my philosophy on these things is that the rush of endorphins you get when eating something that tastes this good more than cancels out any health negatives, and hey – I understand beans are good for you.

To serve six, you’ll need:

500g haricot beans
2 large onions
2 sticks celery
1 carrot
5 cloves
1 bouquet garni
1 large sprig rosemary
1 large sprig thyme
3 bay leaves
6 fat cloves garlic
1 tablespoon herbes de provence
¼ bottle white wine
4 tomatoes, chopped roughly
400g slab pork belly
3 confit duck leg and thigh joints
6 garlicky sausages (if you can find saussice de Toulouse, they’re traditional here, but any very dense, meaty sausage will be good)
Japanese panko breadcrumbs OR bog-standard white breadcrumbs to sprinkle

The night before you want to eat, soak the beans in plenty of cold water. In the morning, drain the beans, discarding the soaking liquid, and put them in your largest casserole dish (you’ll need plenty of spare room in there for the cooking liquid, the other ingredients and the eventual swelling of the beans) with the bouquet garni, the rosemary and thyme, one of the onions, halved and studded with the cloves, the carrot, halved lengthways, one stick of the celery, two of the bay leaves and two of the garlic cloves, peeled and left whole. Chop the pork belly, complete with its rind, into 1 inch chunks, and add it to the saucepan. Pour over cold water to cover the contents of the pan by a couple of inches, and bring to the boil, skimming off any scum that rises to the surface.

When the pot is boiling, lower the heat to a simmer and put the lid on. Ignore it for an hour and a half while you brown the sausages in a tablespoon of the fat from the confit in a frying pan. Remove them to a plate, and use the sausage pan to fry the remaining onion, garlic and celery stick, chopped finely, until soft, in another large tablespoon of duck fat. Preheat the oven to 180° C.

Remove and discard the herbs and vegetables (except the garlic and the bouquet garni) from the beans mixture and drain and reserve the liquid (now stock) from the casserole dish. Return the beans and pork to the casserole, adding the onion, garlic and celery mixture, the chopped tomatoes, the remaining bay leaves, the sausages and the confit duck legs. (Don’t worry about scraping off any fat clinging to the legs – it’ll just add to the wonderful texture.) Pour over the wine and add the reserved stock from the pork and beans to just cover the mixture. Add a tablespoon of salt. Bring the contents of the casserole to a simmer on the hob and put it in the oven for two hours with the lid on, stirring every half an hour.

When the two hours are up, there should be no visible liquid; the whole cassoulet should have an even, creamy texture. Taste for seasoning – you will probably need to add extra salt. Sprinkle the top of the cassoulet with the panko crumbs or breadcrumbs, and cook for another 20-30 minutes with the lid off, until the crumbs are brown and the cassoulet is bubbling through it in places. Serve up, making sure everyone gets a bit of duck, a bit of sausage, and a bit of pork with their creamy beans and crusty top.

Korean hotpot with pork, scallops and black beans

I hadn’t come across chunjang, a Korean black bean sauce, until January’s meal at the excellent Tanuki in Portland. In Korea, it’s actually considered a Chinese sauce, but it’s rather different from the saltier, stronger black bean sauces you’ll find in the Chinese supermarket – very dark in colour, mild and sweet alongside the soy saltiness, and altogether delicious.

Once chunjang is cooked, it’s called jajang (or fried sauce). It’s usually served over noodles with stir-fried pork. I found some at Wai Yee Hong, my favourite online oriental supermarket. When it arrived, I realised I had some scallops and a big chunk of belly pork in the freezer, a sack of sticky rice, a nice block of tofu in the cupboard and a jar of kimchee in the fridge – and a recipe for a hotpot suddenly sprung into in my head, fully formed. Cooking the pork for this takes a long time, but it’s actually very little work and is more than worth the extra effort for the incredible texture you finish up with.

To serve three, you’ll need:

500g pork belly with rind
¼ bottle Chinese rice wine
Water
12 queen scallops
2 tablespoons light soy sauce
1 tablespoon Chinese rice wine
1 teaspoon grated ginger
450g firm tofu
5 dried shitake mushrooms
4 tablespoons kimchee
½ cucumber
8 spring onions (scallions)
2 green birds eye chillies
2 cups Chinese sticky rice (or Thai jasmine rice)
3 cups water
1 tablespoon cornflour
Flavourless oil

Begin the day (or two days) before you want to eat by heating two or three tablespoons of oil in a large frying pan or wok over a high flame. Brown the slab of pork belly until it crackles on the skin side and changes colour on the bottom.

Move the pork to a saucepan that fits it closely, and pour over the quarter-bottle of Chinese rice wine. Add water until liquid covers the pork by about an inch. Bring to a gentle simmer on the hob, then put in an oven at 120°C (240°F) for six hours or overnight. Remove from the cooking liquid (you can freeze this stock to use later, because you won’t be using it in this recipe) and place the pork on a large plate. Put another plate on top and put the weights from your kitchen scale on the top plate to press the pork down, and chill for at least six hours. You can put the scallops in the fridge to defrost at this point too.

When the pork has been pressed and the scallops are defrosted, mix the scallops well in a bowl with the light soy sauce, a tablespoon of Chinese rice wine and the grated ginger, and set aside in the fridge. Pour boiling water over the dried shitake mushrooms to rehydrate them. Dice the tofu, chop the spring onions, and cut the cucumber into thin julienne strips.

Cut the pork into slices. Cook four tablespoons of chunjang in four tablespoons of oil (preferably groundnut, although a flavourless vegetable oil will be fine too) for five minutes over a medium flame. Much of the oil will be absorbed into the sauce. Add the chopped spring onions to the pan, reserving one of them for a garnish later, and stir-fry until they are soft. Add the pork to the pan with the chopped chillies and stir-fry until everything is mixed. Stir the cornflour into a quarter of a mug of cold water, and stir the cold mixture into the pork and black beans (now jajang, not chunjang, because you have cooked it) over the heat until the dish thickens. Remove from the heat and put to one side.

In a claypot or heavy saucepan, bring the rice and water to a brisk boil with the lid on, then turn the heat down very low. After 12 minutes, remove the lid and quickly spread out the black pork mixture over one half of the exposed surface of the rice. Spoon the raw, marinaded scallops and their marinade into the dish along with the sliced shitake mushrooms and the diced tofu, leaving a bit of space for the kimchee when the dish is finished. Sprinkle over five tablespoons of the soaking liquid from the mushrooms. Put the lid back on, and cook over the low heat for another 15 minutes until everything is piping hot.

The ingredients at the top of the dish will have steamed, and their savoury juices will have soaked deliciously into the rice. Add a few tablespoons of kimchee (I really like Hwa Nan Foods’ version, which comes in a jar to keep in the fridge), arrange the cucumber on top of the dish as in the picture, and scatter the reserved spring onion over the pork. Dig in.

Soy and anise braised pork

Soy and anise braised pork bellyI know a lot of you come here for the Chinese and Malaysian recipes, and it hit me last week that I’ve not produced anything new in that line for a couple of months. This soy and anise pork has been worth the wait, though – here, belly pork is braised in a deeply fragrant and savoury sauce until it’s so tender that it positively melts in the mouth.

Star anise is a beautiful, flower-shaped spice from a Chinese evergreen; it’s an entirely different species of plant from European anise, although it has a similar flavour. It’s one of the aromatics used in five-spice powder, and has a warm, intensely fragrant taste. There’s been something of a shortage of the spice in recent years because an acid found in star anise is used in making Tamiflu, the anti-influenza drug. Happily for the cooks among you (and those with flu), drugs companies have since started to synthesise shikimic acid, so star anise is back on the shelves again. The Chinese use it as an indigestion remedy – you can try it yourself by releasing a seed from the woody star and chewing it after a meal if you feel you’ve overindulged.

This recipe capitalises on the affinity star anise has for rich meats like pork. Belly pork is one of my favourite cuts of meat (you can find some more recipes for belly pork here) – it’s flavourful, has brilliant texture, and the fat gives it a wonderful unctuous quality as it bastes itself from within. To serve four with rice and a stir-fried vegetable, you’ll need:

1 kg pork belly
1 tablespoon honey
1 teaspoon five-spice powder
2 tablespoons lard or flavourless oil
5 cloves garlic
6 shallots
4 flowers of star anise
2 tablespoons soft brown sugar
4 tablespoons dark soy sauce
2 teaspoons salt
250 ml pork or chicken stock

Using a very sharp knife or a Chinese cleaver, chop the pork into strips about 1.5 cm thick. (Do not remove the skin, which will become deliciously melting when cooked.) Mix one tablespoon of the soy sauce with the honey and five-spice powder in a bowl, and marinade the sliced pork in the mixture for an hour.

Chop the garlic and shallots very finely. Heat the lard to a high temperature in a thick-bottomed pan with a close-fitting lid, and fry the garlic, shallots, star anise and brown sugar together until they begin to turn gold. Turn the heat down to medium, add the pork to the pan with its marinade, and fry until the meat is coloured on all sides.

Pour over the chicken stock, and add the salt and the rest of the soy sauce. Bring the mixture to the boil, reduce to a gentle simmer, cover and continue to simmer for two hours, turning the meat every now and then. If the sauce seems to be reducing and thickening, add a little water.

This is one of those recipes which is even better left to cool, refrigerated, and then reheated the next day.

Normandy roast belly pork

Roast belly porkPork belly is a fabulous cut. It’s striated with layers of fat between the layers of sweet meat, which, when cooked slowly, melt and baste the joint from within. The English finally seem to be catching on to the idea that belly pork is a good, good thing. I challenge you to find a gastropub menu that doesn’t feature belly pork. It pops up much more often in all kinds of restaurants than it used to (I remember a time not so long ago when the only restaurants serving it were in Chinatown), and it’s appearing much more frequently in supermarkets, so you no longer have to ask for it specially at the butcher’s. It’s also a pleasingly inexpensive cut of meat; you’re paying mere pennies for one of the tastiest bits of the pig, which represents real value.

Pork and apples are natural friends, so I’ve served this slow-roasted joint and its crackling with a cidery, creamy shallot and bacon sauce, and slices of sweet fried apple. Gather your windfalls now – this is a perfect autumn dish.

To serve four, you’ll need:

1kg piece of belly pork
2 large onions
5 rashers smoked streaky bacon
1 sweet eating apple
4 shallots
1 wineglass cider
5 tablespoons crème fraîche
Salt and pepper

Preheat the oven to 150° C (300° F). Use kitchen paper to dry the pork rind well. Score rind of the belly pork in lines about half a centimetre apart with a sharp craft knife, and rub it with salt and pepper. Cut the onions in half and place them, flat side down, in a metal roasting tin, then rest the pork on them – the onions should form a platform for the pork so it doesn’t touch the hot tin and sit in its own fat.

Put the pork in the oven for 3 hours and forget about it. When the time is up, turn the heat up to 200° C (400° F) for a final 20 minutes. Remove the pork from the oven and put it under a hot grill until the skin crackles evenly (about five minutes). Keep an eye on the pork under the grill – it is easy to singe the skin. Finally, leave the pork in a warm place to rest while you prepare the sauce.

Normandy roast belly porkChop the bacon into little lardons and fry without any oil in a non-stick frying pan. When the bacon is crisping up, remove it to a bowl, keeping any bacon fat in the pan. Slice and core the apple, leaving the skin on. Fry the apple slices in the bacon fat until golden and set aside. (If the bacon hasn’t released enough fat, use a spoonful of pork fat from the roasting tin.) Finally, slice the shallots finely and brown them in the bacon fat over a medium flame. Keeping the pan on the heat, add the bacon to the pan, pour over the cider and bring it to the boil for two minutes to burn off the alcohol. Add the crème fraîche to the pan and stir well, and finally add the cooked apples.

Serve the pork on a bed of the sauce and apples with some mashed potato and a green vegetable.

Crispy Chinese roast pork

I am pathetically proud of having successfully cooked a strip of Chinese roast belly pork (siew yoke or siew yuk, depending on how you transliterate it) at home. This pork, with its bubbly, crisp skin and moist flesh is a speciality of many Cantonese restaurants. An even, glassy crispness is hard to achieve if you’re making it at home, but I think I’ve cracked it; with this method, you should be able to prepare it at home too.

You’ll need a strip of belly pork weighing about two pounds. Here in the UK you may have trouble finding a belly in one piece (for some reason, belly pork is often sold in thick but narrow straps of meat); look for a rolled belly which you can unroll and lay flat, make friends with a pliant butcher or shop at a Chinese butcher (you’ll find one in most Chinatowns). Look for a piece of meat with a good layer of fat immediately beneath the skin. The belly will have alternating layers of meat and fat. Try to find one with as many alternating strips as possible.

To serve three or four (depending on greed) with rice, you’ll need:

2lb piece fat belly pork
1 teaspoon sugar
1 teaspoon salt
1 teaspoon five-spice powder
½ teaspoon cinnamon
1 tablespoon Mei Gui Lu jiu (a rose-scented Chinese liqueur – it’s readily available at Chinese grocers, but if you can’t find any, just leave it out)
3 cloves garlic, crushed
2oo ml water
2 tablespoons Chinese white vinegar

Bring the water and vinegar to the boil in a wok, and holding the meat side of your pork with your fingers, dip the rind in the boiling mixture carefully so it blanches. Remove the meat to a shallow tray and dry it well. Rub the sugar, salt, five-spice powder, cinnamon, Mei Gui Lu jiu and garlic well into the bottom and sides of the meat, leaving the rind completely dry. Place the joint rind side up in your dish.

Belly porkUse a very sharp craft knife to score the surface of the rind. If your rind came pre-scored, you still need to work on it a bit – for an ideal crackling, you should be scoring lines about half a centimetre apart as in this photo, then scoring another set of lines at ninety degrees to the original ones, creating tiny diamonds in the rind. Rub a teaspoon of salt into the rind. Place the dish of pork, uncovered (this is extremely important – leaving the meat uncovered will help the rind dry out even further while the flavours penetrate the meat) for 24 hours in the fridge.

Heat the oven to 200° C (450° F). Rub the pork rind with about half a teaspoon of oil and place the joint on a rack over some tin foil. Roast for twenty minutes. Turn the grill section of your oven on high and put the pork about 20cm below the element. Grill the meat with the door cracked open for twenty minutes, checking frequently to make sure that the skin doesn’t burn (once the crackling has gone bubbly you need to watch very closely for burning). The whole skin should rise and brown to a crisp. This can take up to half an hour, so don’t worry if the whole thing hasn’t crackled after twenty minutes – just leave it under the grill and keep an eye on it.

Remove the meat from the heat and leave it on its rack to rest for fifteen minutes. Cut the pork into pieces as in the picture at the top of the page. Serve with steamed rice, with some soya sauce and chillies for dipping. A small bowl of caster sugar is also traditional, and these salty, crisp pork morsels are curiously delicious when dipped gingerly into it.

Roast belly pork with fennel seeds

See this post for methods to get your pork crackling crisp and puffy.

I bought this belly pork from Sainsbury’s to see how successfully it would roast; I’m looking for belly pork to make Siu Yuk, a Chinese crispy belly pork with, and am roasting it in a European style until I find a successful joint which is fatty enough. This joint wasn’t fatty enough, but it made a rich and delicious supper roasted Italian-style with lemon, fennel and onions.

Update – about a year later, I did manage to track down some pork which was just right for Chinese crispy belly pork. You can see that recipe here.

The joint was really quite disturbingly lean and upsettingly tiny (this is what I get for supermarket shopping late at night in the middle of the week), but at least it was nice and dry. It’s not always easy to find belly pork on the bone in the first place; when roasted this only yielded about two tablespoons of fat. Amazing; this is where a pig stores its body fat, and I would expect to see nice, thick lines of white fat separating the layers of lean meat, with a soft layer beneath the skin to aid crackling. This pig had been working out (or had been bred for lean meat, but there’s a whole post on exactly what I think of modern farming methods waiting to be written one day when I’m in a bad mood). I had some lard in the fridge from a pork joint I cooked a while ago, and used that to annoint my anorexic pig-tum.

I’ve noticed fennel being used with pork in a lot of restaurants recently, and it’s a very good accompaniment. With lemon and onion it makes for a rich base of flavour. To serve two, you’ll need:

800g belly pork on the bone
1 onion, sliced thinly
1 lemon, sliced thinly
4 cloves garlic
1 tablespoon fennel seeds
1 tablespoon lard
Salt and pepper

Prepare the pork skin for crackling, being very sure on this small joint to keep your scoring close. Rub the surface with salt, pepper and half of the fennel, and place the whole joint in a roasting tin on top of the sliced onion and lemon (skin still on), sprinkled with the rest of the fennel, and the whole cloves of garlic. Roast at 220°C for half an hour, then bring the temperature down to 150°C for twenty minutes. Rub the skin with the lard, and finish the joint under a hot grill for around five minutes, watching it carefully to stop the crackling from catching.

I served this with mashed potato and sweet red and yellow, pointed peppers which I grilled in a griddle-pan on the top of the oven, mixing the juice from the peppers with the pork’s pan juices to make a kind of gravy. Rich and delicious.