Sticky orange and almond cake

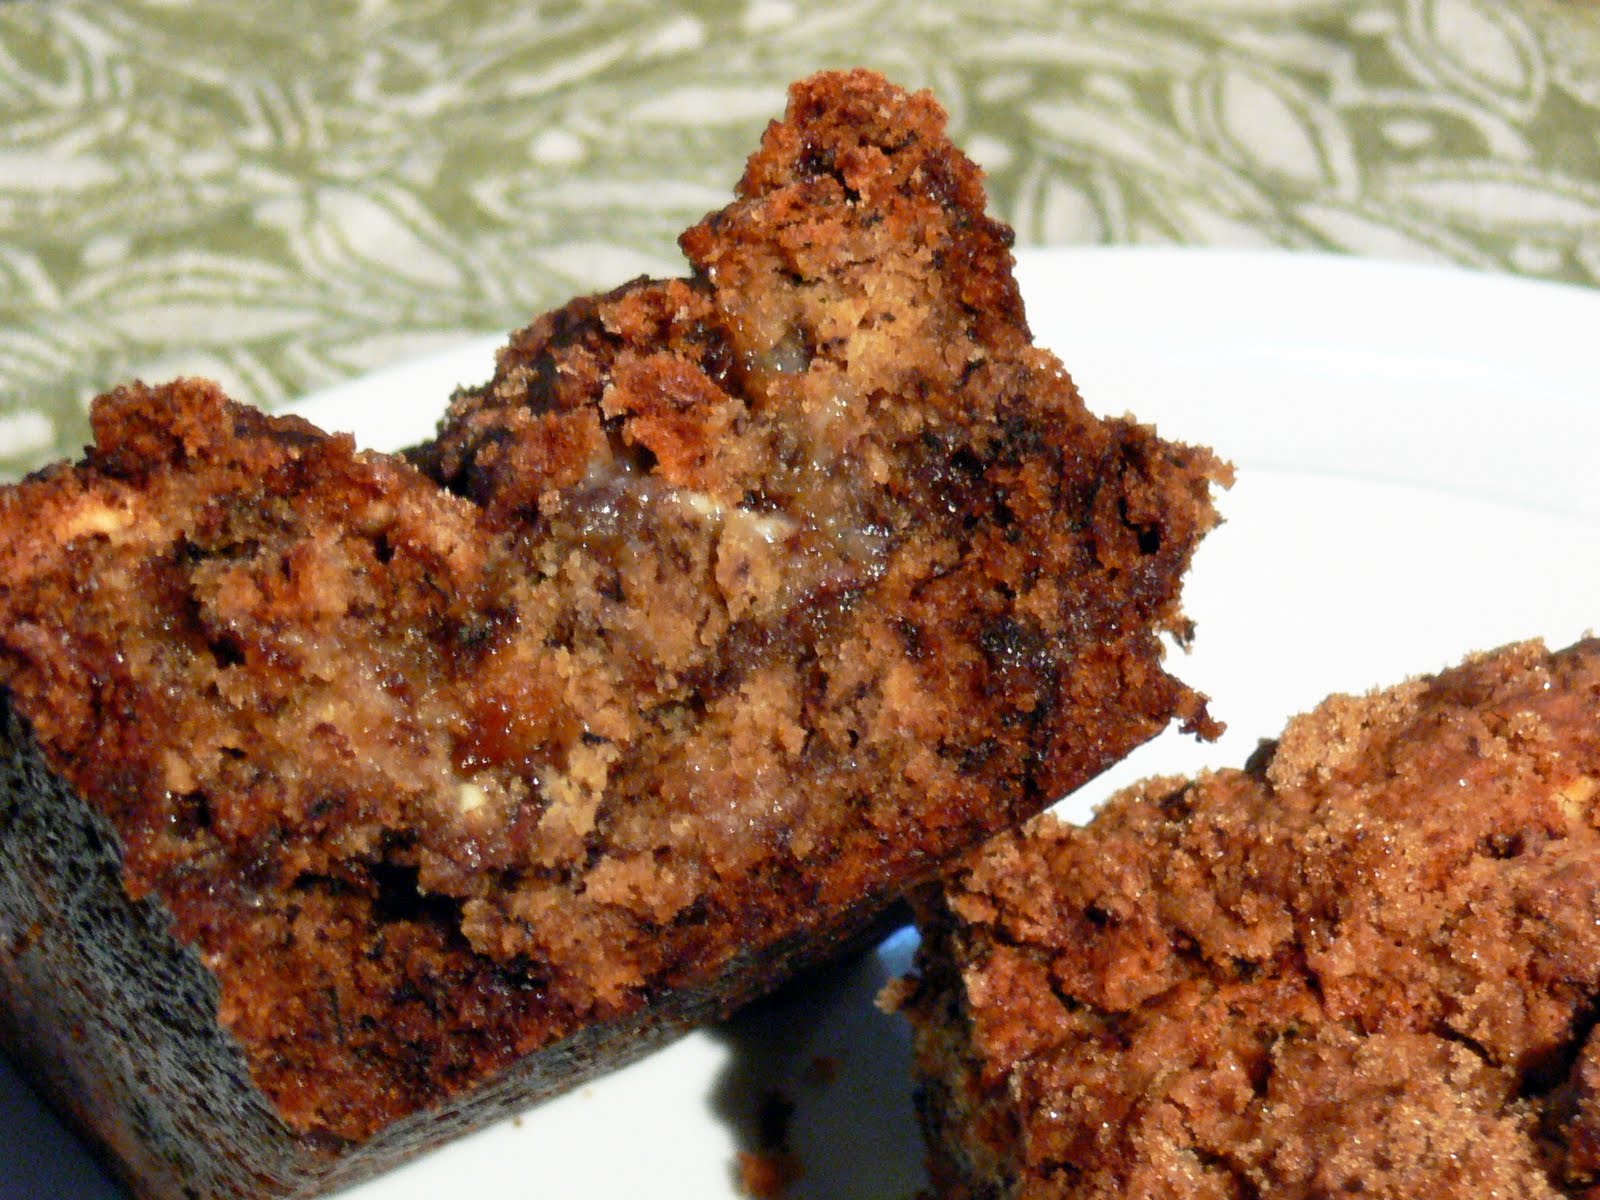
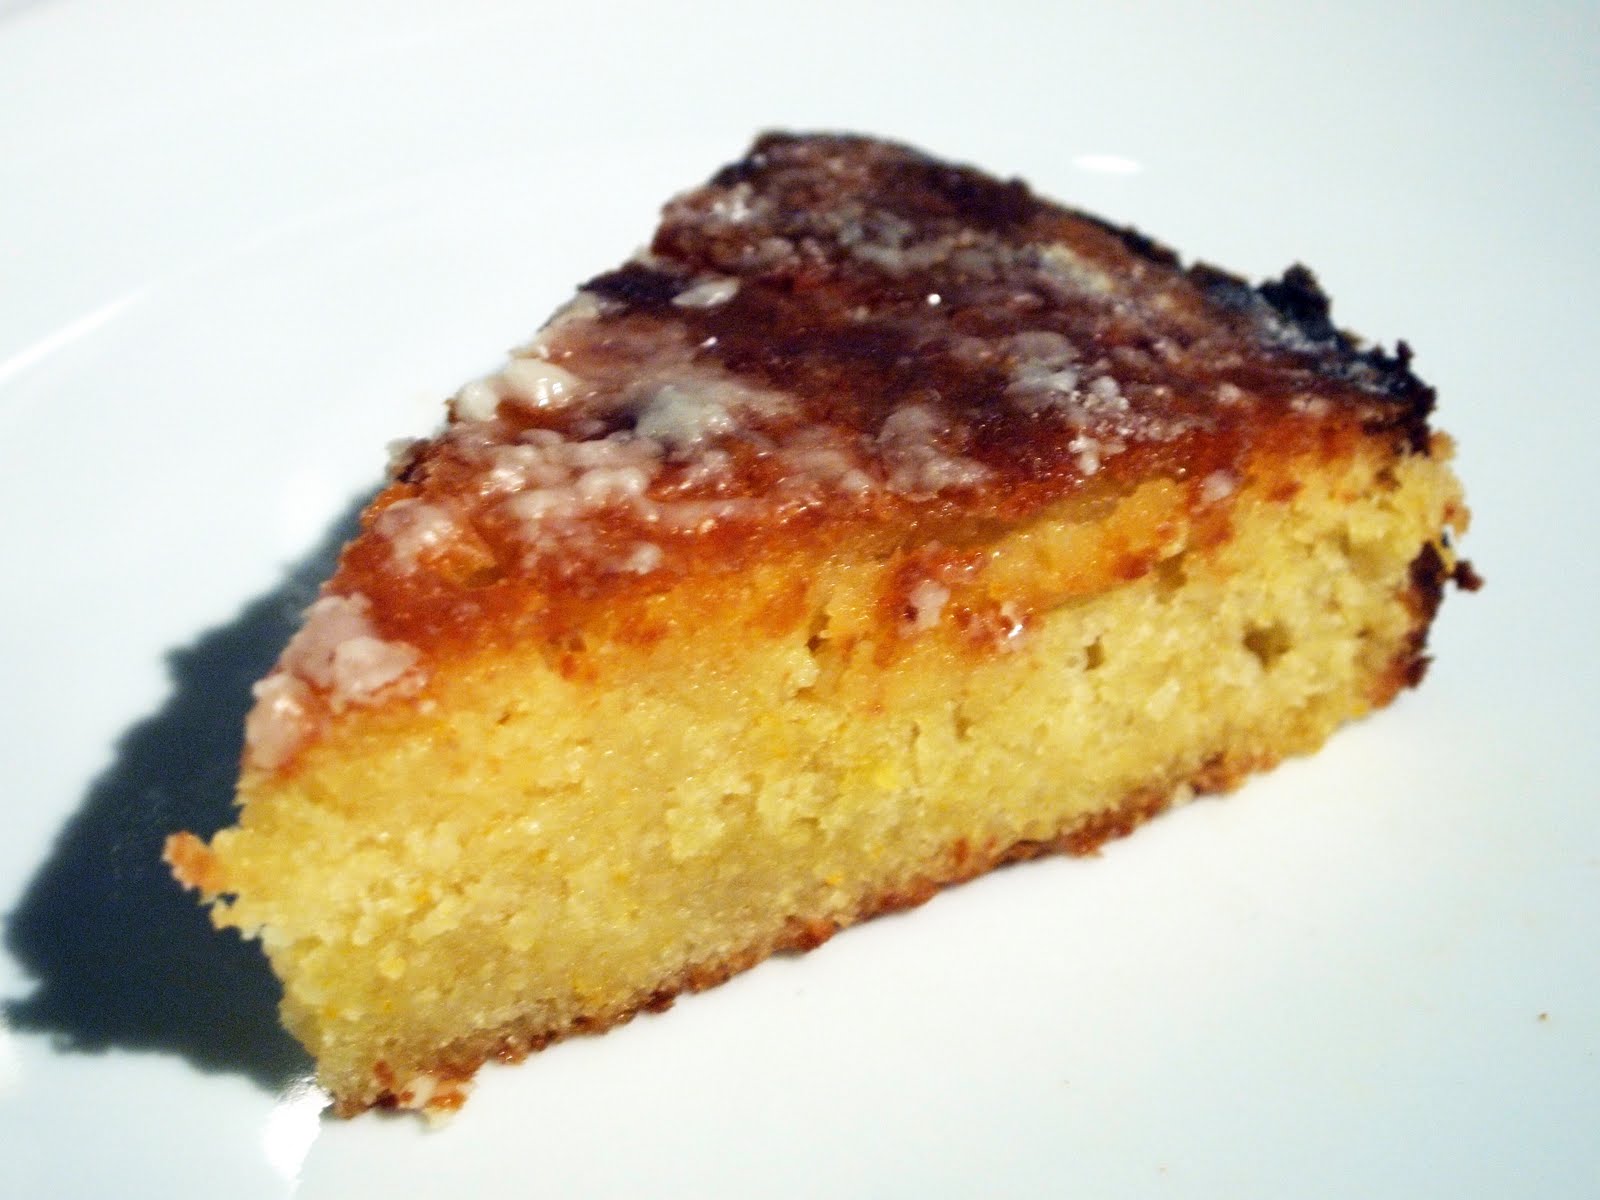
This is just great for winter – a great blast of sunny orange flavour, but rather than coming from a delicious healthy glass of juice, it’s mediated through a sugary cake, made amazingly moist and dense with ground almonds. Stodge is a very important mood-lifter in the dark evenings of December.

If you have visitors this Christmas who don’t like Christmas pudding or Christmas cake, this is a very good alternative. It’s rich, heavy and very luxurious in mouth-feel, and while a spoonful of brandy butter or a slug of cream might feel like overkill, it’d be a pretty handsome variety of overkill. If you do plan on making this for Christmas and want to kick it up a level, add three tablespoons of Cointreau or another orange liqueur to the orange juice you pour over at the end, when the cake comes out of the oven. Do not use Blue Curaçao, for obvious reasons.

You’ll need:

250g salted butter, softened
225g caster sugar
4 eggs
50g plain flour
200g ground almonds
1 teaspoon almond essence
Zest and juice of 2 oranges
2 tablespoons icing sugar

Preheat the oven to 180°C (350°F). Grease and line a springform tin.

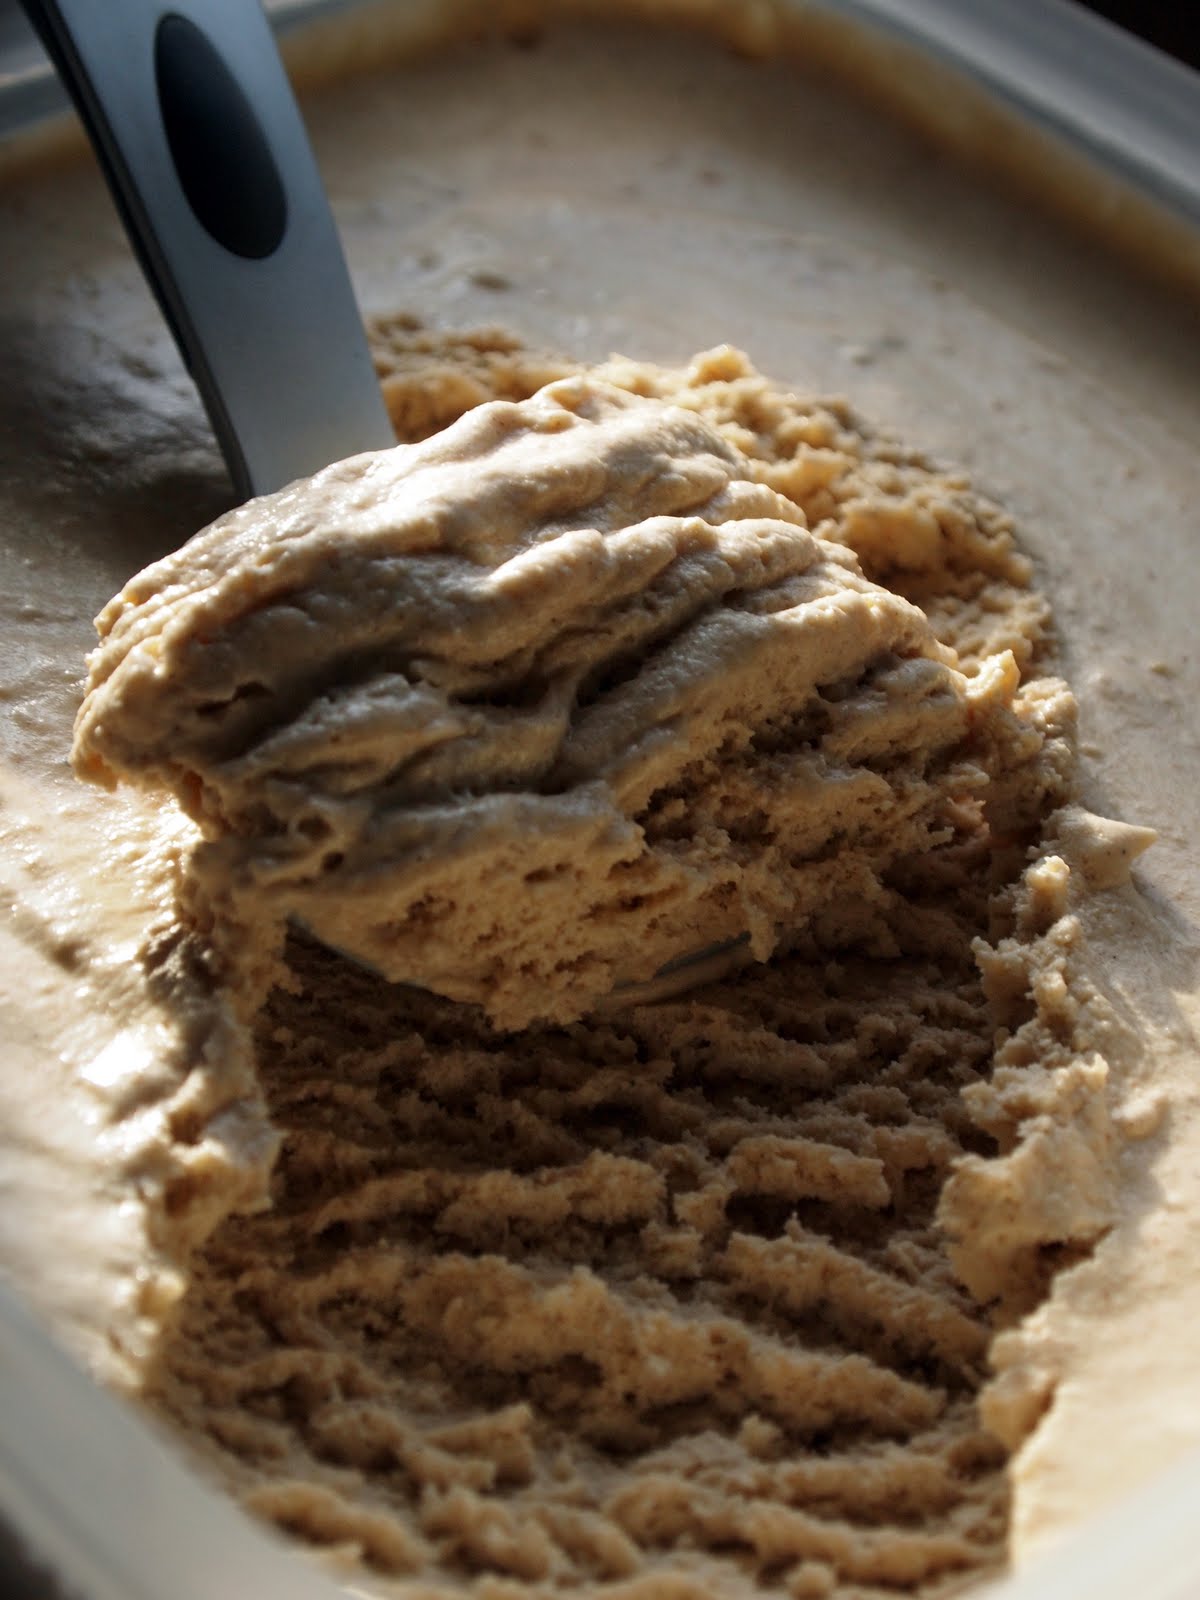
Cream the butter and sugar together until they are pale and fluffy. (You really do need an electric mixer for this recipe, I’m afraid.) Beat the eggs and add them a tablespoon at a time to the butter and sugar mixture along with a tablespoon of flour, whisking as you go and adding more until the last batch is incorporated.

Fold the ground almonds into the batter and add the juice of 1 orange, the zest from both oranges and the almond essence. Stir the liquid ingredients gently and use a spatula to move the cake mixture into the prepared tin.

Bake for 1 hour, checking halfway through to make sure the cake isn’t browning too quickly (if it is, just put a tinfoil hat on it). The cake will leave a toothpick pushed into the centre clean when it’s ready. Remove from the heat, sprinkle over the icing sugar and poke little holes all over the top of the cake. Strain the juice from the remaining orange to get rid of any pulpy bits and spoon it evenly all over the surface of the cake. Cool in the tin for 20 minutes, remove to a rack and when completely cool, wrap carefully for a few hours before serving to allow the flavours to meld and the stickiness to reach a lovely peak.

Hot buttered rum batter

For years, I thought I didn’t like hot buttered rum very much. An oily smear of butter floating on a thin pool of rum-flavoured hot water – nobody’s idea of fun. And then last winter, I saw someone in a restaurant at Lake Tahoe (Ciera at the Montbleu hotel – pricey but pleasant) drinking a creamy, hot, cinnamon-smelling glass of something wonderful. I asked the waiter what it was – hot buttered rum. I ordered a glass: rich and buttery, spicy, full of heat and kick from the rum, and silky smooth. How did they get it to emulsify in the glass like that? The waiter said he wasn’t allowed to give me a recipe, but did say that the chef made it with a sort of batter he prepared using butter and ice cream, and kept it in the freezer. It’s the ice cream which makes the mixture, butter and all, emulsify so pleasingly and creamily in the glass (or mug, if you’re at home); and a tub you’ve made for yourself will keep for months in the freezer, so it’s an excellent thing to have on hand for surprise guests. As far as Christmas/winter drinks go, this one’s approximately 100% bad for you (do not do what I did last night and have four of them in a row if you don’t want to feel a bit unwell), which unfortunately means it’s also about 100% delicious.

I made up a few different sets of batter from recipes I found on the Internet. None of them really hit the spot; in common with a lot of American recipes, I found most of them very, very sweet and a bit bland, relying on the vanilla ice cream for much of their flavour. The recipe below is my take on things, rather less sugary than most of the US recipes. I’ve also used maple syrup along with soft brown sugar for its flavour; and I’ve spiced quite aggressively, especially when it comes to the nutmeg, which has a wonderful affinity with rum. Allspice, like the rum, is Jamaican in origin, and works incredibly well here. And don’t save this mixture just for dolloping in your hot rum and water: as I write this, I’m drinking a lump of the stuff dissolved in a strong mug of coffee, and it’s heavenly.

Things like this make winter a bit less grim.

To make just over a litre of batter to keep in the freezer, you’ll need:

500ml vanilla ice cream
500g salted butter, softened
200g soft brown sugar
200ml maple syrup
1½ tablespoons allspice
2 tablespoons ground cinnamon
1 whole nutmeg, grated

Let the ice cream sit at room temperature until it’s the texture of whipped cream. (You can also make this once the ice cream is completely melted, but I prefer the lighter texture you can achieve using a half-melted tub.) In a large bowl, use an electric whisk to cream together the butter, brown sugar and maple syrup until you have a thick, fluffy mixture. Dump the spices on top with the ice cream and continue to whisk for about five minutes, until the batter is smooth and light. Transfer to containers for freezing.

When you come to make up your drink, just put a dollop of the mixture at the bottom of a mug or glass (I like about three heaped teaspoons in a small mug – your mileage may vary) and add a measure of rum with a small pinch of salt. The salt won’t make the drink salty, but it will act to lift the buttery flavour. Pour over water straight from the kettle to fill the mug, stir until the batter is dissolved, sit down in front of the fire and get drinking.

Peach and papaya jam

Don’t you hate it when the light starts slanting to remind you it’s autumn? This recipe catches the last of the really summery peaches and preserves them with a sugary papaya so you can enjoy them in the dead of winter with toast. I’m blowing my own trumpet a bit here, but I was simply amazed at how good this combination is – this is an extraordinarily good jam, packed with peachy aroma and body.

It’s nice here if you can find some white peaches (or nectarines) as well as some yellow ones. The fruit will be suspended in little chunks in the amber jam, and it’s nice to have a little variety in colour to look at. Peaches and papaya aren’t particularly rich in pectin, and they’re very, very sweet, so there’s less sugar here than you might expect; I have also added a supplementary apple with the juice of a lemon to add a little tartness and that all-important pectin for setting.

As with all jams, make sure you stir this constantly with a wooden spoon as it cooks to avoid burning the bottom of your pan. If you make a lot of jam (or even if you only make a bit), it’s a really good idea to spend a few pounds on a jam thermometer rather than relying on the cold saucer method, where you drip a little jam onto a cold object to see whether it’s setting properly.

To make about 2kg jam, you’ll need:

1 ripe papaya
2 ripe yellow peaches
2 ripe white peaches
1 small, tart apple
Juice of 1 lemon
Sugar (you’ll need to work out the weight – see below)

Sterilise some jars and a ladle.

Peel and seed the fruits. This is very easy with a peach – just quarter it and you should be able to peel the skin away with your fingers. Chop the flesh into chunks, being careful to reserve the juice. Weigh the fruit and any juice, and measure out some sugar weighing ¾ as much as the fruit. (In many jam recipes you’d use equal amounts of fruit and sugar, but these are very sweet fruits, and they don’t need the help!)

Pour the fruit, the lemon juice and the sugar into a saucepan with a jam thermometer, and bring to 110°C (230°F). The faster you can get it to temperature, the better the colour of the fruit will be preserved. Ladle the hot jam into jars, topping with a wax disc if you like, and seal immediately.

Chocolate banana bread

Bananas, white and milk chocolate chunks, and a sugary, crispy crust. What’s not to like? This is a pleasingly easy recipe, and I was very pleased with the reaction when I came up with it the other evening – the entire loaf vanished before I was able to boil the kettle for a pot of tea.

For one disappearing banana miracle loaf, you’ll need:

3 ripe bananas
100g white chocolate
100g milk chocolate
180g plain flour
150g soft light brown sugar + 2 tablespoons to sprinkle
40g salted butter (softened)
1 teaspoon baking powder
1 teaspoon bicarbonate of soda

Preheat the oven to 190°C (375°F). Grease a 9×5 inch loaf tin.

Sift the flour from a height into a large bowl with the bicarbonate of soda and baking powder. In another bowl, use an electric mixer to cream the sugar and butter together until they are pale in colour. Use the back of a fork to mash the bananas, and use the mixer to whip them into the butter and sugar mixture for two minutes.

Wallop the chocolate, still in its packets, with a rolling pin to reduce it to chunks. (This is a lot cheaper than buying dedicated chunks for baking, and the chocolate will probably be of a higher quality too.) Use a spatula to fold the chocolate chunks and contents of the banana bowl into the flour as gently as you can – if you’ve ever eaten a disappointingly solid banana bread it’s almost certainly because the batter has been overhandled. Use the spatula to shuffle the mixture into the loaf tin, sprinkle the top with the extra sugar and bake on a middle shelf of the oven for 45 minutes. Check a skewer comes out clean – if it doesn’t, pop a piece of tin foil on top of the tin to stop the top from going too brown and add another 10 minutes to the cooking time. Cool for quarter of an hour in the tin, then move to a rack to finish cooling (or eat immediately, which is what we did, and very nice it was too).

Gooseberry fool

We English diners aren’t blessed with much, but we’re pretty blessed when it comes to summer fruits. We’ve been through rhubarb, strawberries, cherries and greengages already this summer: now it’s the turn of the gooseberry.

There are several different varieties of this lovely, fragrant berry, some very sharp and best used for cooking (they’re very good simmered down and served with rich meats like duck and goose), and some so sweet they can be eaten raw. Its flavour character and the texture it cooks down to means that it fits well into the sort of recipes you might cook with rhubarb – and if you don’t have any gooseberries, you can make this fool with rhubarb and emerge happy. I very much like the texture of the soft seeds and flesh of the fruit in the mouth, and don’t sieve the gooseberry puree in this recipe to remove them. Try it both ways, and see which you prefer.

Gooseberries have a fantastic affinity with elderflower. It’s just one of those happy coincidences, like strawberries and black pepper (try it some time). If you made the elderflower cordial I encourage you to make every June (or if you have some from the supermarket in the cupboard), use two tablespoons of it in place of the sugar in this recipe. To serve two, you’ll need:

450g dessert gooseberries
2 tablespoons sugar OR elderflower cordial
400ml whipping cream
400ml custard – make the custard using this recipe or buy some from the supermarket chiller cabinet

Top and tail the gooseberries with a sharp knife, and put them in a small saucepan. Add the sugar or elderflower cordial to them and put over a low heat. As they simmer, the berries will collapse into a thick sauce. Remove from the heat, taste for sweetness, adding a little more sugar or cordial if necessary, transfer to a bowl and put the gooseberries into the fridge to chill for a couple of hours. Make up the custard and put it in the fridge to chill with the berries.

When the gooseberries and custard are nice and cold, whip the cream into soft peaks. In glasses, layer the custard, gooseberries and cream to serve. Some like to swirl them in the glass, but I think this is far prettier served in distinct layers.

Greengage jam

Summer’s been a bit of a washout here, but it turns out that the hot start and wet middle and end of the season have meant that the plum harvest this year has been stupendous. (So has the wasp harvest, so be careful if you’re collecting your own.) I don’t have my own plum tree, but I’ve been scrumping plums from trees in a neighbour’s garden across the green that overhang a footpath, eating them at friends’ houses, and buying bushels of the things at the market.

Greengages are my favourite English plum. They’re (surprise!) pale green, extraordinarily sweet, and wonderfully juicy, with golden flesh when ripe. Like Victoria plums, they’re perfect for jam-making, keeping a lovely plummy fragrance when cooked down. They’re very obliging fruits; they’re full of pectin, so you won’t need to add any setting agents to the jam; and you don’t even need to stone them before cooking, as the stones will loosen themselves for you as the fruit cooks down, floating to the top of the jam so you can skim them off as they bob to the surface.

I like the pure plum flavour you get from this jam, but some people like to add a vanilla pod to the saucepan for some extra fragrance. For me, it’s not the best use of an expensive pod; this jam just employs greengages, water and sugar, and it’s none the worse for that. When selecting your greengages, try to find fruits which are ripe but not over-squishy, and reject any with bruises or mouldy bits, as this will affect the length of time your jam will keep once opened.

I find it hard to think about preserves (especially fruit ones) in terms of kilogrammes and litres, so I’m afraid you’ll need to dig out the imperial weights for this one. To make jam from 2lb of ripe greengages, making about 3lb jam, you’ll need:

2lb greengages
1½ lb granulated sugar
½ pint water

Sterilise some jars before you begin. Put the whole greengages and the water in a large pan, and simmer for 20 minutes, stirring occasionally, until the fruits are very soft. Pour in the sugar, stir well and simmer hard, fishing out the stones as they bob to the surface, until the mixture reaches a jam set (it should measure 110°C on a jam thermometer; if you don’t have one, just dribble a bit of the jam onto a cold saucer and check that it’s reached a jammy texture). Skim any scum off the surface and pour into the sterilised jars, sealing immediately.

This is, of course, gorgeous on toast, crumpets or a croissant; my favourite thing to do with this jam is to dollop a big tablespoonful into the middle of a bowl of plain yoghurt for breakfast.

Chilli choc chip cookies

Chillies and chocolate have a lovely affinity; they’re a traditional pairing in South America, where the locals really know how to treat their cocoa. I was making up a traditional toll house cookie recipe – actually, it’s the traditional toll house cookie recipe, as I’ll explain below – yesterday with Dr W (the family that bakes together stays together), and decided to augment the recipe with some fresh Scotch bonnet chillies. Wonderful and potent little balls of fire, they’re one of my favourite chillies. If you’ve not tried them before, be cautious, especially if you find chillies hard to tolerate; these are hot, rocking up at between 100,000 and 350,000 Scoville Units. (The humble jalapeño only rates at between 2,500 and 8,000 Scoville Units, for the sake of comparison.)

Scotch bonnets are closely related to the habanero, but have a very distinct flavour and aroma, fruity and sweet behind all the heat, which I think is just wonderful against chocolate. I’ve only used one here, chopped very finely and creamed in with the butter so its powerful capsaicin (the stuff that burns your tongue off), which is fat-soluble, can work its way smoothly through the cookie dough. The chocolate chunks are a good milk chocolate – nice and smoothly cooling on your tongue against the chilli heat.

The basic recipe I’ve used here is the original toll house cookie recipe – I’ve never found a better. The Toll House was a restaurant in Whitman, Massachusetts, where Ruth Wakefield, one of the owners, was responsible for all the recipes. She came up with this recipe around 1930. Nestle bought the rights to the recipe in 1939 – this ingredients list is from Ruth’s original recipe from the 1947 edition of Toll House Tried and True Recipes, where she calls them Toll House Chocolate Crunch Cookies. (As well as adding the chillies, I have left out a cup of chopped pecan nuts from the recipe – if you want to use them, stir them in with the chocolate bits.) Ruth preferred very tiny, crisp cookies, and only used half a teaspoon of batter for each one, with a much shorter spell in the oven. I like them quite a lot bigger for the squashy middle, and suspect you will too – if you want to make teeny cookies, reduce the cooking time.

To make about 20 cookies, you’ll need:

1 Scotch bonnet pepper
2¼ cups plain flour
1 teaspoon salt
1 cup unsalted butter, softened
¾ cup granulated sugar
¾ cup firmly-packed light brown sugar
1 teaspoon vanilla extract
2 large eggs
1 teaspoon baking soda
2 cups plus 2 tablespoons chocolate morsels (I used two bars of Green & Black’s cook’s milk chocolate, walloped into rough chunks with a rolling pin while still in the wrappers)

Preheat the oven to 190°C (375°F).

Chop the chilli very finely, discarding the seeds if you want to cut the heat down a bit. Sift the flour and salt together in one bowl. In a large mixing bowl, cream the butter and the chilli with an electric mixer (this should take about 2 minutes). Add the sugars gradually, creaming the mixture together until light and fluffy. Beat the vanilla and eggs (one at a time) into the mixture, then the baking soda. Turn the speed of your mixer down to low and add a third of the flour, then gradually add the rest. Stir in the chocolate pieces and drop heaping tablespoons of the mixture onto baking sheets about 2 inches apart to leave space for the cookies to spread.

Bake for between 8 and 10 minutes, until the edges and tops are just turning golden. Allow to cool on the baking sheets for a few minutes so they can firm up a little, then use a spatula to move the cookies to cooling racks (or direct to your mouth).

These are a lovely, crumbly, squashy cookie. They’ll keep in an airtight container for about a week.

Strawberry lemonade

Yes, those are LEGO ice cubes. What of it?

This hot summer has meant that we’ve been blessed with some truly gorgeous strawberries this year – fat, fragrant, juicy and sweet. If you have a glut, this lemonade is so delicious you may well find yourself drinking it instead of eating a dessert. A shot of vodka in the bottom of the glass wouldn’t go amiss either.

I’ve used the strawberry variety called Florence here, which is more fragrant and flavourful than Elsanta (the potato-ish variety you are most likely to come across in the shops). This method, though, where you will find yourself macerating the chopped berries in sugar overnight, makes the most of even Elsanta. Macerating somehow makes them much fruitier in flavour, so use whatever variety you can get your hands on.

To make a jug of lemonade large enough for four glasses, you’ll need:

2 punnets of strawberries (about 500g)
4 heaped tablespoons caster sugar
Juice of 2 lemons
Water

Slice the strawberries into four or five pieces each, and sprinkle generously with the sugar in a large bowl. Mix well with a spoon, making sure every piece of fruit is well sugared, then cover the bowl with cling film and chill in the fridge for about 24 hours, until you are ready to make the lemonade.

When you come to put the lemonade together, pour the pink syrup that will have developed in the strawberry bowl (see picture) into a large jug, and transfer the macerated strawberries themselves to a sieve, making sure you catch any drips in a bowl. Use the back of a ladle to push the strawberries (which will have become very soft in the sugar bath) through the sieve into a bowl until you are left with the seeds and a stiff pulp in the sieve, which you can discard.

Add the pureed strawberries to the syrup in the jug and squeeze in the juice of two lemons. Now add between 1 and 2 glasses of water to the jug (the mixture will be too sweet and sharp without dilution) until you reach a level of flavour you find just right – amounts will vary depending on the particular strawberries you have chosen. Stir well and serve immediately with ice. This drink is unspeakably good packed into a Thermos flask for a picnic – give the Thermos a swift shake before pouring if you use one.

Flapjacks

I had an email a couple of weeks ago from a lady from Mornflake oats, asking if I’d like some samples. Now, I was a big fan of Mornflake as a kid, when the sixth-formers at school had a weekly stall in the dining room where they sold us teenies snacks of the very limited sort allowed by our health-fascist teachers. There wasn’t much that was very good – nobody really liked licorice twigs, and I would sooner die than ever have to eat a carob bar again. Happily, there was one thing on sale I loved without measure – a muesli made by Mornflake with oat clusters, coconut, and chunks of candied papaya and pineapple. Infinitely better for breakfast than school gruel.

I suspect my waxing lyrical about a childhood affection for Mornflake pressed some buttons, because the next morning three cubic feet of oat products arrived on the doorstep. Since then, I’ve been happily munching my way through some really fantastic muesli (the Swiss style is creamy and delicious with the traditional Swiss addition of milk powder, the Fig and Apple is gloriously crispy and tastes divine), oatbran flakes (Very Berry, with strawberries, raspberries and cherries were Dr W’s favourite) and porridge – microwavable single portions in packets, bags of rolled oats, and fine oatbran sprinkles for smooth porridges or garnishes. My cholesterol level is at an all-time low. Mornflake are a considerably older company than I’d realised; the same family has been milling oats for more than 14 generations, and they’ve just celebrated their 333rd anniversary, making them the UK’s eighth-oldest company. The folks at Mornflake tell me that oats will reduce my appetite, keeping me slim and gorgeous (a recent study from King’s College London has identified a hunger-suppressing hormone in oats, which, along with their cholesterol-squelching action appear to be almost sinister in their healthiness). They would also like you to know that a very varied assortment of people, including such luminaries as Tim Henman, Orlando Bloom, David Cameron, Kate Moss and Madonna, have gone on the record as being fans of porridge. I am not sure that this brings anything in particular to your own breakfast experience, but it may be useful for your next pub quiz.

Even after two weeks of artery-cleansing, appetite-suppressing, celebrity-endorsed oaten breakfasts, I still have a goodly portion of Mornflake’s oaten bounty left in the breakfast cupboard. Happily, there’s something really unhealthy and extremely delicious you can do with an awful lot of oats – make an awful lot of flapjacks.

Flapjacks are fast, easy and will make your house smell deliciously of caramel as they cook. To make 25, you’ll need:

275g rolled oats
225g salted butter
225g demerara sugar
2 heaped tablespoons golden syrup

Preheat the oven to 160°C and grease a 30 x 20cm baking tin. Melt the butter, sugar and syrup together in a saucepan over a low heat, and stir the oats into the molten mixture, making sure everything is well blended. Pack the oats into the greased tin, pressing down with the back of a spoon to make sure the mixture is firm and flat on the top.

Bake the flapjacks for 35 minutes, until they are a golden caramel brown. (Overcooking will make your flapjacks hard and dark – 35 minutes will give you crisp edges and a nice squashy middle, but some people prefer a crispier flapjack, so adjust the cooking time to your liking.) Remove from the oven and leave in the tin for ten minutes, then use a spatula to mark the flapjacks into 25 squares. Allow the flapjacks to cool completely before moving them into an airtight tin (or cramming the lot into your face – I’ll leave it up to you).

Fruit scones for cream tea

One of my sad, sad weekend hobbies is wandering around National Trust properties, buying a sack of books at the inevitable second-hand bookshop and then visiting the tea-room for a handsome cream tea, with fluffy scones, strawberry jam and plenty of clotted cream to slather on top. If you’re in East Anglia, the exquisite Oxburgh Hall, where you’ll find a number of embroideries worked by Mary Queen of Scots and Bess of Hardwick, a priest hole you can clamber into and a very fine garden, has a really fabulous tearoom. Ickworth House (English wines, fantastic gardens, wonderful collection of fans) and Wimpole Hall (organic farm, hot-dogs made from the pigs you have just fed pig-nuts to in the barn) also do a very good line in cream teas – but to my mind Oxburgh’s intimate tearoom, housed in the hall’s old kitchens, complete with antique bread ovens and blue and white crockery displaying pictures of the hall itself, still takes the…cake. All the same, while it’s nice to visit Oxburgh once or twice a year (those gardens change gorgeously in character over the seasons), I can’t really justify driving an hour just for a cup of tea and a scone more regularly than that. Time to get baking.

I usually choose a pot of Earl Grey to go with my scones. So when, in the absence of a National Trust tearoom, I decided to prepare my own cream tea at home this weekend, I decided to use some very strong Earl Grey to soak the sultanas in before adding them to the dough. With a pot of tea, a jar of good strawberry jam (try Tiptree’s Little Scarlet or Duchy Originals Strawberry) and some clotted cream (increasingly available in supermarkets and delis – if you can’t find any, use extra-thick double cream rather than whipped cream, which has exactly the wrong texture), you’ll find yourself in possession of one of the finest things you can eat in the afternoon.

A quick note on the egg in the dough. I was lucky enough to have a box of bantam eggs a neighbour had given me, and used two – bantam eggs are tiny, very yolky and rich, and two are approximately the same volume as a single large hen’s egg. If you can find bantam eggs, I’d recommend using two in this recipe.

To make about 16 scones, you’ll need:

225g plain flour
2½ teaspoons baking powder
50g butter
25g caster sugar
1 large egg OR two bantam eggs
Milk (enough to make up 150ml when added to the beaten egg)
100g sultanas
1 large cup strong Earl Grey tea

Start by brewing the tea (make yourself a cup to drink while you’re at it) and preheating the oven to 220°C (425°F). When the tea is nice and strong, pour it over the sultanas in a bowl and leave them to plump up for half an hour while you prepare the dough for the scones.

Sieve the flour and baking powder into a bowl, and cut the softened butter into it in little chunks. Rub the butter into the flour mixture until it resembles breadcrumbs. Stir in the sugar.

When the sultanas have had half an hour in the tea, drain them in a seive and add them to the flour mixture. In a measuring jug, beat the egg. Top the beaten egg up with the milk until you have 150ml of liquid, and stir it gradually into the flour mixture (you may not need all of it), mixing all the time with a wooden spoon, until you have a soft dough that holds together but is not sticky. Try not to over-handle the dough so that your scones are light and fluffy. Roll the dough out on a floured surface to a thickness of about 1cm, and cut out rounds with a 5cm circular cutter.

Place the rounds onto greased baking sheets and brush the tops with any remaining milk/egg mixture (if you have none left, plain milk will do). Bake for 10 minutes until golden brown.

These scones are at their very best served as soon as they come out of the oven, split in half, spread with jam and cream. Once cooled, they’ll keep for a couple of days in an airtight tin.