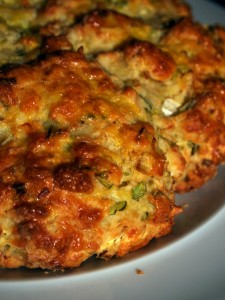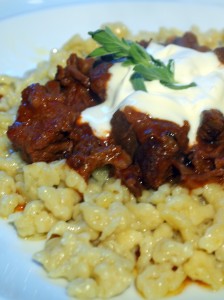
Beef goulash with nokedli

Goulash and nokedliA complicated set of circumstances saw me having to leave China after a week and flying straight to Hungary. Budapest is a beautiful city, but it’s not somewhere I’d recommend for those of you who travel to eat; menus around the city bear identical lists of paprika-heavy casseroles, and there’s not much in the way of haute cuisine. I found two standout restaurants, one in Buda and one in Pest. Café Pierrot, up in the castle district in Buda, is a pricey cellar restaurant with a pretty garden and a French chef, where you’ll find the best foie gras preparations we ate in the city (and Hungary is the biggest producer and consumer of the stuff per capita in the world). And Café Kör, down in Pest by the basilica, has a menu of Austro-Hungarian classics with a really charming wine bar atmosphere.

I really don’t mean to slam paprika-heavy casseroles above (and given that I’ve made one here, you can probably see that I’m actually rather fond of them) – they only get tired after a week or so. I became horribly addicted to nokedli, a spaetzle-ish kind of tiny dumpling, while we were in Budapest. They’re a perfect accompaniment to these rich, dense casseroles, so I swiped a nokedli recipe off the back of a nokedli maker in a Buda craft market (stupidly, I didn’t buy the nokedli maker, which would have meant an easier time for my and Dr W’s ladling arms when it came to making this) and made up a goulash to go with them. If you don’t fancy nokedli with your meal, the casserole is very easy and will go beautifully with rice or with mashed potatoes.

A note on goulash and etymology. The word comes from the Hungarian gulyás (pronounced as we in the UK pronounce goulash – Hungarian is one of those languages where none of the consonants and very few of the vowels do what you think they will), which means cow-herd. If you order a goulash in Hungary you’ll either get a a beef or veal soup, which may or may not contain paprika, or an un-thickened stew with beef, veal and vegetables. The paprika casserole which we in the UK call a goulash is called a papricás (pronounced “paprikash”) or pörkölt – it’s also a dish which originates with Hungarian herdsmen, but somehow the word goulash has come to embrace it over here. I know at least one Hungarian out there (hello Andras) who will probably find something horribly inauthentic about the casserole I’ve made here, but I think you’ll like it nonetheless.

To serve six (it’s worth making plenty – this is an easy recipe which freezes well), you’ll need:

Goulash
1kg beef braising steak, chopped into pieces
3 tablespoons plain flour
4 onions
2 tablespoons sweet paprika
1 teaspoon hot paprika
1 teaspoon sugar
4 cloves garlic
2 bay leaves
1 teaspoon caraway seeds
3 tablespoons tomato purée
250ml white wine
750ml stock (vegetable, chicken or beef)
Zest and juice of 1 lemon
Soured cream/creme fraiche to dollop
Olive oil/bacon fat to brown the meat

Nokedli
4 eggs
1 teaspoon salt
350ml cold water
500g plain flour

Preheat the oven to 160ºC (320ºF).

Dust the meat with the flour and a generous seasoning of salt and pepper. Bring the olive oil or bacon fat to a high heat in a large, thick-bottomed pan, and brown the meat all over (you’ll probably need to do this in a few batches to avoid crowding the pan), removing the browned meat to a bowl.

Reduce the heat to a medium flame, and in the same pan, sauté the onions until they are translucent. Tip the paprika, tomato purée, sugar, garlic, bay and caraway seeds into the onions and continue to sauté for a minute. Return the meat and any juices to the pan.

Pour the wine over the contents of the pan, and using a wooden spoon, scrape away to deglaze any flavoursome brown bits that have stuck to the bottom. Pour over the stock, and bring to a simmer. Cover with a well-fitting lid and put the casserole in the oven for two hours. Check and stir occasionally, and top up with a little water if you think the stew is becoming too dry.

After the two hours are up, add the juice and zest of a lemon, and taste for seasoning. Set aside and heat up when you are ready to eat.

To make the nokedli, put the eggs, salt and water in a large bowl and use a hand whisk to beat the mixture thoroughly. Add the flour a couple of tablespoons at a time until it is all incorporated. You will have a thick, wet dough.

Bring a large pan of water to a rolling boil. If you have a spaetzle or nokedli maker, now’s the time to bring it out. If you don’t, don’t panic; just get a colander out, spoon a ladleful of the mixture into the bottom of the colander, and use the ladle to push the mixture through the colander straight into the boiling water. It will snake out of the colander’s holes in little pieces, which will swell as they hit the water. The colander process can take a fair amount of elbow grease (this is why you might want to buy yourself a nokedli maker), but I like to think I’m mindfully burning off calories in advance of eating far too much. Most of the calories that got burned off here belonged to the chivalrous Dr W, who was probably getting tired of the swearing coming from the kitchen, and took over after a few minutes.

The nokedli are ready as soon as they float to the top of the boiling water. Fish them out with a slotted spoon and keep them in a bowl in a warm place as you work your way through the mixture. You can serve the finished nokedli as they are, or warm them through in a knob of butter in a frying pan, without browning.

Serve the goulash over the nokedli, with a generous splodge of soured cream spooned on top. A sprinkling of oregano and parsley can give this dish a lovely lift, but you may well find you don’t need it.

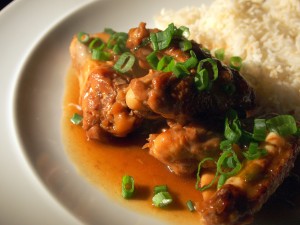
Sesame ginger chicken wings

My Dad always taught us that the best part of the chicken was the wings. The flesh in the wing is sweet from its proximity to the bone, delicate, and lubricated with plenty of flavour-carrying fat from the skin that covers it. Accordingly, we used to fight over the wings every time a chicken appeared on the dinner table, occasionally with our cutlery. Ours was a savage household.

Dad’s Chinese, and this is the kind of comfort food he used to rustle up for us when everybody else’s Dad was frying mince with baked beans. I used to take great pride as a little girl in helping out – slicing the garlic, chopping the ginger, carefully mixing the cornflour into some cold water, and watching, fascinated, as he whirled around the kitchen with a wok and a pair of chopsticks. You can’t beat the cosmopolitan nature of the food education my brother and I got from my parents: Mum’s wonderful meals were from Jane Grigson, the Roux brothers and Elizabeth David, and Dad’s all did something fabulous with soy sauce. Alongside lengthy gastronomic holidays in France, where my brother and I were expected to sit quietly for hours in restaurants with endless cutlery and a million cheeses while Mum and Dad bibbed and tucked (and we did – there’s still little I find as fascinating as my very own slab of foie gras), there were the frequent visits to Malaysia, where food is as important to the national psyche as football is in Britain. Back in the UK, there were regular and keenly looked forward to family trips to London’s Chinatown, which, at the time, was the only place you could find ingredients like sesame oil, chilli sauces and tofu – even ginger was sometimes hard to find in 1970s Bedfordshire. There were bribes of candied winter melon and sesame caramels for the kids, and Dad swiftly made friends with all the local Chinese restaurateurs. We met Kenneth Lo once at a garden party when I was about six. Dad didn’t stop talking about it for weeks.

While most wing recipes you’ll find will have you grill or fry the wings so they are crisp, this Chinese method will have you simmering them in an aromatic, savoury sauce. You’re best off eating these with a knife and fork; fingers will be a bit messy. The popularity of chicken breasts and legs, all neatly pre-jointed, means that there are a lot of surplus wings kicking around out there, and you’ll likely find that you can buy them very cheaply (I prefer the butcher’s wings to the boxes from the supermarket, because I’m more confident about their origin) – this is a good budget dish for the end of the month.

I like to remove the wingtips, which don’t yield any meat, with a pair of poultry shears, and use them to make stock. This isn’t absolutely necessary – if you’re in a hurry, leave yours on. And although my Dad would use a wok to make this, I find a large casserole dish a bit easier, not least because it’s an even depth and comes with a lid.

To serve two, you’ll need:

800g chicken wings
1 teaspoon sugar
½ teaspoon freshly ground black pepper
½ teaspoon salt
2in piece of ginger
2 cloves garlic
12 spring onions, chopped and separated into green and white parts
75ml sesame oil
100ml soy sauce
Water
2 teaspoons cornflour
Groundnut oil to fry

Half an hour before you start to cook, sprinkle the salt, pepper and sugar over the chicken wings, mix well, and set aside.

Heat a couple of spoonsful of oil in your pan, and brown the wings on each side. You may need to do this in a few batches, depending on the size of your pan. When they are browned, return them to the pan with the chopped garlic, the ginger, cut into coins, and the white part of the spring onions. Keep stirring carefully for a minute until the garlic, ginger and onions start to give up their aroma – be careful not to break the skin on any of the wings.

Pour over the sesame oil and soy sauce, and reduce the heat to a low flame. Add water to cover the wings, stir to combine everything, and bring slowly to a simmer. Put a lid on the pan and cook, stirring occasionally, for 12 minutes.

Combine the cornflour with a little cold water. Remove the lid and stir the cornflour mixture through the dish. Continue to simmer until the sauce thickens. Stir through the green part of the spring onions, reserving a little to scatter over the finished dish, and serve with steamed rice and a stir-fried vegetable.

Glass noodle salad

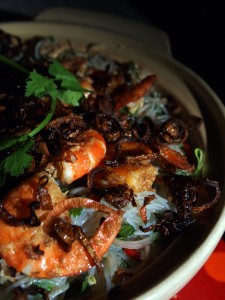
Glass noodle saladA friend complained the other week that there aren’t enough noodle recipes on this blog. So here, just for you, Andras, is a noodle salad.

The noodles in this salad are glass noodles, made from mung beans (the same beans that beansprouts…sprout from). Don’t be tempted to substitute rice noodles, which have a very different texture. You’re unlikely to find glass noodles at your local supermarket, but any oriental grocer will carry them – they are sometimes marked “bean thread” or “pea thread” noodles. Check the packet – the only ingredient should be beans, or bean flour.

Texture’s all-important in this salad. The moist crunch of the lettuce against the dry crunch of crispy shallots, the slip of the noodles and the dense pieces of chicken and prawn all add up to a world-beating mouthfeel. A Thai-style dressing, with herbs, fish sauce, palm sugar, chillies and limes, gets the tastebuds in every part of your tongue working. We ate this as a main dish; it’s great as a side-dish too. For some reason, this is one of those recipes which demands to be eaten outdoors, so consider making it for a picnic or to serve at a barbecue.

To serve two to three as a main course or six as a side-dish, you’ll need:

8 large, raw prawns
2 chicken breasts, without skins
1 tablespoon tom yum paste
1 iceberg lettuce
100g glass noodles
1 handful (25g) coriander
1 handful (25g) mint
Juice of 4 limes
3 tablespoons fish sauce
2 teaspoons palm sugar (substitute soft brown sugar if you can’t find any)
1 red chilli
3 banana shallots

Stir the tom yum paste into the prawns and leave to marinade while you prepare the noodles (about 10 minutes).

Pour boiling water over the noodles to cover, and leave for 5 minutes until they are soft. Drain in a sieve, rinse in cold running water and transfer to a bowl. Use scissors to snip into the noodles so they are cut into pieces about an inch long. Cover and refrigerate.

Heat a tablespoon of oil in a very hot frying pan, and cook the prawns until pink. Remove to a bowl. In the same pan, which will have retained some of the paste, sauté the chicken until it is brown outside and cooked through. Remove to another bowl. Leave the prawns and chicken to cool while you prepare the crispy shallots and dressing – when you come to make the salad, they’ll be close to room temperature.

Slice two long shallots into very thin rings, and shallow-fry in a couple of centimetres of oil, stirring occasionally, until they are brown and sweet (10-15 minutes). Remove from the oil with a skimmer and drain on kitchen paper. Set aside.

Slice the third shallot in half lengthways, and chop very finely. In a bowl, mix it with the herbs, chopped very finely, the sugar, lime juice, fish sauce and finely chopped chilli. Stir the dressing into the chilled noodles. Chop the chicken into dice the size of the top joint of your little finger, and toss the pieces, along with any juices from the chicken, with the noodles.

Slice the lettuce, straight from the fridge, as thinly as possible, and lay it in the bottom of a large serving bowl. Cover with the noodle mixture, and arrange the prawns on top. Sprinkle the crispy shallots over the dish and serve, making sure that some of every layer makes it onto the plate.

Braised ox cheek with gremolata crumbs

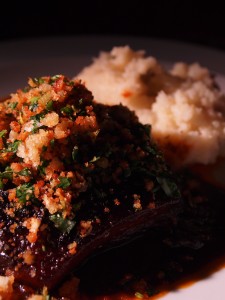
Ox cheek with gremolata crumbsI’ve never been completely clear on why we class cheeks, ox and pork both, as offal. There are no interesting organs here; they’re just muscle and fat, like every other cut of meat on the butcher’s counter. Perhaps it’s because they’re from the head of the animal, inciting a squicky reaction in some – a squicky reaction which I can guarantee those same people wouldn’t apply to a sausage, because they’re not very imaginative. The lengthy ban on the sale in the UK of any cuts from the head or on the bone during BSE made this inexpensive cut disappear for several years, which didn’t do anything at all for its popularity when it returned. You may have to order cheeks in specially at the butcher, but he should be happy to help you.

The meat in an animal’s cheek is tender, rich and basted from within with plenty of flavour-carrying fat. The same goes for fish; when I was a kid, uncles in Malaysia taught me and my brother that the finest bit of a large steamed fish is the cheeks, which we’d pop out with chopsticks and fight over. (A fish-head curry is a fine, fine thing.)

I’ve braised this cheek for hours in a very dense stock-based sauce, and sprinkled some crisp crumbs with herbs and lemon zest over to lift the texture and flavour. Eagle-eyed readers will realise that I’ve nicked the star anise idea, which also brightens the flavour profile of this dish very handsomely, from Bob Bob Ricard. The stock you use is very important, and should absolutely not come from a cube. A good home-made beef stock is essential here. You may find some ready-made alongside the dripping at your butcher’s, but it’s worth making a large pot of your own, some of which you can freeze, and including a roasted marrow bone, some shin or some tail to thicken and beef the stock up. (Sorry.)

To serve four, you’ll need:

1 carrot
1 stick celery
1 large onion
4 star anise
2 bay leaves
4 ox cheeks
500ml passata
500ml beef stock
500ml red wine
1 handful (about 25g) tarragon, leaves picked from tough stalks
1 handful (about 25g) parsley
Zest of 1 lemon
250g white breadcrumbs
Olive oil

Chop the onion, carrot and celery into rough dice. In a large casserole with a lid, sweat the vegetables in a couple of tablespoons of olive oil until the onion and celery are becoming translucent, but not taking on colour. Pour over the liquid ingredients and stir well. Slide the ox cheeks into the casserole with the bay and star anise, season generously, and bring to a gentle simmer.

Set the timer to 3 hours, and continue to simmer with the lid off until the liquid has reduced by about half. Pop the lid on and continue to simmer until the timer goes.

While the cheeks are cooking, prepare your crumbs – for maximum crispiness, do it towards the end of the cooking time. In a large frying pan, sauté the crumbs, moving all the time, in two tablespoons of olive oil until they are golden brown. Remove them to a small bowl. Chop the tarragon and parsley finely and zest the lemon. Stir the herbs and zest into the crumbs with a large pinch of salt and set aside until it’s time to serve the cheeks.

Skim any excess fat off the top of the casserole. Remove the star anise and bay, and discard. Use a skimmer or slotted spoon to fish the cheeks out of the casserole and rest somewhere warm while you pass the sauce through a sieve, using the bottom of a ladle to push the soft vegetables through. Bring the strained sauce back to a simmer.

To serve, ladle a generous puddle of sauce onto a plate, sit a cheek in the middle of the puddle and sprinkle the crumbs over the top. Mashed potato is the perfect accompaniment to this rich dish – you’ll need lots to mop up the delicious sauce. I also served some purple sprouting broccoli (it’s that time of year) dressed with lemon juice and butter, and sprinkled with some toasted pine nuts.

Goat cheese with balsamic shallots

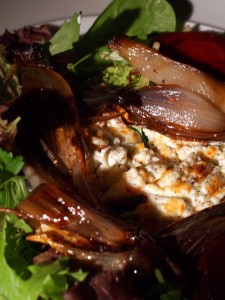
Grilled goats' cheese with balsamic shallotsYou are smarter than I am, and therefore you’ll glance at this picture and think, “Silly woman. She should have bought a cheese with a rind.” You’d be absolutely right, and if you’re making this and want your cheese to hold a nice shape when grilled you’ll need something with a rind. My excuse: my cheese was in a little cardboard box and I made assumptions about the presence of a rind that wasn’t there.

I get through a lot of shallots, but I do make an effort to buy the longer kind (sometimes sold as “banana” shallots, sometimes as “echalion”), which grow here in East Anglia from September to May. They’re larger than the round variety you’ll be buying for the rest of the year, and easier to handle – the flavour is very similar. If you’re using round shallots here, be aware that they might need five minutes or so less cooking time.

Don’t use the wallet-assaultingly expensive, 20-year-old balsamic in a teensy-weensy vial that you bought on your romantic trip to Modena. That one’s for drizzling on Parmesan and perhaps dribbling on some very good bread with a little olive oil that’s been standing on some smashed garlic for an hour or so. For this recipe, you just need the supermarket stuff that comes in large bottles.

I’ve suggested two nut oils to use to dress the salad. I love a light nut oil to finish this sort of dish – buy a small bottle and keep it in the fridge, though, because nut oils go rancid quickly if kept in a cupboard. Experiment! You can buy all kinds of interesting nut oils, like macadamia, pistachio and pine nut, in delicatessens, and this salad is a good place to try them out.

To serve four as a light lunch or starter (all depending on how much crusty bread you intend to go through), you’ll need:

450g banana shallots, peeled and quartered
½ teaspoon salt
25g soft dark brown sugar
75ml balsamic vinegar
2 tablespoons extra-virgin olive oil
200g goats’ cheeses, in a log with a rind
2 tablespoons hazelnut or walnut oil
Salad leaves to serve

Preheat the oven to 220°C (430°F).

When you have peeled and quartered the shallots, use a fork to whisk the olive oil, balsamic vinegar, salt and sugar together in a large bowl. Drop the shallots in and turn them carefully to coat them in the mixture. The shallots shouldn’t fall apart completely, but don’t worry if a few of them shed chunks.

Pour the whole contents of the bowl into a metal baking tray, spreading everything out so the dressed shallots are in one even layer. Roast for 15 minutes, turn, roast for another 15 minutes until dark brown and caramelised, and set aside to cool.

When you are ready to serve the salad, cut the cheese into four discs and grill them on one side until gold and bubbling. Lay out a large handful of salad leaves on each plate, put a cheese in the centre and scatter a quarter of the shallot pieces around the cheese. Grate a generous amount of pepper over the whole salad and drizzle with your choice of nut oil before serving.

Parmesan, leek and thyme scone bread

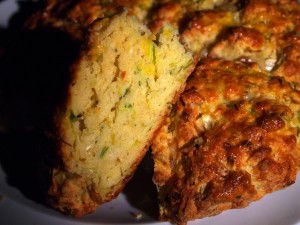
Cut parmesan sconeInspiration comes from funny places, on this occasion Dr W’s nostalgic thoughts about a parmesan and leek scone that Starbucks sold when they first arrived in the UK and we all discovered Frappuccinos and comfy chairs. I remember that scone dimly, and it seems the scone in my imagination and the scone in his are not the same thing at all. The scone I remember was a dry and sad production with not enough cheese, not enough leek, and a miserable little pot of cream cheese to smear inadequately on the cut surface to moisten it. Dr W remembers it as some sort of delicate überscone, a scone of youth and freedom. I love him, so I came up with a scone bread for his dinner that might remind him of the original (not too closely, obviously, because I didn’t like the original much – this one’s much moister and packs a lot more flavour).

You shouldn’t need any butter to moisten this scone; it’s very rich. Treat it as a bready accompaniment to go with ham, some hard cheese, chutney and a salad for a quick supper. It’s best served warm from the oven, but it’s terrific cold, and will be great the next day in a lunchbox too. A bread leavened with baking powder like this is great for those who are nervous around yeast, and, because it doesn’t need long periods of proving and rising, is much quicker to make than a yeasty bread too.

To make enough for six portions, you’ll need:

240g plain flour
1 tablespoon baking powder
1 teaspoon salt
100g salted butter
100g leeks, green and white parts
1 tablespoon fresh thyme leaves, picked from stems
75g Parmesan cheese
50g Cheddar cheese
2 large eggs, plus one to glaze
120ml semi-skimmed milk

Parmesan leek sconePreheat the oven to 190°C (375°F).

Sieve the flour, salt and baking powder into a large bowl. Cut the cold butter into little pieces in the flour bowl and rub them into the flour with your fingers until the mixture resembles breadcrumbs.

Chop the leek into very small dice and grate the cheeses. Stir the leek, cheese and thyme into the flour and butter mixture.

In a small bowl, whisk two eggs and the milk together. Pour into the dry mixture and use your hands to bring ingredients together gently until you have a ball of dough.

On a greased tray lined with parchment paper, press the ball of dough into a flat, round loaf shape. Beat the egg for glazing and brush it over the surface of the loaf.

Bake for 35 minutes until pale gold. A skewer inserted into the middle should come out clean – if it doesn’t, keep cooking for 5 minutes and check again until the scone bread is done.

When the scone bread is ready, remove it to a cooling rack and leave it for twenty minutes to cool off a little. Slice into six pieces and serve warm.

Ham and pea pie with rough puff pastry

There’s often a home-cooked ham in the fridge here. Always the control freak, I like to be able to season and flavour my own ham for sandwiches, pasta dishes and what have you. A piece of smoked gammon simmered in some aromatics of your choosing for a few hours will always be better (and work out cheaper) than slices from the deli or supermarket, and is very little work – plop it into a pan, bring to a simmer, and leave for a few hours while you try on shoes or whatever else it is you fill your days with.

I’m still a big fan of the Coca Cola stock, beefed up with some aromatics, for hams – it’s really worth a whirl if you’ve not tried it yet. Ginger beer is also alarmingly, counterintuitively good here. If you still can’t stomach the idea, a ham is also delicious poached in water with a slug of wine, a few tablespoons of sugar, some onions, garlic and spices like cloves, fennel, star anise and bay. Experiment, and settle on what you like. In the recipe below, I’m assuming you already have a cooked ham at hand. For this sort of recipe, where rather than slicing the ham you will be shredding or cutting it into chunks, I really like a bacon collar. It’s a less monolithic bit of meat than some of the slicing cuts, and has good marbling which helps push the flavour of the stock deep into the meat.

This recipe is all about the aromatics in the ham and in the bechamel sauce. Infusing the milk for your white sauce with shallot, bay, cloves, parsley, whole peppercorns and a stick of celery raises it from a rather boring binder and filler to something rather delicious and gorgeously scented. If you find this all rather a faff, bechamel freezes very well, so you can save time by making plenty and freezing it in boxes. (You can also freeze the infused milk before turning it into bechamel, bread sauce or other sauces – like the finished bechamel, it holds its flavour very successfully.)

Finally, the pastry. I’ve made a rough puff here to cover the pie (the amount of pastry below makes enough for two pies, and I haven’t halved it because cooking with half an egg isn’t very practical – again, this freezes well, or you can keep the extra pastry in the fridge for up to three days). It’s very easy, deliciously flaky, and melts in the mouth. All the same, I won’t hold it against you if you want to save some time and use some pre-prepared pastry instead.

Filling
1 litre milk
3 bay leaves
2 shallots
3 cloves garlic
12 cloves
1 stick celery
1 small bunch parsley
8 peppercorns
6 tablespoons flour
5 tablespoons salted butter
450g cooked ham (try a bacon collar if you can find one)
120g peas (fresh or frozen, depending on the time of year)

Crust
450g flour
120g butter
240g lard
1 egg, and 1 yolk to glaze
2 tablespoons sugar
Juice of 1 lemon
170ml water

Start by infusing the milk. Peel and halve the shallots, and stud them with the cloves. Put all the aromatics in a thick-bottomed pan with the milk, and bring very slowly to a simmer. Turn the heat off, put the lid on and leave to infuse in a warm place for three hours.

While the milk is infusing, put the pastry together. Beat the egg into a bowl with the sugar, lemon juice and water. Beat the mixture and chill in the fridge. Use your fingers to rub the cold butter into the flour until it resembles breadcrumbs, and chop the lard (also straight from the fridge) into pieces about the size of the top joint of your little finger. Stir it into the flour/butter mixture. Add the egg mixture bit by bit, stirring the mixture with a knife until everything comes together. Put the pastry into a freezer bag and rest it the fridge for at least half an hour, until you are ready to put the pie together.

Strain the solid ingredients out of the milk and discard them. Make the bechamel sauce by melting the butter and flour together over a low heat in a clean pan, and cook, stirring, for five minutes. Add the milk a small amount at a time, stirring sauce constantly as you go. The sauce will thicken as you work. Keep adding milk bit by bit until it is all incorporated, and the sauce is thickened. Don’t add salt to the sauce; there should be enough in the ham to season the whole dish.

When you are ready to put the pie together, preheat the oven to 230°C (445°F).

To assemble the pie, chop the ham into bite-sized pieces. Put a layer of ham in the bottom of a pie dish, cover with a layer of peas, and repeat until you have used all the ham and peas up. Pour over the bechamel sauce until your pie dish is filled. Depending on the size of your dish, you may have some left over, but I’m sure you’ll find something to do with it.

Cut the ball of pastry in half and put the half you’re not using in the fridge or freezer.

Roll the pastry you are using out in a large rectangle, and fold it into three, as if it was a piece of A4 paper you are going to put into an envelope. Give the pastry rectangle a quarter turn, roll it out into a large piece again, fold into three, roll out and repeat four or five times. You’ll end up with a sheet of pastry about half a centimetre thick made up of many layers. Lay the pastry sheet on top of the pie dish, cut the excess off the edges and pinch the pastry into place on the dish. Cut a large cross in the middle to allow steam to escape and brush with a beaten egg yolk.

Bake at 230°C (445°F) for 10 minutes, then reduce the heat to 200°C (390°F). Cook for 25 minutes, until the pastry is golden and the pie steaming. Serve immediately.

Bury black pudding hash with peppers and apple vinaigrette

I’ve never really understood why some people get so squeamish about black pudding. I know, I know – it’s blood, back fat and barley – but surely that’s no more upsetting than the gubbins that goes into a standard sausage? Dr W encourages me to mention a chitterling and tripe-tastic andouillette he ate in Paris once, which, he claims, “tasted of bums”. Black pudding is infinitely nicer.

My suspicion is that people recalling cut lips imagine black puddings to taste bloody and metallic. These flavours are absent from a black pudding, which is actually deeply savoury, delicately spiced (especially if you get your mitts on a particularly good one, like these from Bury in Lancashire), and, cooked properly, has a wonderful texture: crisp, sticky and crumbling all at once.

The Bury black pudding is, for my tastes, the most reliable and delicious you’ll find in the UK, and many butchers and supermarkets all over the country carry them – you can also order them online from the makers. (At a supermarket, you’re more likely to find one on the deli counter than the butchery counter.) They’re seriously, seriously good; porky, plump and gorgeously spiced. The recipe is a secret, but apparently there’s pennyroyal, fennel and all kinds of other good stuff in there. Do try to go out of your way to find a couple for this recipe.

To serve four, you’ll need:

2-3 Bury black puddings
4 large potatoes (I used Kestrel)
3 large banana shallots
4 piquillo peppers
3 tablespoons bacon fat (use good lard if you can’t find any and do some exercise tomorrow)
1 sweet apple
2 tablespoons cider vinegar
5 tablespoons walnut oil
5 tablespoons grapeseed oil
1 teaspoon lemon thyme leaves, picked from stems
1 teaspoon honey
A few handfuls salad leaves
Salt and pepper

Chop the potatoes without peeling them into 1½ cm dice, and slice the shallots into rounds. Fry over a medium flame in a large pan using two tablespoons of the bacon fat, turning frequently, until golden (about 20-25 minutes). Ten minutes or so before the potatoes are ready, fry the peeled, halved black puddings in the remaining bacon fat for five minute on each side.

While the potatoes and black pudding are cooking, put the peppers under the grill, turning every few minutes, until the skins are blackened. Put them straight into an airtight plastic box and seal with the lid while you prepare the other ingredients. The steam from the peppers will help to release the skins. Peel the peppers after five minutes in the box, discarding the skins and reserving any juices. Halve them and slice into strips.

Chop the apple into small dice and make up the vinaigrette with the vinegar, honey, walnut and grape oils and any juices from the peppers, with a small pinch of salt. Stir through the apple and thyme and set aside.

When you are ready to put the dish together, stir the peppers into the hot potatoes. Now, normally I abhor the chi-chi “towers of things on a plate” thing, but this is a recipe it suits well. So get out a large pastry cutter to use as a template, and pile the potato mixture onto a plate. Use a sharp knife on a chopping board to dice the black pudding roughly and heap it on top of the potatoes. Top with a handful of salad and spoon the apple dressing over the top. Serve immediately.

Cheese and chorizo baked potato

I seem to be having a bit of a thing about chorizo at the moment. Blame this never-ending winter – a hot blast of smoke, paprika and garlic is surprisingly uplifting when it’s this steadily grim outside.

This is a great storecupboard dish, and one that goes down very well with kids (if yours don’t tolerate the heat of the paprika, substitute a teaspoon of Dijon mustard. You can also use good ham, preferably home-cooked, in place of the chorizo). This is fatsome and packed with carbs: it’s absolutely not a diet dish. Cook it on a day when you’ve been yomping in the woods or chopping logs. To serve four, you’ll need:

Four large potatoes
1 tablespoon olive oil
75g cream cheese
100g grated cheddar cheese
1 clove garlic, crushed into a paste
2 banana shallots, diced finely
1 tablespoon smoked paprika
1 chorizo ring
1 handful (about 25g) chopped parsley
1 large pinch salt, plus salt to rub on the skins

Preheat the oven to 200°C (450°F). Use your hands to rub the olive oil into the skins of the potatoes, and dredge them with plenty of flaky salt. I used smoked Maldon salt, which marries nicely with the other smoky flavours in this dish. Bake the potatoes for an hour and a half.

While the potatoes are cooking, chop the chorizo into small pieces and fry them in a dry pan until the fat is running. Set aside. Chop and grate the other ingredients.

When the potatoes are ready, slice them in half and, holding the potato in an oven glove, scoop out the flesh into a mixing bowl. You’ll be left with a nice little potato-skin cup. Stir the cheeses (reserving a little cheddar to sprinkle over the top), shallot, garlic, parsley and paprika into the fluffy potato with a large pinch of salt, and when everything is well-mixed, stir in the chorizo and its fat. Pile the mixture back into the potato skins, and top with the reserved cheese.

Return the filled skins to the oven for another 20 minutes, until golden brown on top, and serve piping hot.

Chicken and chorizo risotto

This is a very, very tasty use of all of those bits from a roast chicken that you don’t get round to eating on its first appearance on the table. I rather enjoy stripping a cold chicken carcass after a roast: popping the oysters out of the underside, shredding the meat from a leftover leg with my fingers, and spooning any jellied juices into a bowl with the scraps. Now, those bits of chicken will serve to make a very fine sandwich with plenty of salt and pepper, but you can also make them work a bit harder as part of a rich, creamy risotto for supper the next day.

The quality of your chicken stock here is all-important, and the risotto will be much better if yours is home-made. I like to buy those very cheap boxes of chicken wings and pop them in a stockpot with the stripped carcass, some aromatics (bay, carrots, shallot and celery), a covering of water and a slug of white wine. You can make a handsome amount of stock like this, and freeze what you don’t use immediately.

To serve four, you’ll need:

As much meat as you can save from a roast or poached chicken (I had a whole leg and thigh, and scraps from the breast and underside, but you’ll be fine with less meat)
1 dried chorizo ring
320g Carnaroli risotto rice
1 litre hot chicken stock
75ml vermouth
3 banana shallots, diced finely
2 sticks celery, diced finely
2 bay leaves
1 teaspoon fennel seeds
Zest of 1 lemon
75g frozen peas
60g grated parmesan cheese
30g butter
Salt and pepper

Chop the chorizo into coins, and each of those coins into quarters. While you cook the risotto, cook in a frying pan without oil until the chorizo is becoming crisp and the fat is running – once it reaches this stage, remove it from the heat and set aside.

In a large pan, saute the shallots and celery with the bay and fennel in the butter until the shallots are soft, but not taking on colour. Add the rice and continue sauteing over a low heat until the rice is coated with butter and looks translucent. Stir in the shredded chicken meat and pour over the vermouth, and stir until all the liquid is absorbed into the rice.

Add a ladle of the hot stock and simmer, stirring until the stock is absorbed. Add another ladle of stock and repeat until all the stock is absorbed into the rice, and the risotto is thick and creamy, the grains of rice al dente. This should take about 20 minutes. Stir in the lemon zest with the peas and parmesan, and check the seasoning, adjusting to taste. Remove from the heat and leave covered for 5 minutes.

Remove the lid and stir the chorizo with its oil through the risotto, reserving a few pieces to scatter over the top. Serve immediately.